DATA PROJECTOR
XJ-360
User's Guide
· Make sure you read all of the precautions in the
printed "User's Guide (Basic Operations)" first.
Also see the "User's Guide (Basic Operations)"
for information about setting up the projector and
replacing its lamp.
· Keep this manual in a safe place for future
reference.
E

·
Digital Light ProcessingTM, DLPTM, Digital Micromirror DeviceTM, and DMDTM
are trademarks of Texas Instruments Incorporated of the United States.
·
Microsoft, Windows, Windows NT, Windows XP, and the Windows logo are
registered trademarks or trademarks of Microsoft Corporation of the United
States in the United States and other countries.
·
Apple and Macintosh are registered trademarks of Apple Computer, Inc. of
the United States.
·
Other company and product names may be registered trademarks or
trademarks of their respective owners.
· The contents of this User's Guide are subject to change without notice.
· Copying of this manual, either in part or its entirety, is forbidden. You are
allowed to use this manual for your own personal use. Any other use is
forbidden without the permission of CASIO COMPUTER CO., LTD.
· CASIO COMPUTER CO., LTD. shall not be held liable for any lost profits or
claims from third parties arising out of the use of this product or this manual.
· CASIO COMPUTER CO., LTD. shall not be held liable for any loss or lost
profits due to loss of data caused by malfunction or maintenance of this
product, or any other reason.
· The sample screens shown in this manual are for illustrative purposes only,
and appear differently from the screens actually produced by the product.

Contents
3
Projection Operations ....................................................................4
Projecting onto a Screen................................................................................... 4
Keystone Correction (KEYSTONE)................................................................... 8
Using Color Mode (COLOR MODE) ............................................................... 11
Adjusting the Volume Level (VOL +/) ............................................................ 12
Muting the Image and Audio (MUTE).............................................................. 12
Enlarging the Projected Image (D-ZOOM +/)................................................ 13
Freezing the Projected Image (FREEZE) ....................................................... 14
Displaying the Pointer ..................................................................................... 14
Using the Setup Menu ..................................................................16
Setup Menu Overview..................................................................................... 16
Setup Menu Screen Operations...................................................................... 19
Setup Menu Reference ................................................................................... 27
Image Adjustment ...................................................................................................... 27
Signal Settings ........................................................................................................... 30
Screen Settings.......................................................................................................... 31
Detailed Settings ........................................................................................................ 35
Operational Info ......................................................................................................... 46
Appendix........................................................................................48
Remote Controller Signal Range .................................................................... 48
Projection Distance and Screen Size .............................................................. 49
Connecting to a Component Video Output Device ......................................... 50
Full-screen Display of an RGB Image ............................................................. 51
Password Feature ........................................................................................... 52
Cleaning the Projector..................................................................................... 53
Reattaching the Lens Cover............................................................................ 54
Projector Troubleshooting ............................................................................... 56
Supported Signals........................................................................................... 58
Projection Operations
4
Projection Operations
This section explains the basic steps for projecting an image.
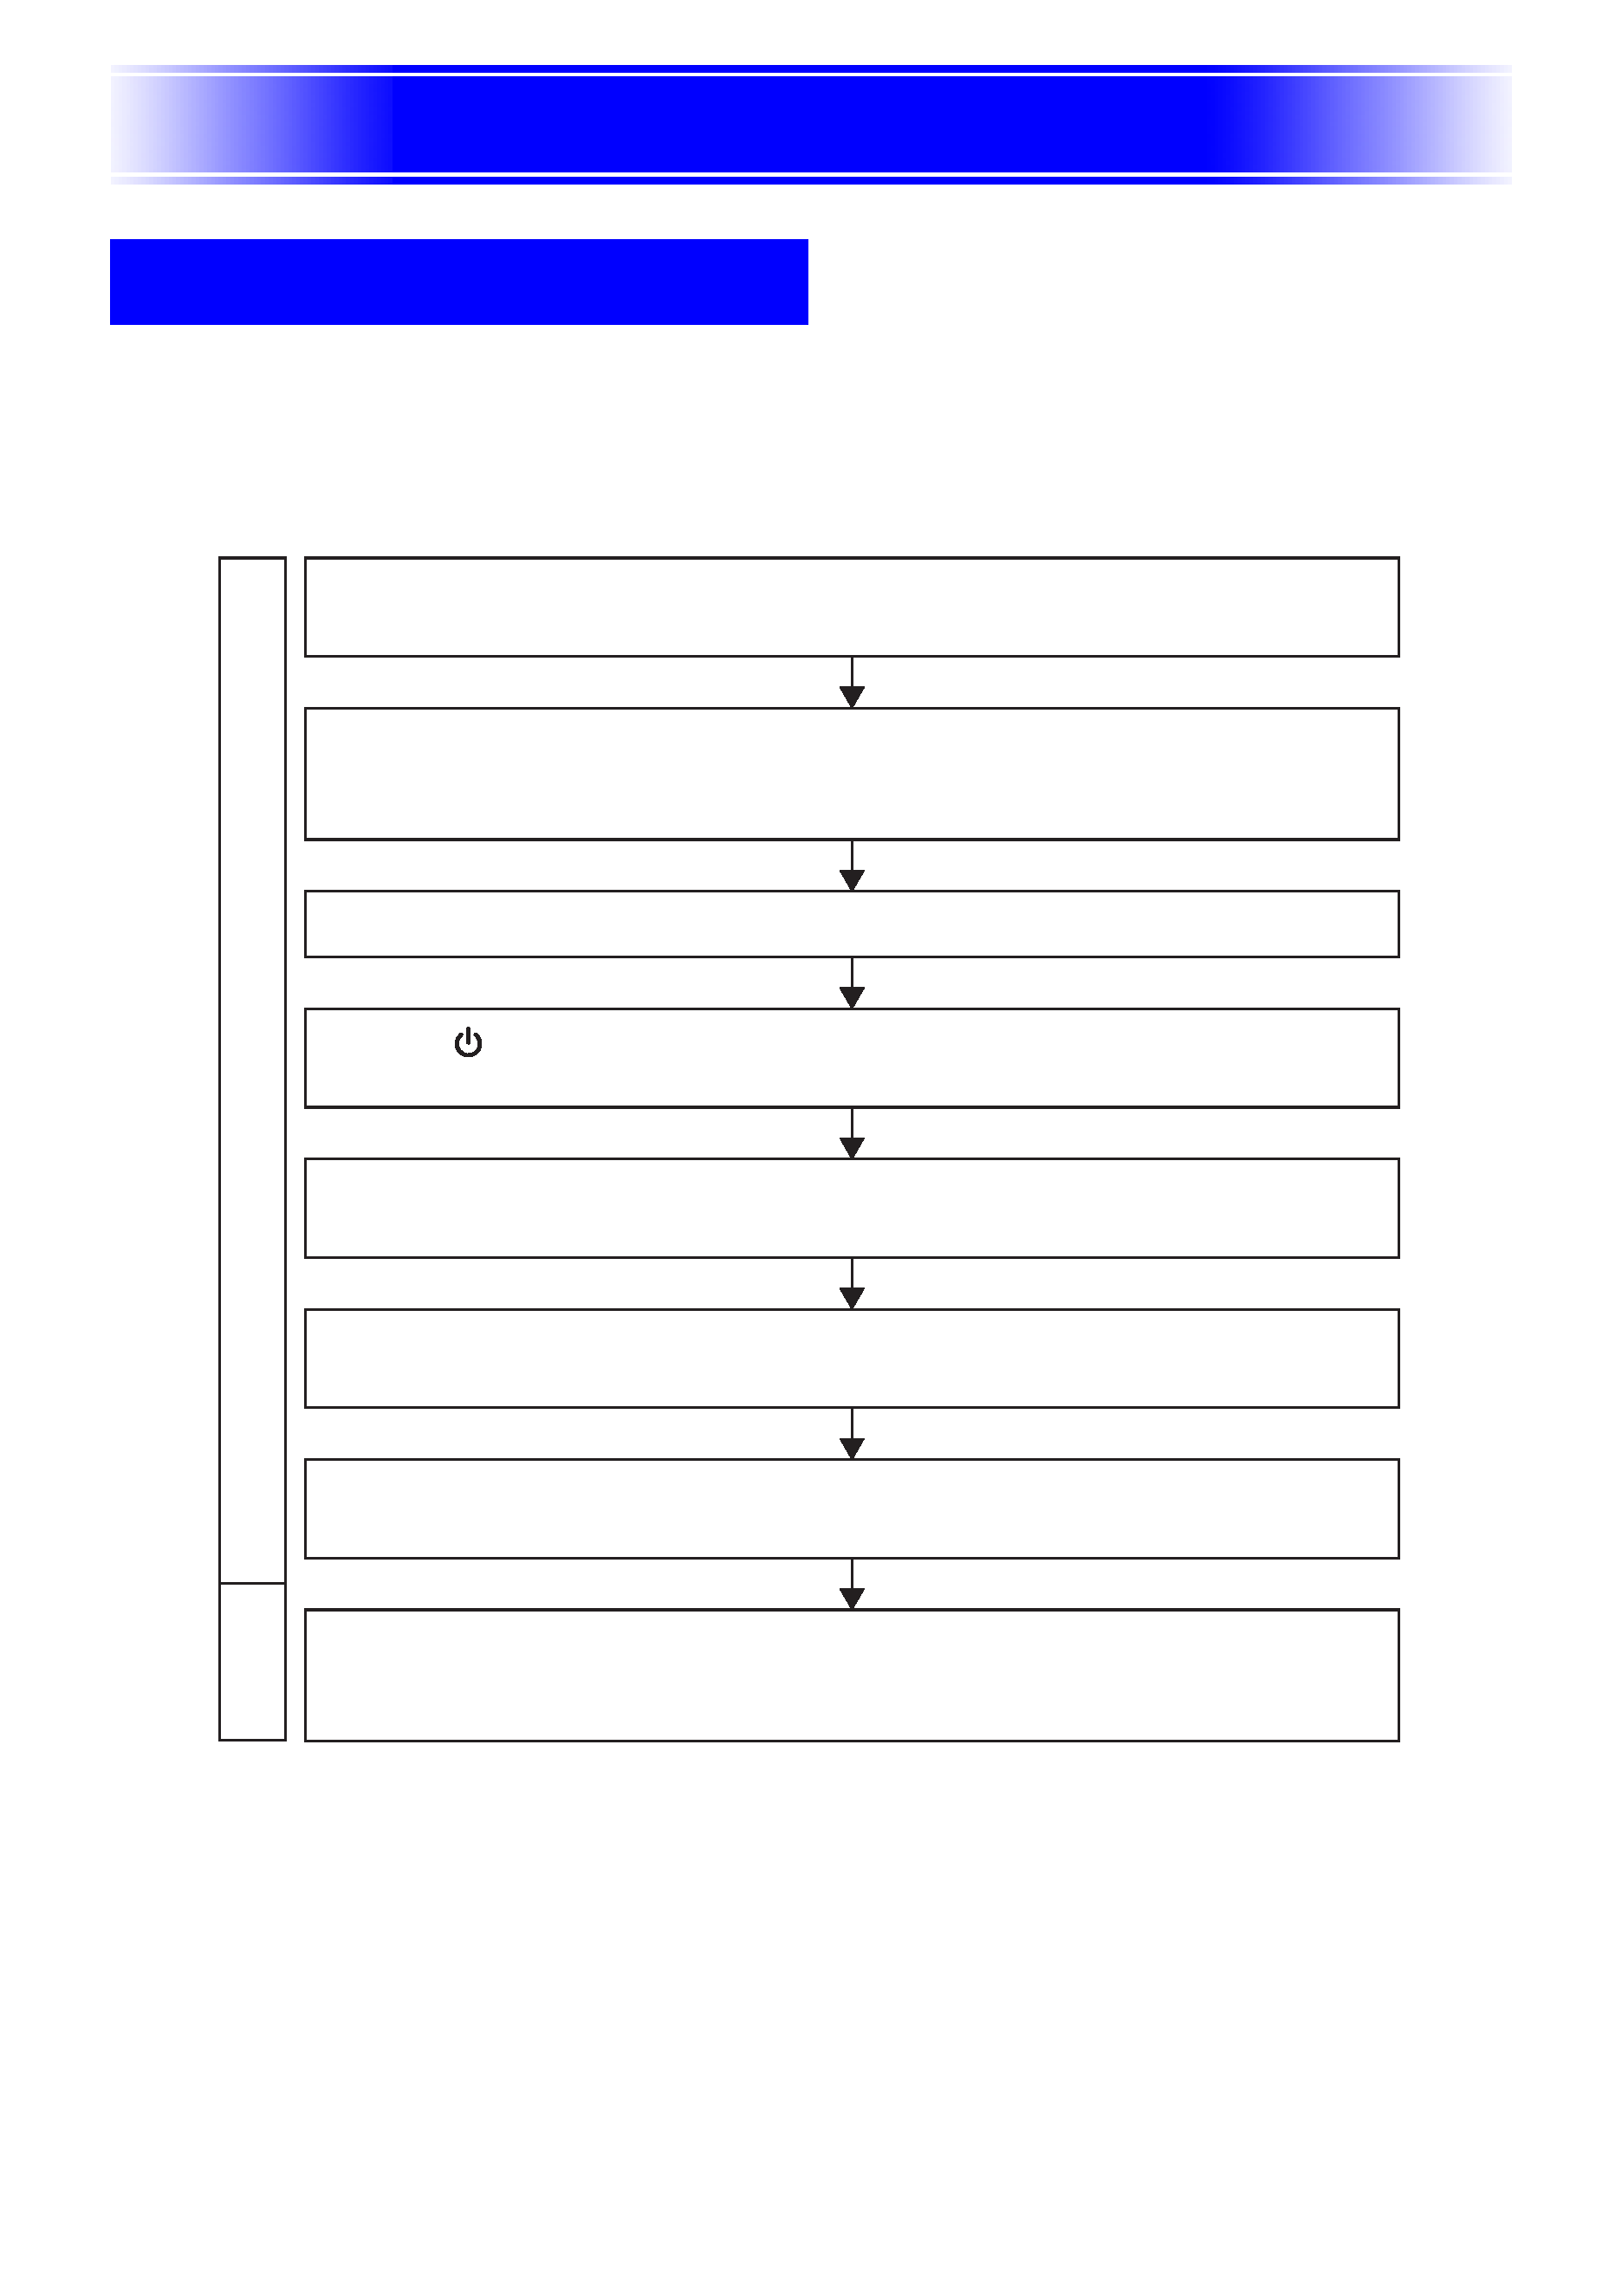
Basic Flow
Projecting onto a Screen
Prepar
ing
the
Projector
Star
ting
Projection
Set up the projector and point it at the screen.
User's Guide (Basic Operations): Setting Up the Projector
Connect the computer or video device to the projector.
User's Guide (Basic Operations): Connecting a Computer to the Projector
User's Guide (Basic Operations): Connecting to a Standard Video Device
Turn on the projector and the connected computer or video device.
Press the [
] (power) key to turn on the projector.
User's Guide (Basic Operations): Turning On the Projector
Perform fine adjustment of the projection position and angle.
User's Guide (Basic Operations): Adjusting the Projector Elevation Angle
Select the input source.
"Manually Selecting the Input Source" (page 6)
Adjust the projected image size and focus the image.
"Zoom and Focus" (page 7)
Start projection (presentation, video, etc.).
· Perform the required operation on the input source computer or video equipment.
· Use the projector's various functions to adjust the projected image as required.

5
Projection Operations
Auto Input Source Selection
When you turn on the projector, it checks the status of each input source (whether or not
the input source is sending a signal) in the sequence shown below. It automatically selects
the first input source it finds that is sending an input signal, and projects the applicable
image.
If the RGB input terminal is connected to a computer and the S-VIDEO input terminal is
connected to a video deck and signals are being supplied by both, for example, the projector
automatically selects RGB input when it is turned on. The currently selected input source
name is shown in the upper right corner of the projection screen.
If the projector does not find any input signal, the message "No signal input" appears in
place of the input source name.
The input source that corresponds to input to the RGB input terminal is displayed in
accordance with the "Detailed Settings
Advanced Settings 2
RGB Input" (page 44)
as shown below.
When the setting is "Auto":
"RGB" is displayed when the input signal to the RGB
input terminal is RGB, "Component" is displayed in
the case of a component signal.
When the setting is "RGB":
"RGB" is displayed.
When the setting is "Component": "Component" is displayed.
Note that the projector does not select the input source automatically when "Off" is
selected for the "Detailed Settings
Advanced Settings 1
Auto Input Detect" (page 40)
on the setup menu.
RGB terminal input
VIDEO terminal input
S-VIDEO terminal input
(RGB/Component)
(VIDEO)
(S-VIDEO)