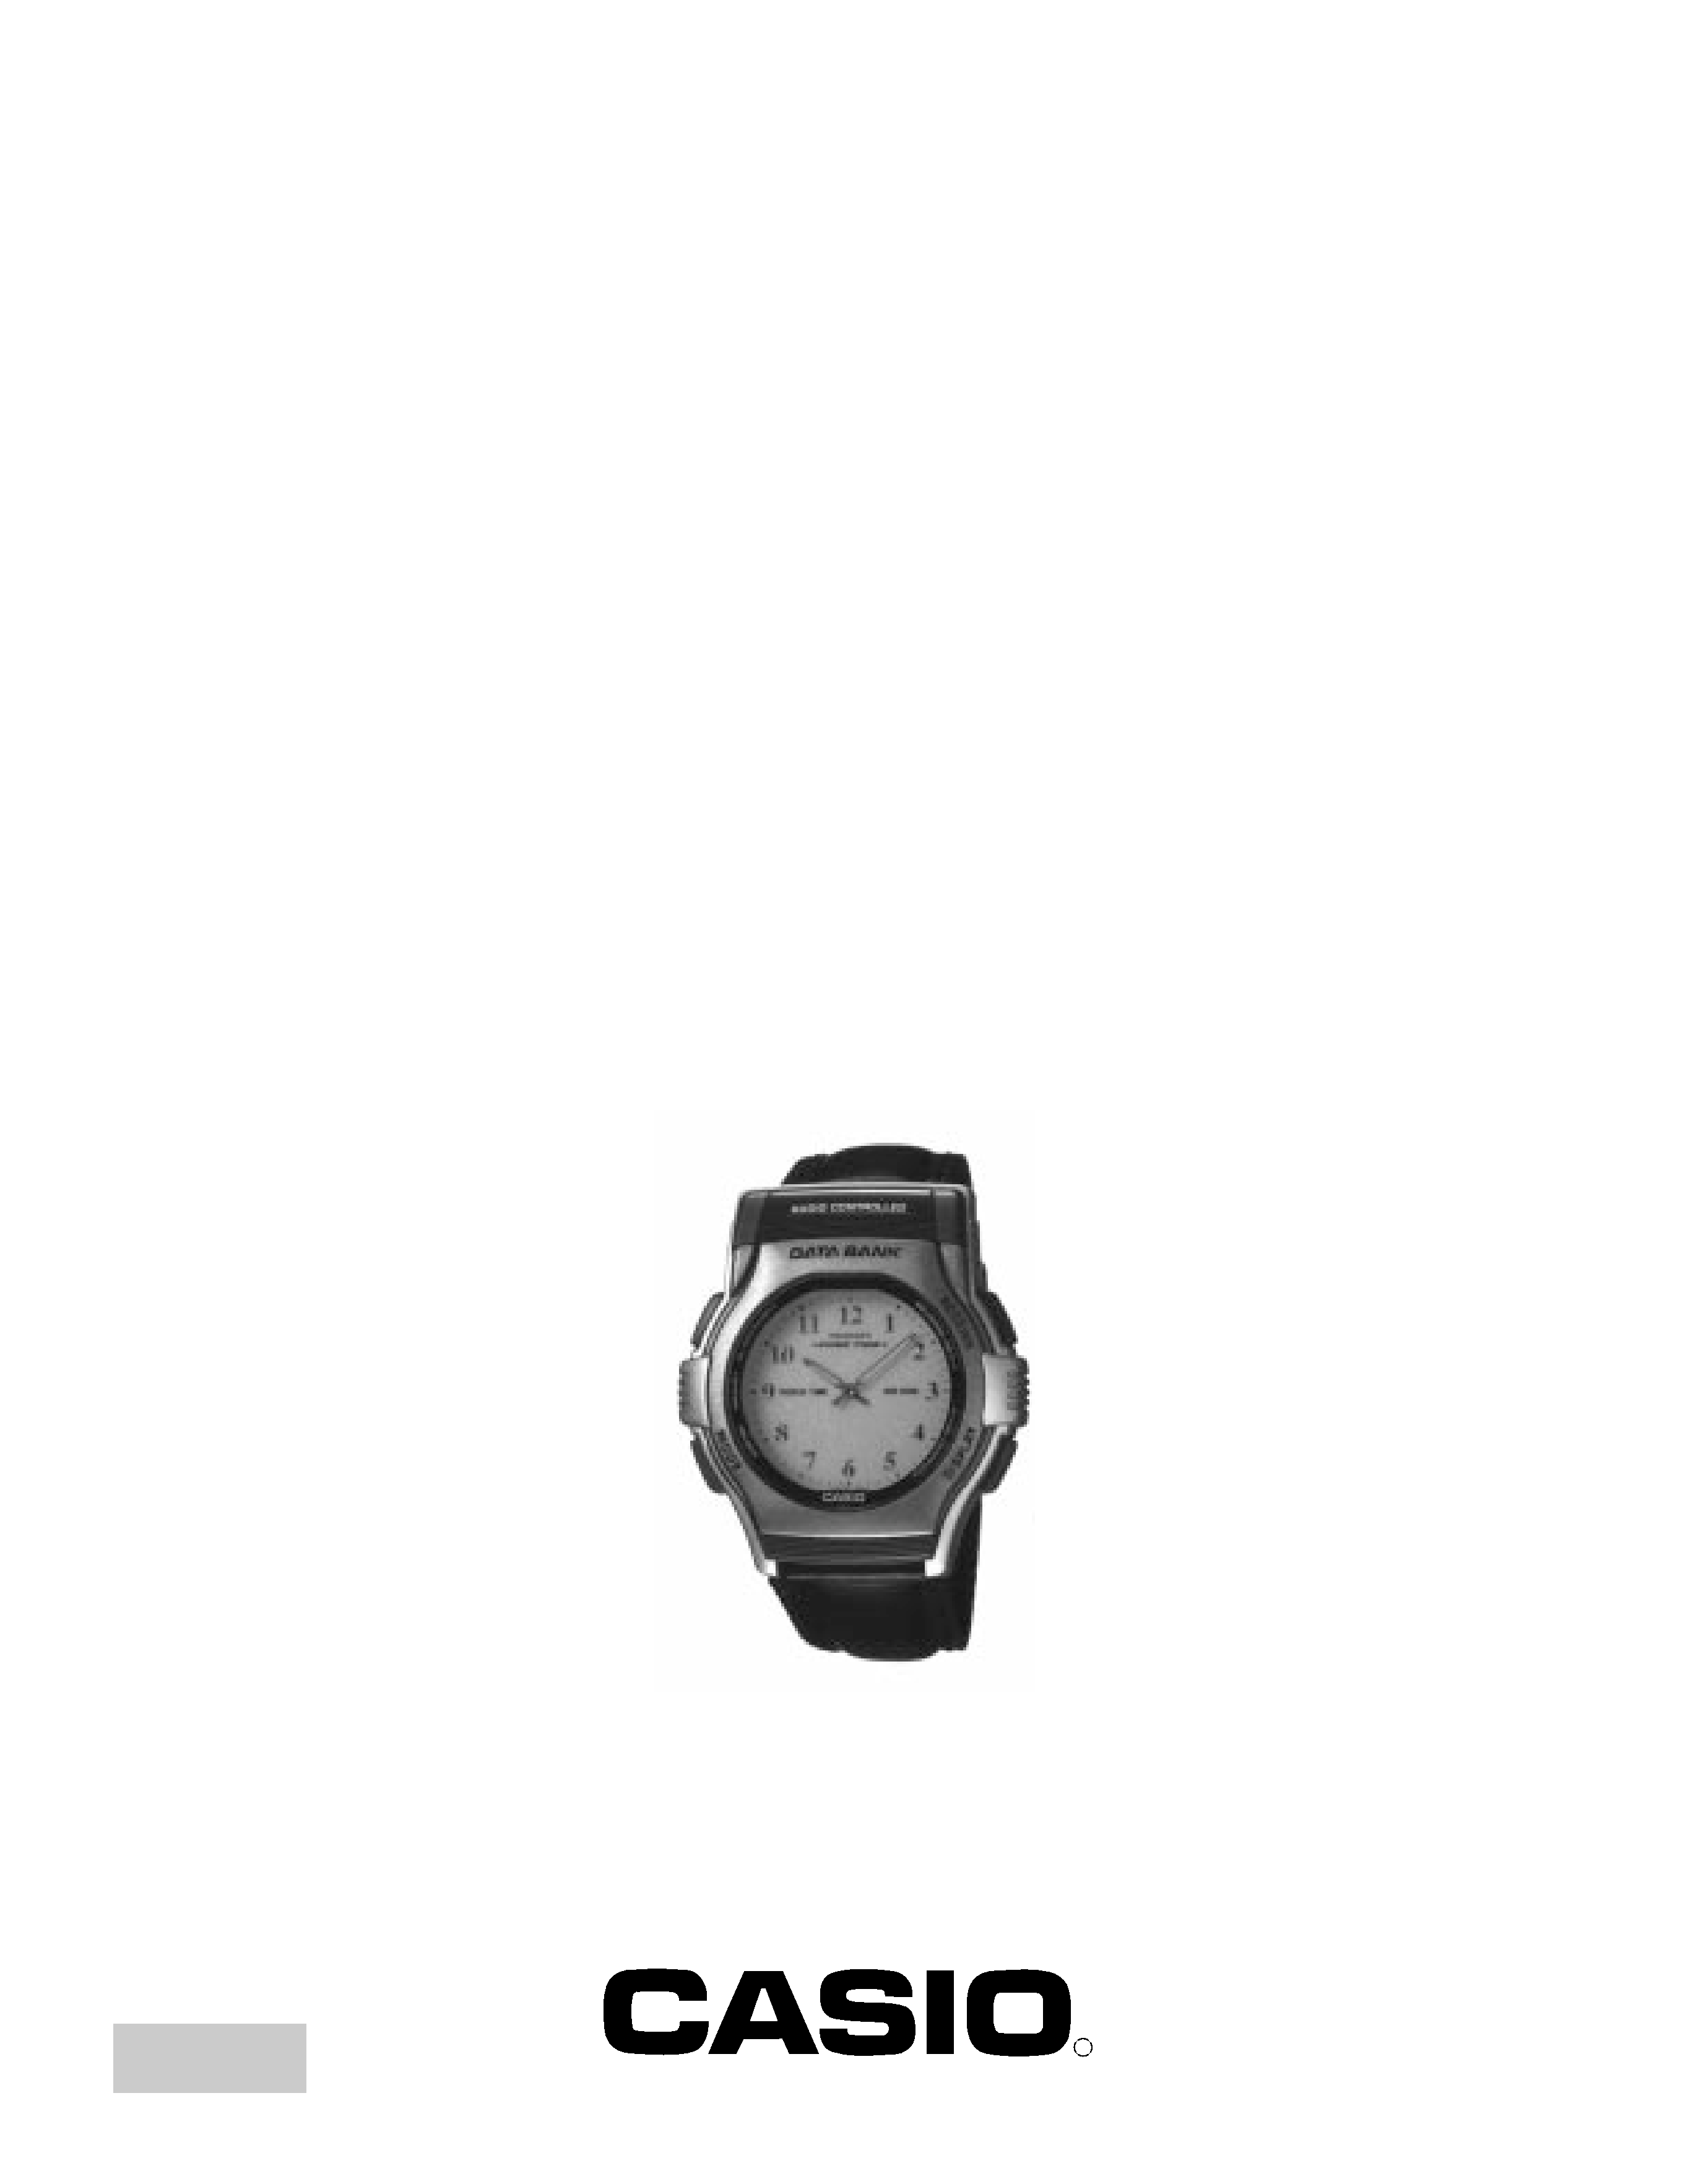
QW-1382
MODULE NO.
R
REF. NO. S/M-565
SEPTEMBER 1997
SERVICE MANUAL
& PARTS LIST
(WITHOUT PRICE)
FKT-200L
INDEX
-- 1 --
1. SPECIFICATIONS: QW-1382
CONTENTS
1. SPECIFICATIONS: QW-1382 ........................................................................ 1
2. OPERATION CHART: QW-1382 ................................................................... 2
3. DRAWINGS
3-1. BLOCK DIAGRAMS: QW-1382 ........................................................................
7
3-2. CHECKING TERMINALS AND COMPONENTS: QW-1382 ............................
8
3-3. P1 ~ P5 PADS ...................................................................................................
8
4. EXPLODED VIEW: QW-1382 ........................................................................ 9
5. PARTS LIST: QW-1382 ............................................................................... 10
6. PARTS LIST: CASE/CENTER FKT-200L ................................................... 11
7. PRECAUTIONS FOR REPAIR: QW-1382
7-1. AC (ALL CLEAR) AND REMOVING OF MODULE ........................................
12
7-2. ACCURACY CHECKING ................................................................................
12
Item
Detail
Battery
CR2016
Battery life
Approx. 1.5 years
Current consumption
3.623
µA maximum
Alarm system
Piezo plate on Cover/Back
Accuracy
±20 sec./month
Accuracy setting system Capacitor/Chip
Accuracy checking
See page 12
Accuracy setting
+0.43 ~ +0.72 sec./day
Functions
· Accuracy at normal temperature:
±20 seconds a month (without auto or
manual receipt of time calibration signal)
· Timekeeping Mode
Regular timekeeping: Hr, min, sec, pm, month, date, day
12/24-hour formats
Auto-calendar (pre-programmed to the year 2039)
Other: 4 display formats (Time/Date, Analog, Seconds, Date);
Contrast adjustment
· Time Calibration Signal Reception
Auto Receive (Twice per day at 2:00 AM and 4:00 AM); Manual Receive;
Last date/time received display
· Time Calibration Signal
Station name: DCF77; Mainflingen, Germany; Frequency: 77.5 kHz;
Range: approximately 1,200 km
· Telememo Mode
Memory capacity: Up to 30 sets of data, each set including;
name (8 characters) and telephone number (12 digits)
Other: Auto sort, Remaining memory display
· World Time Mode: 29 time zones; Daylight saving time on/off
· Alarm Mode: Daily alarm, hourly time signal
· 1/100 sec. stopwatch
Measuring capacity: 23:59'59.99"
Measuring modes: Elapsed time, split time, two finishes
· Hand Setting Mode
Other: 2 analog hands (hour, minutes)
Electro-luminescent backlight
-- 2 --
2. OPERATION CHART: QW-1382
L
C
A
D
B
P
CNT indicator
L
C
A
D
B
P
Language indicator
ENG
(English)
ESP
(Spanish)
ITA
(Italian)
FRA
(French)
DEUT.
(German)
Press D
Press A
L
C
A
D
B
P
GMT
differential
Auto
Receive
Language
DST
Seconds
Hour
Minutes
Year
Month
Date
CNT
12/24-Hour
format
Receive indicator
L
C
A
D
B
P
w
v
PM indicator
Month-Date
Seconds
Hour : Minutes
Day of week
Time/Date
Date
Seconds
Analog
w
v
· If the digital display of your watch is continually changing, see "AUTO
DISPLAY FUNCTION" for information on how to stop it.
GENERAL GUIDE
P
w
L
C
A
D
B
P
v
w
w
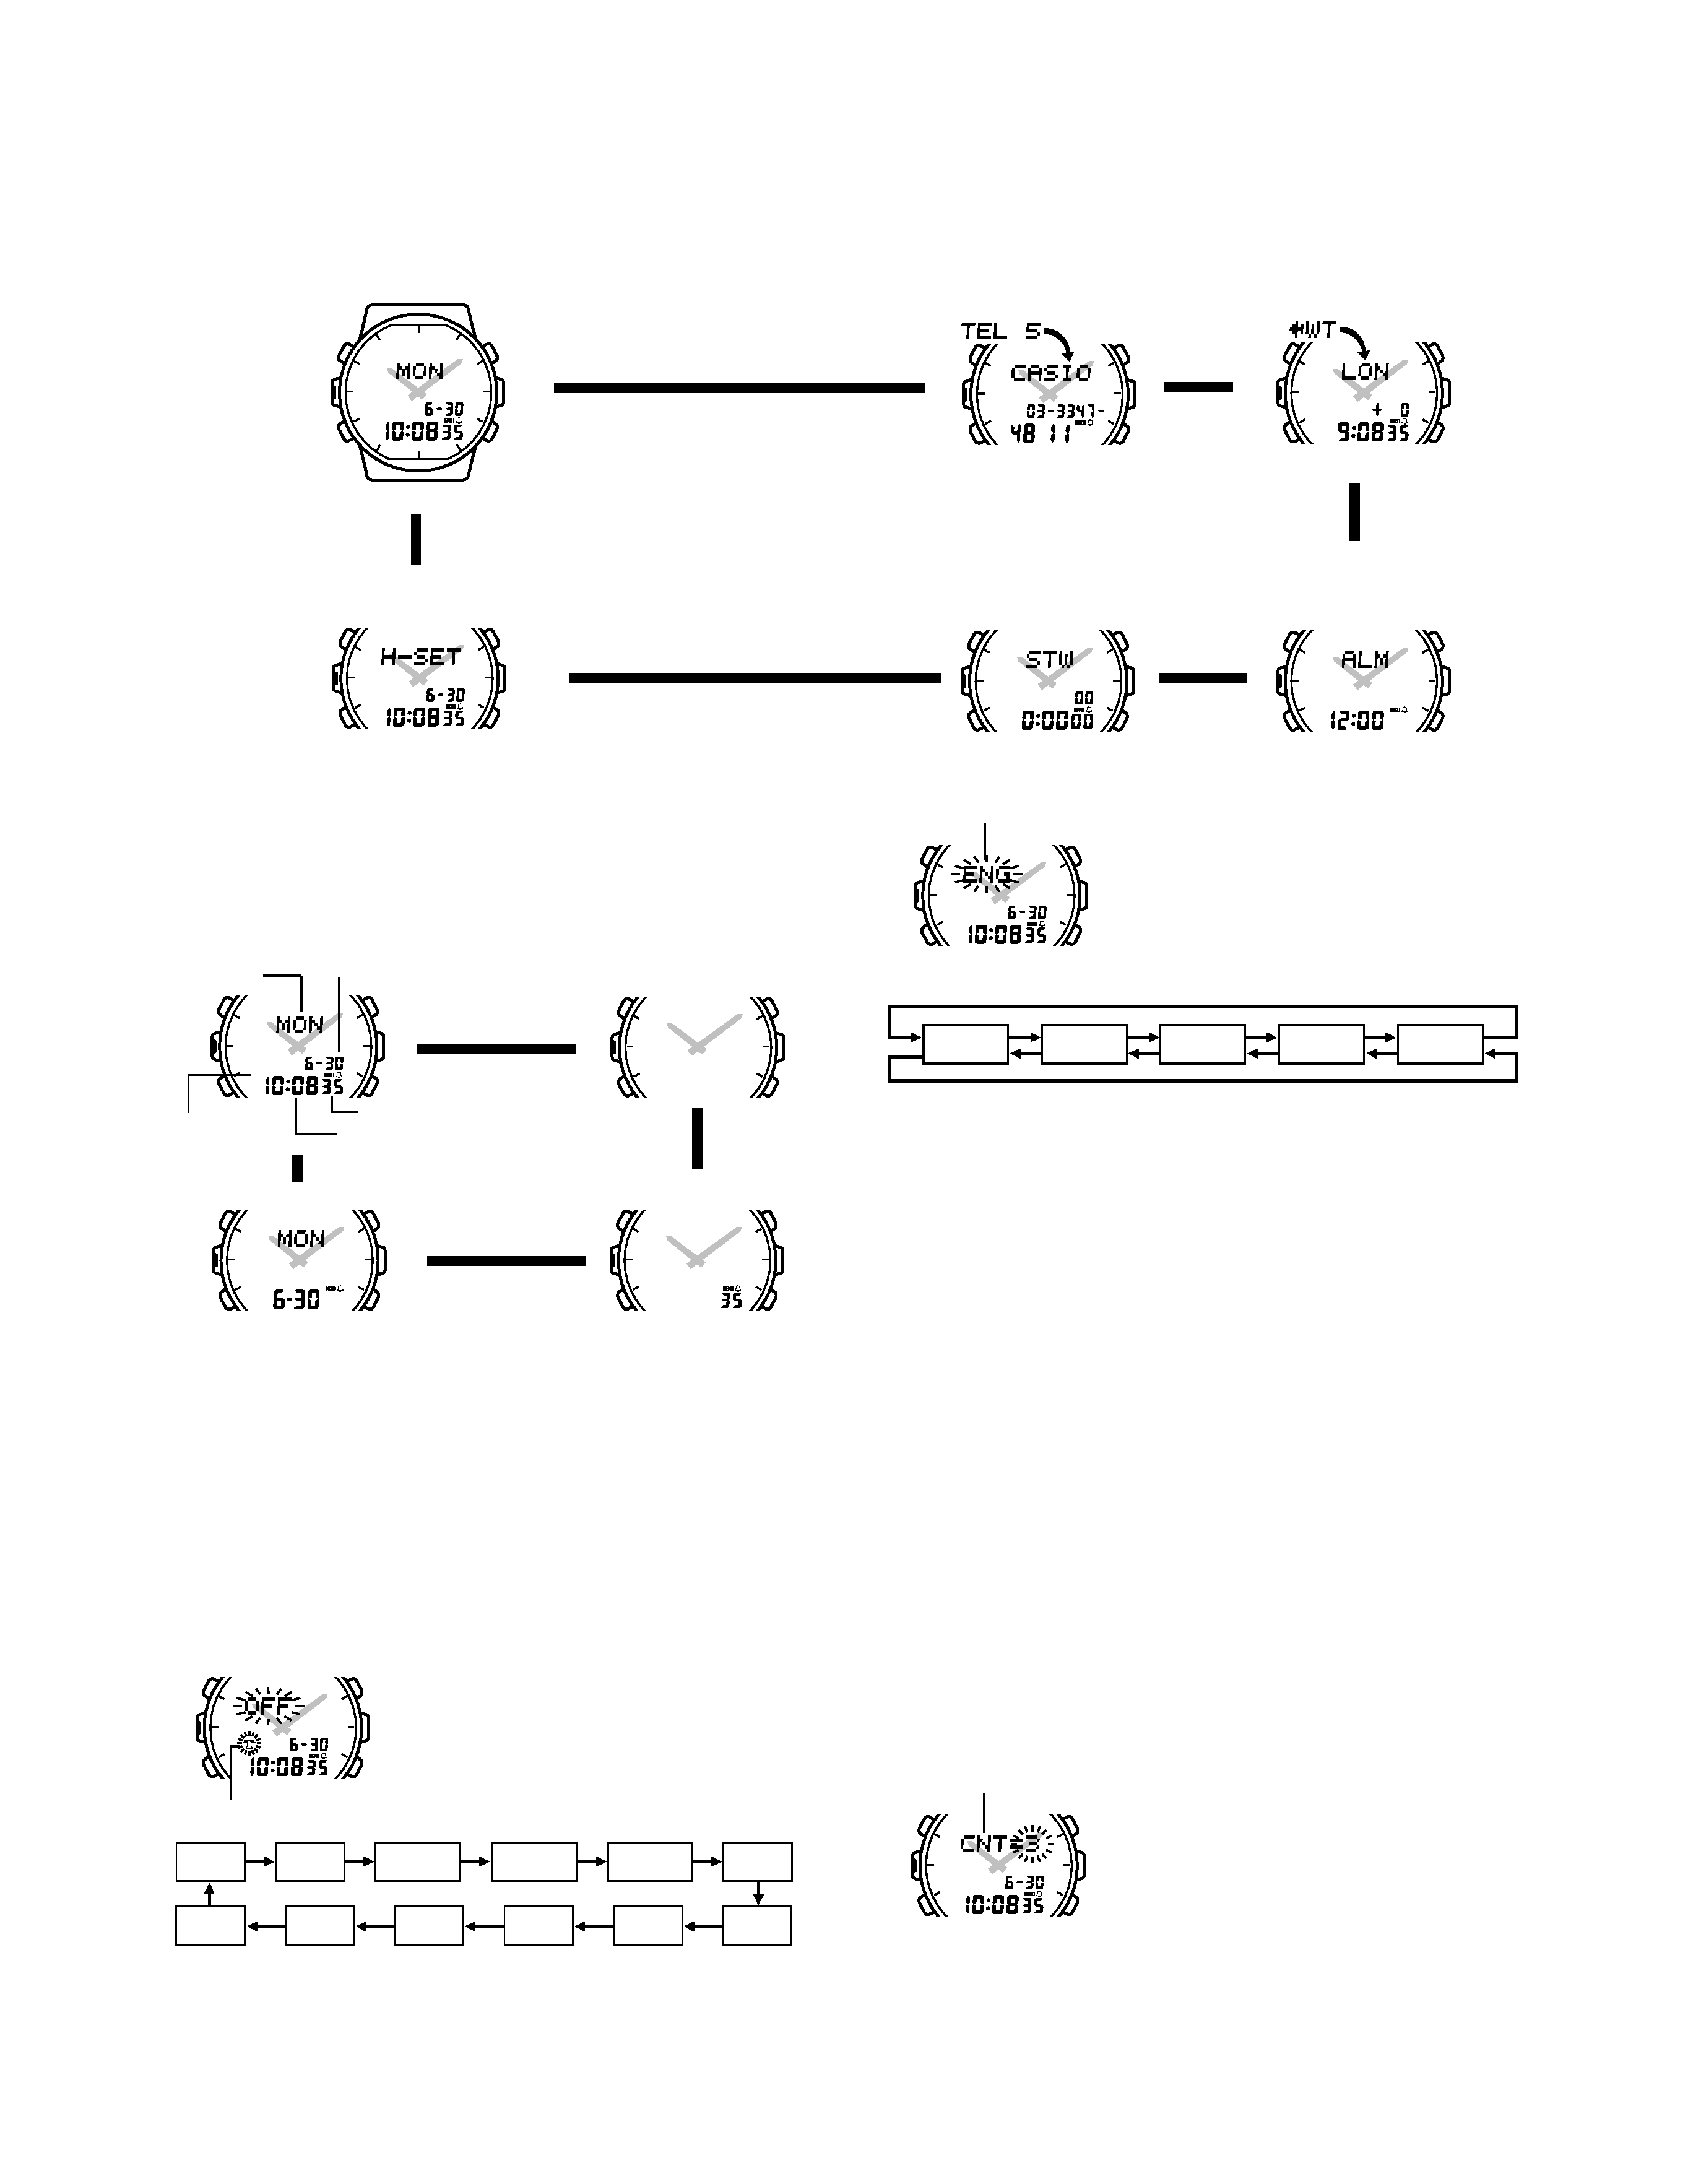
Timekeeping Mode
Telememo Mode
World Time Mode
w
P
w
Hand Setting Mode
Stopwatch Mode
Alarm Mode
· Press C to change from mode to mode. After you perform an operation in
any mode, pressing C returns to the Timekeeping Mode.
· Press L in any mode to illuminate the display for about two seconds.
Press C
TIMEKEEPING MODE
In addition to time and date settings, the Timekeeping Mode also lets you
adjust the contrast of the digital display.
· The Timekeeping Mode is actually made up to four sub-modes. Press D to
switch between the sub-modes.
· This watch displays text for the day of the week in any one of the five
different languages (English, German, French, Italian, and Spanish).
· See the "Day of the Week List" at the back of this manual for information on
abbreviations used.
About Manual Time Setting and Time Calibration
Signal Reception
The current time for this watch can be set by inputting the time and date you
want (manual setting) or by a time calibration signal. Note that the time
calibration signal is available only in certain areas in Europe. For details on
time calibration reception and the areas in which the time calibration signal is
available, see the section of this manual titled: "TIME CALIBRATION SIG-
NAL RECEPTION."
To set the current time manually
1. Press B while in the Timekeeping Mode.
The current Auto Receive on/off setting
flashes on the display because it is
selected.
· The receive indicator also flashes along with
the current on (
ON) /off ( OFF) setting.
2. Press C to change the selection in the
following sequence.
· The Auto Receive, DST, and GMT differential settings are used for time
calibration signal
reception only. For details on these settings, see the
section of this manual titled: "TIME CALIBRATION SIGNAL RECEPTION."
· See the section of this manual titled "To adjust the display contrast" for
details on using the CNT (contrast) setting.
3. Press C until the language indicator is
flashing on the display.
· The language indicator shows the language
currently set for the day of the week.
· The day of the week is set automatically in
accordance with the date.
4. Use A and D to change the language
setting in the following sequence.
5. Press C until the 12/24-hour indicator is flashing on the display.
· 12H indicates 12-hour format, while 24H indicates 24-hour format.
6. Press D to toggle between the 12-hour (
12H) and 24-hour ( 24H) formats.
· With the 12-hour format, the P (PM) indicator appears to the left of the
digital time for times in the range of noon to 11:59 pm. Times from midnight
to 11:59 am are shown without any indicator.
· With the 24-hour format, times are indicated in the range of 00:00 to 23:59,
with a 24 indicator to the left of the digital time.
7. Press C until the seconds digits are flashing on the display.
8. Press D to reset the seconds to 00.
· If you press D while the seconds count is in the range of 30 to 59, the
seconds are reset to 00 and 1 is added to the minutes. If the seconds
count is 00 to 29, the minutes count is unchanged.
9. Press C until the hour digits are flashing on the display.
10. Press D to increase the setting or A to decrease it. Holding down either
button changes the setting at high speed.
11. Repeat steps 9 and 10 to set the minutes, year, month, and date.
12. After you make the settings you want, press B to return to the
Timekeeping Mode.
· When you use the above procedure to set the digital display time, the hands
of the analog timepiece normally adjust according to your setting. If, for any
reason, the digital time does not match the analog time, use the procedure
described under "HAND SETTING MODE" to match the analog setting with
the digital display.
· The date can be set within the range of January 1, 1995 to December 31, 2039.
· If you do not operate any button for a few minutes while a selection is
flashing, the flashing stops and the watch goes back to the Timekeeping
Mode automatically.
To adjust the display contrast
1. Press B while in the Timekeeping Mode.
The current Auto Receive on/off setting
flashes on the display because it is
selected.
2. Press C 11 times until the
CNT (contrast)
indicator is flashing on the display.
· The value to the right of the CNT indicator
shows the current contrast setting. You can
set the contrast to a value from 1 (lightest) to
7 (darkest).
3. Use D to increase the contrast value and A to decrease it.
4. After you make the setting you want, press B to return to the Timekeeping
Mode.
-- 3 --
Frankfurt
AUTO
ON
OFF
Press D
Press A
GMT
differential
Auto
Receive
Language
DST
Seconds
Hour
Minutes
Year
Month
Date
CNT
12/24-Hour
format
L
C
A
D
B
P
Receive indicator
About the backlight
In any mode, press L to illuminate the display for about two seconds.
· The backlight of the watch employs an electro-luminescent (EL) panel,
which loses illuminating power after very long use.
· The illumination provided by the backlight may be hard to see when viewed
under direct sunlight.
· The watch will emit an audible sound whenever the display is illuminated.
This is caused by a transistor that vibrates when the EL panel lights up. It
does not indicate malfunction of the watch.
· The backlight automatically turns off whenever an alarm sounds.
· The backlight remains lit for about two seconds from the point you press
L , even if it is already lit when you press L . If you keep L depressed for
about 15 seconds, the backlight will automatically turn off.
TIME CALIBRATION SIGNAL RECEPTION
This watch is designed to pick up a time calibration signal that is being
transmitted from Mainflingen, Germany and update its time setting in accord-
ance with the signal. There are two different methods you can use to receive
the signal: auto receive and manual receive. With auto receive, the watch
automatically receives the calibration signal twice each day and makes
appropriate adjustments. With manual receive, you perform a specific but-
ton operation to receive the calibration signal.
Important!
· If you are using the time calibration signal to set the time for this watch, be
sure to correctly set your home city. Otherwise, there is the chance that the
watch will not set the correct time. See the "To set your home city data" for
details.
· Time calibration reception is limited to specific geographic areas in Europe.
See "Time calibration signal reception precautions" for details.
· The current time setting in accordance with the time calibration signal takes
priority over any time settings you make.
· The watch is designed to automatically update the date and day of the week
for the period January 1, 1995 to December 31, 2039. Setting of the date by
the time calibration signal cannot be performed starting from January 1,
2040.
· This watch can receive signals that differentiate between leap years and
non-leap years.
· After the watch successfully receives time calibration signal data, it first
applies it to adjust the digital time setting and then adjusts the analog
setting to match the digital time. If, for any reason, the digital time does not
match the analog time, use the procedure described under "HAND
SETTING MODE" to match the analog setting with the digital display.
· Auto receive is turned on when the watch is shipped from the factory.
To set your home city data
You can make Auto Receive on/off, DST (daylight saving time), and GMT
differential settings for your home city (the city where you normally use the
watch). This data can be changed any time you move to another geographic
area.
1. Press B while in the Timekeeping Mode.
The current Auto Receive on/off setting
flashes on the display because it is
selected.
· The receive indicator flashes along with the
current on (
ON) /off ( OFF) setting.
2. Press D to toggle Auto Receive on and off.
3. Pressing C
to changes to another
selection in the following sequence.
4. Press C until the DST indicator is flashing on the display along with the
current auto receive setting (
AUTO, ON, or OFF).
· AUTO Setting
Daylight saving time is activated and cancelled automatically in accordance
with time calibration signal data. Use this setting if you plan to use the
watch in an area where the daylight saving time period starts and ends on
the dates used in Germany.
· ON Setting
One hour is added to the current time indicated by the time calibration signal
and adjusted in accordance with the GMT time differential setting you make.
· OFF Setting
Daylight saving time is not applied.
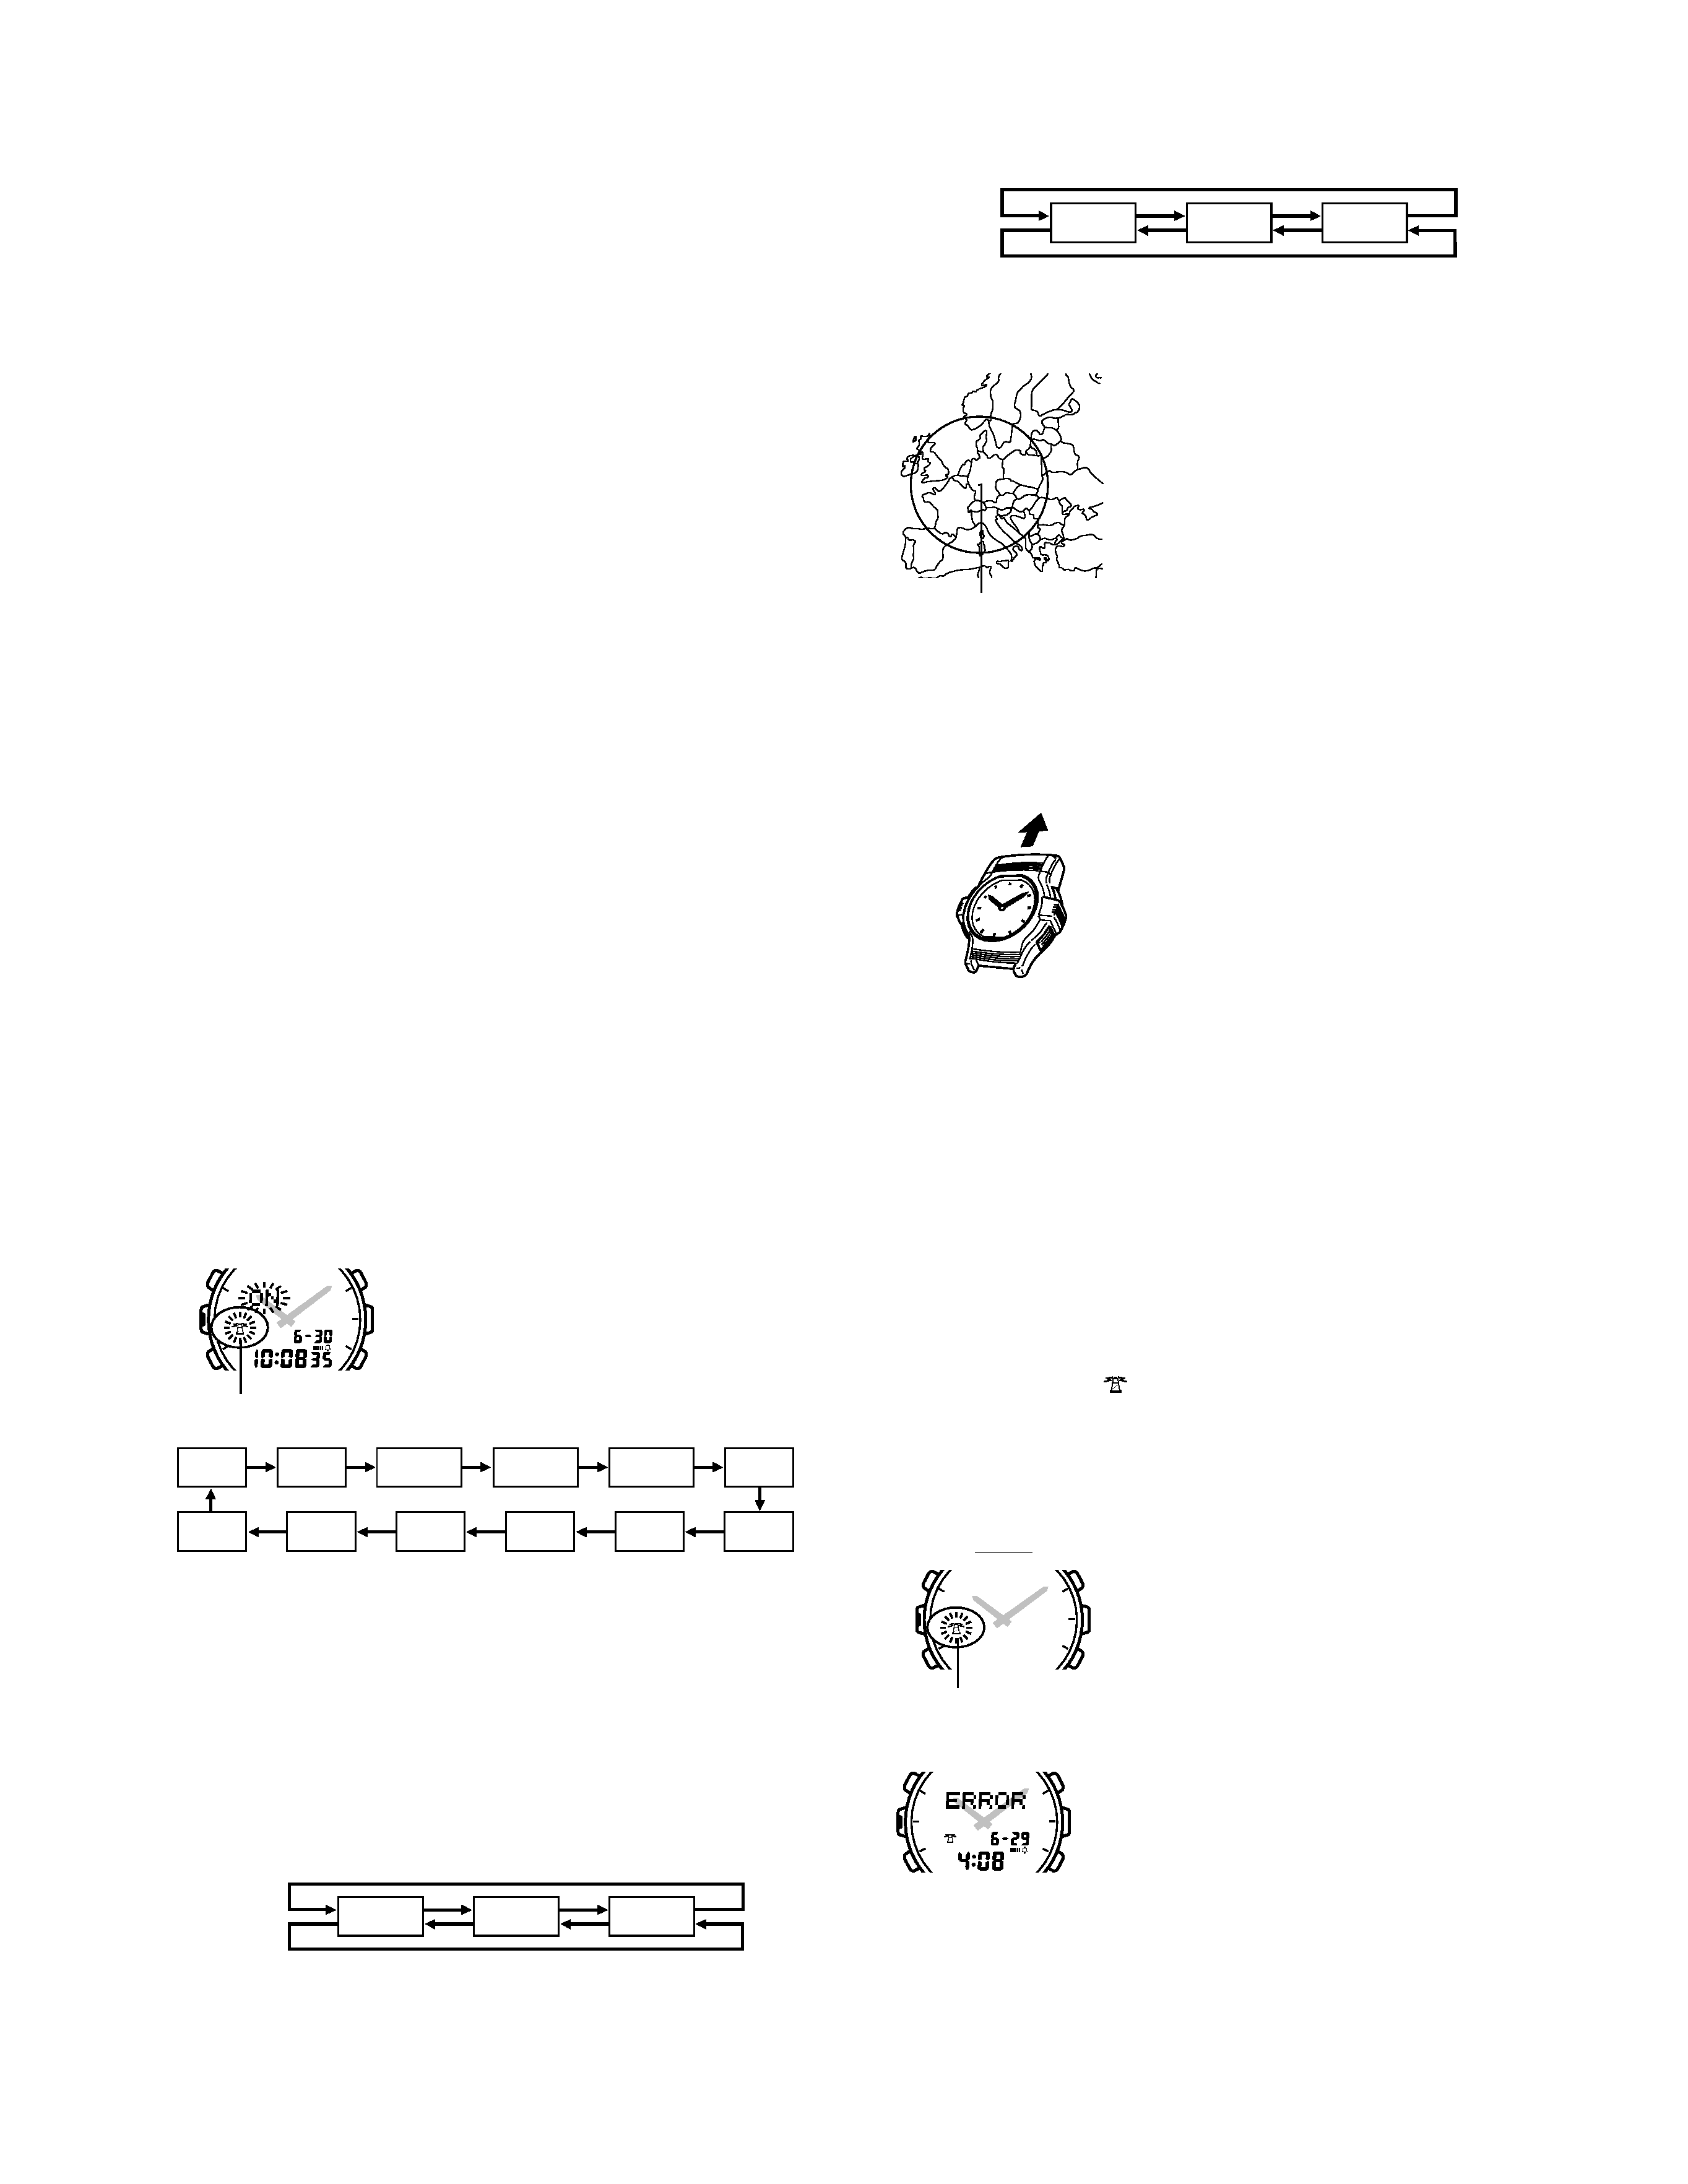
5. Use the A and D buttons to change the DST setting in the sequence
shown below.
6. After making the setting you want, press C until the
GMT indicator
appears on the display.
· The value to the right of the GMT indicator is the time differential from
Greenwich Mean Time. This value is based on standard times only, and it
does not allow for daylight saving time (summer time).
7. Use the A and D buttons to change the GMT differential setting in the
sequence shown below.
8. After making all the home city settings you want, press B to return to the
Timekeeping Mode.
Time calibration signal reception precautions
· This watch is able to receive the time
calibration signal being transmitted from
Mainflingen,
Germany
(located
25
kilometers southeast of Frankfurt). Signal
reception is possible within the area
represented by a circle with a radius of
about 1200 kilometers.
· Even when the watch is within the reception
range, signal reception is impossible if the
signal is blocked by mountains or other
geological formations between the watch
and signal source.
· Signal reception is affected by weather, atmospheric conditions, and
seasonal changes.
· At long distances that are out of the line of sight of the signal transmitter, the
signal is bounced off of the ionosphere. Because of this, such factors as
changes in the reflectivity of the ionosphere, as well as movement of the
ionosphere to higher altitudes due to seasonal atmospheric changes or the
time of day may change the reception range of the signal and make
reception temporarily impossible.
· This watch is designed to receive the signal
transmitted from Mainflingen. This means
that reception is best when the antenna built
into the 12 o'clock edge of the watch is
facing towards Mainflingen. Note, however,
that moving the watch while the time
calibration signal receive operation is taking
place will make stable reception impossible.
· Proper signal reception can be difficult or even impossible under the
conditions listed below. When receiving indoors, move to a location as near
as possible to a window. Think of the watch as acting like a TV or radio
when it is receiving the signal.
Nearby TVs, refrigerators, computers, or other household appliances
Far away from broadcasting stations, among ferro-concrete structures or
near mountains.
Underground, in tunnels or in ferro-concrete buildings.
Near high-tension wires, neon signs, or radio stations with interfering
frequencies.
Near railroads, highways or airports.
In trains or cars.
· Radio interference can cause incorrect signal reception.
· Strong electrostatic charge can result in the wrong time being set.
· The analog hands do not move during signal reception. The analog hand
setting is changed based on the digital time setting after the time calibration
signal is successfully received.
· The daily alarm and hourly time signal do not operate during signal
reception.
· The receive indicator (
) flashes on the digital display while a signal
receive function is in progress.
· The watch initially changes the digital time setting to match the data
(German time) received in the time calibration signal. Next, it adjusts the
received time in accordance with the GMT differential setting. Finally, the
analog hands are adjusted in accordance with the digital time setting.
To perform manual time calibration signal reception
1. In the Timekeeping Mode, hold down A
until the figures in the digital display are
cleared (about three seconds).
2. Release A to start time calibration signal
reception, which is indicated by the flashing
receive indicator.
· Time calibration signal reception takes from
8 to 15 minutes.
· When the receive operation is successful, the
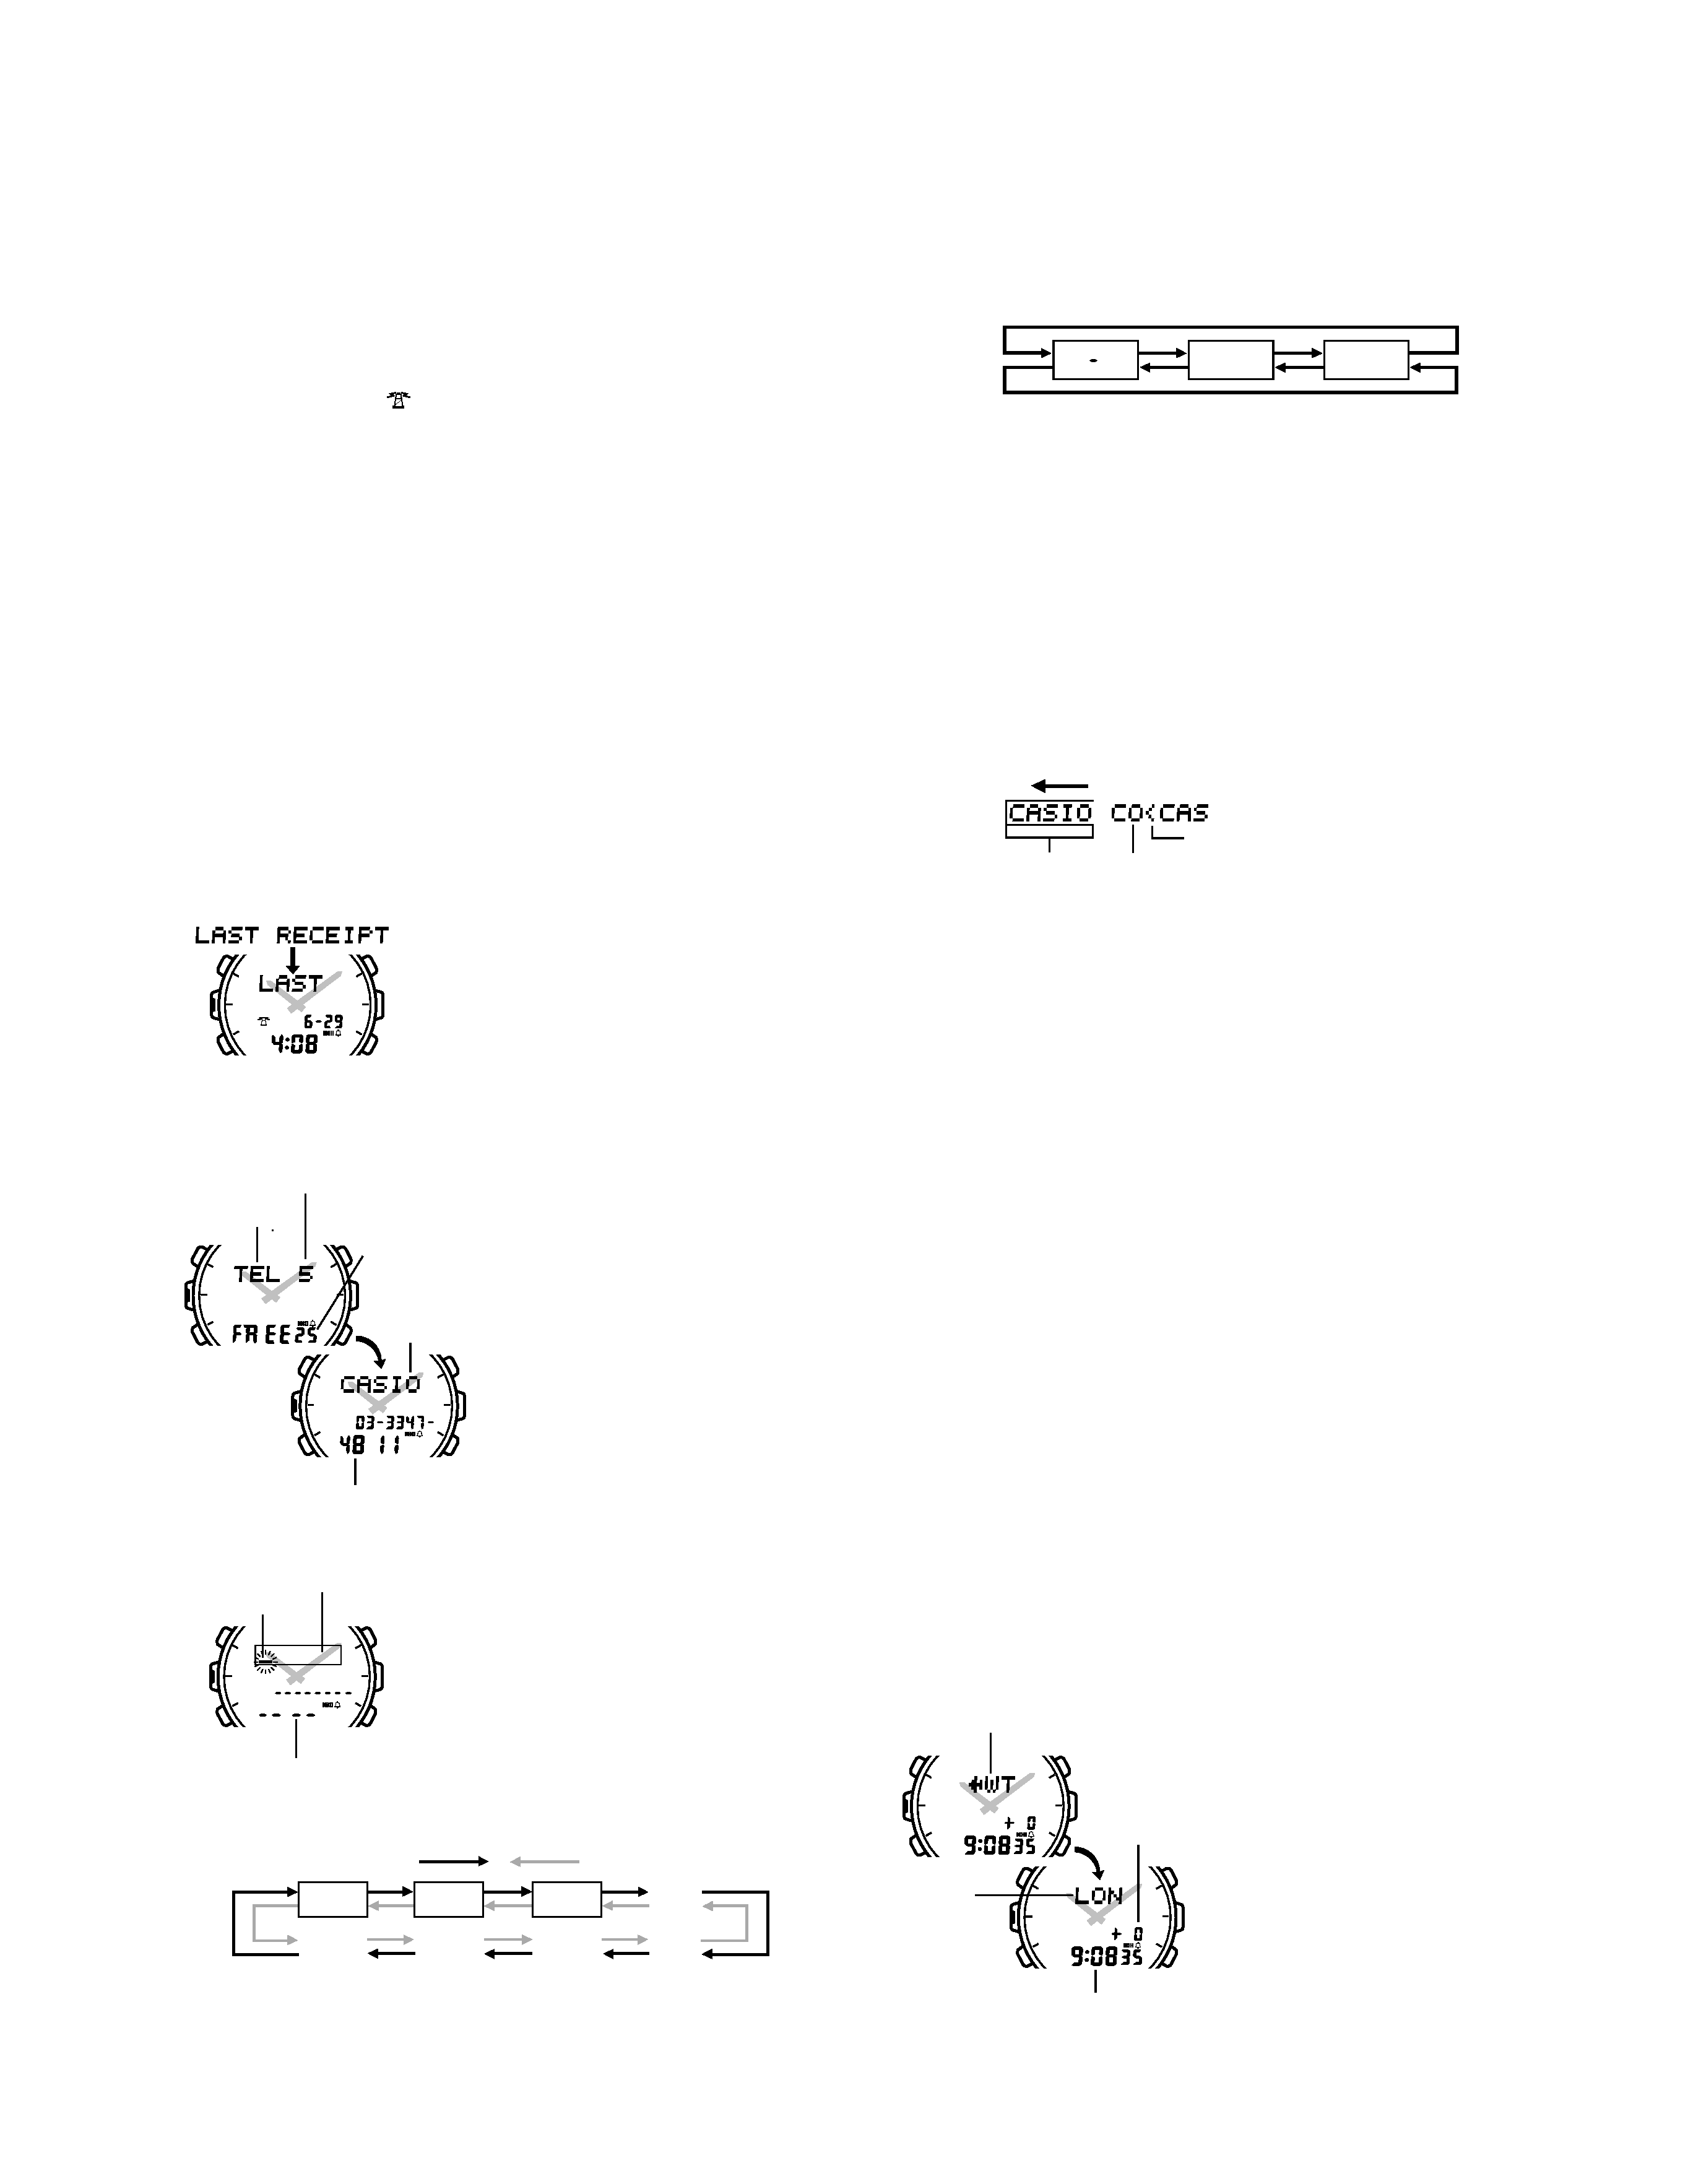
message LAST RECEIPT appears on
the display together with the received time
and date for about one or two minutes. Next,
the watch returns to the Timekeeping Mode.
· When the receive operation is unsuccessful,
the message
ERROR appears on the
display together with the date and time of
the last successful receipt for about one or
two minutes. Next, the watch returns to the
Timekeeping Mode.
· Pressing A while the LAST RECEIPT or ERROR message is on
the display returns to the Timekeeping Mode.
· To interrupt a receive operation and return to the Timekeeping Mode, press A .
GMT+1
GMT+2
GMT+0
Press D
Press A
L
C
A
D
B
Receive indicator
-- 4 --
L
C
A
D
B
P
P
Mode indicator
GMT
differential
City code
Current time in the selected city
About Auto Receive
When auto receive is turned on, the watch automatically starts to receive the
time calibration signal when the digital time in the Timekeeping Mode reaches
2:00 AM and 4:00 AM each day (calibration times).
· The Auto Receive operation is performed only if the watch is in the
Timekeeping Mode or World Time Mode when one of the calibration times
is reached. It is not performed if the time is reached while you are making
settings (while settings are flashing on the display).
· Auto receipt of the calibration signal is designed to be performed early in
the morning, while you sleep (provided that the digital time is set correctly).
Before going to bed for the night, remove the watch from your wrist, and put
it in a location where it can easily receive the signal.
· The receive indicator (
) indicates that at both or at least one of the last
calibration time receipt attempts were successful.
· When auto receive is turned on, the watch receives the calibration signal for
8 to 15 minutes each day when the digital time reaches 2:00 AM and 4:00
AM. Do not operate any of the watch's buttons within 15 minutes prior to or
following the calibration times. Doing so can interfere with correct
calibration.
· Remember that receipt of the calibration signal depends on the time shown
on the digital display. The receive operation will be performed whenever the
digital display shows 2:00 AM and 4:00 AM, regardless of whether or not
that is actually the correct time.
· When both receipts are successful, the watch uses the data of the second
receipt for calibration. When only one receipt is successful, the watch uses
the data of the successful receipt.
To turn auto receive on and off
1. Press B while in the Timekeeping Mode. The current Auto Receive on/off
setting flashes on the display because it is
selected.
· The receive indicator flashes along with the current on (ON) /off (OFF)
setting.
2. Press D to toggle Auto Receive on and off.
3. Press B to return to the Timekeeping Mode.
Last signal receipt display
In the Timekeeping Mode, press A to display
the date and time of the last successful receipt.
· The last receipt data remains on the display
for about one or two minutes or until you
press A again to return to the Timekeeping
Mode.
TELEMEMO MODE
The Telememo Mode lets you store up
to 30 pairs of name and telephone
number data. Data is automatically
sorted based on the characters of the
name. You can recall data by scrolling
through it on the display.
· See the "Character List" at the back
of this manual for details on how the
watch sorts data.
· The data item on the display when
you exit the Telememo Mode
appears first the next time you enter
the Telememo Mode.
· If you do not operate any button for a
few minutes while in the Telememo
Mode, the watch automatically goes
back to the Timekeeping Mode.
To input new Telememo data
1. In the Telememo Mode, press A or D
until the new data display appears.
· The new data display is the one that is blank
(contains no name and telephone number).
· If there is no Telememo data stored in
memory yet, the new data display appears
as soon as you enter the Telememo Mode.
2. Press B and a cursor appears in the text
area.
3. Use A and D to change the character at
the cursor position in the text area. The
character changes in the following
sequence.
· Holding down either button changes the character at high speed.
4. When the character you want is at the cursor position, press C to move
the cursor to the right.
5. Repeat the steps 3 and 4 until your text is complete.
· You can input up to eight characters in the text area.
L
C
A
D
B
L
C
A
D
B
Cursor
Text area
Number area
[New Data Display]
(space)
A to Z0 to 9-
.
:/
Press D
Press A
l
L
C
A
D
B
Number of telememo
items stored
Mode indicator
Remaining
memory
Name
Telephone number
6. After you input a name, use C to move the cursor to the number area.
· The text area can hold up to eight characters. When the cursor is located at
the eighth space of the text area, moving the cursor to the right causes it to
jump down to the first digit in the number area. When the cursor is at the
12th digit of the number area, moving it to the right causes it to jump back
up to the first character of the text area.
7. Use A and D to change the character (hyphen, number, or space) at the
cursor position in the number area. The character changes in the following
sequence.
· Holding down either button changes the character at high speed.
8. When the character you want is at the cursor position, press C to move
the cursor to the right.
9. Repeat steps 7 and 8 until you complete number input.
· You can input up to 12 digits in the number area.
10. After inputting your data, press B to store it.
· At this time, the cursor appears in the text area, ready for input of a new
Telememo data item. Note, however, that if the last data item saved
resulted in the memory becoming full, pressing B returns to the Telememo
Mode data screen instead.
11. Input more data (starting from step 3 above) or press B again to return to
the Telememo Mode data screen (without the cursor).
· When you press B , the message SORT appears on the display for a few
seconds. After the sort operation is complete, the watch returns to the
Telememo Mode data screen (without the cursor).
· The text area of the display can show only five characters at a time, so
longer text scrolls continuously from right to left.
· If the message { FULL appears in the text area of the display, it means
that memory is full. To store more data, you will first have to delete some of
the data stored in memory.
· If you do not perform any button operation for a few minutes while the
cursor is on the display, the watch automatically returns to the Telememo
Mode data screen (without the cursor).
To recall Telememo data
In the Telememo Mode, press D to scroll forward through stored data items
or A to scroll in reverse.
· Holding down either button scrolls through the data at high speed.
To edit Telememo data items
1. In the Telememo Mode, scroll through the data items and display the one
you want to edit.
2. Press B and the first character of the text area starts to flash.
3. Use C to move the flashing to the character you want to change.
4. Use A and D to change the character.
· For details on inputting characters, see "To input new Telememo data"
(steps 3 for name input and 7 for number).
5. After making the changes that you want, press B to store them and return
to the Telememo Mode data screen.
To delete Telememo data
1. In the Telememo Mode, scroll through the data items and display the one
you want to delete.
2. Press B and the first character of the text area starts to flash.
3. Press A and D at the same time to delete the data item.
· At this time the cursor appears in the text area, ready for input.
4. Input data or press B to return to the Telememo Mode data screen.
WORLD TIME MODE
The World Time Mode shows the cur-
rent time in 29 time zones around the
world.
· For full information on city codes,
see the "City Code Table" at the
back of this manual.
· The GMT differential is the time
difference of the time zone where the
city code is located from Greenwich
Mean Time.
· The GMT differentials used by this
watch are based on Universal Time
Coordinated (UTC) data.
· The seconds count of the World Time
is synchronized with the seconds
count in the Timekeeping Mode.
· The time zone that is displayed
when you leave the World Time
Mode will still be displayed when you
enter the World Time Mode again.
Continuously scrolls
Text area
Last letter of text
Separator (inserted automatically)
0 to 9
(space)
Press D
Press A
