
USER AND INSTALLATION MANUAL - ANNEX
ENGLISH
HT 200 - HT 200 DM - HT250
USER AND INSTALLATION MANUAL
(ANNEX)
INTRODUCTION
These pages discuss information regarding the
HT 200 Dual Mode, to be understood as an annex
to the user and installation manual for the Grand
Cinema line of products.
It also includes notes that concern all Grand
Cinema products: HT 200, HT 250, HT 200 Dual
Mode.
HT 200 DM SPECIFICATIONS
The HT 200 DM projector mounts a new 6-
segment colour wheel that dramatically reduces
the so called "rainbow effect" and gives a better
contrast, better colorimetry and a lower black level
to the image.
The new DMD chip can be set in two different
functioning modes: 4:3 aspect (800x600 active
pixels) and 16:9 aspect (848x480 active pixels).
In the 16:9 functioning mode there will be a faster
"load time", which means a major improvement in
faster moving images. Moreover, by increasing
the number of horizontal pixels it will allow to view
16:9 images at a 848x480 resolution, best suitable
for progressive DVD players and HDTV.
Switching from 4:3 mode to 16:9 mode is easy
and immediate by simply pressing the "mode"
button on the remote control (shown below) or
with the use of the screen menu (selecting the
"Image" display).
Like the HT 250, the HT 200 DM projector also
allows customization of Colour Temperature
values (see § 13.2.5.1 on the user and installation
manual) and selection of a Gamma correction
curve from a choice of four options (§ 13.2.5.2).
NOTE
Do not use the HT 200, HT 250 and HT 200
DM projectors at an ambient temperature
higher than 35°C (95°F).
Regarding transportability, the HT 200, HT
250 and HT 200 DM projectors are to be
considered "Desktop equipment".
800x600 Pixels
(4:3 mode)
800x600 pixels
(4:3 mode)
848x480 pixels
(16:9 mode)
848
600
480
600
80
40
800
USER AND INSTALLATION MANUAL - ANNEX
ENGLISH
INSTALLATION
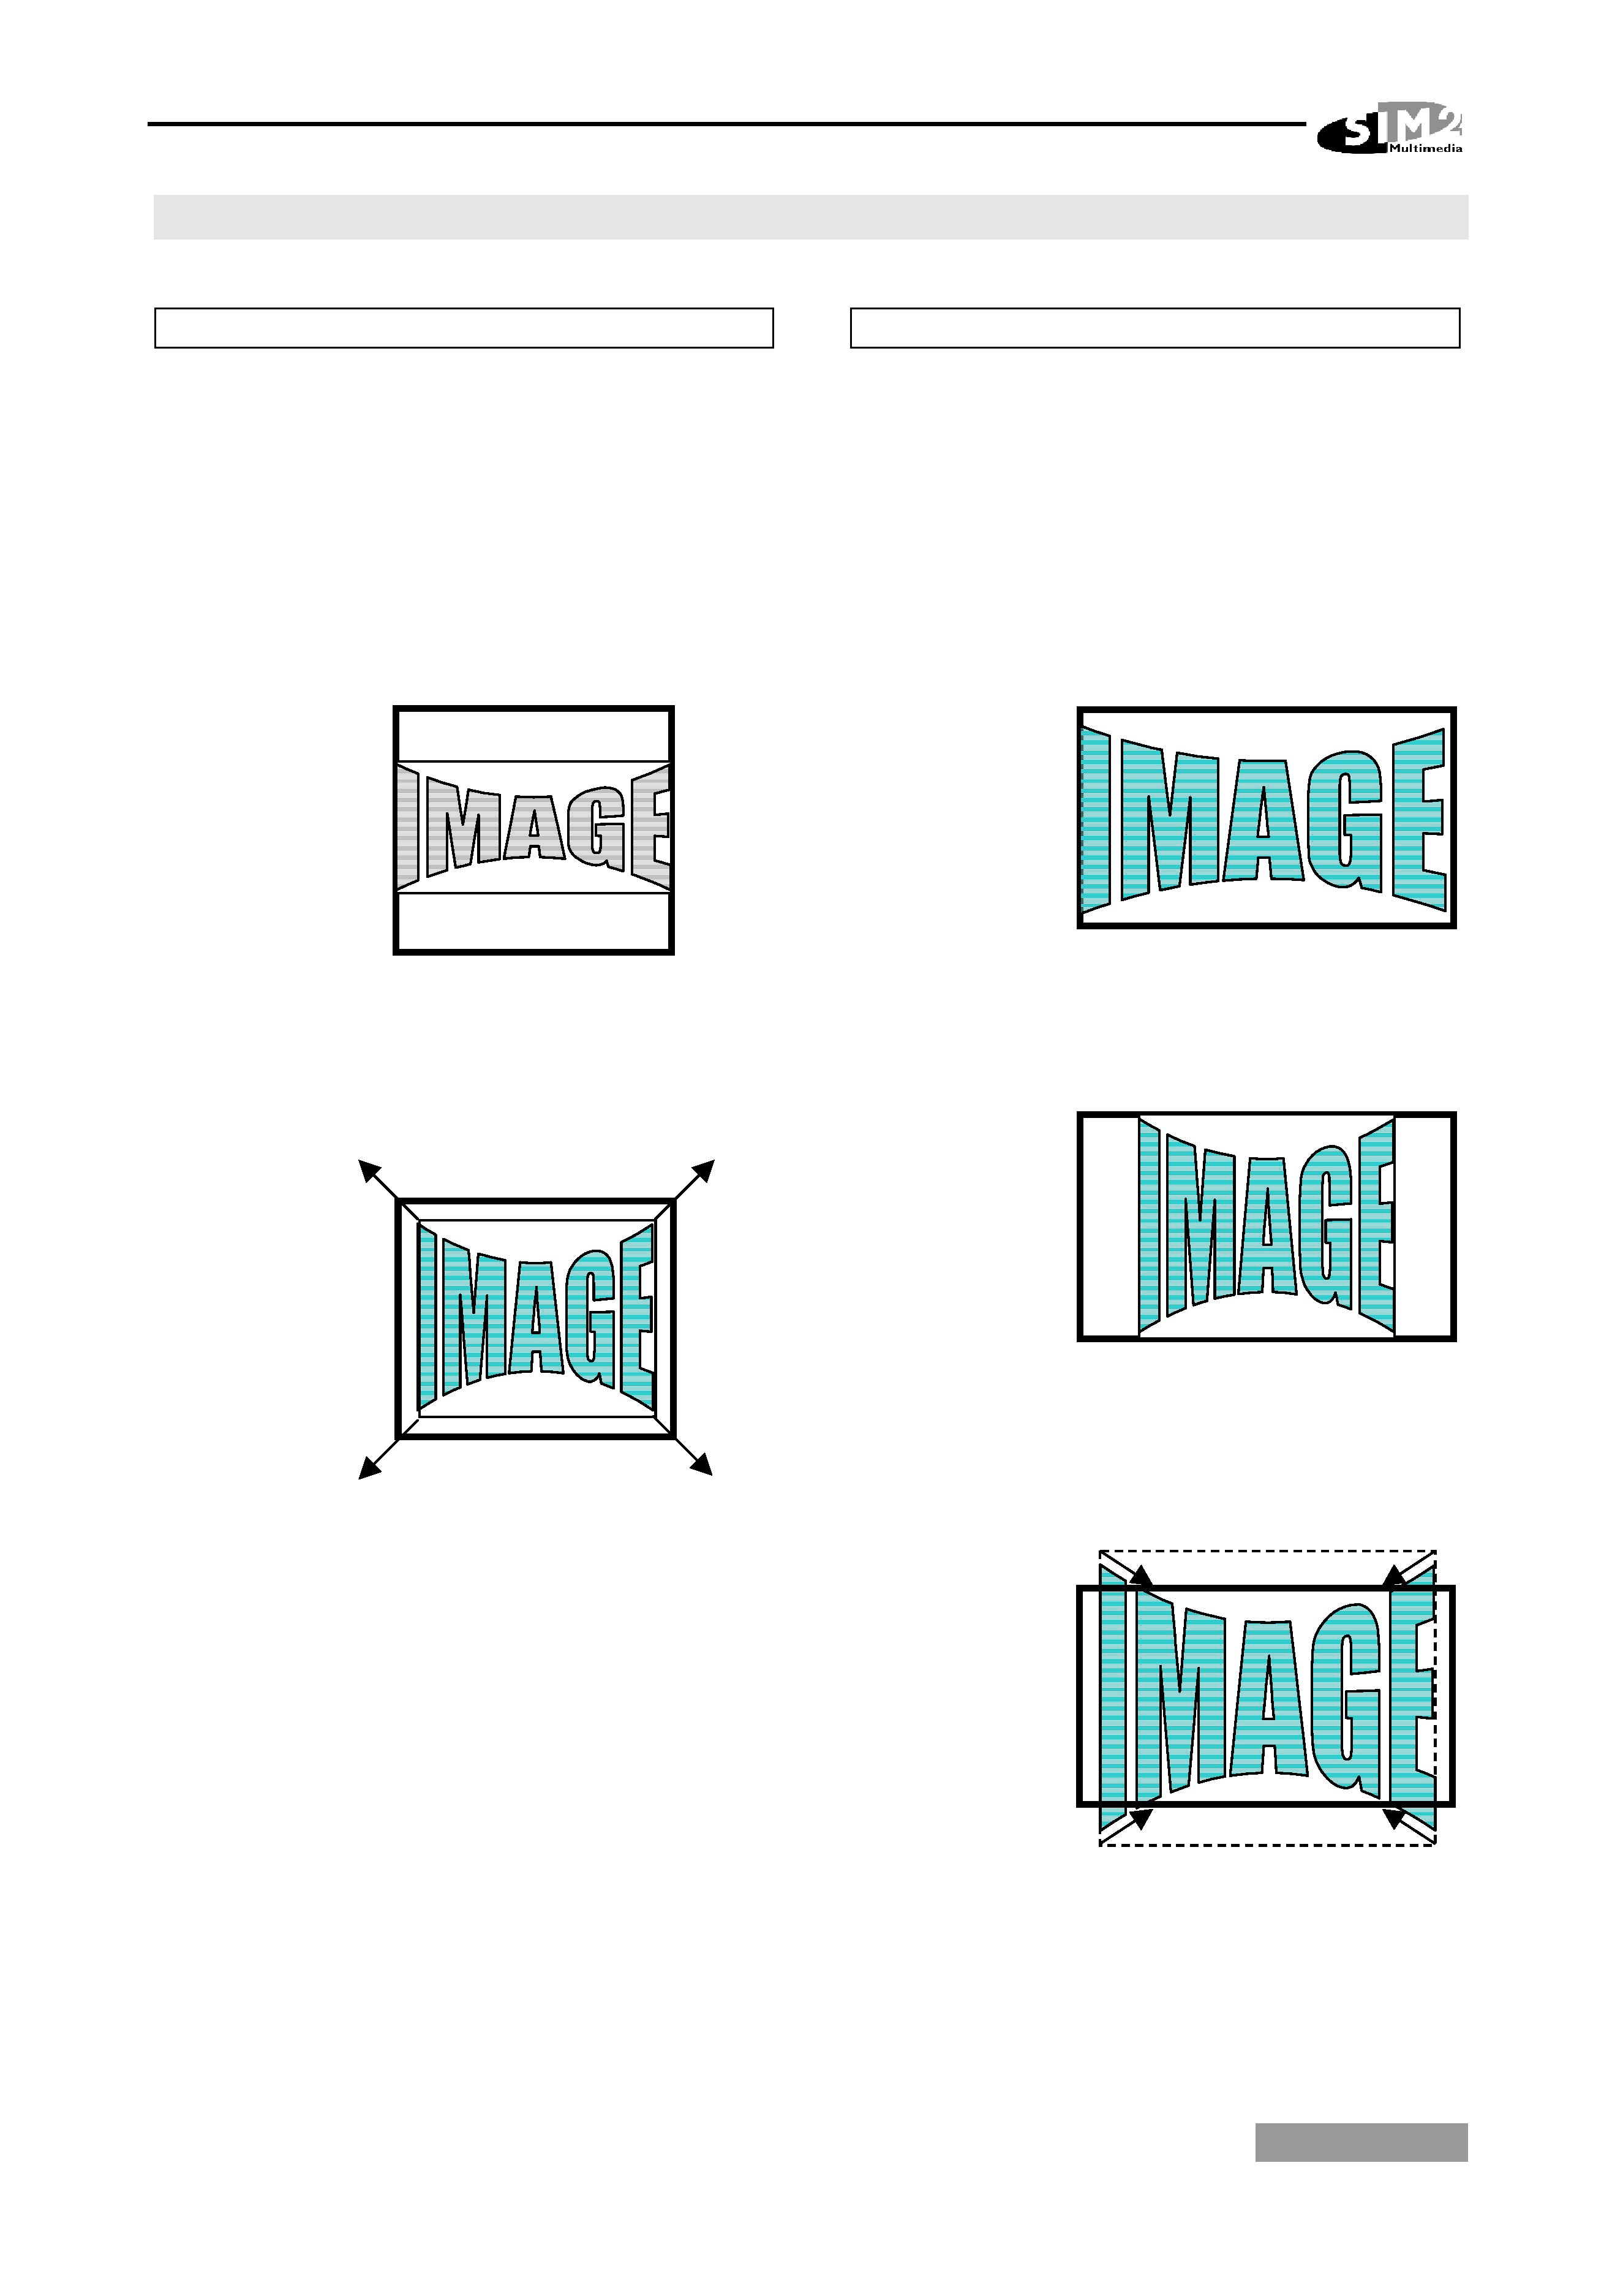
4:3 SCREEN
The higher horizontal resolution in the 16:9 mode
makes the projected image slightly wider than the
4:3 mode image (see Image 1 below). If you want
to use both modes, use the 16:9 mode to get the
proper throw ratio for the installation.
1. Screen 4:3
Mode 16:9
Source 16:9
2. Screen 4:3
Mode 4:3
Source 4:3
It is possible to meet the size of the screen by
zooming out.
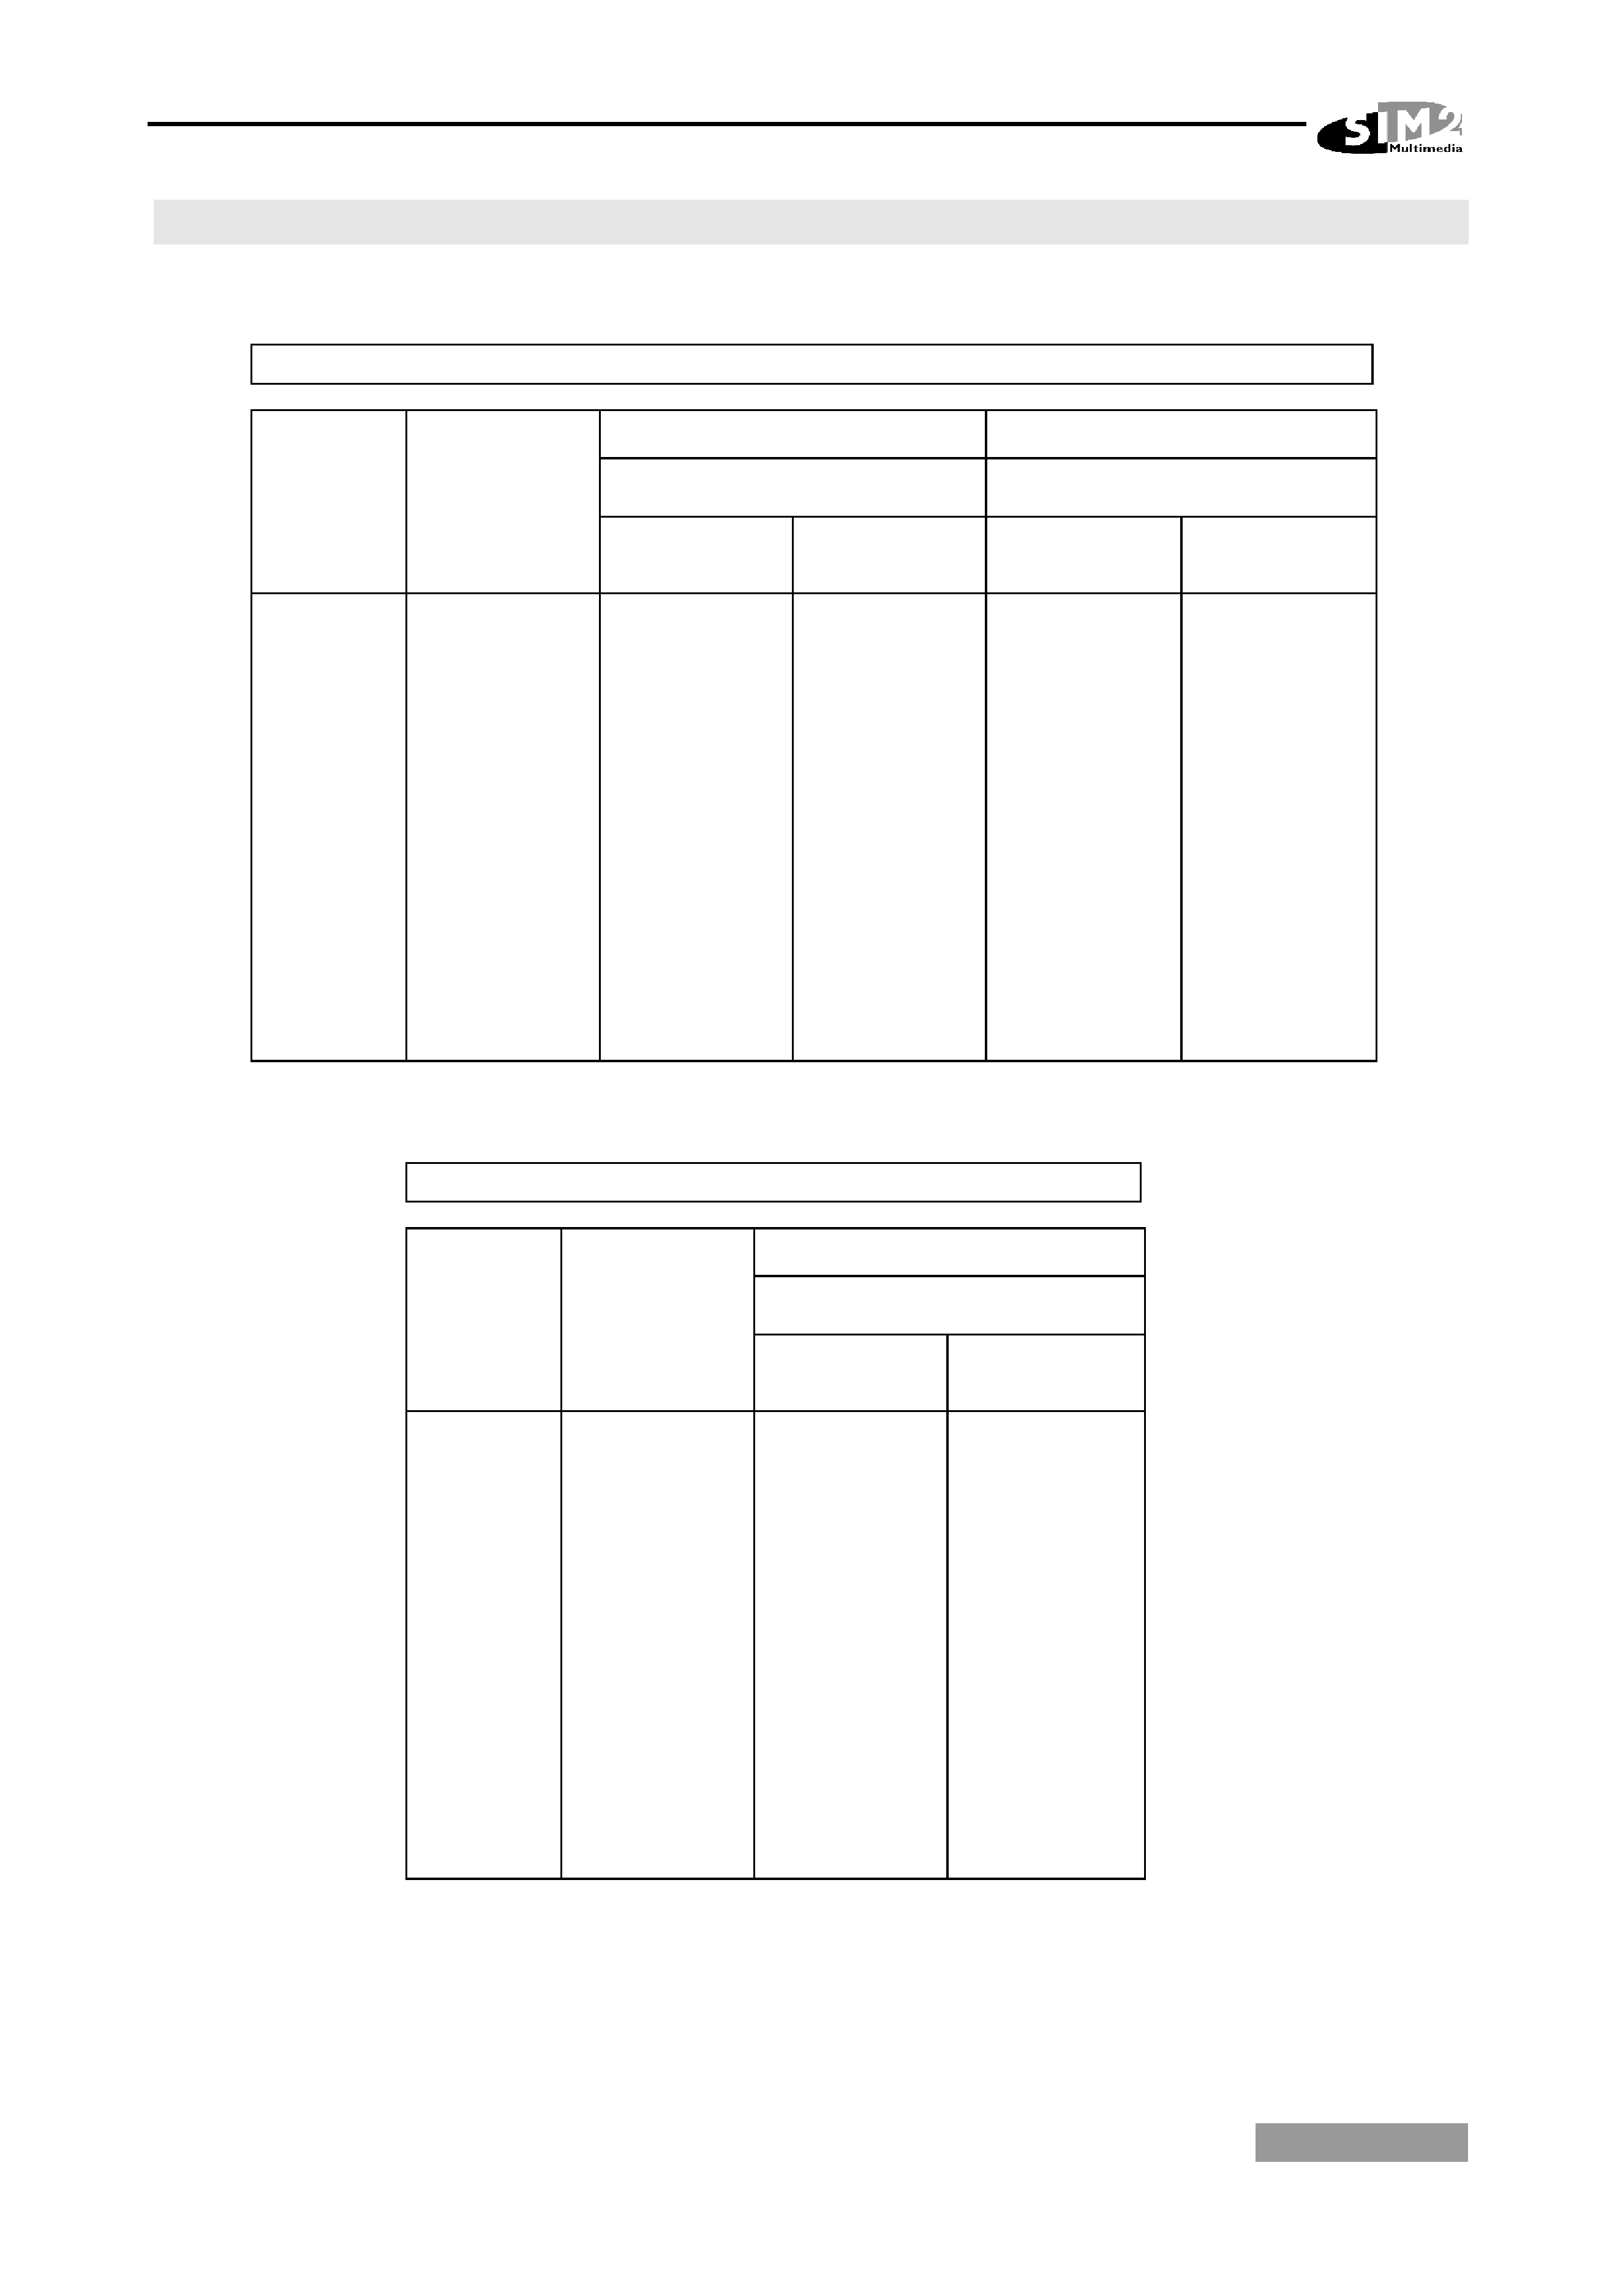
16:9 SCREEN
If the installation is done with a 16:9 screen and
16:9 mode, the 4:3 material can be displayed by
selecting 'Normal' in the 'Aspect' On Screen
Display menu or by switching to 4:3 mode and
then zooming in.
1. Screen 16:9
Mode 16:9
Source 16:9
2. Screen 16:9
Mode 16:9
Source 4:3
3. Screen 16:9
Mode 4:3
Source 4:3
It is possible to meet the size of the screen by
zooming in.
USER AND INSTALLATION MANUAL - ANNEX
ENGLISH
PROJECTION DISTANCES - HT 200 Dual Mode
4:3 Screen
4:3 Mode
16:9 Mode
Projection distance
Projection distance
Screen
size
(diagonal)
in.
Screen
width
m
in.
min
m
ft.
max
m
ft.
min
m
ft.
max
m
ft.
50
1.02
40.0
2.32
7.61
3.17
10.39
2.19
7.19
2.99
9.80
60
1.22
48.0
2.79
9.15
3.80
12.47
2.63
8.63
3.58
11.76
70
1.42
56.0
3.25
10.66
4.43
14.55
3.07
10.06
4.18
13.72
80
1.63
64.0
3.72
12.20
5.07
16.62
3.51
11.50
4.78
15.68
90
1.83
72.0
4.18
13.71
5.70
18.70
3.94
12.94
5.38
17.64
100
2.03
80.0
4.64
15.22
6.33
20.78
4.38
14.38
5.97
19.60
120
2.44
96.0
5.57
18.27
7.60
24.94
5.26
17.25
7.17
23.52
150
3.05
120.0
6.97
22.87
9.50
31.17
6.57
21.56
8.96
29.40
180
3.66
144.0
8.36
27.43
11.40
37.40
7.89
25.88
10.75
35.28
200
4.06
160.0
9.29
30.48
12.67
41.56
8.76
28.75
11.95
39.20
220
4.47
176.0
10.22
33.53
-
-
9.64
31.63
-
-
250
5.08
200.0
11.61
38.09
-
-
10.96
35.94
-
-
16:9 Screen
16:9 Mode
Projection distance
Screen
size
(diagonal)
in.
Screen
width
m
in.
min
m
ft.
max
m
ft.
50
1.11
43.6
2.39
7.84
3.25
10.66
60
1.33
52.3
2.86
9.38
3.91
12.83
70
1.55
61.0
3.34
10.96
4.56
14.96
80
1.77
69.7
3.82
12.53
5.21
17.09
90
1.99
78.4
4.30
14.11
5.86
19.23
100
2.21
87.2
4.77
15.65
6.51
21.36
120
2.66
104.6
5.73
18.80
7.81
25.62
150
3.32
130.7
7.16
23.49
9.76
32.02
180
3.98
156.9
8.59
28.18
11.72
38.45
200
4.43
174.3
9.55
31.33
-
-
220
4.87
191.8
10.50
34.45
-
-
250
5.53
217.9
11.94
39.17
-
-
MANUALE D'USO ED INSTALLAZIONE - ADDENDUM
ITALIANO
HT 200 - HT 200 DM - HT250
MANUALE D'USO ED INSTALLAZIONE
(ADDENDUM)
INTRODUZIONE
Questo documento riporta informazioni relative al
modello HT 200 Dual Mode, da intendersi come
aggiunte al Manuale d'Uso ed Installazione dei
prodotti della linea Gran Cinema.
Contiene inoltre delle avvertenze che si riferi-
scono a tutti i prodotti della gamma Grand Ci-
nema: HT 200, HT 250, HT 200 Dual Mode.
CARATTERISTICHE HT 200 DM
Il proiettore HT 200 DM incorpora una nuova
ruota colore a 6 segmenti tale da ridurre drasti-
camente il cosiddetto "effetto arcobaleno" e fornire
una immagine con un miglior contrasto e migliore
colorimetria.
Il pannello DMD di cui è dotato, inoltre, può es-
sere configurato secondo due distinte modalità di
funzionamento: formato 4:3 (800x600 pixels attivi)
e formato 16:9 (848x480 pixels attivi).
In questa seconda modalità di funzionamento, la
velocità di costruzione delle immagini è maggiore,
con benefici nella resa delle immagini in movi-
mento. In più, se la sorgente è un DVD progres-
sivo o un segnale HDTV, non è necessario alcun
scalamento verticale dell'immagine, permettendo
una migliore definizione della stessa.
Il passaggio dalla modalità 4:3 alla modalità 16:9
è immediato ed è ottenibile selezionando la voce
di menu apposita (nella pagina "Regolazioni
Immagine") o, semplicemente, da telecomando
premendo il tasto dedicato.
Il proiettore HT 200 DM consente inoltre la scelta
di valori personalizzati di Temperatura Colore (si
veda §13.2.5.1 sul Manuale d'uso ed installa-
zione) e la selezione di una curva di Correzione
Gamma tra una scelta di quattro (§13.2.5.2).
AVVERTENZE
Non utilizzare i proiettori HT 200, HT 250 e
HT 200 DM con temperatura ambiente supe-
riore a 35 °C.
Ai fini della trasportabilità, i proiettori HT 200,
HT 250 e HT 200 DM rientrano nella categoria
degli "Apparecchi da tavolo".
800x600 Pixels
(4:3 mode)
800x600 pixels
(4:3 mode)
848x480 pixels
(16:9 mode)
848
600
480
600
80
40
800
MANUALE D'USO ED INSTALLAZIONE - ADDENDUM
ITALIANO
SCHERMO 4:3
La maggiore risoluzione orizzontale propria del
modo 16:9 fa sì che l'immagine proiettata sia
leggermente più larga dell'immagine ottenibile con
il modo 4:3 (si veda la figura 1 sotto).
Per poter visualizzare correttamente entrambi i
modi, fare riferimento, nel corso dell'installazione,
alle distanze di proiezione relative al modo 16:9.
1. Schermo 4:3
Modo 16:9
Sorgente 16:9
2. Schermo 4:3
Modo 4:3
Sorgente 4:3
E' possibile utilizzare lo zoom ottico per allargare
l'immagine fino a riempire lo schermo.
16:9 SCREEN
Per un'installazione con schermo 16:9, nel caso di
sorgenti aventi formato 4:3, si può scegliere tra la
selezione del modo 16:9 (impostare allora il
formato
"Normale"
nel
menu
"Regolazioni
Immagine | Formato" dell'On Screen Display) e la
selezione del modo 4:3, con conseguente
riduzione dell'immagine proiettata mediante zoom
ottico.
1. Schermo 16:9
Modo 16:9
Sorgente 16:9
2. Schermo 16:9
Modo 16:9
Sorgente 4:3
3. Schermo 16:9
Modo 4:3
Sorgente 4:3
E' possibile utilizzare lo zoom ottico per restrin-
gere l'immagine entro lo schermo.