
USER'S GUIDE 2568
1
Getting Acquainted
Congratulations upon your selection of this CASIO watch. To get the most out of your
purchase, be sure to carefully read this manual and keep it on hand for later reference
when necessary.
Expose the watch to bright light to charge its battery before using it.
You can use this watch even as its battery is being charged by exposure to bright
light.
····· Be sure to read "Battery" of this manual for important information you need
to know when exposing the watch to bright light.
If the display of the watch is blank...
If the Power Saving on (S) indicator flashes on the
display, it means that the display is blank because the
watch's Power Saving function has turned off the
display to conserve power. Power Saving automatically
turns off the display and puts the watch into a sleep state
whenever your watch is left for a certain period where it
is dark.
· The initial factory default setting is Power Saving on.
· The watch recovers from the sleep state if you move it
to a well-lit area*, if you press any button, or if you
angle the watch towards your face for reading.
* It can take up to five seconds for the display to turn on.
····· See "Power Saving function" for more information.
About This Manual
· Button operations are indicated using the letters shown
in the illustration.
· Each section of this manual provides you with the
information you need to perform operations in each
mode. Further details and technical information can be
found in the "Reference" section.
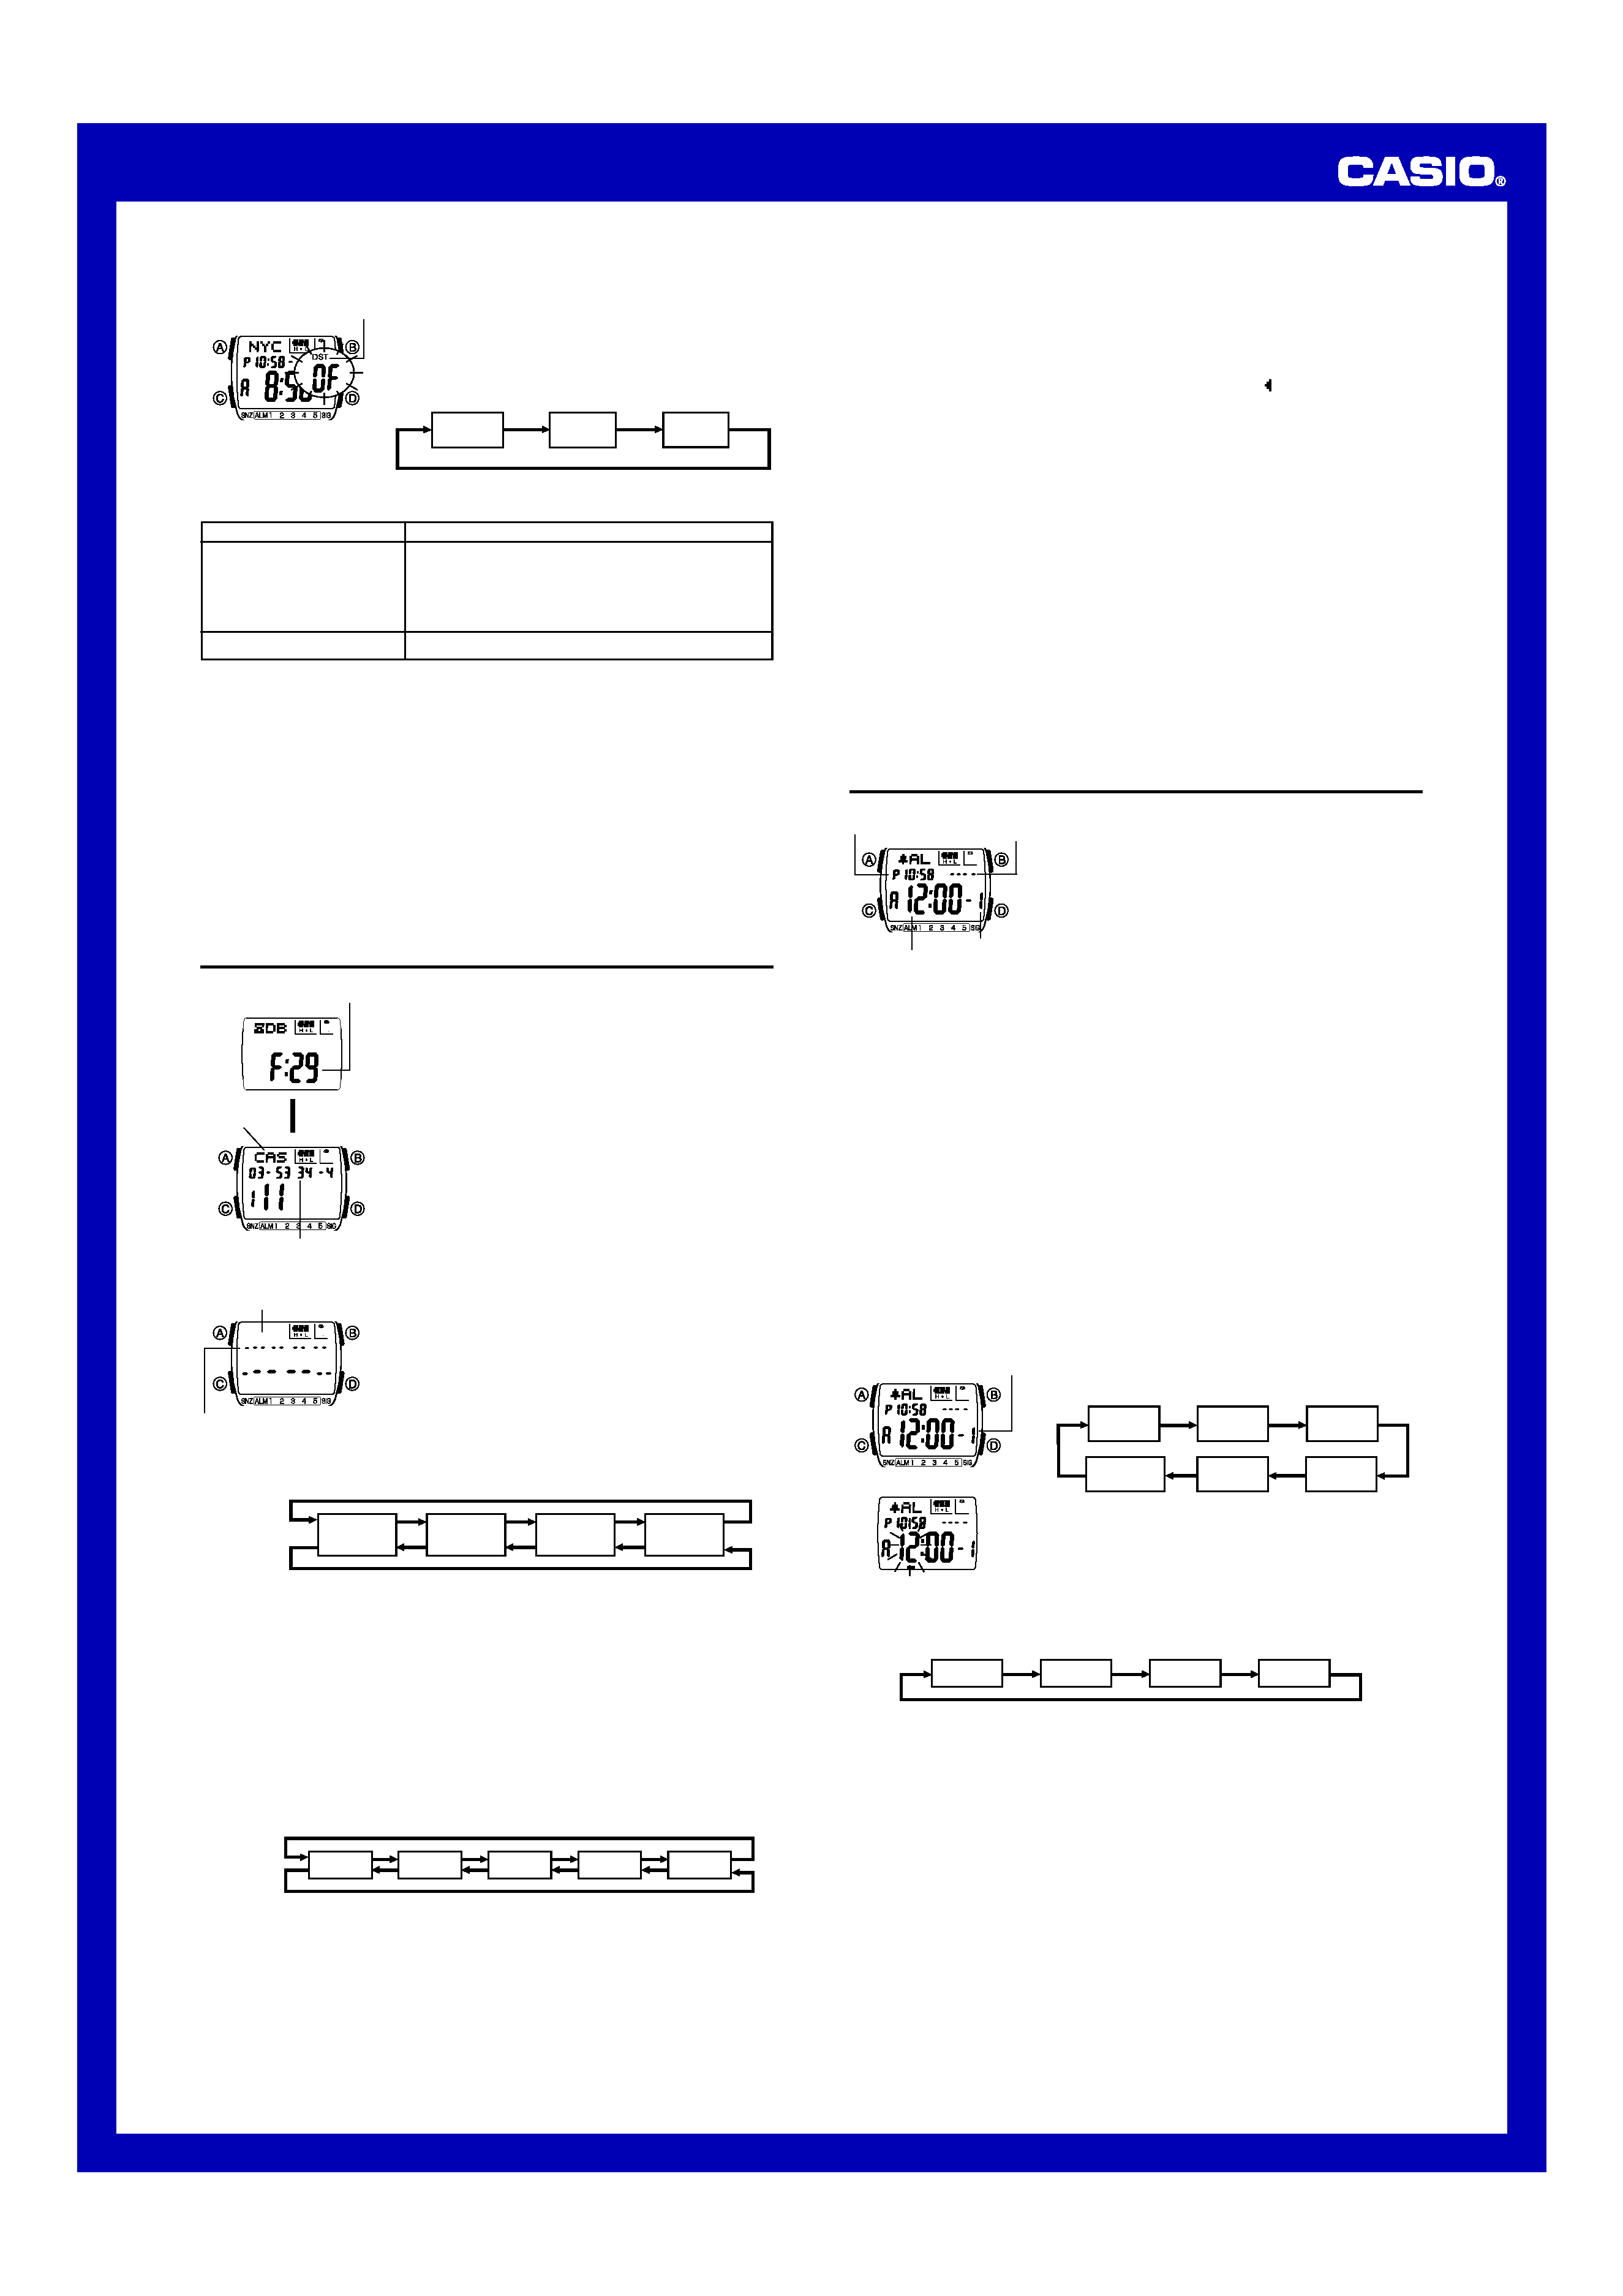
General Guide
· Press C to change from mode to mode.
· In any mode (except when a setting screen is on the display), press B to illuminate
the display.
Data Bank Mode
Countdown
Timer Mode
World Time Mode
L
L
L
Alarm Mode
Timekeeping Mode
L
Press C.
L
L
L
Stopwatch Mode
Day Counter Mode
Timekeeping
Use the Timekeeping Mode to set the time and date.
Note
This watch is capable of displaying text for the day of the
week in any one of 16 different languages (English,
Portuguese, Spanish, French, Dutch, Danish, German,
Italian, Czech, Swedish, Polish, Greek, Romanian,
Turkish, Russian, and Japanese).
To set the time and date
1. In the Timekeeping Mode, hold down A until the
seconds start to flash, which indicates the setting
screen.
2. Use C to move the flashing in the sequence shown
below to select other settings.
Day of week
Month Day
Hour : Minutes Seconds
PM indicator
Year
Language indicator
· The currently selected language indicator flashes on the display while the
Language (setting) is selected in the above sequence.
3. When the setting you want to change is flashing, use B and D to change it as
described below.
Seconds
DST on/off
Hour
Minutes
Day
Month
Year
Language
To change this setting
Seconds
DST on/off
Hour, Minutes, Year,
Month, Day
Language
Perform this button operation
Press D to reset to
00.
Press D to toggle between Daylight Saving Time
(
ON displayed) and standard time (OF displayed).
Use D (+) and B () to change the setting.
Use B and D to change the language setting.
· While the language indicator is flashing on the display, use B and D to cycle
through the language indicators as shown below, until the one for the language
you want to select is displayed.
4. Press A to exit the setting screen.
· The day of the week is automatically displayed in accordance with the date (year,
month, and day) settings.
· See the "Day of the Week List" for information on abbreviations used.
Indicator
Language
ENx
English
POR
Portuguese
ESP
Spanish
FRA
French
NED
Dutch
DAN
Danish
Press D.
Press B.
Indicator
Language
DEU
German
ITA
Italian
CES
Czech
SVE
Swedish
POL
Polish
E
Greek
Indicator
Language
RO
Romanian
T)R
Turkish
PUC
Russian
JPN
Japanese
· In addition to the day of the week display, the language setting also affects the type
of characters you can input for the name in the Data Bank Mode and the text in the
Day Counter Mode.
· Holding down A in the Timekeeping Mode displays the indicator for the currently
selected language. Keeping A depressed for about two seconds changes to the
Timekeeping Mode setting screen (indicated by the seconds flashing). If you
accidentally display the setting screen, press A again to exit.
To toggle between 12-hour and 24-hour timekeeping
In the Timekeeping Mode, press D to toggle between 12-hour timekeeping (indicated
by A or P on the display), or 24-hour timekeeping.
· With the 12-hour format, the P (PM) indicator appears on the display for times in the
range of noon to 11:59 p.m. and the A (AM) indicator appears for times in the range
of midnight to 11:59 a.m.
· With the 24-hour format, times are displayed in the range of 0:00 to 23:59, without
any indicator.
· The 12-hour/24-hour timekeeping format you select in the Timekeeping Mode is
applied in all modes.
Daylight Saving Time (DST)
Daylight Saving Time (summer time) advances the time setting by one hour from
Standard Time. Remember that not all countries or even local areas use Daylight
Saving Time.
To toggle the Timekeeping Mode time between DST and Standard Time
1. In the Timekeeping Mode, hold down A until the
seconds start to flash, which indicates the setting
screen.
2. Press C to move the flashing to the DST on/off setting.
3. Press D to toggle between Daylight Saving Time (
ON
displayed) and standard time (
OF displayed).
4. Press A to exit the setting screen.
· The DST indicator appears on the display to indicate
that Daylight Saving Time is turned on in the
Timekeeping, Alarm, and Day Counter Mode.
DST indicator
World Time
The World Time shows the current time in 28 cities (29
time zones) around the world.
· The time settings of the Timekeeping Mode and the
World Time Mode are independent from each other, so
you must make separate settings for each.
· Whenever you change the time setting for any city in the
World Time Mode, the settings of all other cities are
changed accordingly.
· The UTC differential value indicates the number of hours
difference in time between the currently selected time
zone and UTC.
· All of the operations in this section are performed in the
World Time Mode, which you enter by pressing C.
UTC
differential
Current time in
the selected city
code
Timekeeping
mode time
City code
USER'S GUIDE 2568
2
To set the current time in the World Time Mode
1. In the World Time Mode, use D to select the city code
whose time you want to set.
2. After you select a city code, hold down A until the DST
on/off setting of the World time starts to flash, which
indicates the setting screen.
3. Use C to move the flashing in the sequence shown
below to select other settings.
DST indicator
Hour
DST on/off
Minutes
4. When the setting you want to change is flashing, use B and D to change it as
described below.
· While the settings are flashing on the display, pressing B and D at the same
time changes the DST on/off, hour, and minutes settings so they match the
Timekeeping Mode time.
· When setting the world time using the 12-hour format, take care to set the time
correctly as a.m. (A indicator) or p.m. (P indicator).
To change this setting
DST on/off
Hour, Minutes
Perform this button operation
Press D to toggle between Daylight Saving Time
(
ON displayed) and standard time (OF displayed).
· The above operation toggles all World Time city
codes between Daylight Saving Time and Standard
Time.
Use D (+) and B () to change the setting.
5. Press A to exit the setting screen.
· The DST indicator appears on the display to indicate that Daylight Saving Time is
turned on in the World Time Mode.
· Note that you cannot make settings for individual city codes. Daylight Saving Time
(summer time) advances the time setting by one hour from Standard Time.
Remember that not all countries or even local areas use Daylight Saving Time.
To view the time in another city code
In the World Time Mode, press D to scroll city codes (time zones).
· For full information on city codes, see the "City Code Table".
Data Bank
The Data Bank Mode lets you store up to 30 records,
each containing name and telephone number data.
Records are automatically sorted based on the characters
of the name. You can recall records by scrolling through
them on the display.
· The characters you can input for the name depend on
the language you select in the Timekeeping Mode. See
"To set the time and date" for more information.
Changing the language setting does not affect names
that are already stored.
· See "Sort Table" for details on how the watch sorts
records.
· All of the operations in this section are performed in the
Data Bank Mode, which you enter by pressing C.
Remaining memory
Name
L
Telephone number
To create a new Data Bank record
1. In the Data Bank Mode, use D to display the new data
screen.
· To jump directly to the new data screen, press B and
D at the same time.
· If the new data screen does not appear when you
press D, it means that memory is full. To store
another record, you will first have to delete some of
the records stored in memory.
2. Hold down A until the flashing cursor (
_) appears in
the name area of the display.
3. In the name area, use B and D to cycle through
characters at the cursor position. The characters cycle
in the sequence shown below.
Name area
Number area
A to Z
(alphabet)
(space)
@ to -
(symbol)
0 to 9
(number)
Press D.
Press B.
New Data Screen
· The above character sequence is for English input. See "Character List" for the
character sequences of other languages.
4. When the character you want is at the cursor position, press C to move the cursor
to the right.
5. Repeat steps 3 and 4 until the name is complete.
· You can input up to eight characters for the name.
6. After you input the name, press C as many times as necessary to move the cursor
to the number area.
· When the cursor is located at the eighth space of the name area, moving the
cursor to the right causes it to jump to the first digit of the number. When the
cursor is at the 16th digit of the number, moving it to the right (by pressing C)
causes it to jump to the first character in the name.
7. In the number area, use B and D to cycle through numbers and symbols
(hyphen, brackets, space) at the cursor position. The characters cycle in the
sequence shown below.
0 to 9
x
[
]
(space)
Press B.
Press D.
8. When the character you want is at the cursor position, press C to move the cursor
to the right.
9. Repeat steps 7 and 8 until you complete number input.
· You can input up to 16 digits for the number.
· The number initially contains all hyphens. You can leave the hyphens as they are
or replace them with numbers or other symbols (brackets, space).
10. Press A to store your data and return to the Data Bank record screen (without
the cursor).
· When you press A to store data, the name and number you input flash for about
one second as Data Bank records are sorted. After the sort operation is complete,
the Data Bank record screen appears.
· The name can show only three characters at a time, so longer text scrolls continuously
from right to left. The last character is indicated by the symbol
after it.
To recall Data Bank records
In the Data Bank Mode, use D to scroll through Data Bank records on the display.
To edit a Data Bank record
1. In the Data Bank Mode, use D to scroll through the records and display the one
you want to edit.
2. Hold down A until the flashing cursor appears on the display.
3. Use C to move the flashing to the character you want to change.
4. Use D (forward) and B (back) to change the character.
5. After making the changes that you want, press A to store them and return to the
Data Bank record screen.
To delete a Data Bank record
1. In the Data Bank Mode, use D to scroll through the records and display the one
you want to delete.
2. Hold down A until the flashing cursor appears on the display.
3. Press B and D at the same time to delete the record.
· The message CLR appears to indicate that the record is being deleted. After the
record is deleted, the cursor appears on the display, ready for input.
4. Input data or press A to return to the Data Bank record screen.
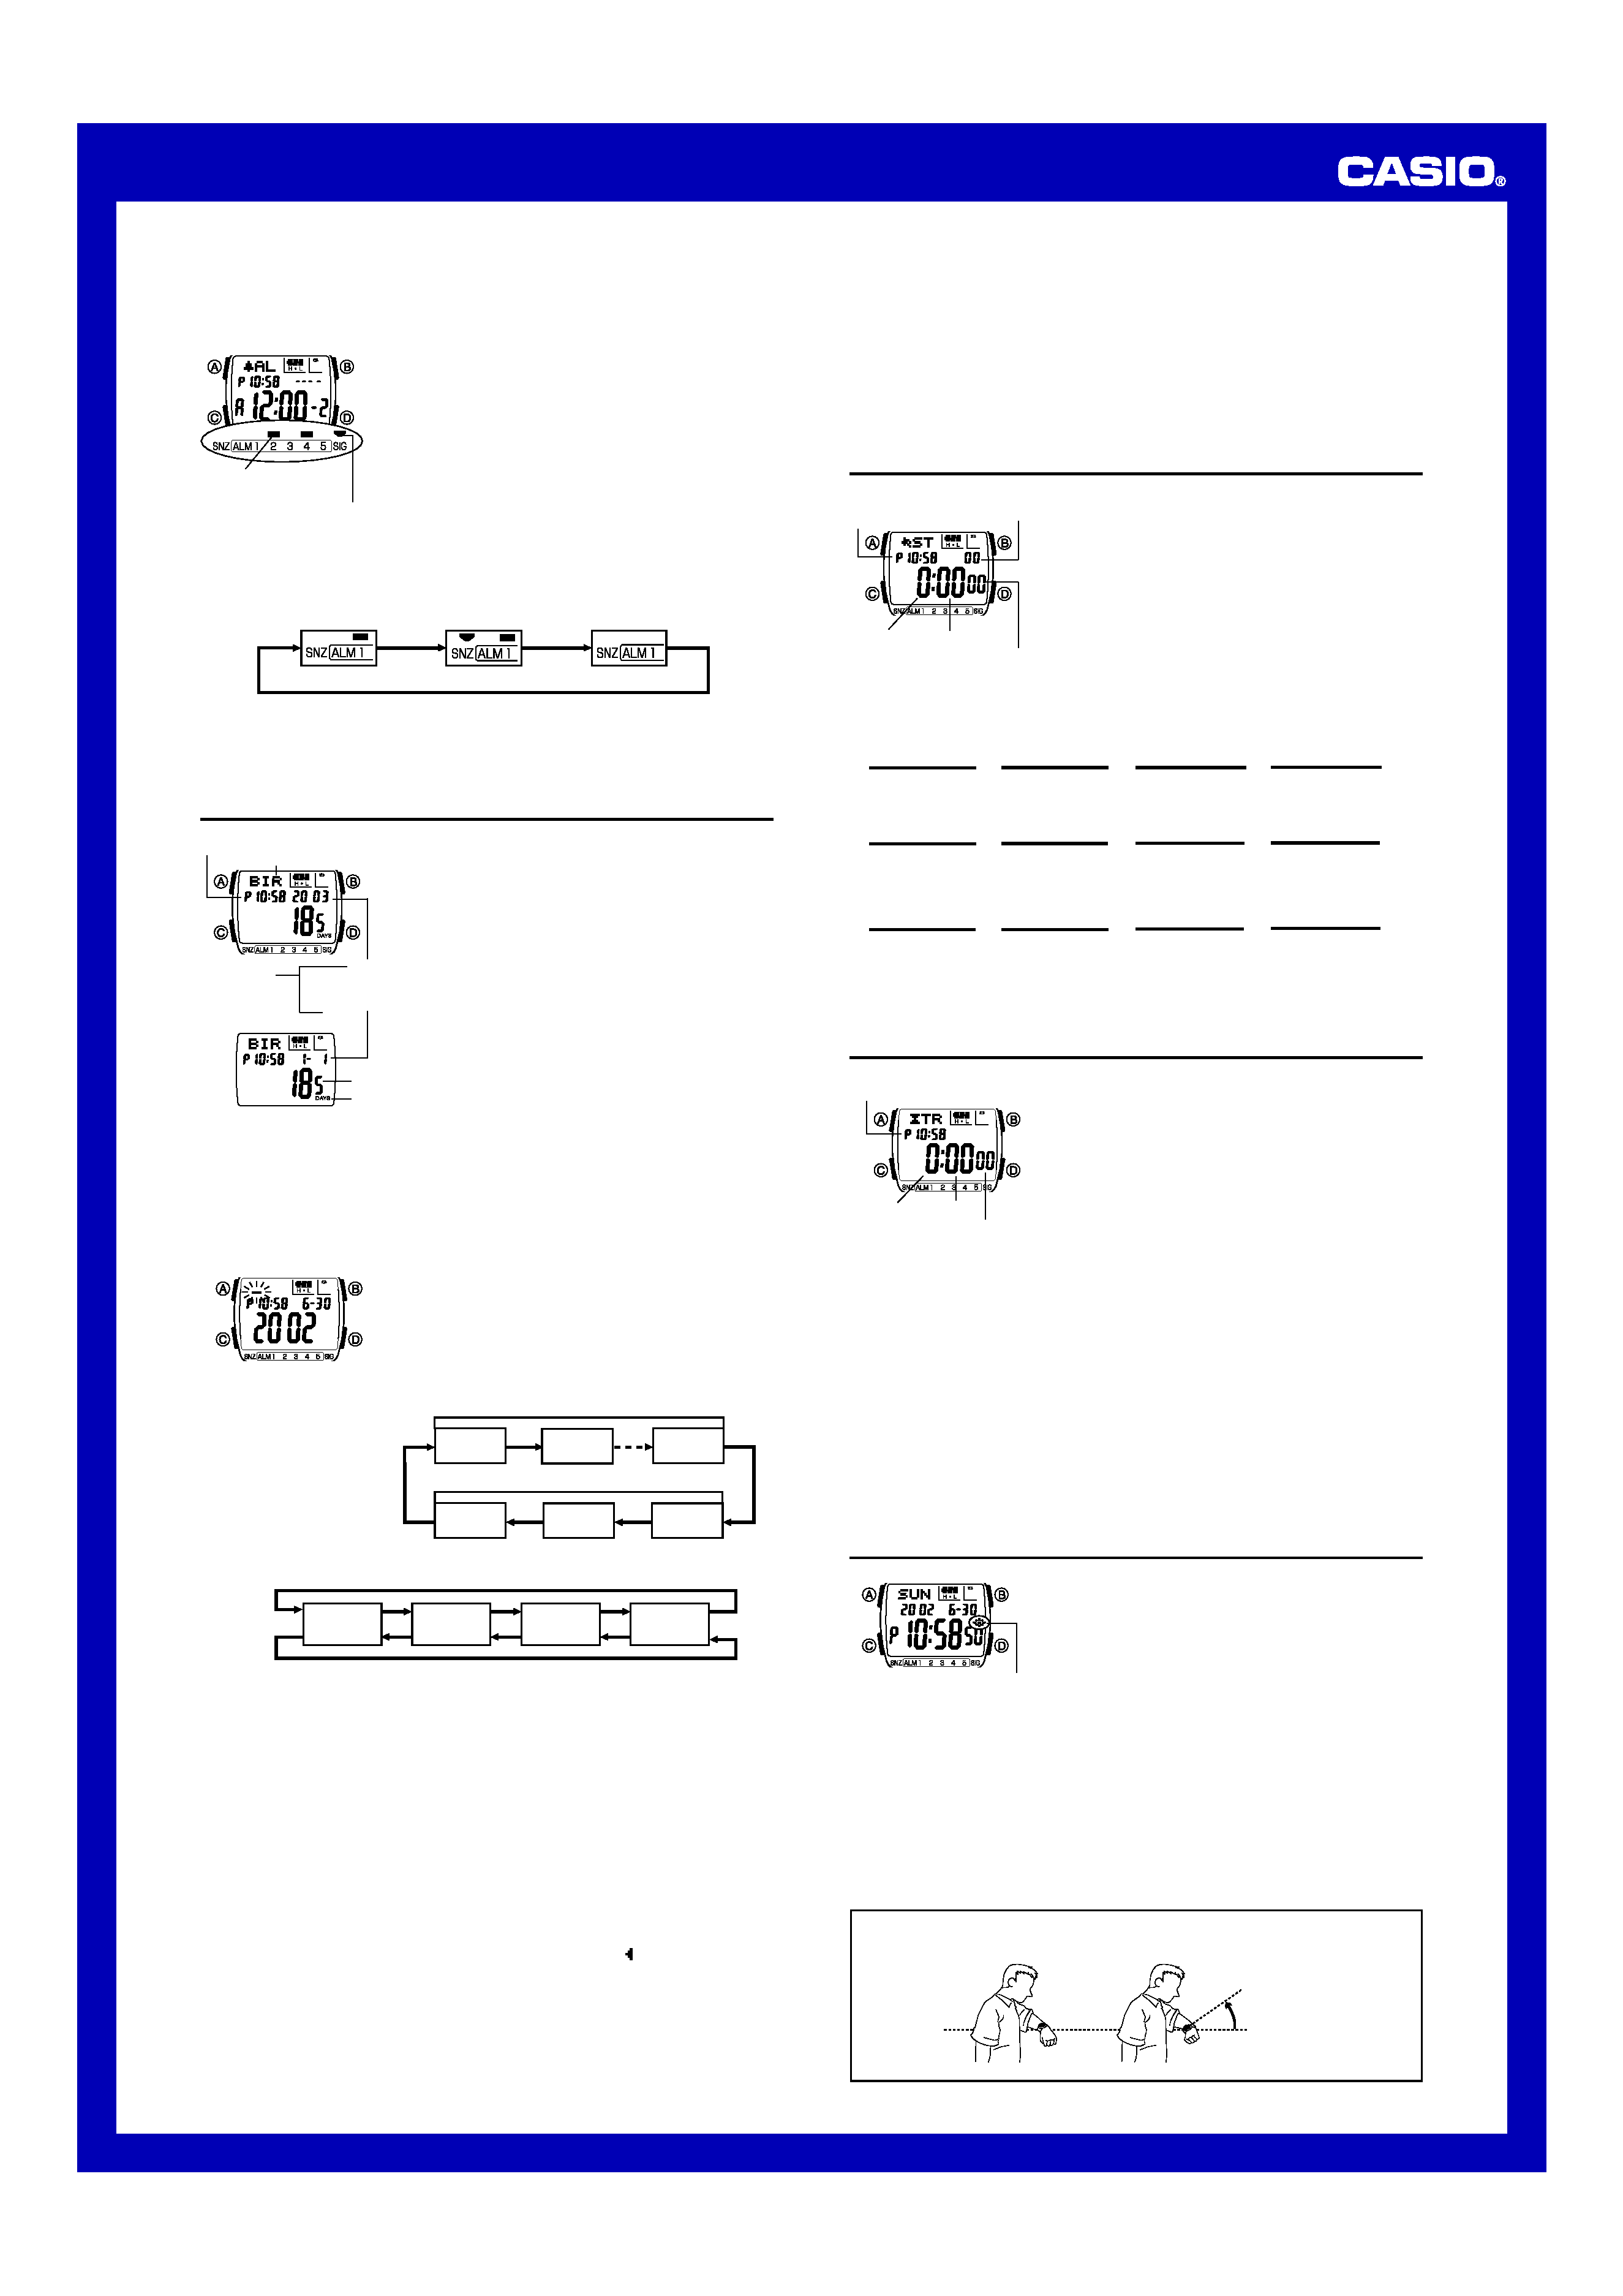
Alarms
You can set up to five independent multi-function alarms
with hour, minutes, month, and day. When an alarm is
turned on, the alarm tone sounds when the alarm time is
reached. One of the alarms can be configured as a
snooze alarm or a one-time alarm, while the other four are
one-time alarms.
You can also turn on an Hourly Time Signal that causes
the watch to beep twice every hour on the hour.
· There are five alarms numbered 1 through 5. You can
configure Alarm
1 as a snooze alarm or a one-time
alarm. Alarms
2 through 5 can be used as one-time
alarms only.
· Alarm settings (and Hourly Time Signal settings) are
available in the Alarm Mode, which you enter by
pressing C.
Timekeeping
Mode time
Alarm date
(month Day)
Alarm time
(Hour : Minutes)
Alarm number
Alarm Types
The alarm type is determined by the settings you make, as described below.
· Daily alarm
Set the hour and minutes for the alarm time. This type of setting causes the alarm to
sound everyday at the time you set.
· Date alarm
Set the month, day, hour and minutes for the alarm time. This type of setting causes
the alarm to sound at the specific time, on the specific date you set.
· 1-Month alarm
Set the month, hour and minutes for the alarm time. This type of setting causes the
alarm to sound everyday at the time you set, only during the month you set.
· Monthly alarm
Set the day, hour and minutes for the alarm time. This type of setting causes the alarm
to sound every month at the time you set, on the day you set.
To set an alarm time
1. In the Alarm Mode, use D to scroll through the alarm
screens until the one whose time you want to set is
displayed.
· Each of the five alarm screens has an alarm number.
The Hourly Time Signal screen does not have an
alarm number.
2. After you select an alarm, hold down A until the hour
setting of the alarm time starts to flash, which indicates
the setting screen.
· This operation automatically turns on the alarm.
Alarm number
Alarm
1
Alarm
2
Alarm
3
Hourly Time
Signal
Alarm
5
Alarm
4
3. Use C to move the flashing in the sequence shown below to select other settings.
4. While a setting is flashing, use D (+) and B () to change it.
· To set an alarm that does not include a month (Daily alarm, Monthly alarm), set x
for the month. Use D and B until the
x mark appears (between 12 and 1) while
month setting is flashing.
· To set an alarm that does not include a day (Daily alarm, 1-Month alarm), set xx
for the day. Use D and B until the
xx mark appears (between the end of the
month and 1) while the day setting is flashing.
· When setting the alarm time using the 12-hour format, take care to set the time
correctly as a.m. (A indicator) or p.m. (P indicator).
5. Press A to exit the setting screen.
Minutes
Hour
Month
Day
Alarm Operation
The alarm tone sounds at the preset time for 10 seconds, regardless of the mode the
watch is in. In the case of the snooze alarm, the alarm operation is performed a total
of seven times, every five minutes, until you turn the alarm off or change it to a one-
time alarm.
· Pressing any button stops the alarm tone operation.
· Performing any one of the following operations during a 5-minute interval between
snooze alarms cancels the current snooze alarm operation.
Displaying the Timekeeping Mode setting screen
Displaying the alarm
1 setting screen
USER'S GUIDE 2568
3
To test the alarm
· In the Alarm Mode, hold down D to sound the alarm.
To turn Alarms
2
2
2
2
2 through 5
5
5
5
5 and the Hourly Time Signal on and off
1. In the Alarm Mode, use D to select a one-time alarm
(alarm number
2 through 5) or the Hourly Time Signal.
2. Press A to toggle it on and off.
· The on/off status of Alarms 2 through 5 and the Hourly
Time Signal is shown by indicators along the bottom of
the displays.
· The alarm on indicators and Hourly Time Signal on
indicator are displayed in all modes.
· While an alarm is sounding, the applicable alarm on
indicator flashes on the display.
Alarm on
indicator
Hourly time signal
on indicator
To select the operation of Alarm
1
1
1
1
1
1. In the Alarm Mode, use D to select Alarm
1.
2. Press A to cycle through the available settings in the sequence shown below.
· The snooze on indicator and Alarm1 on indicator are displayed in all modes.
· The snooze on indicator flashes during the 5-minute intervals between alarms.
· The alarm indicator (Alarm1 on and/or snooze on) flashes while the alarm is
sounding.
Snooze alarm on
One-time alarm on
Alarm off
Snooze on indicator and Alarm
1
1
1
1
1 on indicator
Press A.
Day Counter
The Day Counter lets you count the number of days from
the Timekeeping Mode's current date to a specific target
date.
· There are five Day Counter records, each of which can
be set with its own text and target date (year, month,
day).
· When the target date falls before the current date (as
kept in the Timekeeping Mode), the number of days is
displayed as a negative value.
· Whenever the date specified by any one of the Day
Counters matches the date of the Timekeeping Mode
(regardless of the Day Counter's year setting), the DAYS
indicator flashes on the Timekeeping Mode and Day
Counter Mode.
Text area
Year
Month
Day
Target date
(Alternate at
the 1-second
interval)
Number of days
DAYS indicator
Timekeeping
Mode time
· The initial default target date when you purchase the watch, after you have its
battery replaced, or when battery power drops to Level 5 is January 1, 2001.
· The characters you can input for the text depend on the language you select in the
Timekeeping Mode. See "To set the time and date" for more information. Changing
the language setting does not affect texts that are already stored.
· All of the operations in this section are performed in the Day Counter Mode, which
you enter by pressing C.
To create a new Day Counter record
1. In the Day Counter Mode, use D to scroll through the
Day Counter records until the one you want is on the
display.
2. Hold down A until the flashing cursor appears in the
text area of the display, which indicates the setting
screen.
3. Press C to move the flashing in the sequence shown
below.
Character 1
Month
Year
Target date
Text area
Character 2
Character 8
Day
4. While the cursor is in the text area, use B and D to cycle through characters at
the cursor position. The characters cycle in the sequence shown below.
· The above character sequence is for English input. See "Character List" for the
character sequences of other languages.
5. When the character you want is at the cursor position, press C to move the cursor
to the right.
6. Repeat steps 4 and 5 until the name is complete.
· You can input up to eight characters for the text.
7. After you input the text, press C as many times as necessary to move the cursor
to the target date.
· When the cursor is located at the eighth space of the text area, moving the cursor
to the right causes it to jump to the year setting. When the cursor is at the day
setting, moving it to the right (by pressing C) causes it to jump to the first
character in the text.
8. While the year, month, or day setting is flashing, use D (+) and B () to change
the setting.
· You can set a target date in the range of January 1, 1940 to December 31, 2039.
9. After everything is the way you want, press A to exit the setting screen.
· The text can show only three characters at a time, so longer text scrolls continuously
from right to left. The last character is indicated by the symbol
after it.
Note
· Use the above procedure to edit Day Counter records, too.
To recall Day Counter records
In the Day Counter Mode, use D to scroll through the Day Counter records.
A to Z
(alphabet)
(space)
@ to -
(symbol)
0 to 9
(number)
Press B.
Press D.
To delete a Day Counter record
1. In the Day Counter Mode, scroll through the records and display the one you want
to delete.
2. Hold down A until the flashing cursor appears on the display.
3. Press B and D at the same time to delete the record.
· The message CLR appears to indicate that the record is being deleted. After the
record is deleted, the cursor appears on the display and Timekeeping Mode
current date is set as the target date, ready for input.
4. Input data or press A to exit the setting screen.
Stopwatch
The stopwatch lets you measure elapsed time, split times,
and two finishes.
· The display range of the stopwatch is 23 hours, 59
minutes, 59.99 seconds.
· The stopwatch continues to run, restarting from zero
after it reaches its limit, until you stop it.
· The stopwatch measurement operation continues even
if you exit the Stopwatch Mode.
· Exiting the Stopwatch Mode while a split time is frozen
on the display clears the split time and returns to
elapsed time measurement.
· All of the operations in this section are performed in the
Stopwatch Mode, which you enter by pressing C.
Seconds
Hours
1/100 second
Minutes
Timekeeping
Mode time
To measure times with the stopwatch
D
Start
Stop
Elapsed Time
Re-start
Clear
D
Stop
D
D
A
Split Time
D
Start
Split
Split release
Clear
A
Stop
A
D
A
Two Finishes
D
Split
Stop
Clear
A
Split release
D
A
A
First runner
finishes.
Display time of
first runner.
Second runner
finishes.
Display time of
second runner.
(SPL displayed)
Countdown Timer
The countdown timer can be set within a range of 1
minute to 24 hours. An alarm sounds when the countdown
reaches zero.
· Countdown timer functions are available in the
Countdown Timer Mode, which you enter by pressing
C.
To set the countdown start time
1. In the Countdown Timer Mode, hold down A until the
hour setting of the countdown start time starts to flash,
which indicates the setting screen.
2. Press C to move the flashing between the hour and minute settings.
3. While a setting is flashing, use D (+) and B () to change it.
· To set the starting value of the countdown time to 24 hours, set 0:00.
4. Press A to exit the setting screen.
Seconds
Hours
Minutes
Timekeeping
Mode time
To use the countdown timer
Press D while in the Countdown Timer Mode to start the countdown timer.
· When the end of the countdown is reached, the alarm sounds for 10 seconds or until
you stop it by pressing any button. The countdown time is automatically reset to its
starting value after the alarm stops.
· Press D while a countdown operation is in progress to pause it. Press D again to
resume the countdown.
· To completely stop a countdown operation, first pause it (by pressing D), and then
press A. This returns the countdown time to its starting value.
· The countdown timer measurement operation continues even if you exit the
Countdown Timer Mode.
Backlight
The backlight uses an EL (electro-luminescent) panel that
causes the entire display to glow for easy reading in the
dark. The watch's auto light switch automatically turns on
the backlight when you angle the watch towards your face
in the dark.
· The auto light switch must be turned on (indicated by
the auto light switch on indicator) for it to operate.
· See "Backlight Precautions" for other important
information about using the backlight.
To turn on the backlight manually
In any mode, press B to illuminate the display for about one second.
· The above operation turns on the backlight regardless of the current auto light
switch setting.
Auto light switch
on indicator
About the Auto Light Switch
Turning on the auto light switch causes the backlight to turn on for about one second,
whenever you position your wrist as described below in any mode. Note that this
watch features a "Full Auto EL Light," so the auto light switch operates only when
available light is below a certain level. It does not turn on the backlight under bright
light.
Moving the watch to a position that is parallel to the ground and then tilting it
towards you more than 40 degrees causes the backlight to turn on.
More than
40
°
Parallel to
ground
USER'S GUIDE 2568
4
Warning!
· Always make sure you are in a safe place whenever you are reading the
display of the watch using the auto light switch. Be especially careful when
running or engaged in any other activity that can result in accident or injury.
Also take care that sudden illumination by the auto light switch does not
surprise or distract others around you.
· When you are wearing the watch, make sure that its auto light switch is turned
off before riding on a bicycle or operating a motorcycle or any other motor
vehicle. Sudden and unintended operation of the auto light switch can create a
distraction, which can result in a traffic accident and serious personal injury.
To turn the auto light switch on and off
In the Timekeeping Mode, hold down B for about two seconds to toggle the auto light
switch on (
displayed) or off (
not displayed).
· The auto light switch on indicator (
) is on the display in all modes while the auto
light switch is turned on.
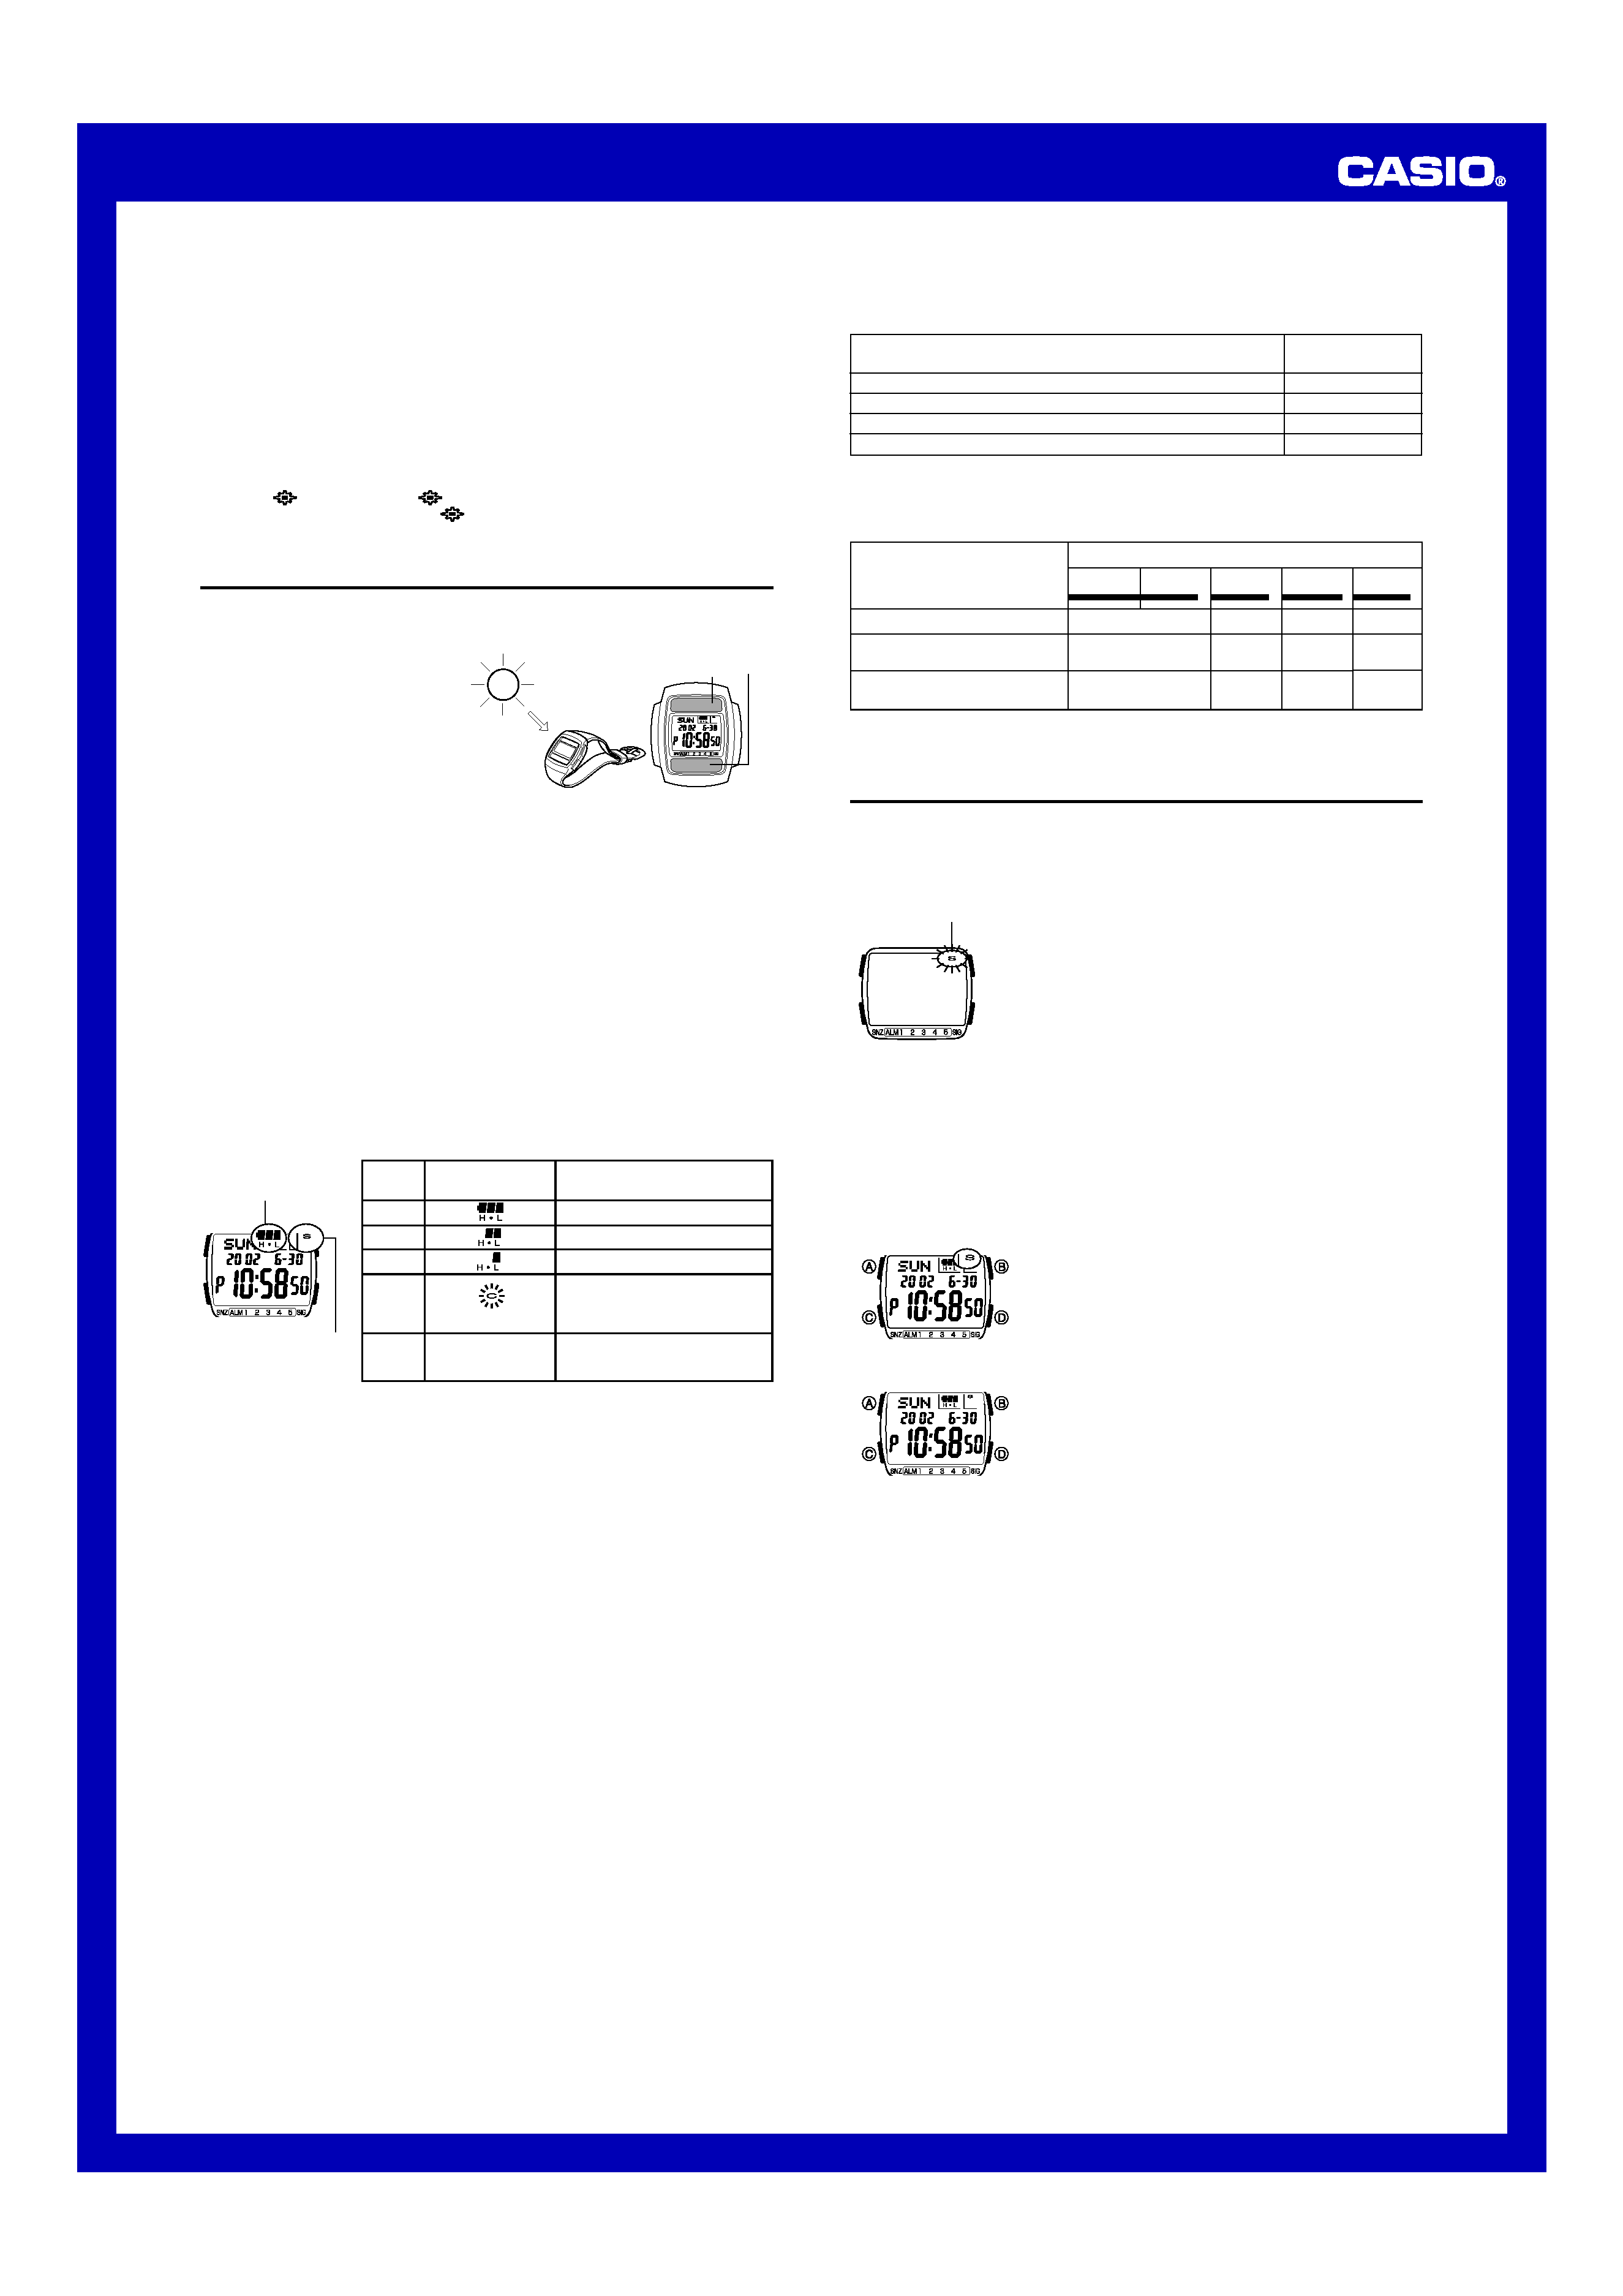
Battery
This watch is equipped with a solar cell and a rechargeable battery (secondary
battery) that is charged by the electrical power produced by the solar cell. The
illustration shown below shows how you should position the watch for charging.
Example: Orient the watch so its face is
pointing at a light source.
· Note that charging efficiency drops
when any part of the solar cell is
blocked by clothing, etc.
· The illustration shows how to position
a watch with a resin band.
Important!
· Storing the watch for long periods in an area where there is no light or wearing it in
such a way that it is blocked from exposure to bright light can cause rechargeable
battery power to run down. Be sure that the watch is normally exposed to bright light
whenever possible.
· This watch employs a solar cell that converts light into electricity, which charges a
built-in rechargeable battery. Normally, the rechargeable battery should not need
replacement, but after very long use over a number of years, the rechargeable
battery may lose its ability to achieve a full charge. Should you notice problems with
getting the rechargeable battery to a full charge, contact your dealer or CASIO
distributor about having the rechargeable battery replaced.
· The rechargeable battery should be replaced with a CASIO-specified ML2016
battery only. Other rechargeable batteries can cause damage to the watch.
· All data stored in memory is deleted, and the current time and all other settings
return to their initial factory defaults whenever battery power drops to Level 5 and
when you have the battery replaced.
· Turn on the watch's Power Saving function and keep it in an area normally exposed
to bright light when storing it for long periods. This helps to keep the rechargeable
battery from going dead.
Solar cell
Battery Power Indicator
The battery power indicator on the display shows you the current status of the
rechargeable battery's power.
Function Status
All functions enabled.
All functions enabled.
All functions enabled.
Beeper tone, backlight,
display, and buttons are
disabled.
All functions, including
timekeeping, are disabled.
Level
1
2
3
4
5
Battery Power
indicator
(Charge Soon Alert)
Battery power
indicator
Power Saving on (S)/
Charge (C)/Recover (R)
indicator
· The flashing charge (C) indicator at Level 4 tells you that battery power is very low,
and that exposure to bright light for charging is required as soon as possible.
· At Level 5, all functions are disabled and settings return to their initial factory
defaults. Functions are enabled once again after the rechargeable battery is
charged, but you need to set the time, date, and all other settings after the battery is
recharged to Level 3 from Level 5. Though the time appears on the display after the
battery is charged to Level 4 (indicated by flashing charge (C) indicator), you will not
be able to change the time, date, and all other settings until the battery reaches
Level 3 (no charge (C) indicator) .
· Leaving the watch in direct sunlight or some other very strong light source can
cause the battery power indicator to temporarily show a reading that is higher than
the actual battery level. The correct battery power indicator should appear after a
few minutes.
· If you use the backlight or any of the alarm functions a number of times during a
short period, the recover (R) indicator appears on the display and the following
operations become disabled until battery power recovers.
Backlight; Beeper tone
After some time, battery power will recover and the recover (R) indicator will
disappear, indicating that the above functions are enabled again.
Charging Precautions
Certain charging conditions can cause the watch to become very hot. Avoid leaving
the watch in the areas described below whenever charging its rechargeable battery.
Warning!
Leaving the watch in bright light to charge its rechargeable battery can cause it
to become quite hot. Take care when handling the watch to avoid burn injury.
The watch can become particularly hot when exposed to the following
conditions for long periods.
· On the dashboard of a car parked in direct sunlight
· Too close to as incandescent lamp
· Under direct sunlight
Charging Guide
After a full charge, timekeeping remains enabled for up to about six months, while the
watch is used under the conditions described below.
Operating Conditions
· Watch is not exposed to light
· Display on 18 hours per day, sleep state 6 hours per day
· 1 backlight operation (1.5 seconds) per day
· 10 seconds of alarm operation per day
Charge Times
Exposing the watch to light for the periods shown below each day restores the power
used by the above operating conditions.
· Stable operation is promoted by frequent charging.
Exposure Level (Brightness)
Approximate
Exposure Time
Outdoor Sunlight (50,000 lux)
5 minutes
Sunlight Through a Window (10,000 lux)
24 minutes
Daylight Through a Window on a Cloudy Day (5,000 lux)
48 minutes
Indoor Fluorescent Lighting (500 lux)
8 hours
Recovery Times
The table below shows the amount exposure that is required to take the battery from
one level to the next.
· The above exposure time values are all for reference only. Actual required exposure
times depend on lighting conditions.
Exposure Level
(Brightness)
Outdoor Sunlight (50,000 lux)
Sunlight Through a Window
(10,000 lux)
Daylight Through a Window
on a Cloudy Day (5,000 lux)
Approximate Exposure Time
Level 5
Level 4
Level 3
Level 2
Level 1
L
L
L
33 hours
171 hours
3 hours
16 hours
33 hours
16 hours
83 hours
165 hours
3 hours
14 hours
28 hours
L
Reference
This section contains more detailed and technical information about watch operation.
It also contains important precautions and notes about the various features and
functions of this watch.
Power Saving Function
When turned on, the Power Saving function automatically
puts the watch into a sleep state whenever it is left in an
area where it is dark for about one hour in the
Timekeeping Mode or Auto Display screen. The sleep
state is indicated by a blank screen with Power Saving on
(S) indicator flashing on it. In the sleep state, all functions
are enabled, except for the display.
· Wearing watch inside the sleeve of clothing can cause it
to enter the sleep state.
Power saving on indicator
· The watch will not enter the sleep state between 6:00 AM and 9:59 PM. If the watch
is already in the sleep state when 6:00 AM arrives, however, it will remain in the
sleep state.
To recover from the sleep state
Perform any one of the following operations.
· Move the watch to a well-lit area. It can take up to five seconds for the display to turn
on.
· Press any button.
· Angle the watch towards your face for reading.
To turn Power Saving on and off
In the Timekeeping Mode, hold down D for about two
seconds to toggle Power Saving on (S indicator displayed)
and off (S indicator not displayed).
· Note that pressing D also toggles between 12-hour
timekeeping and 24-hour timekeeping.
Auto Display
Auto Display continually changes the contents of the
digital display.
To turn off Auto Display
Press any button (except for B) to turn off Auto Display.
This returns to the Timekeeping Mode.
To turn on Auto Display
Hold down C for about three seconds until the watch
beeps.
· Note that Auto Display cannot be performed while a
setting screen is on the display.
Auto return features
· After you perform any button operation (except for the backlight button) in any mode,
pressing C returns directly to the Timekeeping Mode.
· If you leave the watch in the Data Bank, Alarm, and Day Counter Mode for two or
three minutes without performing any operation, it automatically changes to the
Timekeeping Mode.
· If you leave a screen with flashing digits or a cursor on the display for two or three
minutes without performing any operation, the watch automatically saves any
settings you have made up to that point and exits the setting screen.
Data and Setting Scrolling
The B, C, and D buttons are used in various modes and setting screens to scroll
through data on the display. In most cases, holding down these buttons during a scroll
operation scrolls through the data at high speed.
Initial Screens
When you enter the Data Bank, Alarm, or Day Counter Mode, the data you were
viewing when you last exited the mode appears first.
Timekeeping
· Resetting the seconds to 00 while the current count is in the range of 30 to 59
causes the minutes to be increased by 1. In the range of 00 to 29, the seconds are
reset to
00 without changing the minutes.
· The year can be set in the range of 2000 to 2039.
· The watch's built-in full automatic calendar automatically makes allowances for
different month lengths and leap years. Once you set the date, there should be no
reason to change it except after you have the watch's battery replaced or when
battery power drops to Level 5.
USER'S GUIDE 2568
5
UTC
The letters "UTC" stands for "Universal Time Coordinated," which is the world-wide
scientific standard of timekeeping. It is based upon carefully maintained atomic
(cesium) clocks that accurate to within microseconds. Leap seconds are added
reference point for UTC is Greenwich, England.
Backlight Precautions
· The electro-luminescent panel that provides illumination loses power after very long
use.
· The illumination provided by the backlight may be hard to see when viewed under
direct sunlight.
· The watch may emit an audible sound whenever the display is illuminated. This is
due to vibration of the EL panel used for illumination, and does not indicate
malfunction.
· The backlight automatically turns off whenever an alarm sounds.
· Frequent use of the backlight shortens the battery life.
Auto light switch precautions
· Wearing the watch on the inside of your wrist and movement or vibration of your arm
can cause the auto light switch to activate and illuminate the display. To avoid
running down the battery, turn off the auto light switch whenever engaging in
activities that might cause frequent illumination of the display.
· The backlight may not light if the face of the watch is
more than 15 degrees above or below parallel. Make
sure that the back of your hand is parallel to the ground.
· The backlight turns off in about one second, even if you
keep the watch pointed towards your face.
· Static electricity or magnetic force can interfere with proper operation of the auto
light switch. If the backlight does not light, try moving the watch back to the starting
position (parallel with the ground) and then tilt it back toward you again. If this does
not work, drop your arm all the way down so it hangs at your side, and then bring it
back up again.
· Under certain conditions, the backlight may not light until about one second after you
turn the face of the watch towards you. This does not necessarily indicate
malfunction of the backlight.
More than 15 degree
too high
PAGO PAGO
HONOLULU
ANCHORAGE
LOS ANGELES
DENVER
CHICAGO
NEW YORK
CARACAS
RIO DE JANEIRO
LONDON
PARIS
City
City
UTC
Other major cities in the same time zone
Code
Differential
City Code Table
PPG
HNL
ANC
LAX
DEN
CHI
NYC
CCS
RIO
LON
PAR
11.0
10.0
9.0
8.0
7.0
6.0
5.0
4.0
3.0
2.0
1.0
+0.0
+1.0
PAPEETE
NOME
VANCOUVER, SAN FRANCISCO, LAS VEGAS,
SEATTLE, DAWSON CITY
EL PASO, EDMONTON
MEXICO CITY, HOUSTON, DALLAS/FORT WORTH,
NEW ORLEANS, WINNIPEG
MIAMI, MONTREAL, DETROIT, BOSTON,
PANAMA CITY, HAVANA, LIMA, BOGOTA
LA PAZ, SANTIAGO, PORT OF SPAIN
SAO PAULO, BUENOS AIRES, BRASILIA,
MONTEVIDEO
AZORES, PRAIA
DUBLIN, LISBON, CASABLANCA, DAKAR,
ABIDJAN
MILAN, ROME, BERLIN, MADRID, FRANKFURT,
AMSTERDAM, VIENNA, ALGIERS, STOCKHOLM, HAMBURG
CAIRO
JERUSALEM
JEDDAH
TEHRAN
DUBAI
KABUL
KARACHI
DELHI
DHAKA
YANGON
BANGKOK
HONG KONG
TOKYO
ADELAIDE
SYDNEY
NOUMEA
WELLINGTON
+2.0
+3.0
+3.5
+4.0
+4.5
+5.0
+5.5
+6.0
+6.5
+7.0
+8.0
+9.0
+9.5
+10.0
+11.0
+12.0
ISTANBUL, ATHENS, HELSINKI, BEIRUT,
DAMASCUS, CAPE TOWN
MOSCOW, KUWAIT, RIYADH, ADEN, ADDIS
ABABA, NAIROBI
SHIRAZ
ABU DHABI, MUSCAT
MALE
MUMBAI, KOLKATA
COLOMBO
JAKARTA, PHNOM PENH, HANOI, VIENTIANE
SINGAPORE, KUALA LUMPUR, TAIPEI, PERTH,
BEIJING, MANILA, ULAANBAATAR
SEOUL, PYONGYANG
DARWIN
GUAM, MELBOURNE, RABAUL
PORT VILA
CHRISTCHURCH, NADI, NAURU ISLAND
CAI
JRS
JED
THR
DXB
KBL
KHI
DEL
DAC
RGN
BKK
HKG
TYO
ADL
SYD
NOU
WLG
· Based on data as of December 2001.
Day of the Week List
Sunday
Monday Tuesday Wednesday Thursday
Friday
Saturday
ENx
SUN
oON
TUE
WED
THU
FRI
SAT
POR
DOo
SEx
TER
QUA
QUI
SEX
SaB
ESP
DOo
LUN
oAR
oIb
JUE
VIE
SaB
FRA
DIo
LUN
oAR
oER
JEU
VEN
SAo
NED
ZON
oAA
DIN
WOE
DON
VRI
ZAT
DAN
SvN
oAN
TIR
ONS
TOR
FRE
LvR
DEU
SON
oON
DIE
oIT
DON
FRE
SAo
ITA
DOo
LUN
oAR
oER
xIO
VEN
SAB
CES
NED
PON
eTE
ST
TV
PaT
SOB
SVE
SiN
owN
TIS
ONS
TOR
FRE
LiR
POL
NIE
PON
WTO
qRO
CZW
PIl
SOB
E
YP
EY
TPI
TETQEM
QAP
AB
ROo
DUo
LUN
oAR
oIE
JOI
VIN
Sjo
TgR
PAZ
PZT
SAL
mAR
PER
CUo
CTS
RUS
CS
QO
BT
SR
YTQTSB
JPN
SUN
oON
TUE
WED
THU
FRI
SAT
Character List
ENx: (space) A B C D E F x H I J n L o N O P Q R S T U V W X Y Z @ ]
? ' ,
. ; : ( ) / + - 0 1 2 3 p 5 6 q 8 9
POR: (espaço) A ; ( , h B C ^ D E = [ F x H I > J n L o N O ? ] i P
Q R S T U @ V W X Y Z @ ] ? ' ,
. ; : ( ) / + - 0 1 2 3 p 5
6 q 8 9
ESP: (espacio) A ; B C D E = F x H I > J n L o N ` O ? P Q R S T U @
) V W X Y Z @ ] ? ' ,
. ; : ( ) / + - 0 1 2 3 p 5 6 q 8 9
FRA: (espace) A ( , B C ^ D E = a [ c F x H I e d J n L o N O ] g P
Q R S T U b f ) V W X Y Z @ ] ? ' ,
. ; : ( ) / + - 0 1 2 3
p 5 6 q 8 9
NED: (Spatie) A B C D E F x H I J n L o N O P Q R S T U V W X Y Z @
] ? ' ,
. ; : ( ) / + - 0 1 2 3 p 5 6 q 8 9
DAN: (Mellemsrum) A B C D E F x H I J n L o N O P Q R S T U V W X Y
Z u v w @ ] ? ' ,
. ; : ( ) / + - 0 1 2 3 p 5 6 q 8 9
DEU: (Leerzeichen) A h B C D E F G H I J n L M N O i P Q R S T U ) V
W X Y Z @ ] ? ' ,
. ; : ( ) / + - 0 1 2 3 p 5 6 q 8 9
ITA: (spazio) A ( B C D E = a F x H I j e J n L o N O ? k P Q R S T U
b V W X Y Z @ ] ? ' ,
. ; : ( ) / + - 0 1 2 3 p 5 6 q 8 9
CES: (prostor) A a B C
D
E =
F x H I > J n L o N
O ? P Q R
S
T
U @
V W X Y
Z
@ ] ? ' ,
. ; : ( ) / + - 0 1 2 3 p 5
6 q 8 9
SVE: (Mellanslag) A B C D E F x H I J n L o N O P Q R S T U V W X Y Z
w h i @ ] ? ' ,
. ; : ( ) / + - 0 1 2 3 p 5 6 q 8 9
POL: (epacja) A l B C m D E n F x H I J n L o o N p O ? P Q R S q T U
V W X Y Z r s @ ] ? ' ,
. ; : ( ) / + - 0 1 2 3 p 5 6 q 8 9
E
: (
) A B D
E Z H
I d n
o N
O Q P
T Y
V X
@
] ? ' ,
. ; : ( ) / + - 0 1 2 3 p 5 6 q 8 9
ROM: (spa iu) A r , B C D E F x H I e J n L o N O P Q R S s T t U V W
X Y Z @ ] ? ' ,
. ; : ( ) / + - 0 1 2 3 p 5 6 q 8 9
T)R: (bo luk) A B C ^ D E F x y H I t J n L o N O i P Q R S s T U )
V W X Y Z @ ] ? ' ,
. ; : ( ) / + - 0 1 2 3 p 5 6 q 8 9
PUC: (npo en) A B C D E F G * I J K L M o O P Q R S T U V W X Y
a
b c i e f h @ ] ? ' ,
. ; : ( ) / + - 0 1 2 3 p 5 6 q 8 9
JPN: (
)
A B C D E F x H
I J n L o N O P Q R S T U V W X Y Z @ ] ? ' ,
. ; : ( ) / +
- 0 1 2 3 p 5 6 q 8 9
1
2
3
4
5
6
7
8
9
10
11
12
(space) 13
14
15
16
17
18
19
20
21
22
23
24
25
26
27
28
29
30
31
32
33
34
35
36
37
38
39
40
41
42
43
44
45
46
47
48
49
50
51
52
53
54
55
56
57
58
59
60
61
62
63
64
65
66
67
68
69
70
71
72
f
r
j
h
h
l
B
C
m
m
D
73
74
75
76
77
78
79
80
81
82
83
84
E
b
a
[
c
n
F
H
A
a
Sort Table
85
86
87
88
89
90
91
92
93
94
95
96
97
98
99
100
101
102
103
104
105
106
107
108
109
110
111
112
113
114
115
116
117
118
119
120
121
122
123
124
125
126
127
128
129
130
131
132
133
134
135
136
137
138
139
140
141
142
143
144
145
146
147
148
149
150
151
152
153
154
155
156
157
158
159
160
161
162
163
164
165
166
167
168
p
`
O
?
k
l
i
+
g
P
Q
I
>
j
e
d
t
J
n
L
o
M
N
R
S
q
s
T
t
U
@
b
f
)
V
W
X
Y
Z
r
s
u
v
w
h
i
B
C
D
E
F
Z
H
I
d
n
c
*
I
J
K
L
M
M
N
O
P
Q
R
S
T
Y
169
170
171
172
173
174
175
176
177
178
179
180
181
182
183
184
185
186
187
188
189
190
191
192
193
194
195
196
197
198
199
200
201
202
203
204
205
206
207
208
U
V
W
X
Y
a
b
c
e
f
h
@
]
?
'
,
.
;
:
(
)
/
+
-
0
1
2
3
4
5
6
7
8
9
· Character 2 through 58 are for Japanese.
· Character 64 (h) is for German, character 136 (h) is for Swedish.
· Character 104 (i) is for German and Turkish, character 137 (i) is for Swedish.
· Character 138 through 184 are for Russian and/or Greek.