Table of contents
MPC1000 Quick manual
1
Basic information
1
Cursor, Cursor Key
1
Field, DATA wheel
1
Function keys
1
MAIN page
1
MODE key
1
WINDOW key
1
Tutorial of the MPC1000
1
Playing back a demo song
2
Playing a preset program
2
Recording the performance by hitting the pads
3
Playing back several sequence in a series
4
Selecting the sequences in real time
4
Playing back the sequences in the selected order
4
Recording a sound
4
Preparing the recording
5
Starting the recording
5
Assigning the recorded sound to the pad
6
Loop playback of the phrase sample
6
Adjusting the start/end points of the sample
7
Recording to a sequence
7
Setting the same number of the bars for the sample and the sequence
8
Setting the same tempo for sample and the sequence
8
Saving the data
8
Turning off the Autoload function
9
12/01/2003 Rev. 1.1
MPC1000 Quick manual
Welcome to MUSIC PRODUCTION CENTER MPC1000. This quick manual describes the basic operation to get
started with the MPC1000. For the detailed information, see the operator's manual.
Basic information
Below is the basic information that you need to know to use the MPC1000.
Cursor, Cursor Key
The highlighted part on the screen is called the "cursor" .You can move the cursor on the screen using four
cursor keys on the panel.
Field, DATA wheel
The locations, where the cursor can be located, are called "field". You can change the settings of the selected
field, by turning the [DATA] wheel.
Function keys
Six keys (F1 to F5) aligned under the LCD (liquid crystal display) are function keys. Those keys correspond to
each of the six functions that are displayed on the bottom of the LCD. The functions that each function key
represents depend on the contents on the LCD.
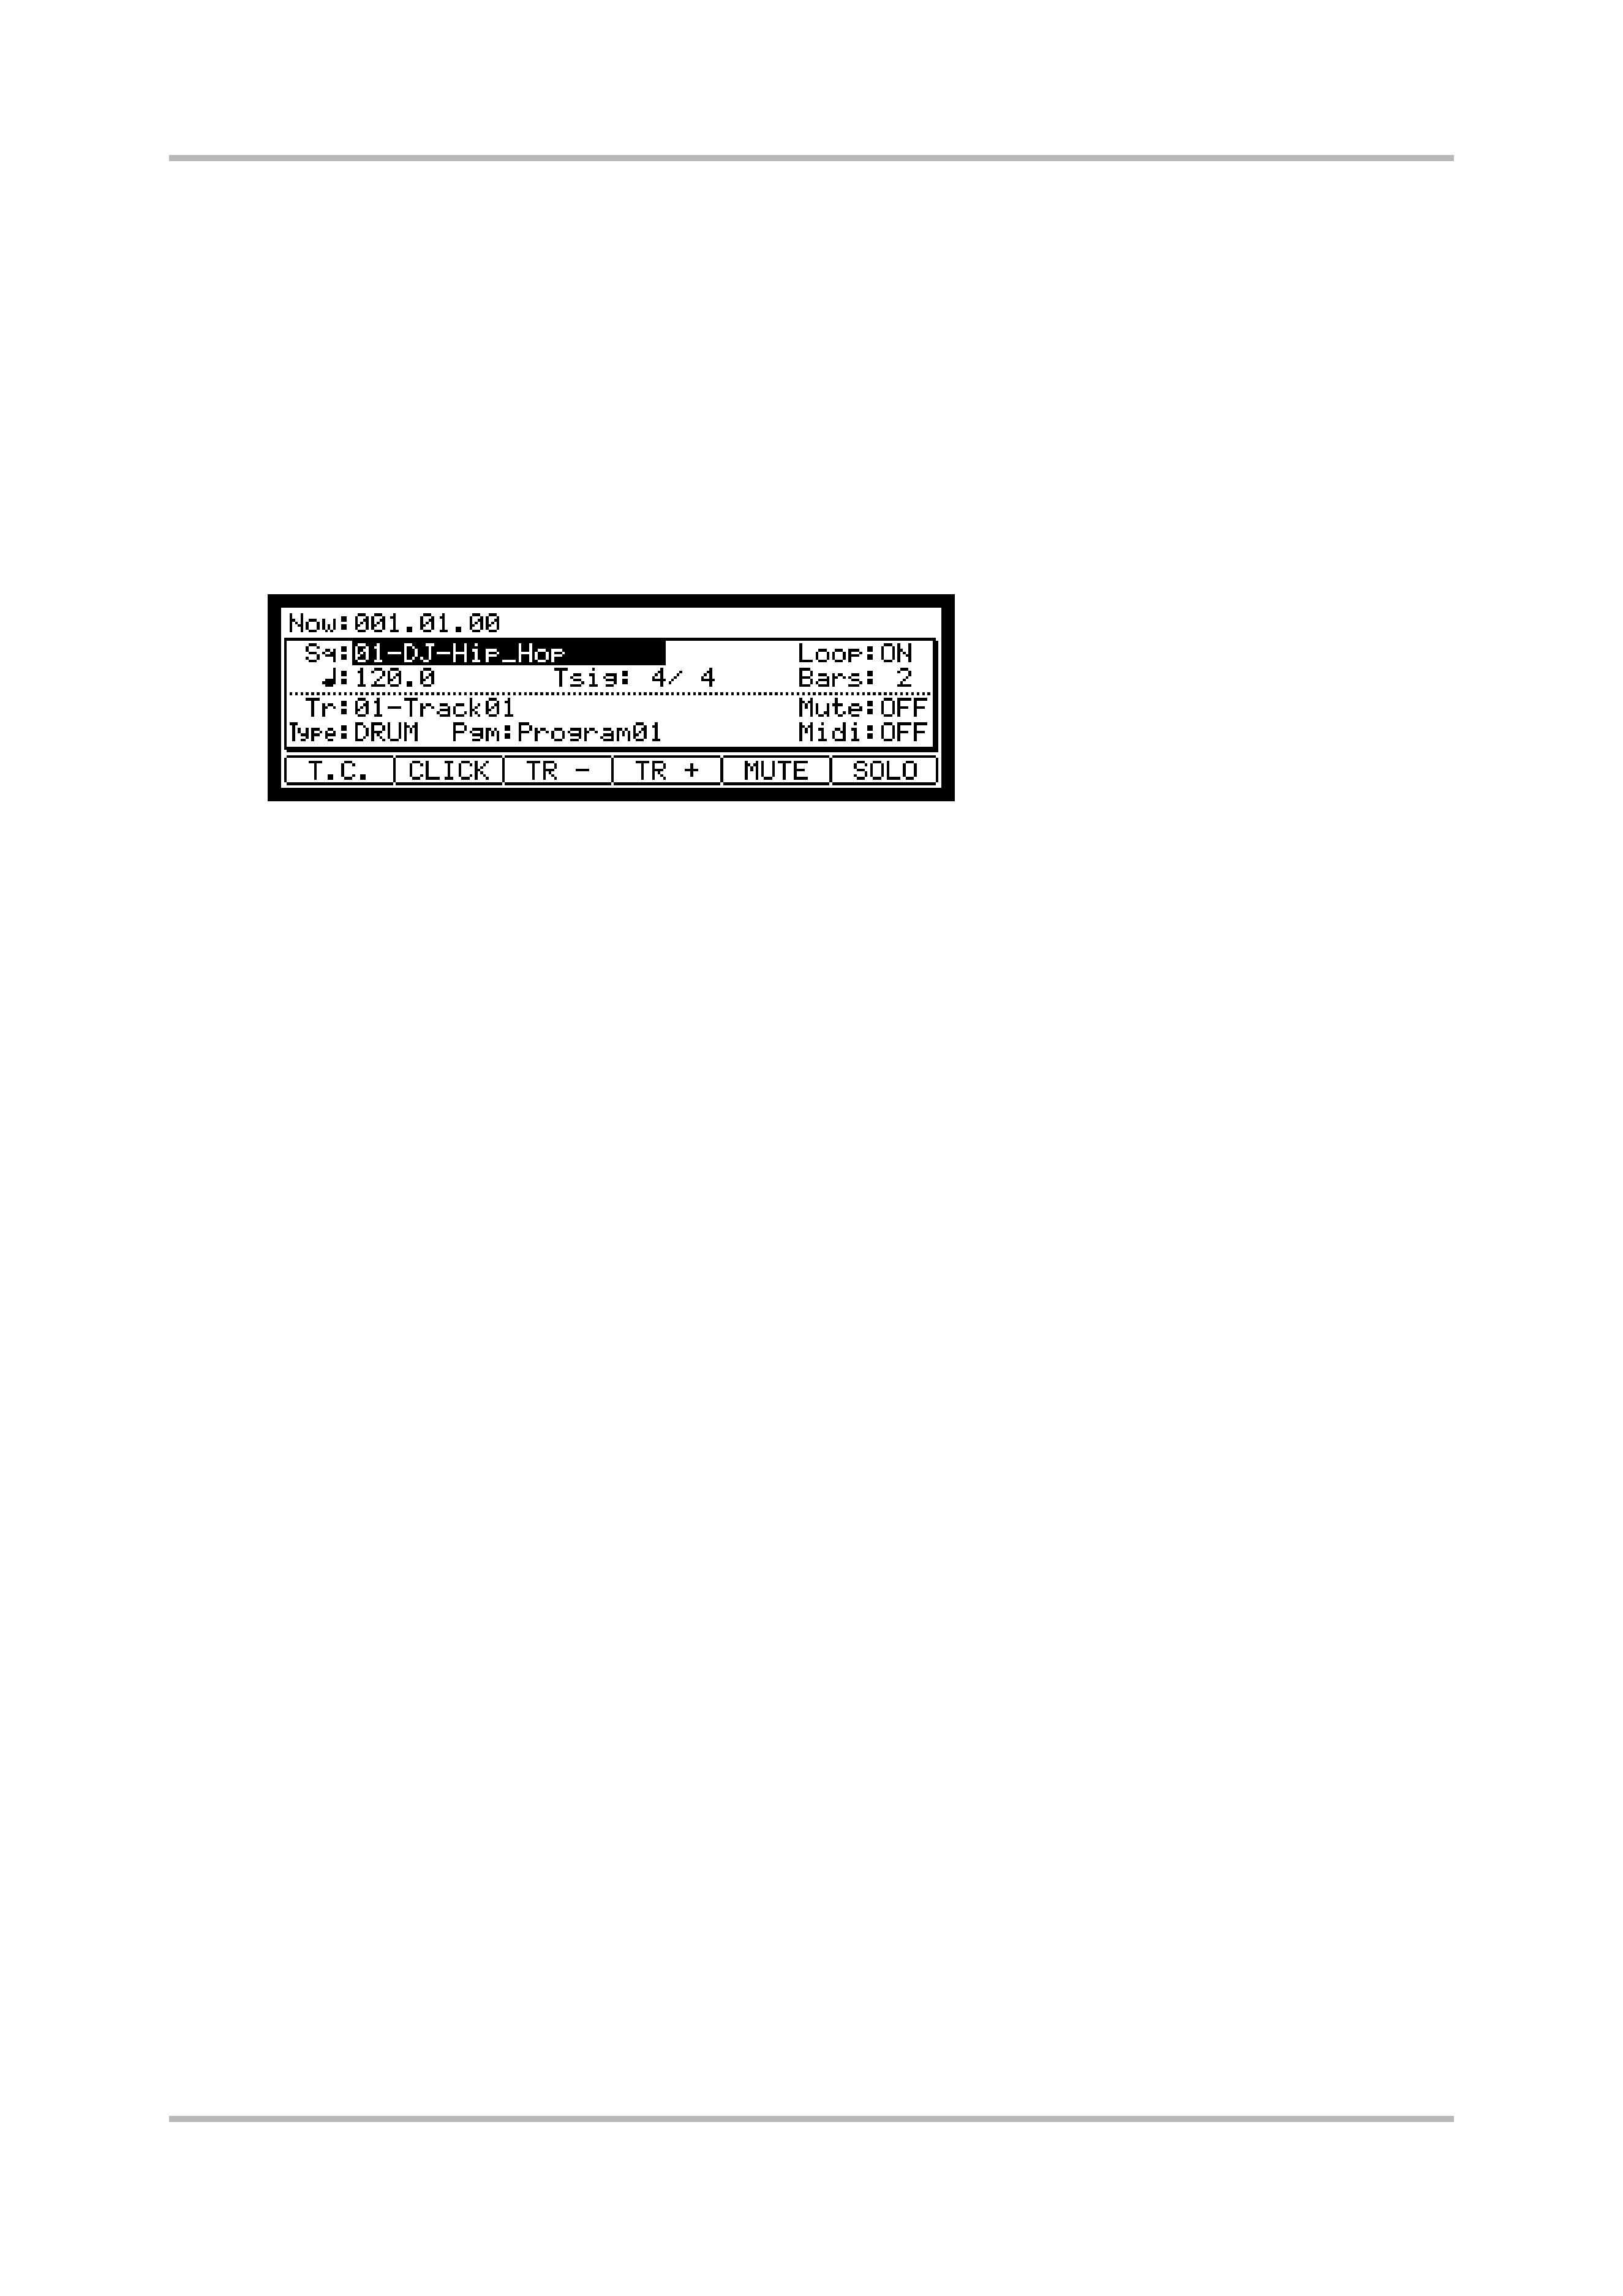
MAIN page
This is the main screen of the MPC1000, where you record and play back sequences.
You can go back to this page at any time by pressing the [MAIN] key.
MODE key
By pressing the [MODE] key and hitting a pad, you can switch modes. The mode that a pad corresponds to is
displayed above each pad.
WINDOW key
Pressing the [WINDOW] key brings up a window for the detailed setting of the selected field. This is not
available for all fields. When you select a field in which you can use the [WINDOW] key, the LED of the key is lit.
Tutorial of the MPC1000
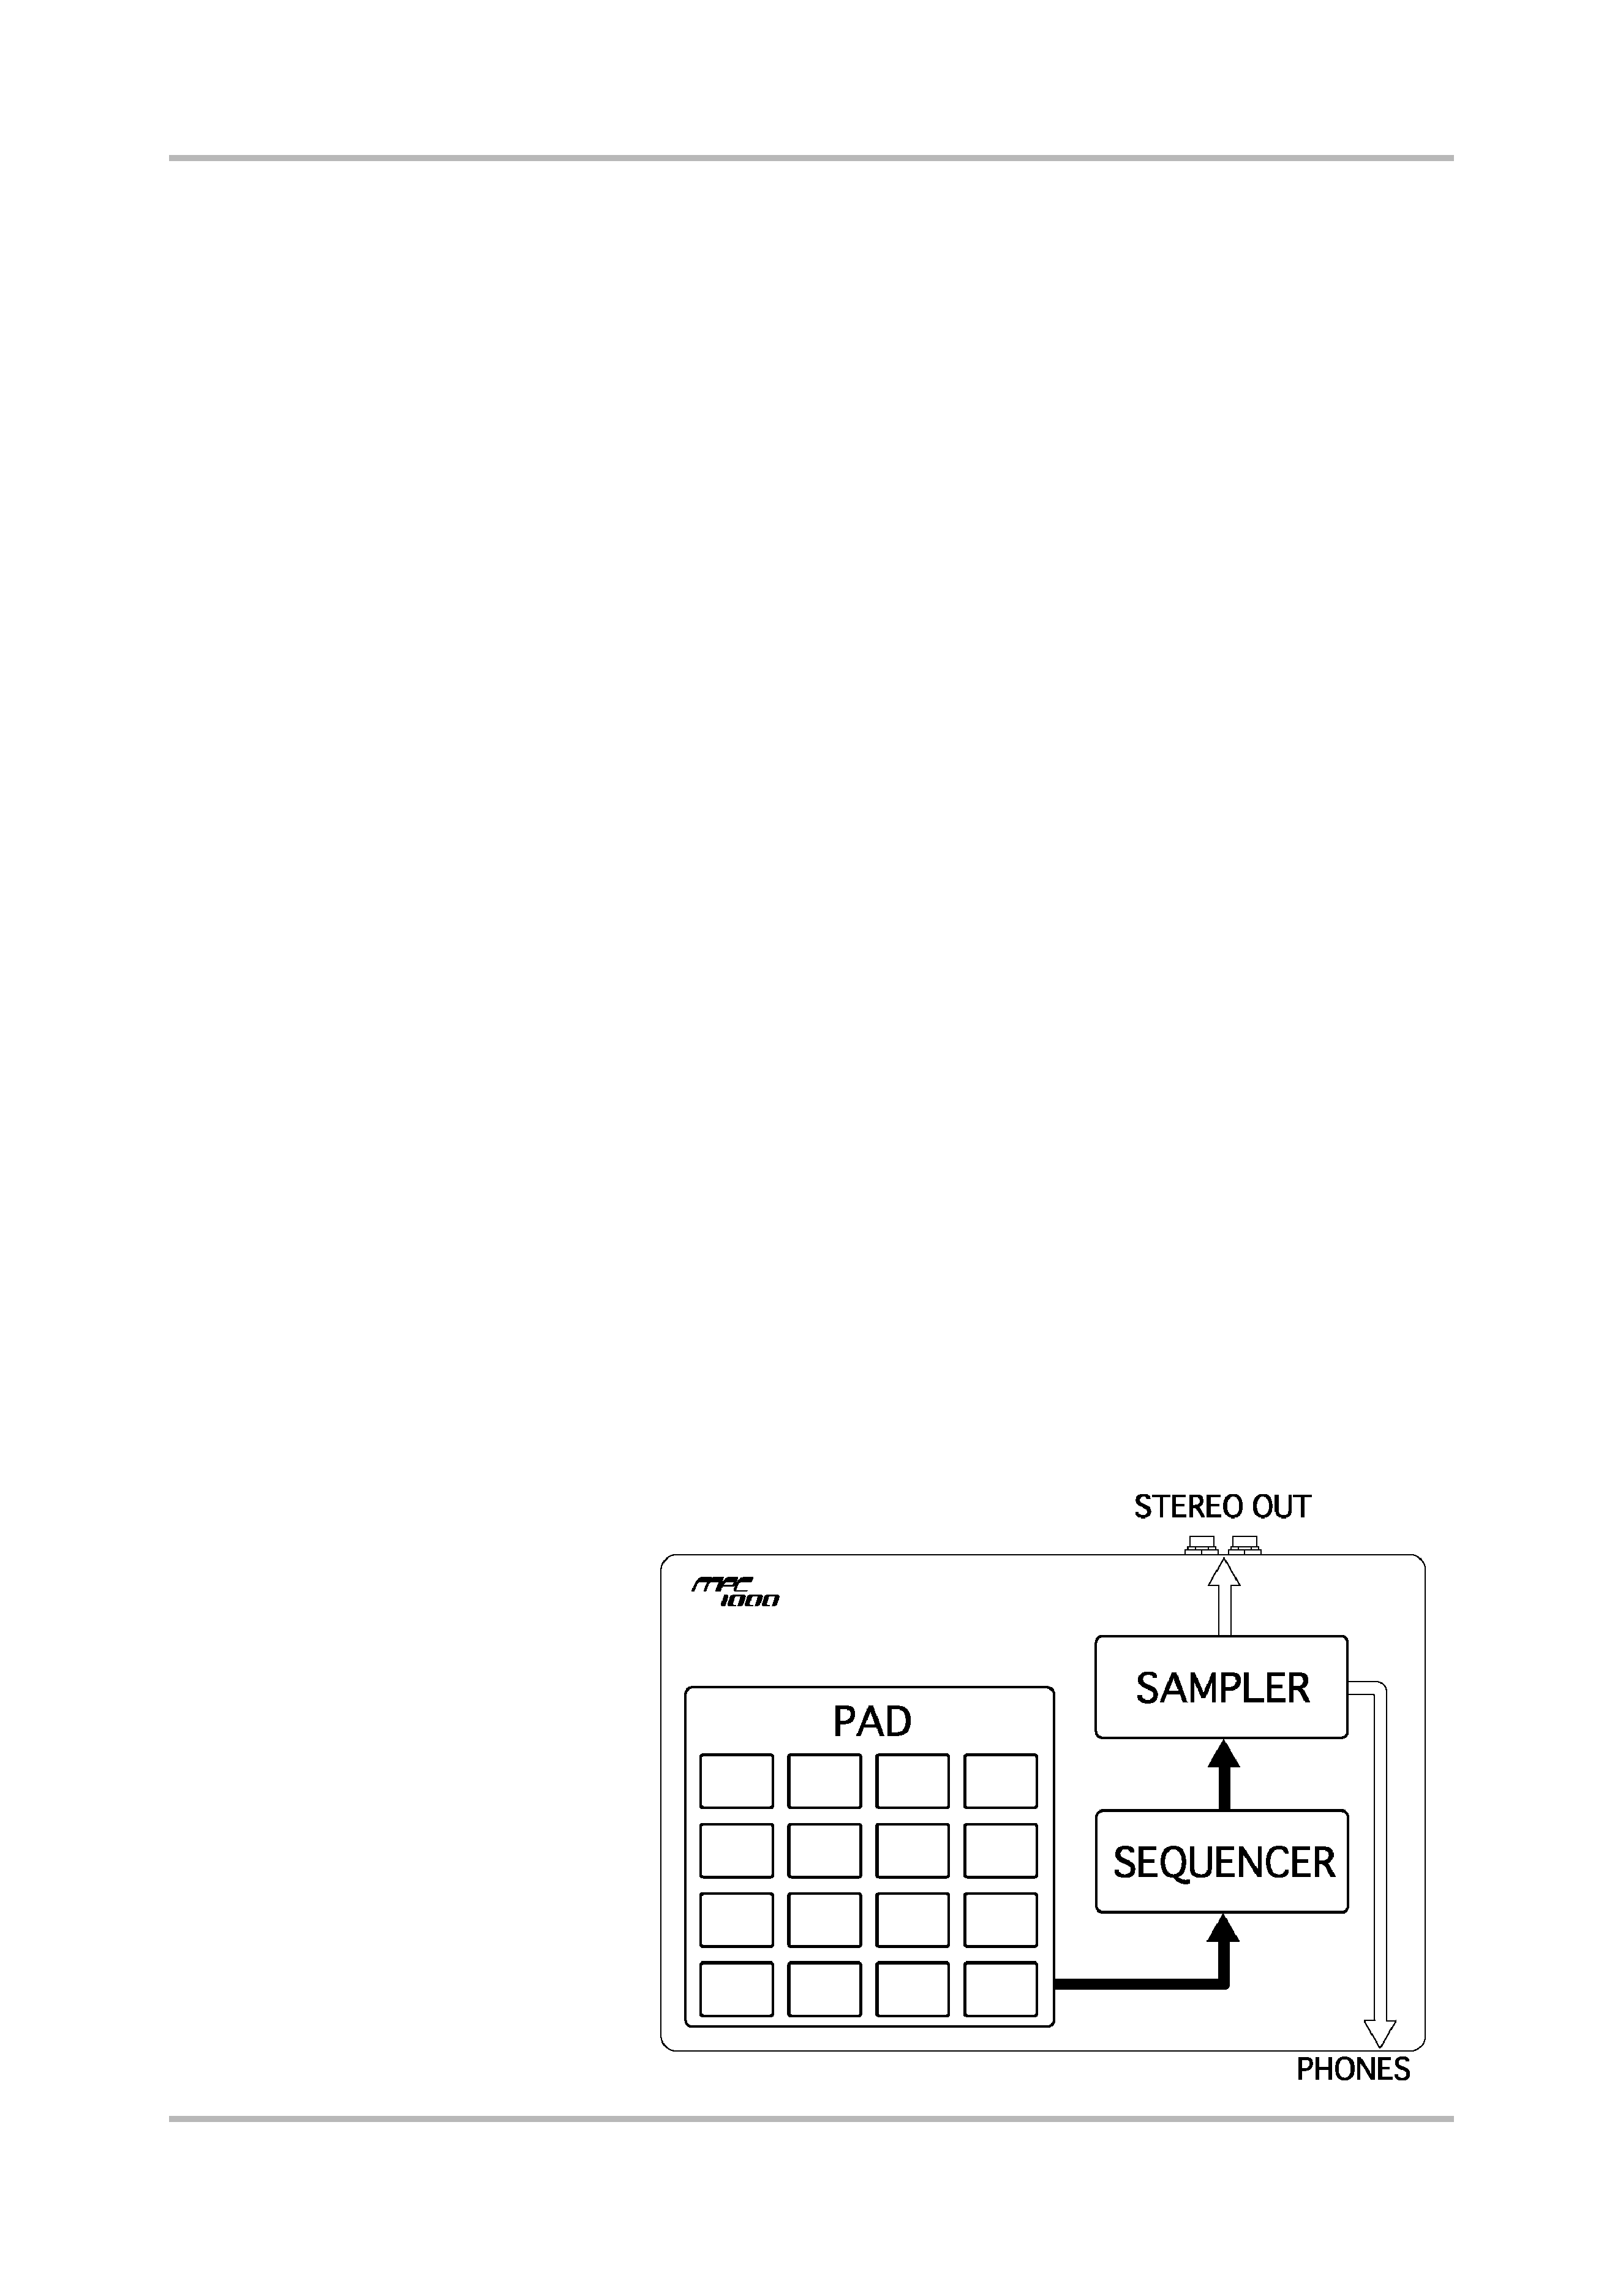
The MPC1000 consists of the
sampler section, where you record
and playback the sound, the
sequencer section, where you
record the performance, and the
pads, which you use to play the
sounds.
You record your performance to the
sequencer and play the sound of the
sampler by the recorded sequences.
The performance data (MIDI data) is
sent from the pads to the sequencer,
and from sequencer to the sampler.
The sampler plays the actual sound
from the performance data that is
sent to the sampler.
MPC1000 Quick manual
-1-
Playing back a demo song
The MPC1000 has a demo song and a preset program in its internal memory and it loads the data automatically
when you switch on the unit (Autoload function). To play back a demo song, proceed as follows.
01. Connect a headphone to the PHONE jack of the MPC1000.
For more information about connecting devices, see the "Connecting the MPC1000 to external audio/MIDI
device" section of the operator's manual (page 4).
02. Switch on the MPC1000.
When you switch on the MPC1000, it displays the start-up screen and then starts the internal data
automatically. After the data is loaded, it displays the MAIN page.
03. Make sure that "01-DJ-Hip_Hop" is selected in the Sq field and press the [PLAY START]
key.
Pressing the [PLAY START] key starts the playback of the demo song. To stop the playback, press the
[STOP] key. When you press the [PLAY] key again, the MPC1000 will start the playback at the point you
stopped last time.
After you finish playing back the "01- DJ-Hip_Hop", try to play back another song. You can select a song by turning
the DATA wheel in the Sq field.
Playing a preset program
Next, let's try to play the preset program using the pads. You can play the program that is selected in the Pgm field
of the MAIN page by hitting the pad.
01. Select any of the (unused) sequences in the Sq field.
(unused) means that the sequence is not used yet.
02. Switch to the Pgm field and select the program that you wish to play.
You can select the program in the Pgm field. You can select the program within the memory by turning the
DATA wheel in the Pgm field.
03. Hit the pad. The MPC1000 will play the preset program.
You can play up to 64 pads by switching between pad bank A through D, but the samples may not be
assigned to all the pads.
MPC1000 Quick manual
-2-

Recording the performance by hitting the pads
To record the performance to a sequence using the internal preset program, proceed as follows.
01. Press the [MAIN] key to display the MAIN page.
02. In the Sq field, select a sequence to which you wish to record the performance.
You can select any sequence for recording a performance; but here, select a sequence that says "unused".
"Unused" indicates that the sequence is not used.
03. In the Tr field, select a track on which you wish to record the performance.
The performance data will be recorded on a track in the sequence. You can select any track, but here select
"Tr:01".
04. In the Pgm field, select a program you wish to play.
05. Press the [PLAY START] key while holding the [REC] key.
The recording will start after 4 counts.
06. Play the pads to the click sounds.
In default, the sequence is set to 2 bars. After recording for 2 bars, the MPC1000 will start playing back the
recorded performance. If you make another performance with pads, you can add the performance to the
currently recorded one. This is called "over dub".
07. You can stop the over dub by pressing [STOP] key.
08. Press the [PLAY] key to play the recorded performance.
09. If you do not like the performance, you can start a new recording by pressing the
[REC]+[PLAY START] keys.
It cancels the currently recorded performance data and starts a new recording.
10. To add the recording to the already recorded data, press the [PLAY START] key while
holding the [OVER DUB] key.
It plays back the currently recorded performance and you can add the new performance by hitting pads. You
can delete only the specific pad.
11. Start the overdub by pressing the [PLAY START] key while holding the [OVER DUB] key.
12. Hold the pad that you wish to delete, while holding [ERASE] key.
From the performance data being recorded, only the section from where you press the [ERASE] key and pad
and you release them will be deleted. By pressing the pad at the right timing, you can delete the performance
data at certain timing in the phrase.
If you select another sequence in the Sq field, you can record a new performance separately. By playing back
those sequences, you can create one whole song.
Tips: You can set the length of the sequence in the Bar field, and the time signature in the Tsig field. For more
information, see the "Sequence feature" section of the operator's manual. (on page 10)
MPC1000 Quick manual
-3-