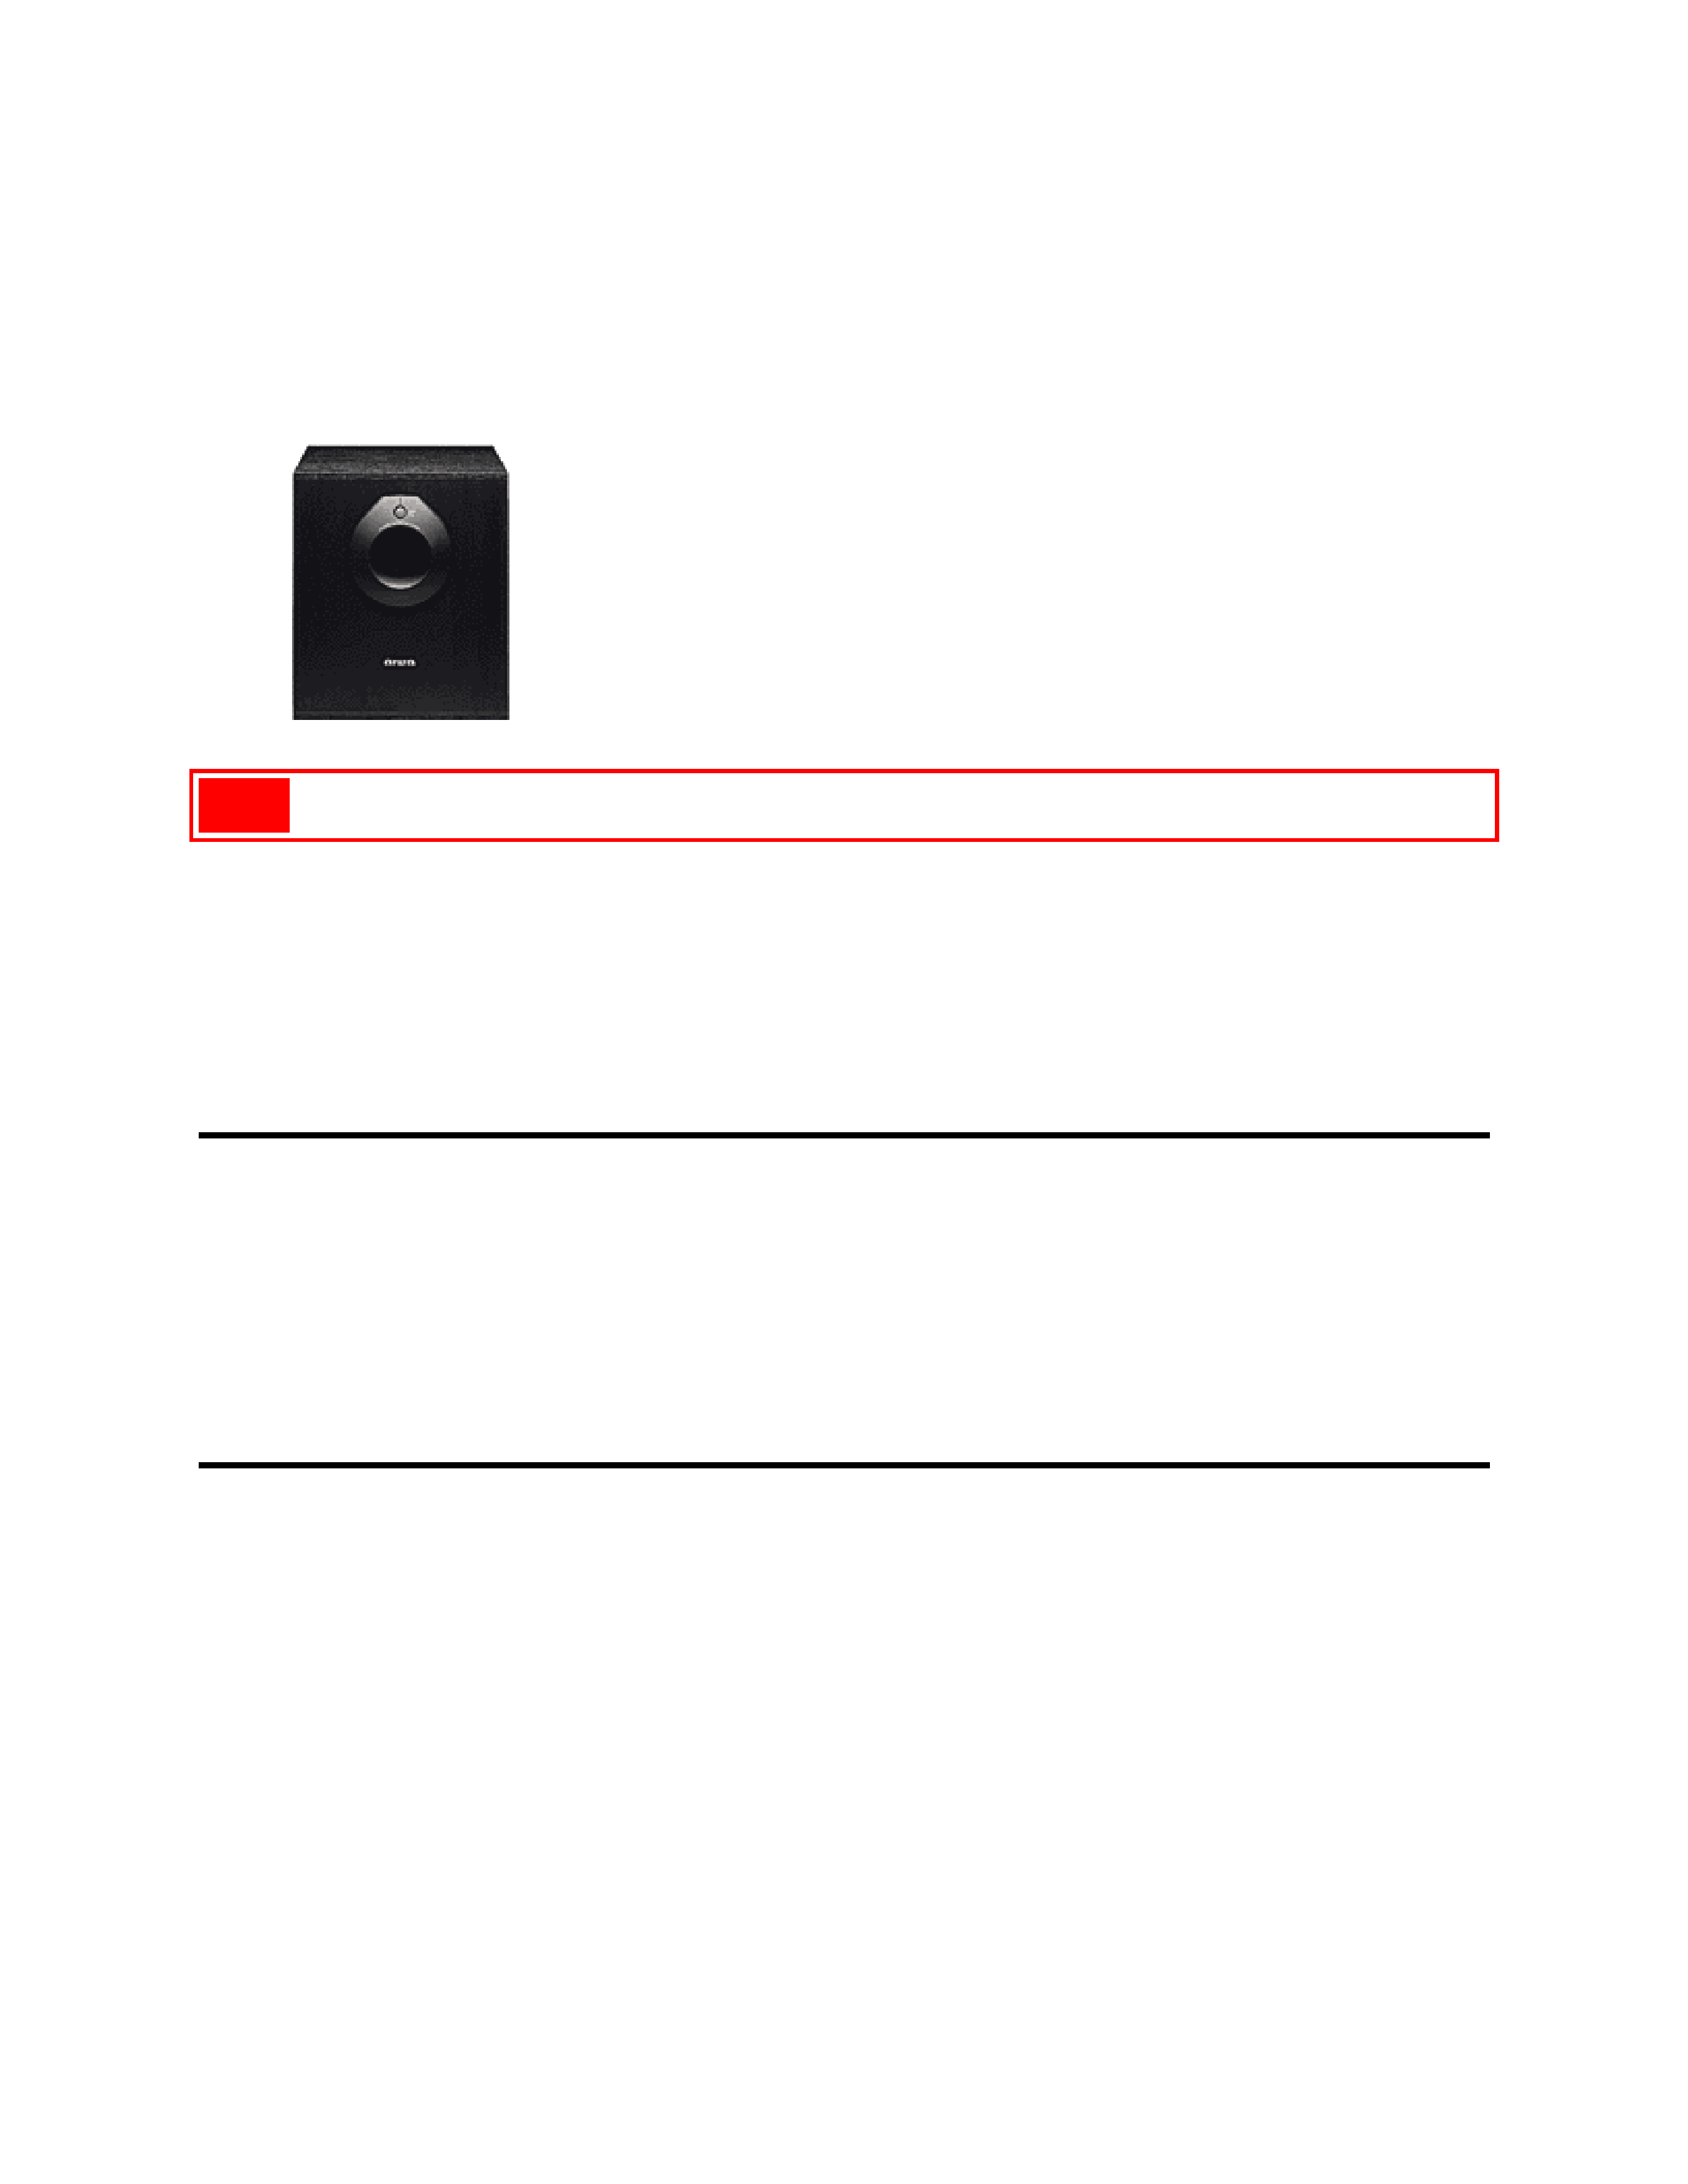
aiwa
Active Speaker System (Powered Subwoofer)
TS-W60
pg. 2
OWNERS RECORD
For your convenience, record the model number and serial number (you will find them on the rear of your set) in the
space provided below. Please refer to them when you contact your AIWA dealer in case of difficulty.
Model No. TS-W60 U
Serial No.
TABLE OF CONTENTS
FEATURES. . . . . . . . . . . . . . . . . . . . . . . . . . . . . . . . . . . . . . . . . . . . . . . . . . . . . . . . . . . . .2
PRECAUTIONS. . . . . . . . . . . . . . . . . . . . . . . . . . . . . . . . . . . . . . . . . . . . . . . . . . . . . . . . . 4
POSITIONING. . . . . . . . . . . . . . . . . . . . . . . . . . . . . . . . . . . . . . . . . . . . . . . . . . . . . . . . . . 6
CONNECTIONS. . . . . . . . . . . . . . . . . . . . . . . . . . . . . . . . . . . . . . . . . . . . . . . . . . . . . . . . .6
OPERATION. . . . . . . . . . . . . . . . . . . . . . . . . . . . . . . . . . . . . . . . . . . . . . . . . . . . . . . . . . . .8
SPECIFICATIONS. . . . . . . . . . . . . . . . . . . . . . . . . . . . . . . . . . . . . . . . . . . . . . . . . . . . . . 10
FEATURES
· VOLUME control
· PHASE switch (NORMAL/REVERSE)
You can use the PHASE switch to change the quality or volume of sound reproduced by the powered subwoofer.
· AUTO POWER function
You can set the powered subwoofer to be powered on automatically when it receives signal from the stereo system.
· Frequency turnover control
According to the frequency range of the front speakers, you can adjust the frequency range of the sound reproduced
by the powered subwoofer.
· Two-way connection to the amplifier
The TS-W60 can be connected to equipment either with an RCA phono lack for a super woofer, or typical L and R
speaker terminals.
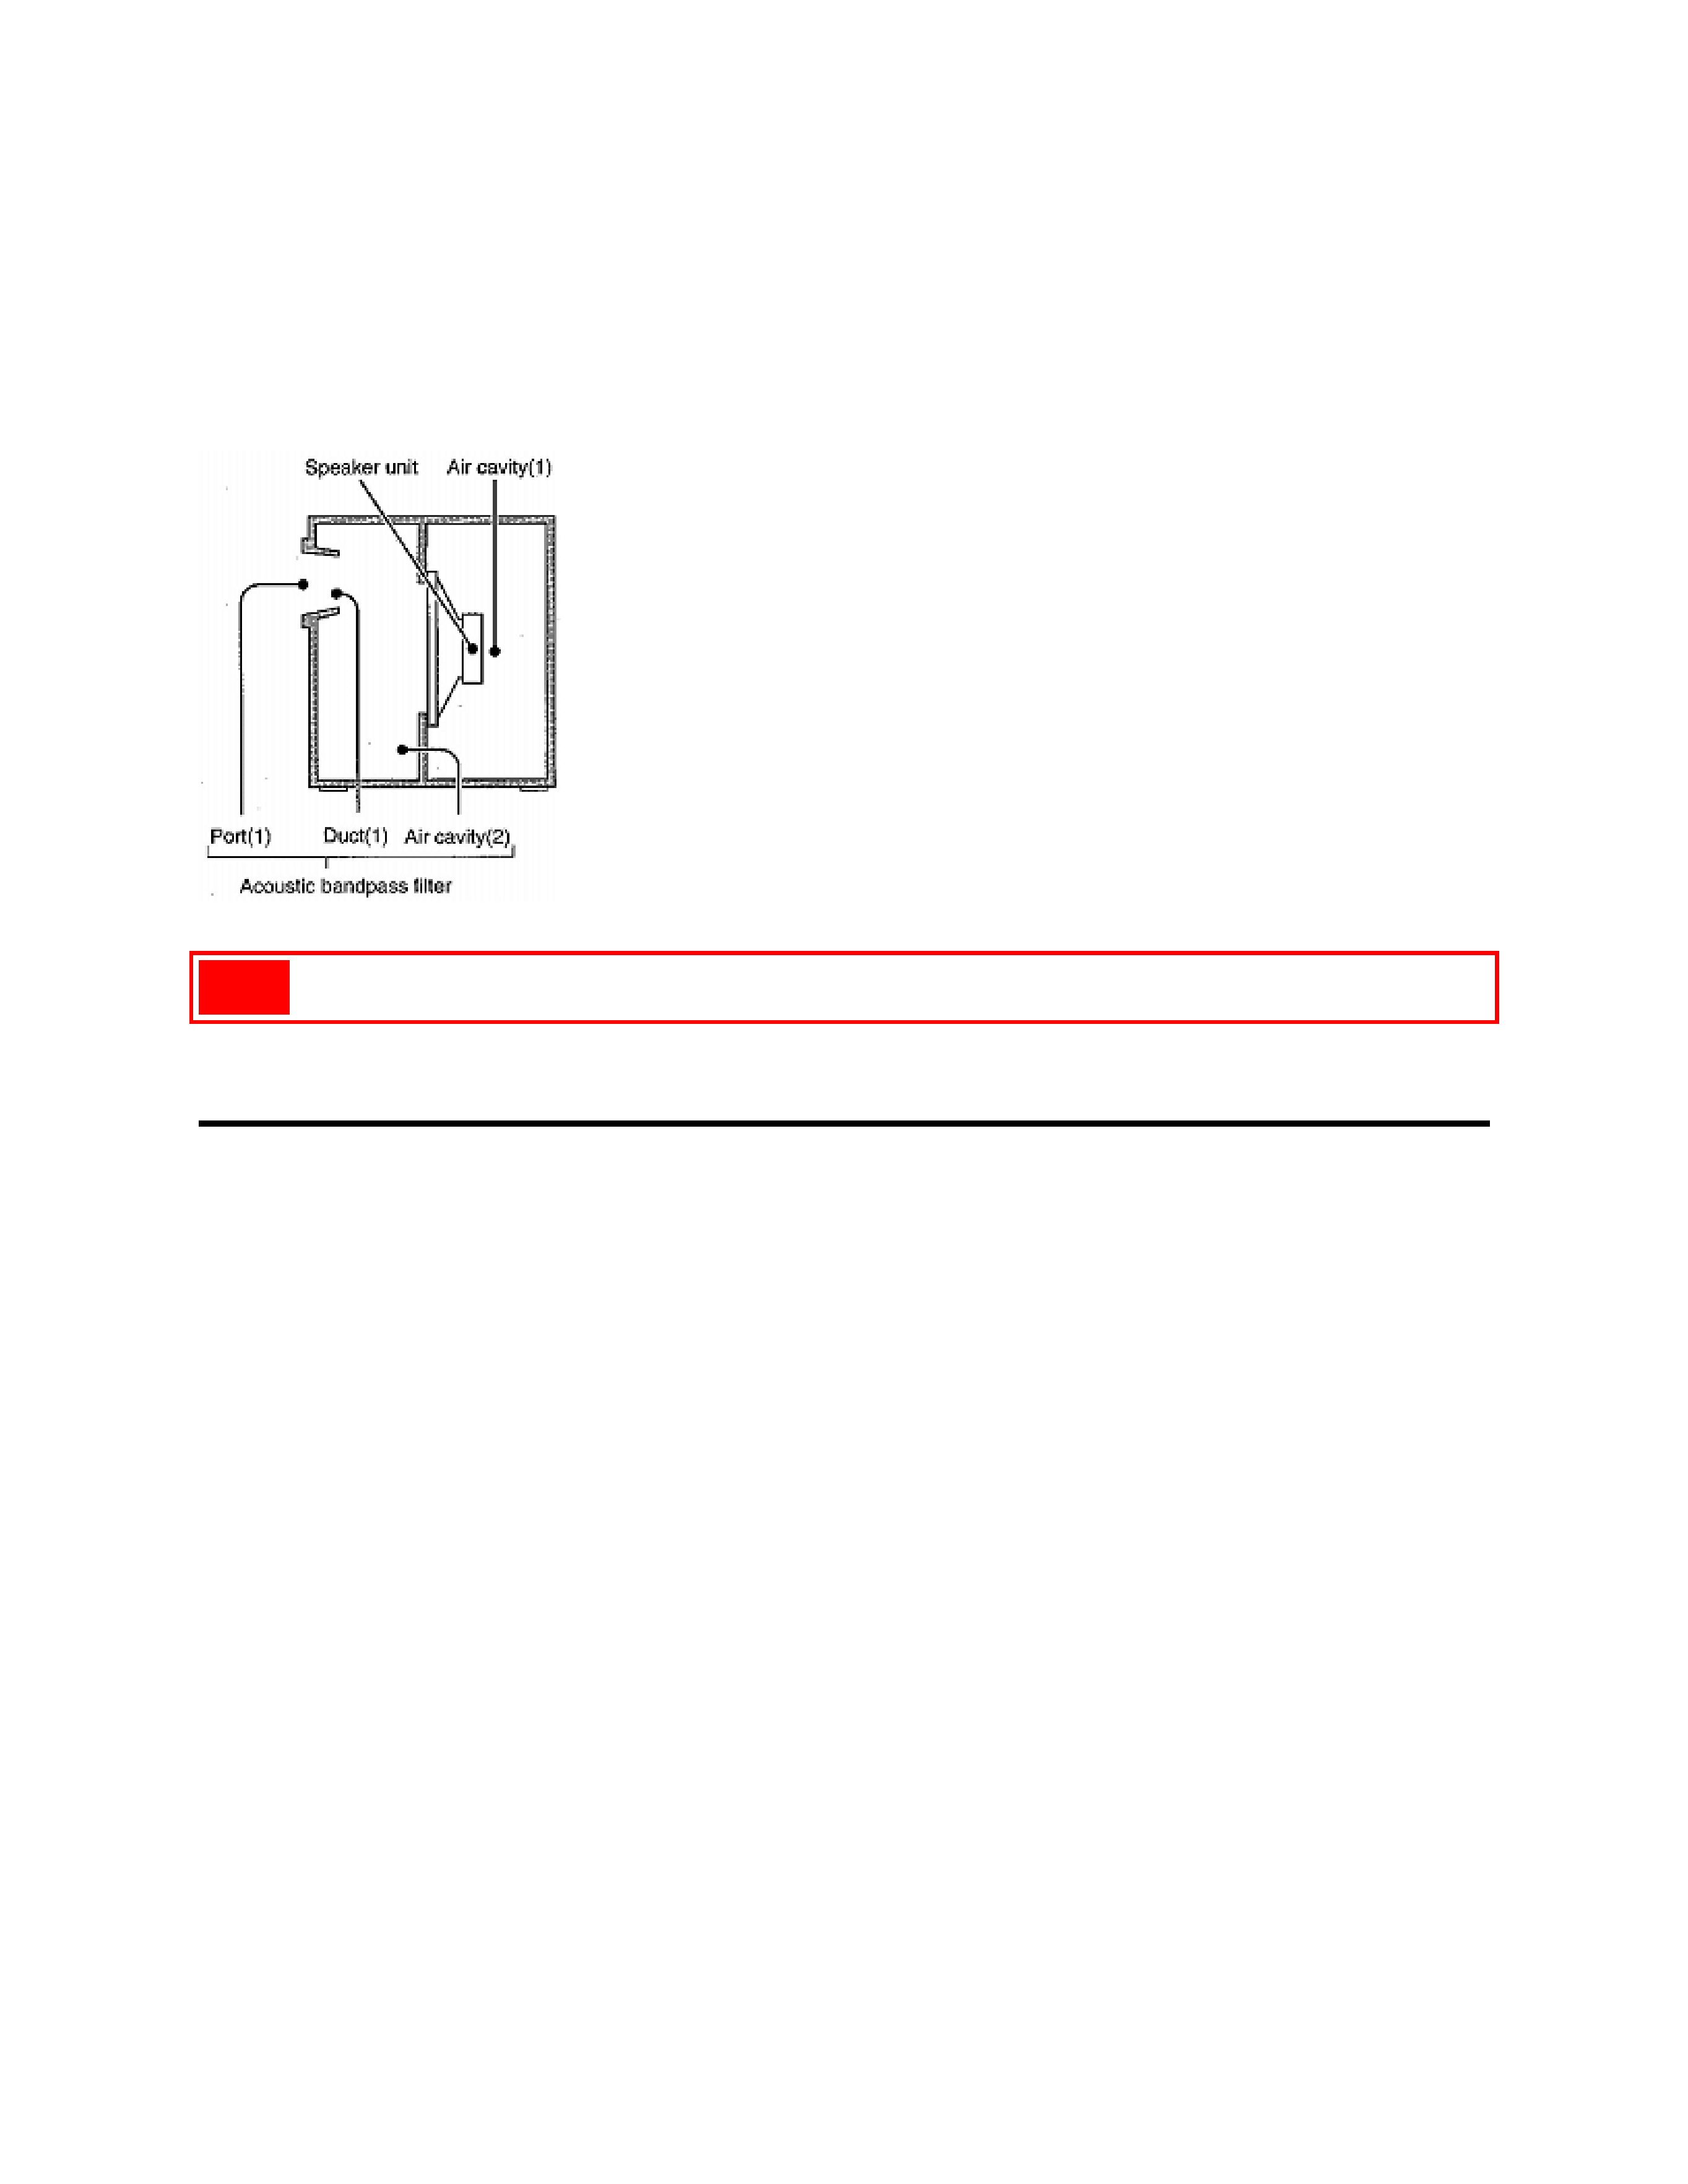
· Dynamic Bass System
TS-W60 adopts a Dynamic Bass System in which port (1), duct (1), and air cavity (2) compose an acoustic bandpass
filter in front of air cavity (1). By virtue of this structure, the bass reproduction limit is extended and sounds higher
than middle range frequencies are reduced in the Dynamic Bass System. This makes it possible for the TS-W60 to
reproduce powerful bass sound.
pg. 4
PRECAUTIONS
Follow the advice below for safe and correct operation.
ON AC voltage
Before connecting AC cord, check that the rated voltage shown on the rear panel matches your local voltage.
AC 120 V, 60 Hz
Positioning
· Do not use the unit in places which are extremely hot, cold, dusty or humid.
· The unit should be situated with adequate space around it so that proper heat ventilation is assured. Allow 10 cm
clearance from the rear and the top of the unit, and 5 cm from the each side.
- Do not place the unit on a bed, rug, or similar surface that may block the ventilation openings.
- Do not install the unit in a bookcase, cabinet, or airtight rack where ventilation may be impeded.
Using the unit near a TV set
Although the unit is magnetically shielded, there may be cases in which the picture on some TV sets may become
magnetically distorted.
· If the TV picture is distorted, turn off the power of the TV set once, and after 15 to 30 minutes turn it on again.
· If there seems to be no improvement, move the unit further away from the TV set.
· Furthermore, be sure not to place magnets or objects using magnets, such as audio racks, toys etc. near the TV set.
These may cause magnetic distortion to the picture due to their interaction with the unit.
Howling or buzzing sound
A howling or buzzing sound may be heard if a turntable or a stereo system is placed near the unit. Move the unit
away from the equipment or decrease the volume.
Safety
· When connecting and disconnecting the AC cord, always grasp the plug. Do not pull the cord by itself since pulling
the cord may damage it and thus be hazardous.
· When you are not going to use the unit for a long period of time, disconnect the AC cord. If the cord is plugged in,
a small amount of current keeps on flowing to the unit even if the power button is not ON.
Cleaning
To clean the cabinet, use a soft cloth slightly moistened with a mild detergent solution. Do not use strong solvents,
such as alcohol, benzine or thinner.
Keep away magnetic items
Keep cassette tapes, personal credit card etc. using magnetic cording away from the unit as the recorded information
may be erased or some noise may be added on cassette tapes.
Should any problem occur, disconnect the AC cord and refer servicing to qualified personnel only.
pg. 6
POSITIONING
Because low-frequency sound reproduced by the powered subwoofer is mostly non-directional, the listener will be
unable to localize the bass source. Accordingly, the powered subwoofer provides maximum flexibility in terms of
positioning. For the most effective low-frequency sound, the powered subwoofer should be placed on the floor close
to a wall or in a corner of the room.
CONNECTIONS
Connect the speaker cords before connecting the AC cord.
Connect in A way if your stereo system has a SUPER WOOFER output jack. If not, connect in B way.
Never connect in both of A and B ways simultaneously.
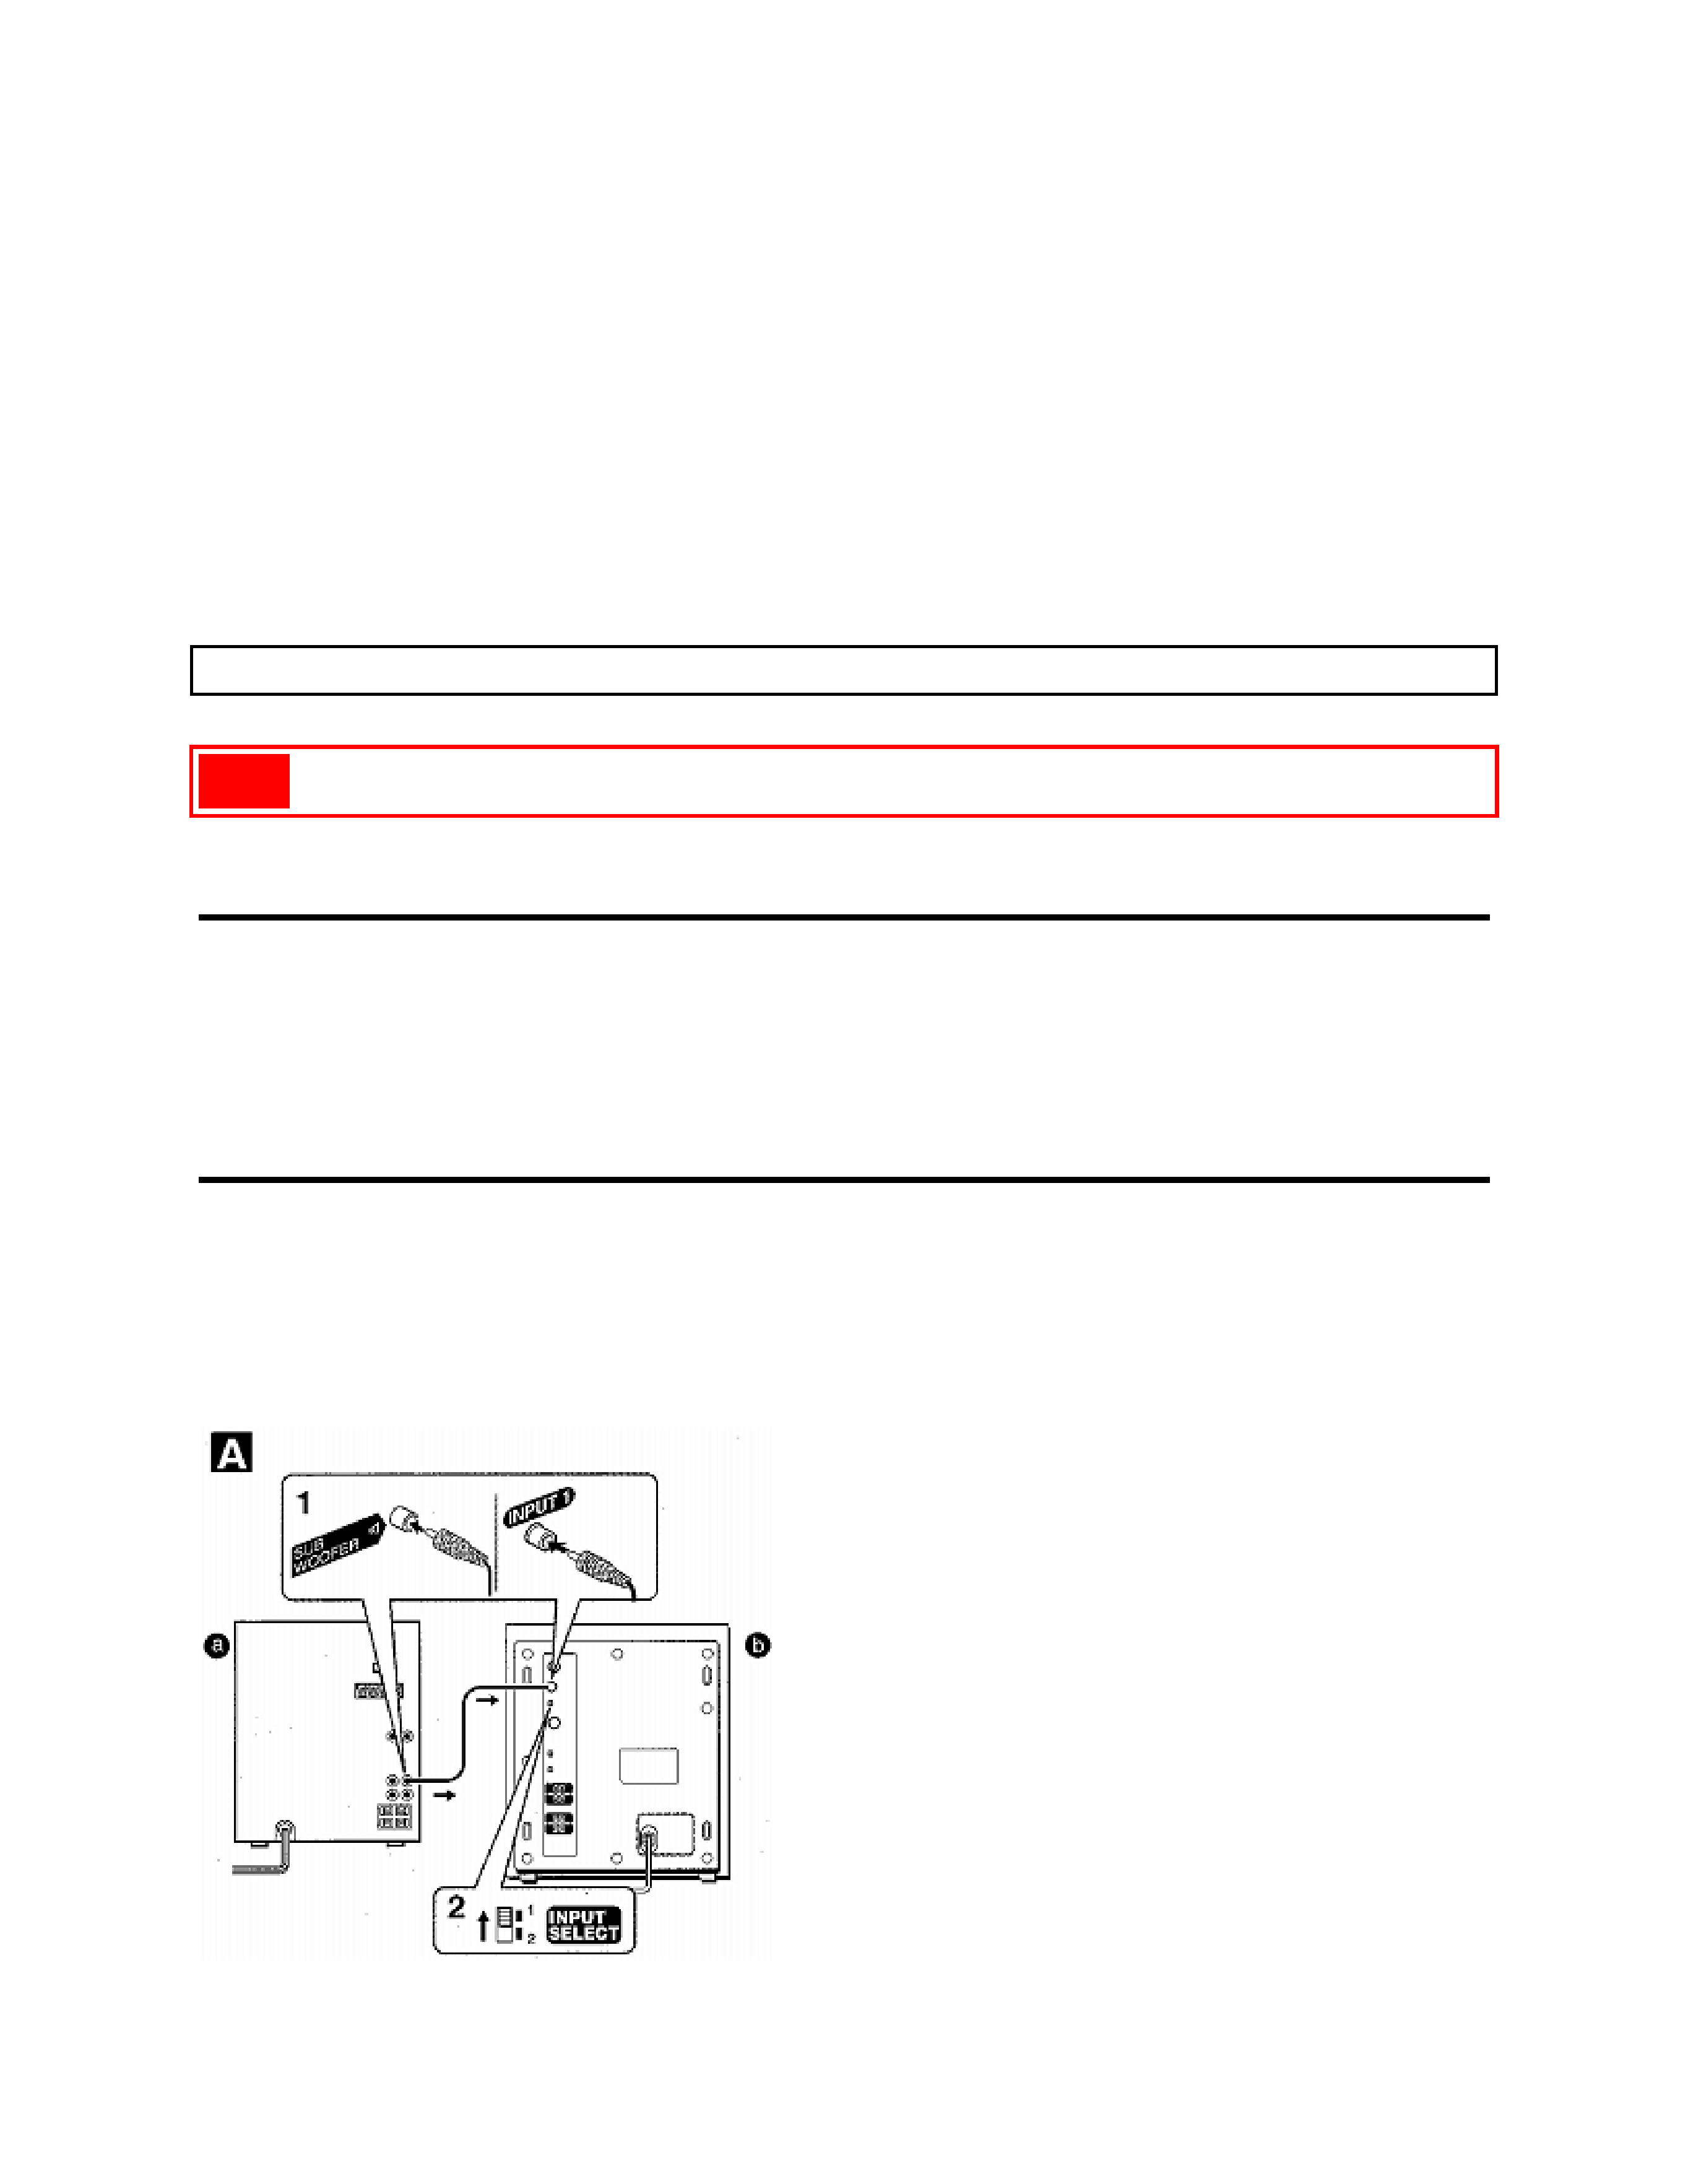
A Connecting an AIWA stereo system with a SUPER WOOFER or SUB WOOFER output jack (RCA phono jack)
to the powered subwoofer
Preparations
Turn off the power of this unit.
1 Connect the SUPER WOOFER or SUB WOOFER jack on the stereo system side a to the INPUT 1 (FROM
SUPER WOOFER TERMINAL) jack on the powered subwoofer b with the supplied connecting cord.
2 Set the INPUT SELECT switch to "1".
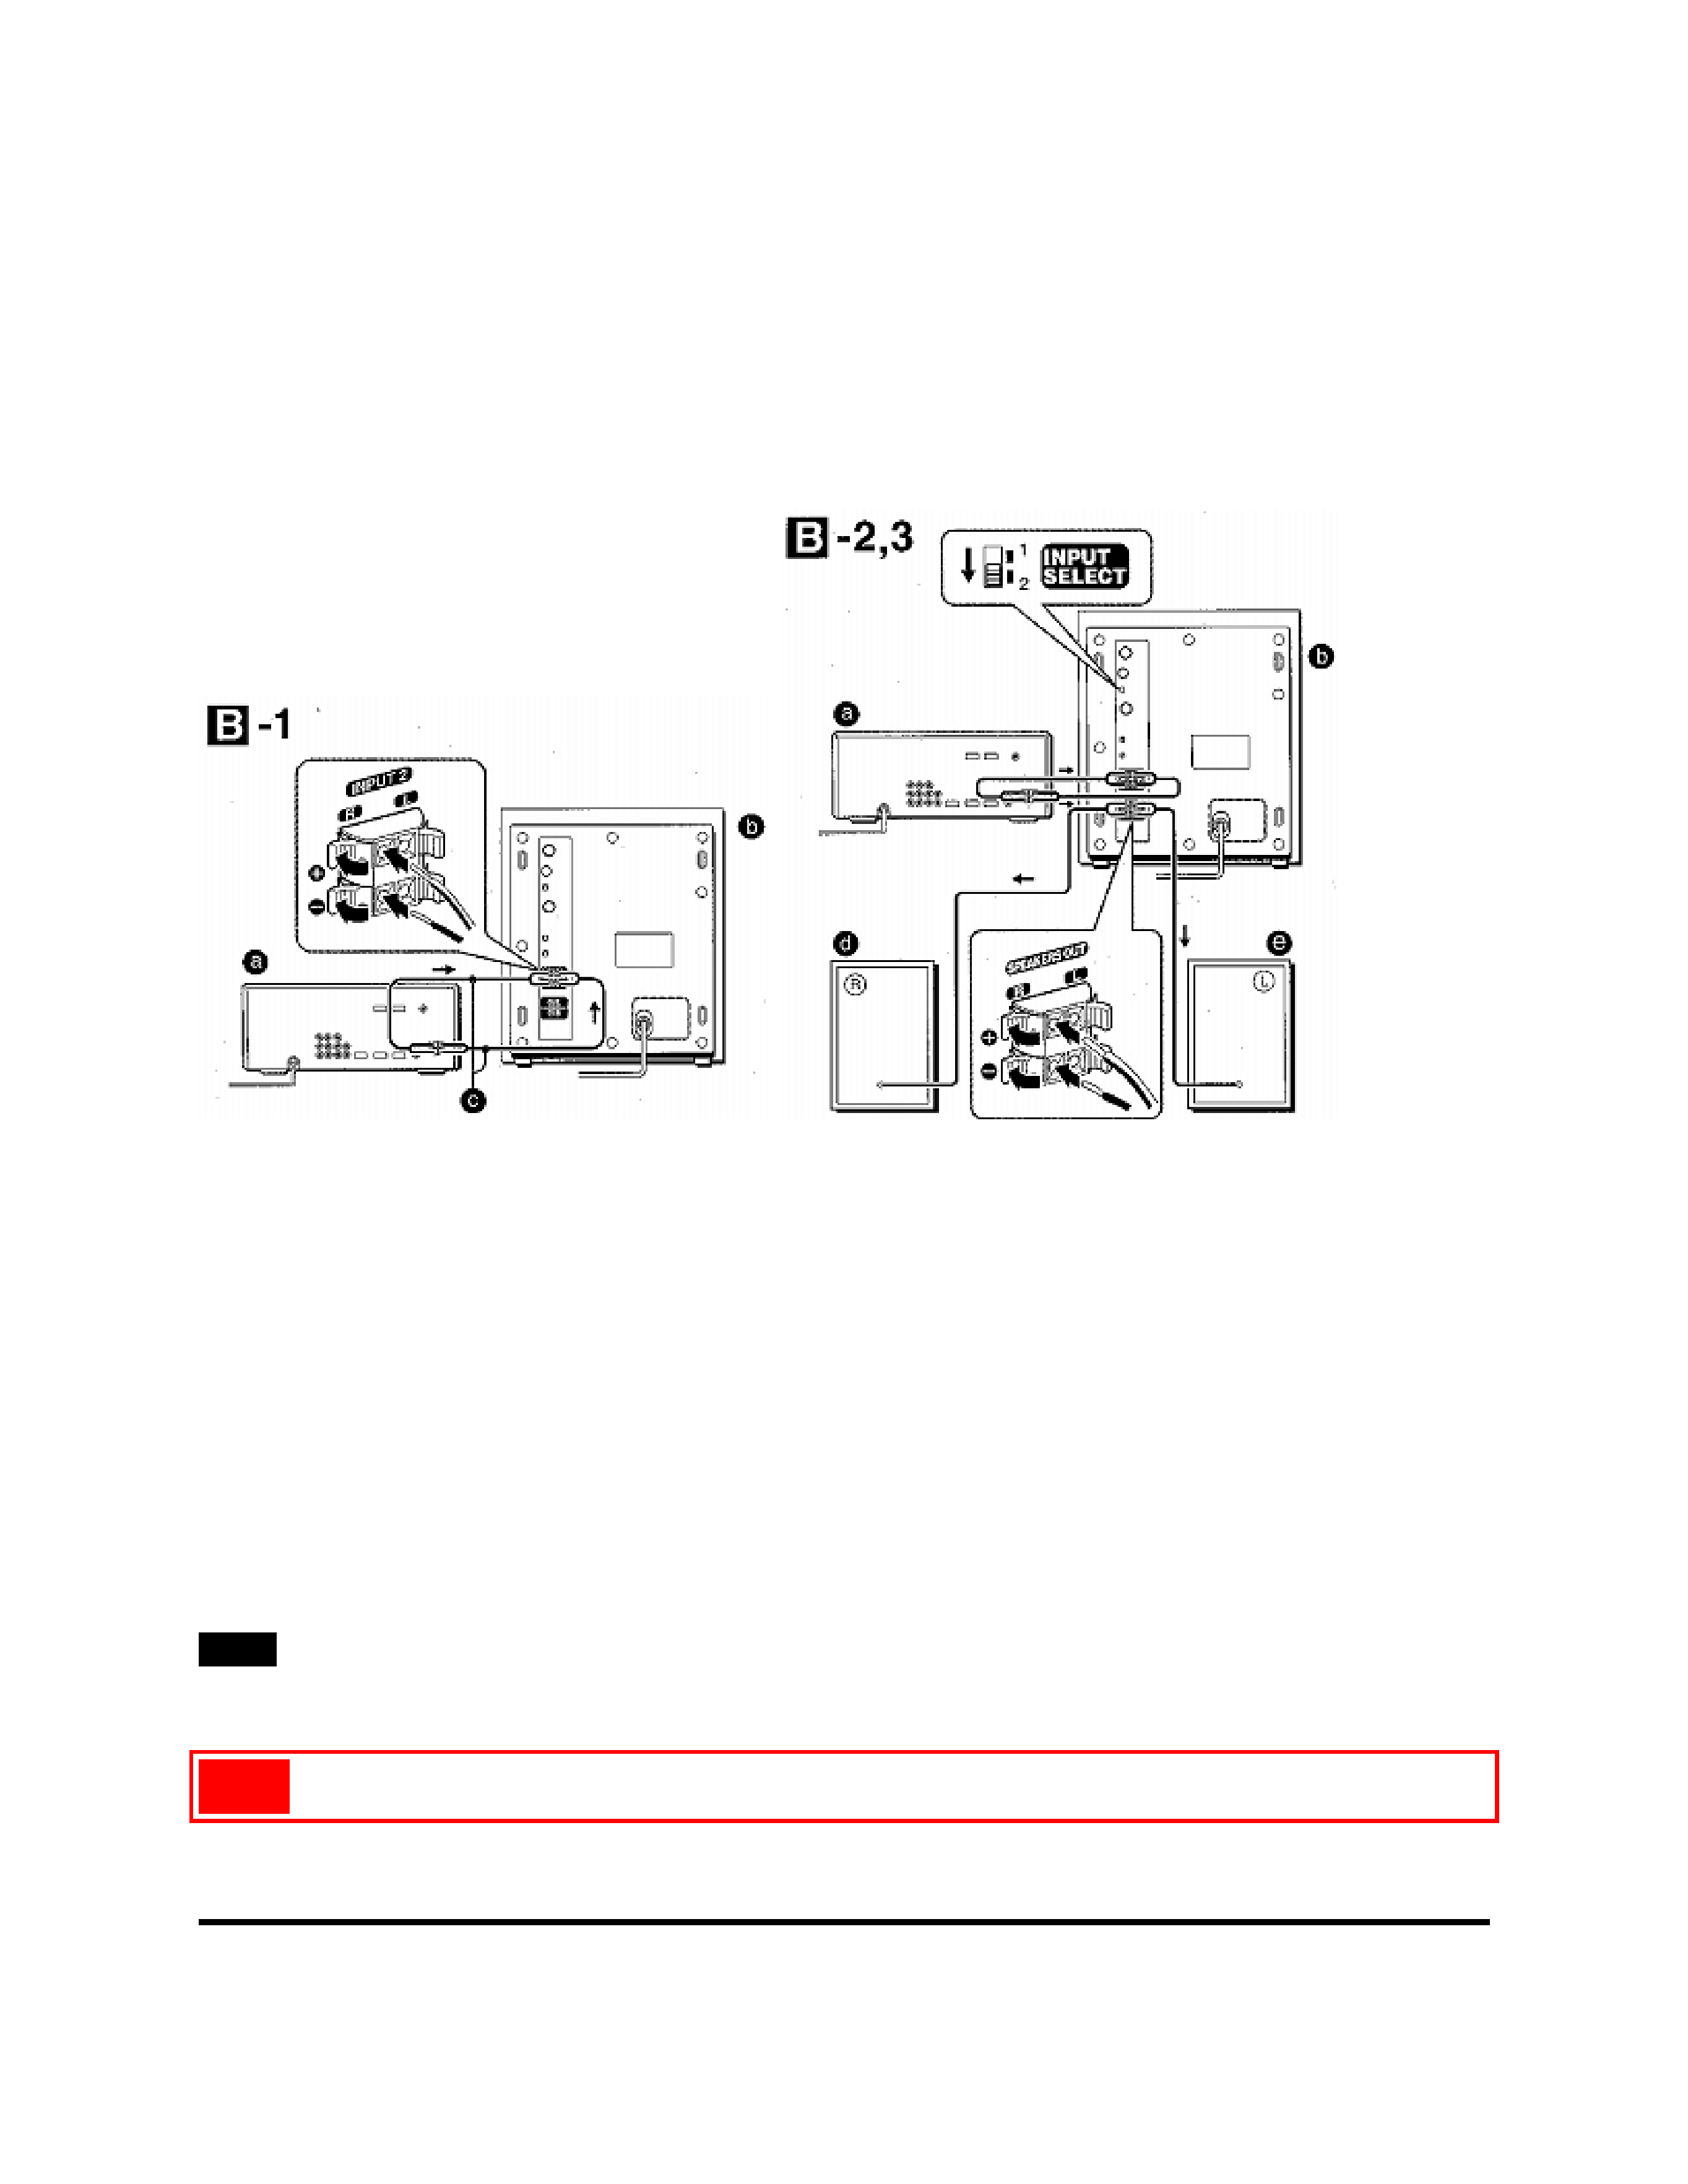
B Connecting a stereo system with typical L and R speaker terminals to the powered subwoofer
Preparations
Turn off the power of the stereo system and remove the speaker cords from the speaker terminals on the system.
1 Connect the stereo system speaker terminals a to the INPUT 2 (FROM SPEAKERS OUT) terminals on the
powered subwoofer b with the supplied speaker cords c.
Make sure the L and R and the + and - cords are connected correctly.
2 Using the speaker cords removed in "Preparations" above, connect the right and left speakers d e to the
SPEAKERS OUT terminals on the powered subwoofer b.
3 Set the INPUT SELECT switch to "2".
Connecting the AC cord
Connect the AC cord to a wall outlet.
NOTE
Use left/right speakers whose impedance corresponds with the value specified on the stereo system.
pg. 8
OPERATION
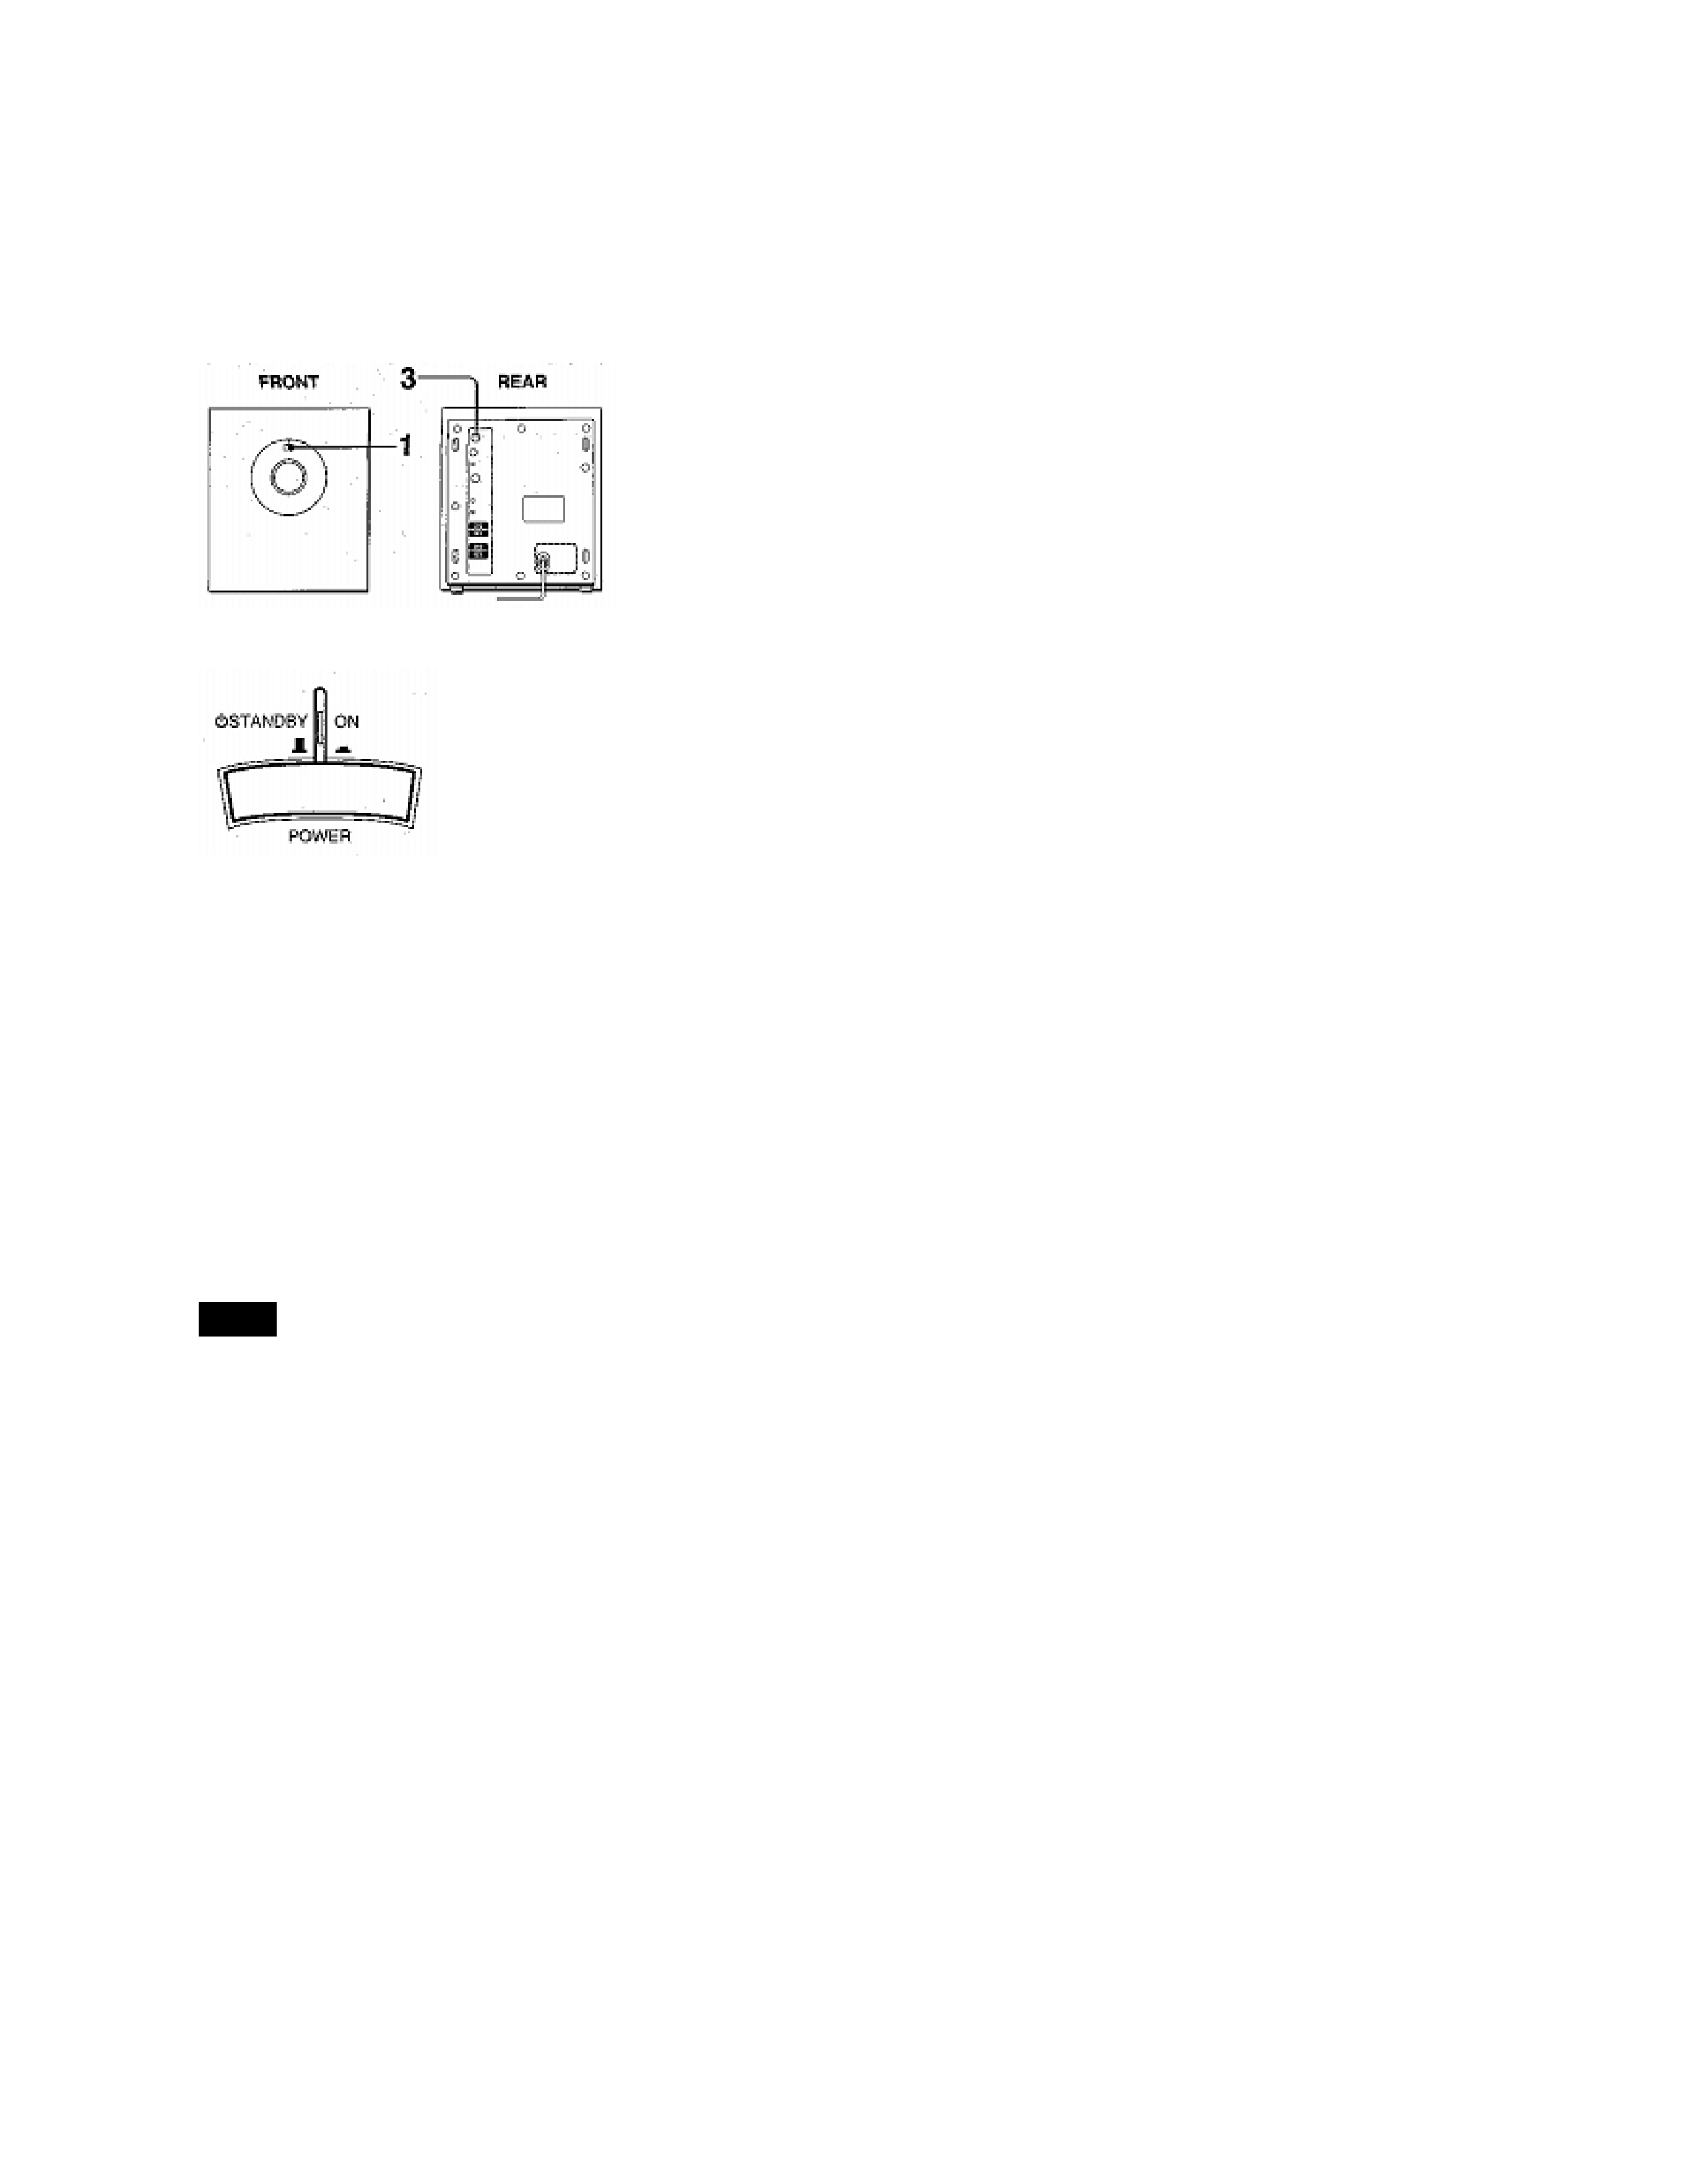
ADJUSTING THE VOLUME BALANCE
Adjust the volume balance between the powered subwoofer and the left and right speakers of the connected stereo
system.
1 Press the POWER button.
The indicator above the button lights up.
2 Start playback on the connected stereo system.
3 Adjust the volume of the powered subwoofer.
Moderate volume setting
To get natural bass sounds, adjust the volume of the powered subwoofer according to its position and the graphic
equalizer setting of the stereo system.
Adjustment examples
(a) Set the VOLUME control to a little lower than the middle when the subwoofer is placed on the floor and the
graphic equalizer is set to off.
(b) Set the VOLUME control to the middle when the subwoofer is positioned higher than the floor and the graphic
equalizer is set to off.
NOTE
· To avoid overloading the powered subwoofer, do not set the volume of the stereo system so high that the sound is
distorted.
· Low frequency sounds may be distorted when they are emphasized by the graphic equalizer on the stereo system.
Adjust the VOLUME control on the powered subwoofer or the graphic equalizer on the stereo system.
· If the powered subwoofer will not be used for a long period of time, press the POWER button to turn off the power,
and unplug the AC cord from the wall outlet.
CHANGING THE PHASE