3-865-659-12 (1)
©1998 by Sony Corporation
CCD-TRV63/TRV66
Model No. CCD-TRV
Model No. AC-
Serial No.
Serial No.
Video Camera
Recorder
Operating Instructions
Before operating the unit, please read this manual thoroughly,
and retain it for future reference.
Owner's Record
The model and serial numbers are located on the bottom. Record the
serial number in the space provided below. Refer to these numbers
whenever you call upon your Sony dealer regarding this product.
2
Welcome!
Congratulations on your purchase of this Sony Handycam VisionTM camcorder. With your
Handycam Vision, you can capture life's precious moments with superior picture and sound
quality. Your Handycam Vision is loaded with advanced features, but at the same time it is
very easy to use. You will soon be producing home video that you can enjoy for years to
come.
WARNING
To prevent fire or shock hazard, do
not expose the unit to rain or
moisture.
DISPOSAL OF LITHIUM ION BATTERY.
LITHIUM ION BATTERY.
DISPOSE OF PROPERLY.
You can return your unwanted lithium ion batteries
to your nearest Sony Service Center or Factory
Service Center.
Note:
In some areas the disposal of lithium ion
batteries in household or business trash may
be prohibited.
For the Sony Service Center nearest you call
1-800-222-SONY (United States only)
For the Sony Factory Service Center nearest you call
416-499-SONY (Canada only)
Caution: Do not handle damaged or leaking lithium
ion battery.
For customers in the U.S.A.
CAUTION
You are cautioned that any changes or modifications
not expressly approved in this manual could void
your authority to operate this equipment.
Note:
This equipment has been tested and found to comply
with the limits for a Class B digital device, pursuant
to Part 15 of the FCC Rules. These limits are designed
to provide reasonable protection against harmful
interference in a residential installation. This
equipment generates, uses, and can radiate radio
frequency energy and, if not installed and used in
accordance with the instructions, may cause harmful
interference to radio communications. However,
there is no guarantee that interference will not occur
in a particular installation. If this equipment does
cause harmful interference to radio or television
reception, which can be determined by turning the
equipment off and on, the user is encouraged to try to
correct the interference by one or more of the
following measures:
-- Reorient or relocate the receiving antenna.
-- Increase the separation between the equipment
and receiver.
-- Connect the equipment into an outlet on a circuit
different from that to which the receiver is
connected.
-- Consult the dealer or an experienced radio/TV
technician for help.
For customers in CANADA
CAUTION
TO PREVENT ELECTRIC SHOCK, MATCH
WIDE BLADE OF PLUG TO WIDE SLOT,
FULLY INSERT.
This symbol is intended to alert
the user to the presence of
uninsulated "dangerous voltage"
within the product's enclosure
that may be of sufficient
magnitude to constitute a risk of
electric shock to persons.
This symbol is intended to alert
the user to the presence of
important operating and
maintenance (servicing)
instructions in the literature
accompanying the appliance.
Never expose the battery pack to temperatures
above 60 °C (140°F), such as in a car parked in
the sun or under direct sunlight.

Getting
started
3
Table of contents
Quick Start Guide ............................. 4
Getting started
Using this manual ................................... 6
Checking supplied accessories .............. 7
Step 1 Preparing the power supply ..... 8
Installing the battery pack .............. 8
Charging the battery pack .............. 9
Connecting to a wall outlet ........... 11
Step 2 Inserting a cassette ................... 12
Recording Basics
Recording a picture .............................. 13
Shooting backlit subjects
(BACK LIGHT) ........................ 18
Shooting in the dark
(NightShot) ............................... 18
Superimposing the date and time
on pictures ................................ 20
Checking the recording
END SEARCH/EDITSEARCH/
Rec Review ...................................... 21
Playback Basics
Playing back a tape ............................... 22
Viewing the recording on TV .............. 25
Advanced Recording Operations
Photo recording ..................................... 27
Using the wide mode ........................... 29
Using the fader function ...................... 31
Using special effects
Picture effect ................................. 34
Using special effects
Digital effect ................................. 35
Using the PROGRAM AE function .... 38
Adjusting the exposure manually ...... 40
Focusing manually ................................ 41
Superimposing a title ........................... 42
Making your own titles ........................ 44
Using the built-in light ......................... 46
Advanced Playback Operations
Playing back a tape with digital effects
........................................................... 48
Editing on Other Equipment
Dubbing a tape ...................................... 49
Recording video or TV programs ....... 50
Customizing Your Camcorder
Changing the MENU settings ............. 51
Resetting the date and time ................. 57
Additional Information
Usable cassettes and playback modes
........................................................... 59
Changing the lithium battery in your
camcorder ........................................ 61
Troubleshooting .................................... 63
Self-diagnosis display .......................... 66
Warning indicators and messages ...... 67
Using your camcorder abroad ............ 68
Maintenance information and
precautions ...................................... 69
Specifications ......................................... 73
Quick Reference
Identifying the parts and controls ...... 74
Quick Function Guide .......................... 81
Index ....................................................... 82

Quick
Start
Guide
4
Quick Start Guide
This chapter introduces you to the basic features of your
camcorder. See the page in parentheses "( )" for more
information.
Open the DC IN
jack cover.
Connect the plug with
its 4 mark facing up.
Inserting a cassette (p. 12)
Connecting the power cord (p. 11)
Use the battery pack when using your camcorder outdoors (p. 8).
3 Close the cassette
compartment by
pressing the "PUSH"
mark on the cassette
compartment. The
cassette compartment
automatically goes
down.
1 Slide EJECT in the
direction of the arrow
while pressing the
small blue button.
2 Insert a cassette
into the cassette
compartment
with its
window facing
out.
EJECT
Quick
Start
Guide
5
LO
CK
START/STOP
S
TA
ND
BY
LO
CK
START/STOP
S
TA
ND
BY
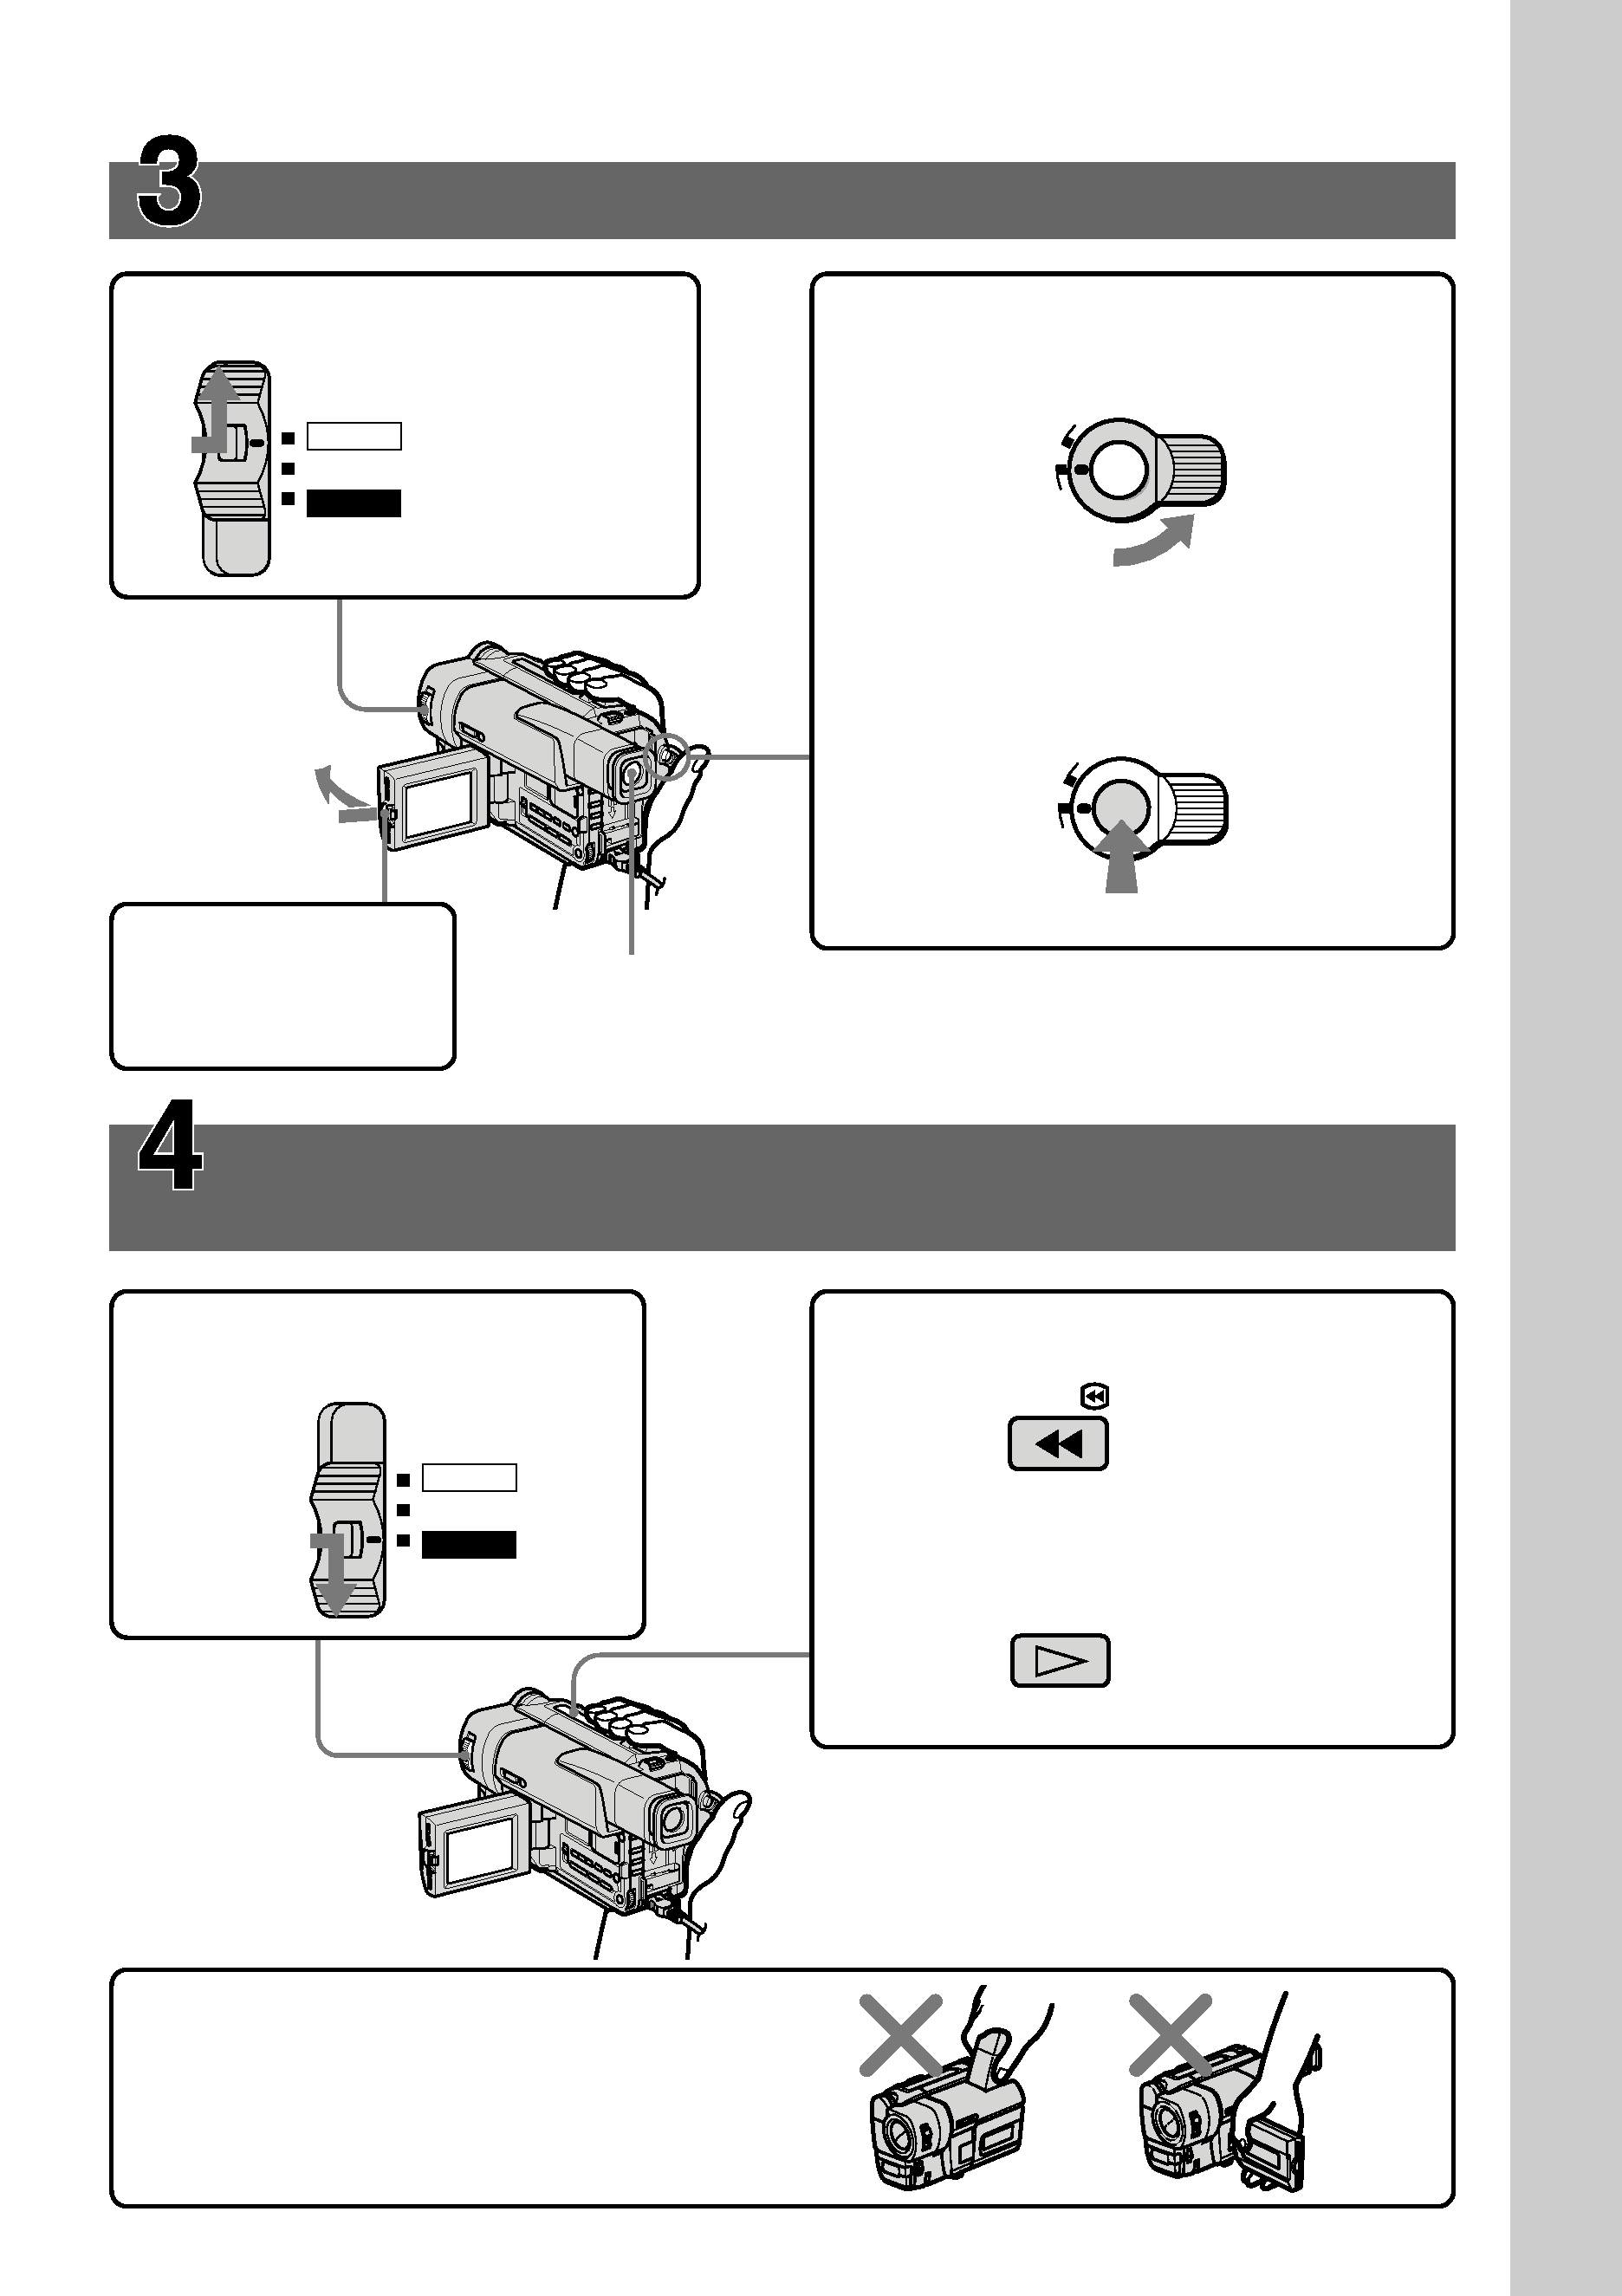
Recording a picture (p. 13)
Viewfinder
When the LCD panel is closed, use the
viewfinder placing your eye against its eyecup.
Monitoring the playback picture on the LCD
screen (p. 22)
NOTE
Do not pick up your camcorder by holding
the viewfinder or by holding the LCD
panel.
1 Set the POWER switch to VTR
while pressing the small green
button.
2 Press 0 to rewind the tape.
3 Press ( to start playback.
1 Set the POWER switch to CAMERA
while pressing
the small green
button.
2 Open the LCD
panel while
pressing OPEN.
3 Turn STANDBY to STANDBY. The
picture appears on the LCD screen.
4 Press the red button. Your camcorder
starts recording. To stop recording,
press the red button again.
POWER
OFF
VTR
CAMERA
POWER
OFF
VTR
CAMERA
REW
PLAY