03/01/05
Pa
g
e
1
of
4
DP-01 / DP-01FX
Quick Start Guide
Thisguideisdesignedtogetyouup-and-running
with the DP-01 and DP-01FX. If you have any
questions that aren't answered in this short guide,
consult the Users Guide for detailed information
on using your new Digital Portastudio.
Record a Track
TheDP-01givesyoueighttrackstorecordto.
This allows you to record a guitar, rewind, play
bass over that part, and continue repeating until
your song is finished.
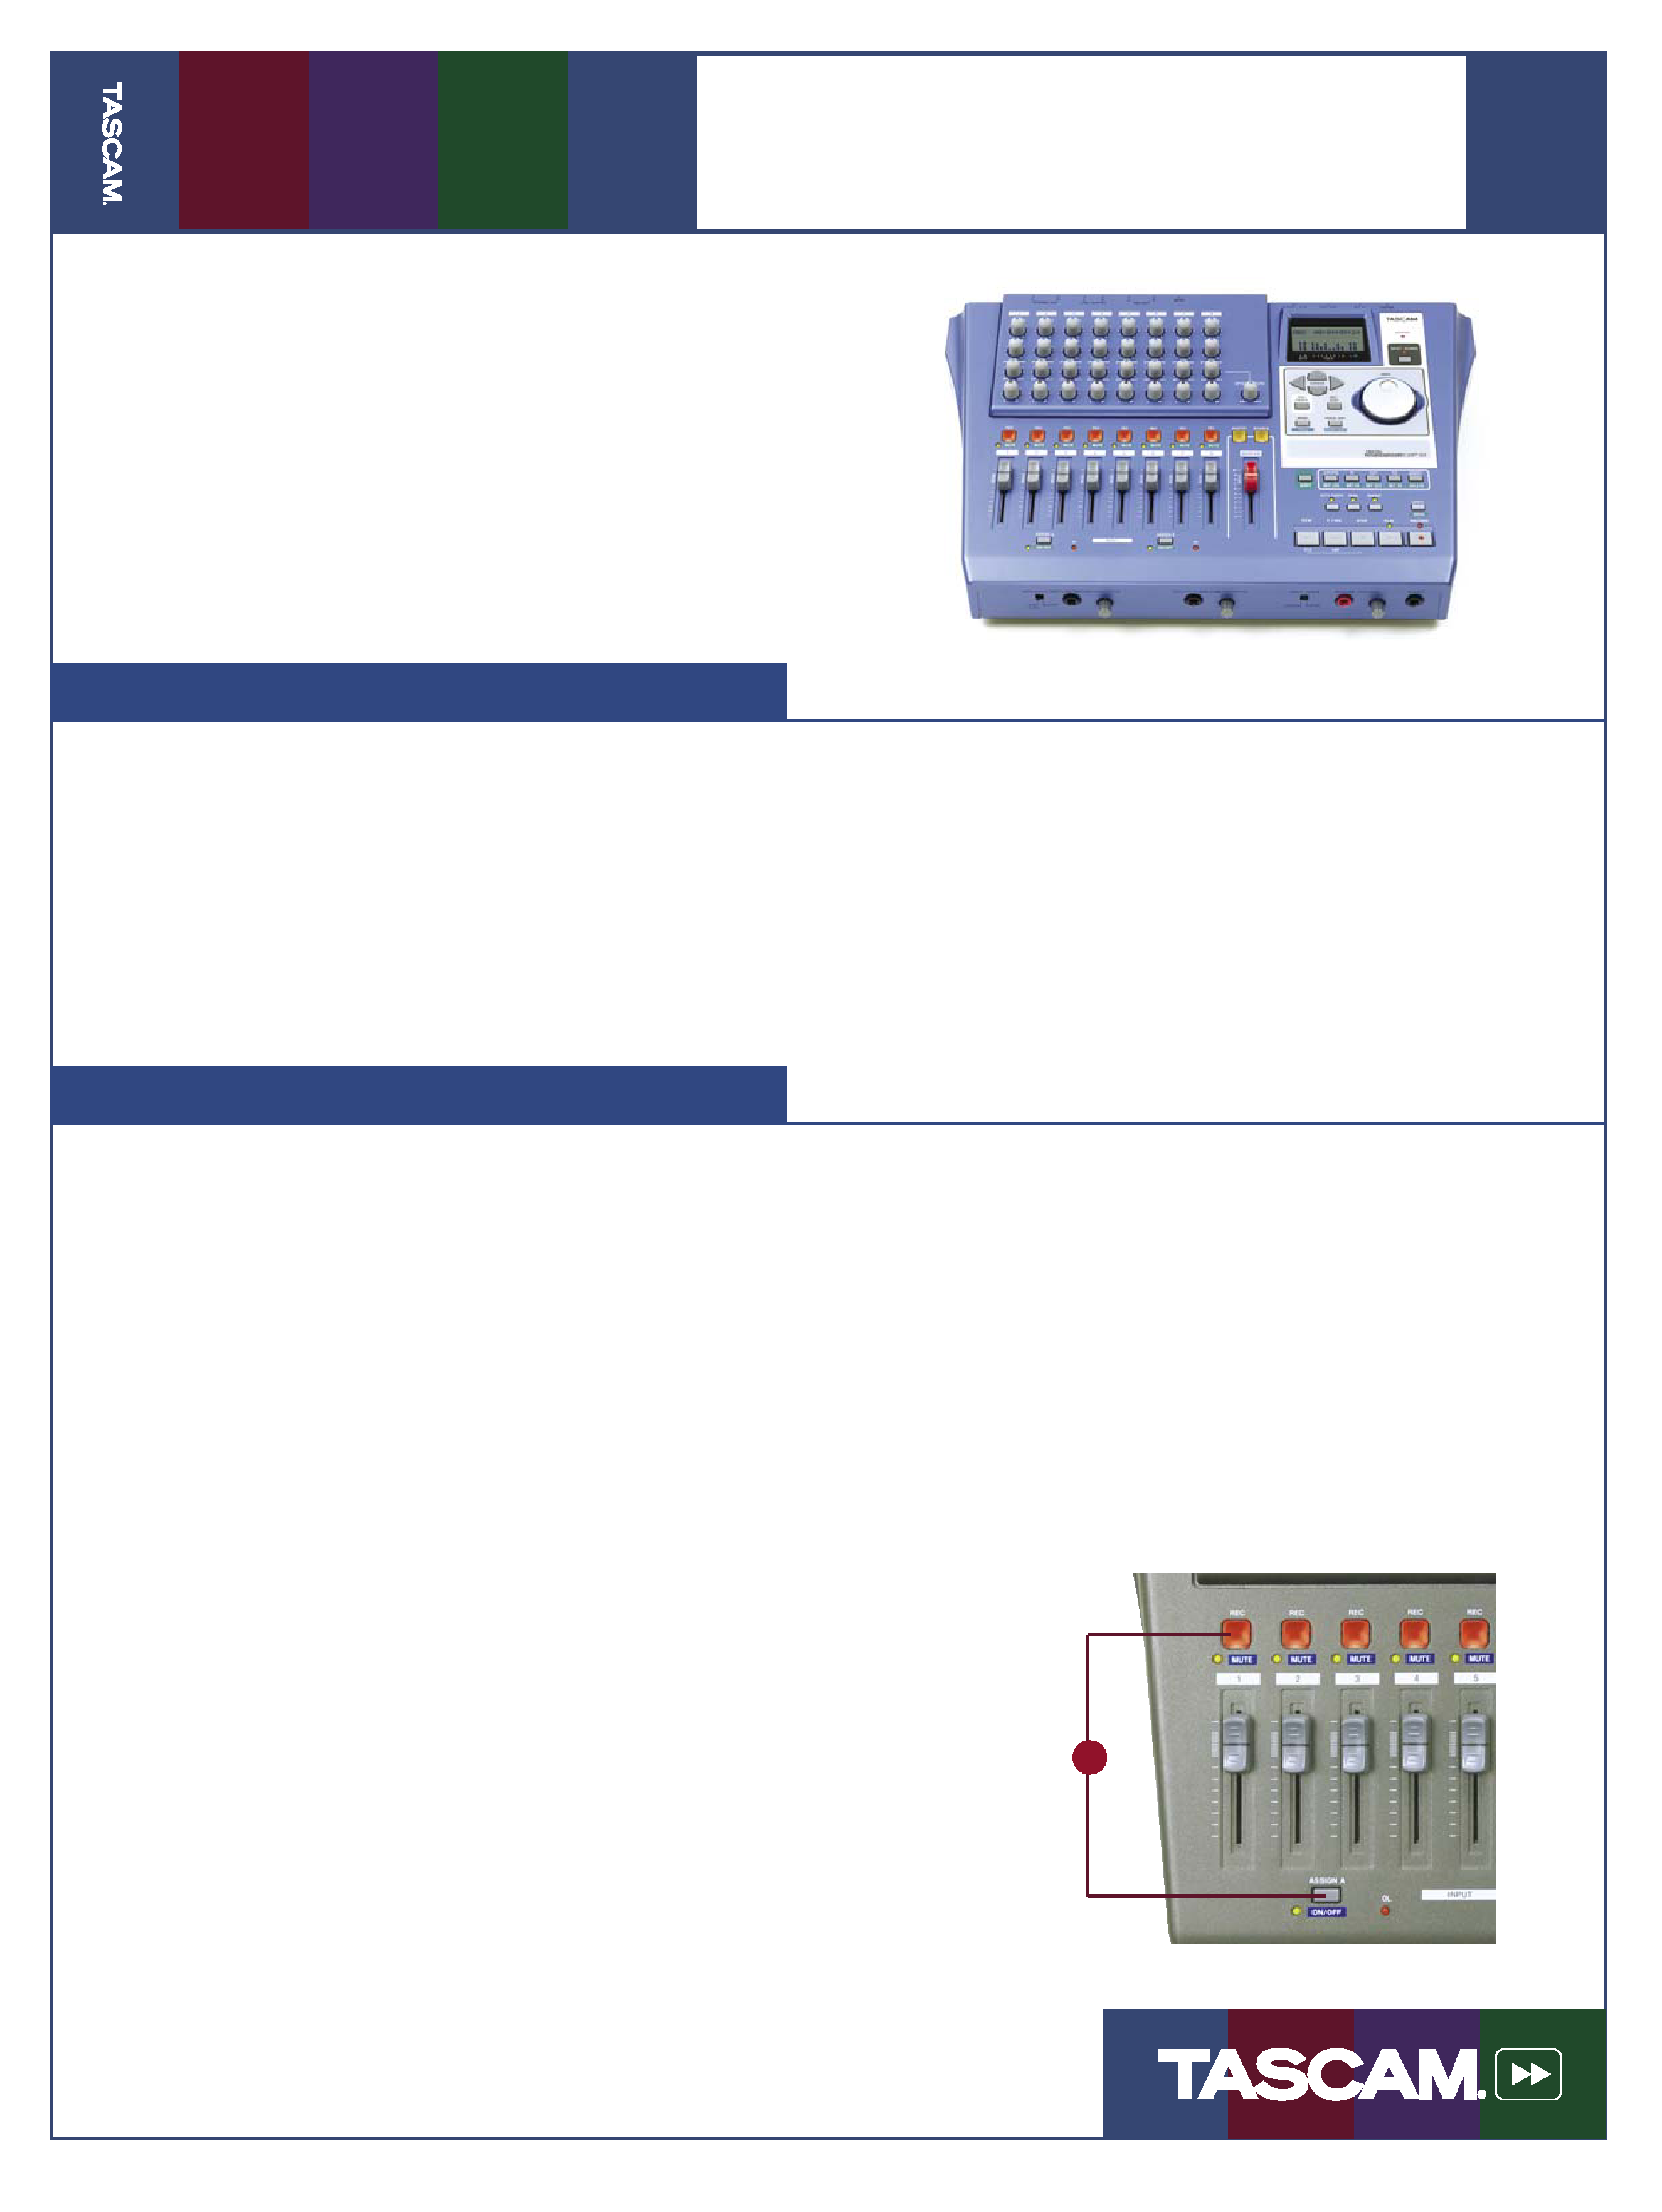
1. Plug an instrument or microphone into Input
A, on the front of the DP-01.
2. If you plugged a guitar or bass directly into the
DP-01, set the front-panel switch to GUITAR.
Otherwise, set it to MIC/LINE. If you're using
a condenser microphone on the DP-01FX, turn
phantom power ON.
3. While watching the meters on the LCD screen,
turn the front-panel trim knob so that your
loudest notes do not make the meter go all the
way to the top.
3. Hold down the button above the input labeled
ASSIGN A. While you're still holding that but-
ton, press the REC button above one of the eight
track faders. It will flash to show you that your
input has been assigned to that track.
4. Press the REC button that you just assigned the
input to. It will flash slowly.
5. Press the PLAY and RECORD buttons to start
recording. When you're finished, press STOP
and press the REC button to disarm the track.
6. To record another track and play along with the
one you just recorded, first press the ASSIGN A
button and press the REC button of the track
you just recorded to. This "de-assigns" the input
from that track. Press the REC button for one of
the other tracks, rewind to the beginning of the
song, and then repeat steps 4 and 5.
Note: You will hear your instrument through
the master outputs even if no tracks are armed.
Build a New Song
We'llbeginbycreatinganewsongfilesothat
you have a fresh slate to work from.
1. Press the MENU button. Turn the data wheel
until you reach SONG and press the right cursor
button.
2. Turn the data wheel to select CREATE and press
the right cursor button.
3. If you want, use the DATA WHEEL to name your
new song. Otherwise, or afterwards, press EN-
TER.
3
03/01/05
Pa
g
e
2
of
4
DP-01 / DP-01FX
Quick Start Guide
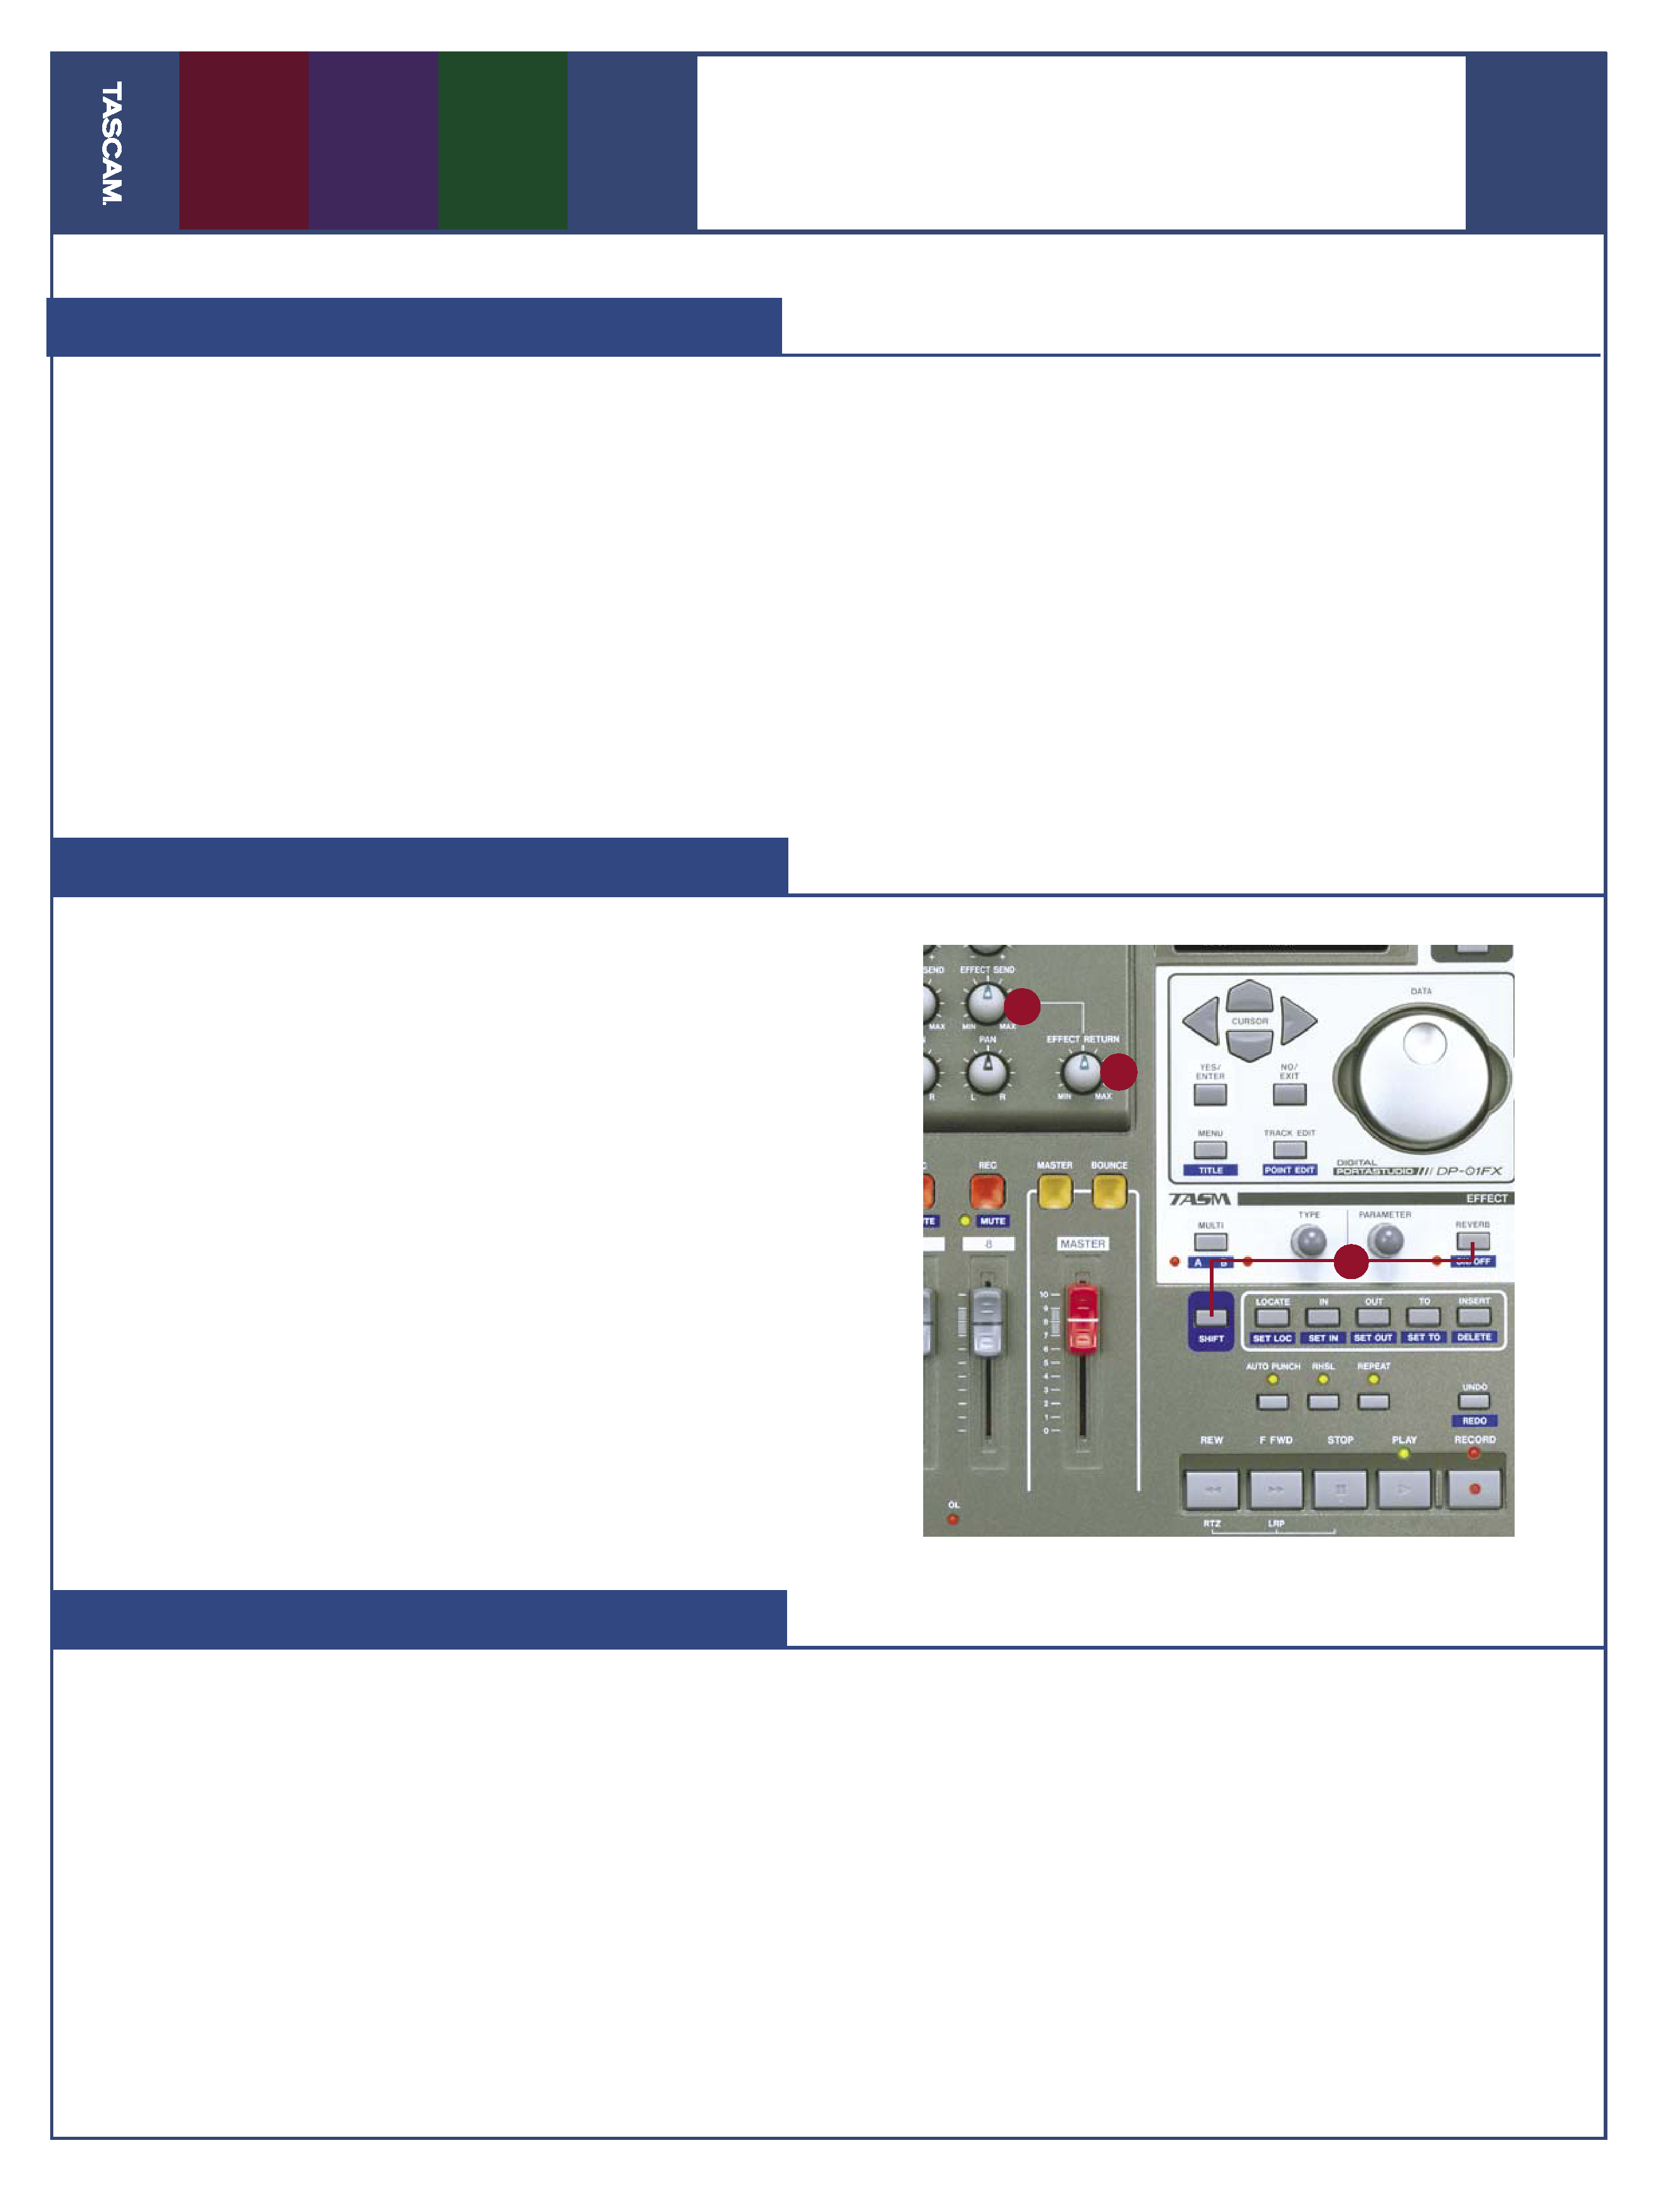
Using the Reverb Effect (DP-01FX)
TheDP-01FXhasadedicatedReverbeffectthat's
available to all tracks. Each channel has an Ef-
fect Send knob so that you can control the amount
of reverb lots of reverb for the drums, a little on
the vocal, etc. Here's how you set that up.
1. If the REVERB light is not on, hold the SHIFT
button and press REVERB.
2. Let go of the SHIFT button and press REVERB
again. The LCD window will show you what
reverb type is selected.
3. Turn the TYPE knob to change to a different
reverb type: Hall, Room, Live or Studio.
4. Turn the PARAMETER knob to change the decay
time of the reverb for a larger or smaller-sound-
ing space.
5. Send your recorded tracks to the reverb proces-
sor using the EFFECT SEND knobs above those
channel faders and adjust the overall level of
the external effect using the EFFECT RETURN
knob.
Using the Multi Effect (DP-01FX)
The DP-01FX has two effects processors.The
Multi effect processes the input as it's recorded
to disk, while the Reverb effect is only for the mix-
down and only gets recorded when you master your
song. This section explains how to use the Multi:
1. Plug a guitar or other sound source into one of
the front-panel inputs.
2. Set the INPUT MODE switch on the front panel
to MONO.
3. While holding SHIFT, press the MULTI button.
The LED next to the button will show whether
the effect is processing the A input, B input or
neither one.
4. Let go of the SHIFT button and press MULTI
again. The LCD screen will show you what ef-
fect program is selected. The first line shows
the name of the program ("CoolPick"), and the
second line shows what instrument it's designed
for ("EGTR").
5. Turn the TYPE knob to change to a different
effect program.
6. Turn the PARAMETER knob to change the sound
of that program.
Using External Effects
Ifyouhaveareverbormultieffectsprocessor,you
can plug it into the DP-01 to use in your mix.
1. Plug the SEND on the rear panel of the DP-01
into the input of your effects processor.
2. Plug the outputs of your effects processor into
the RETURN inputs of the DP-01.
3. Set the Mix control on your effects processor to
100% wet.
4. [DP-01FX only] Turn off the internal reverb pro-
cessor by holding the SHIFT button and pressing
the REVERB button (the light will go out).
5. Send your recorded tracks to the effects proces-
sor using the EFFECT SEND knobs above those
channel faders.
6. You can adjust the overall level of the external
effect using the EFFECT RETURN knob.
6
5
4
03/01/05
Pa
g
e
3
of
4
DP-01 / DP-01FX
Quick Start Guide
Bounce Tracks
Let'ssayyou'rerecordingyourrockoperaand
you need more tracks than you have available.
You can "bounce" tracks on the DP-01, which means
mixing them down to other tracks and recording
over the first set of tracks. To do this:
1. Press the BOUNCE button. (It lights up in Bounce
mode)
2. Press the REC button above the track you want
to bounce to. If you want to mix your tracks
in stereo (leaving six available), press the REC
button over a second track.
3. You can record yourself using the inputs dur-
ing your bounce. If you don't want to do this,
unplug any mics or guitars to make sure there
isn't any noise on your tracks.
4. Press PLAY and RECORD at the beginning of your
song. You can change the levels, panning (in
stereo) and effects while you record the bounce.
Press STOP at the end of the song.
5. You can now record new parts over your previ-
ous tracks.
Mix Your Song
Onceallofthepartsinyourarrangementhave
been recorded, you'll want to mix these down
to a stereo master track to transfer to CD, MP3 or
some other format that you can share.
1. Use the channel faders to set the level for each
track.
2. Turn the PAN knobs to adjust the stereo position
for each track.
3. Use the EQ HIGH and EQ LOW knobs to adjust
the tone of each track.
4. Use the EFFECT SEND knob to send a track to
an external effects processor (if attached) or
built-in reverb (DP-01FX only). Use the EFFECT
RETURN knob to control the overall level of the
effect.
5. When you have a mix you're happy with, press
the MASTER button. It will start flashing.
6. Rewind to the beginning of your song. Hold
the SHIFT button and press SET IN to set your
beginning point.
7. Fast Forward to the end of your song. Hold the
SHIFT button and press SET OUT.
8. Rewind to the beginning of the song. Make sure
the MASTER light is still flashing and press PLAY
and RECORD.
9. As your mix is being recorded, you can change
levels, panning, effects and even fade the Master
level down at the end of the song. When the
recorder reaches the end of the song (which
you set using the SET OUT button), recording
will stop.
10. Press the MASTER button again. It will light up
solid. You can rewind to the beginning of the
song and listen to the mix you just recorded.
If you're happy with your mix, you'll want to
transfer it to a computer to encode it as an MP3 or
burn it to a CD. See the next step for information
on how to do this.
03/01/05
Pa
g
e
4
of
4
DP-01 / DP-01FX
Quick Start Guide
7733 Telegraph Rd · Montebello, CA · 90640 · phone 323.726.0303 · www.tascam.com
© 2005 TASCAM, a division of TEAC America. All trademarks are the property of their respective holders. All rights reserved. Design and
specifications subject to change without notice.
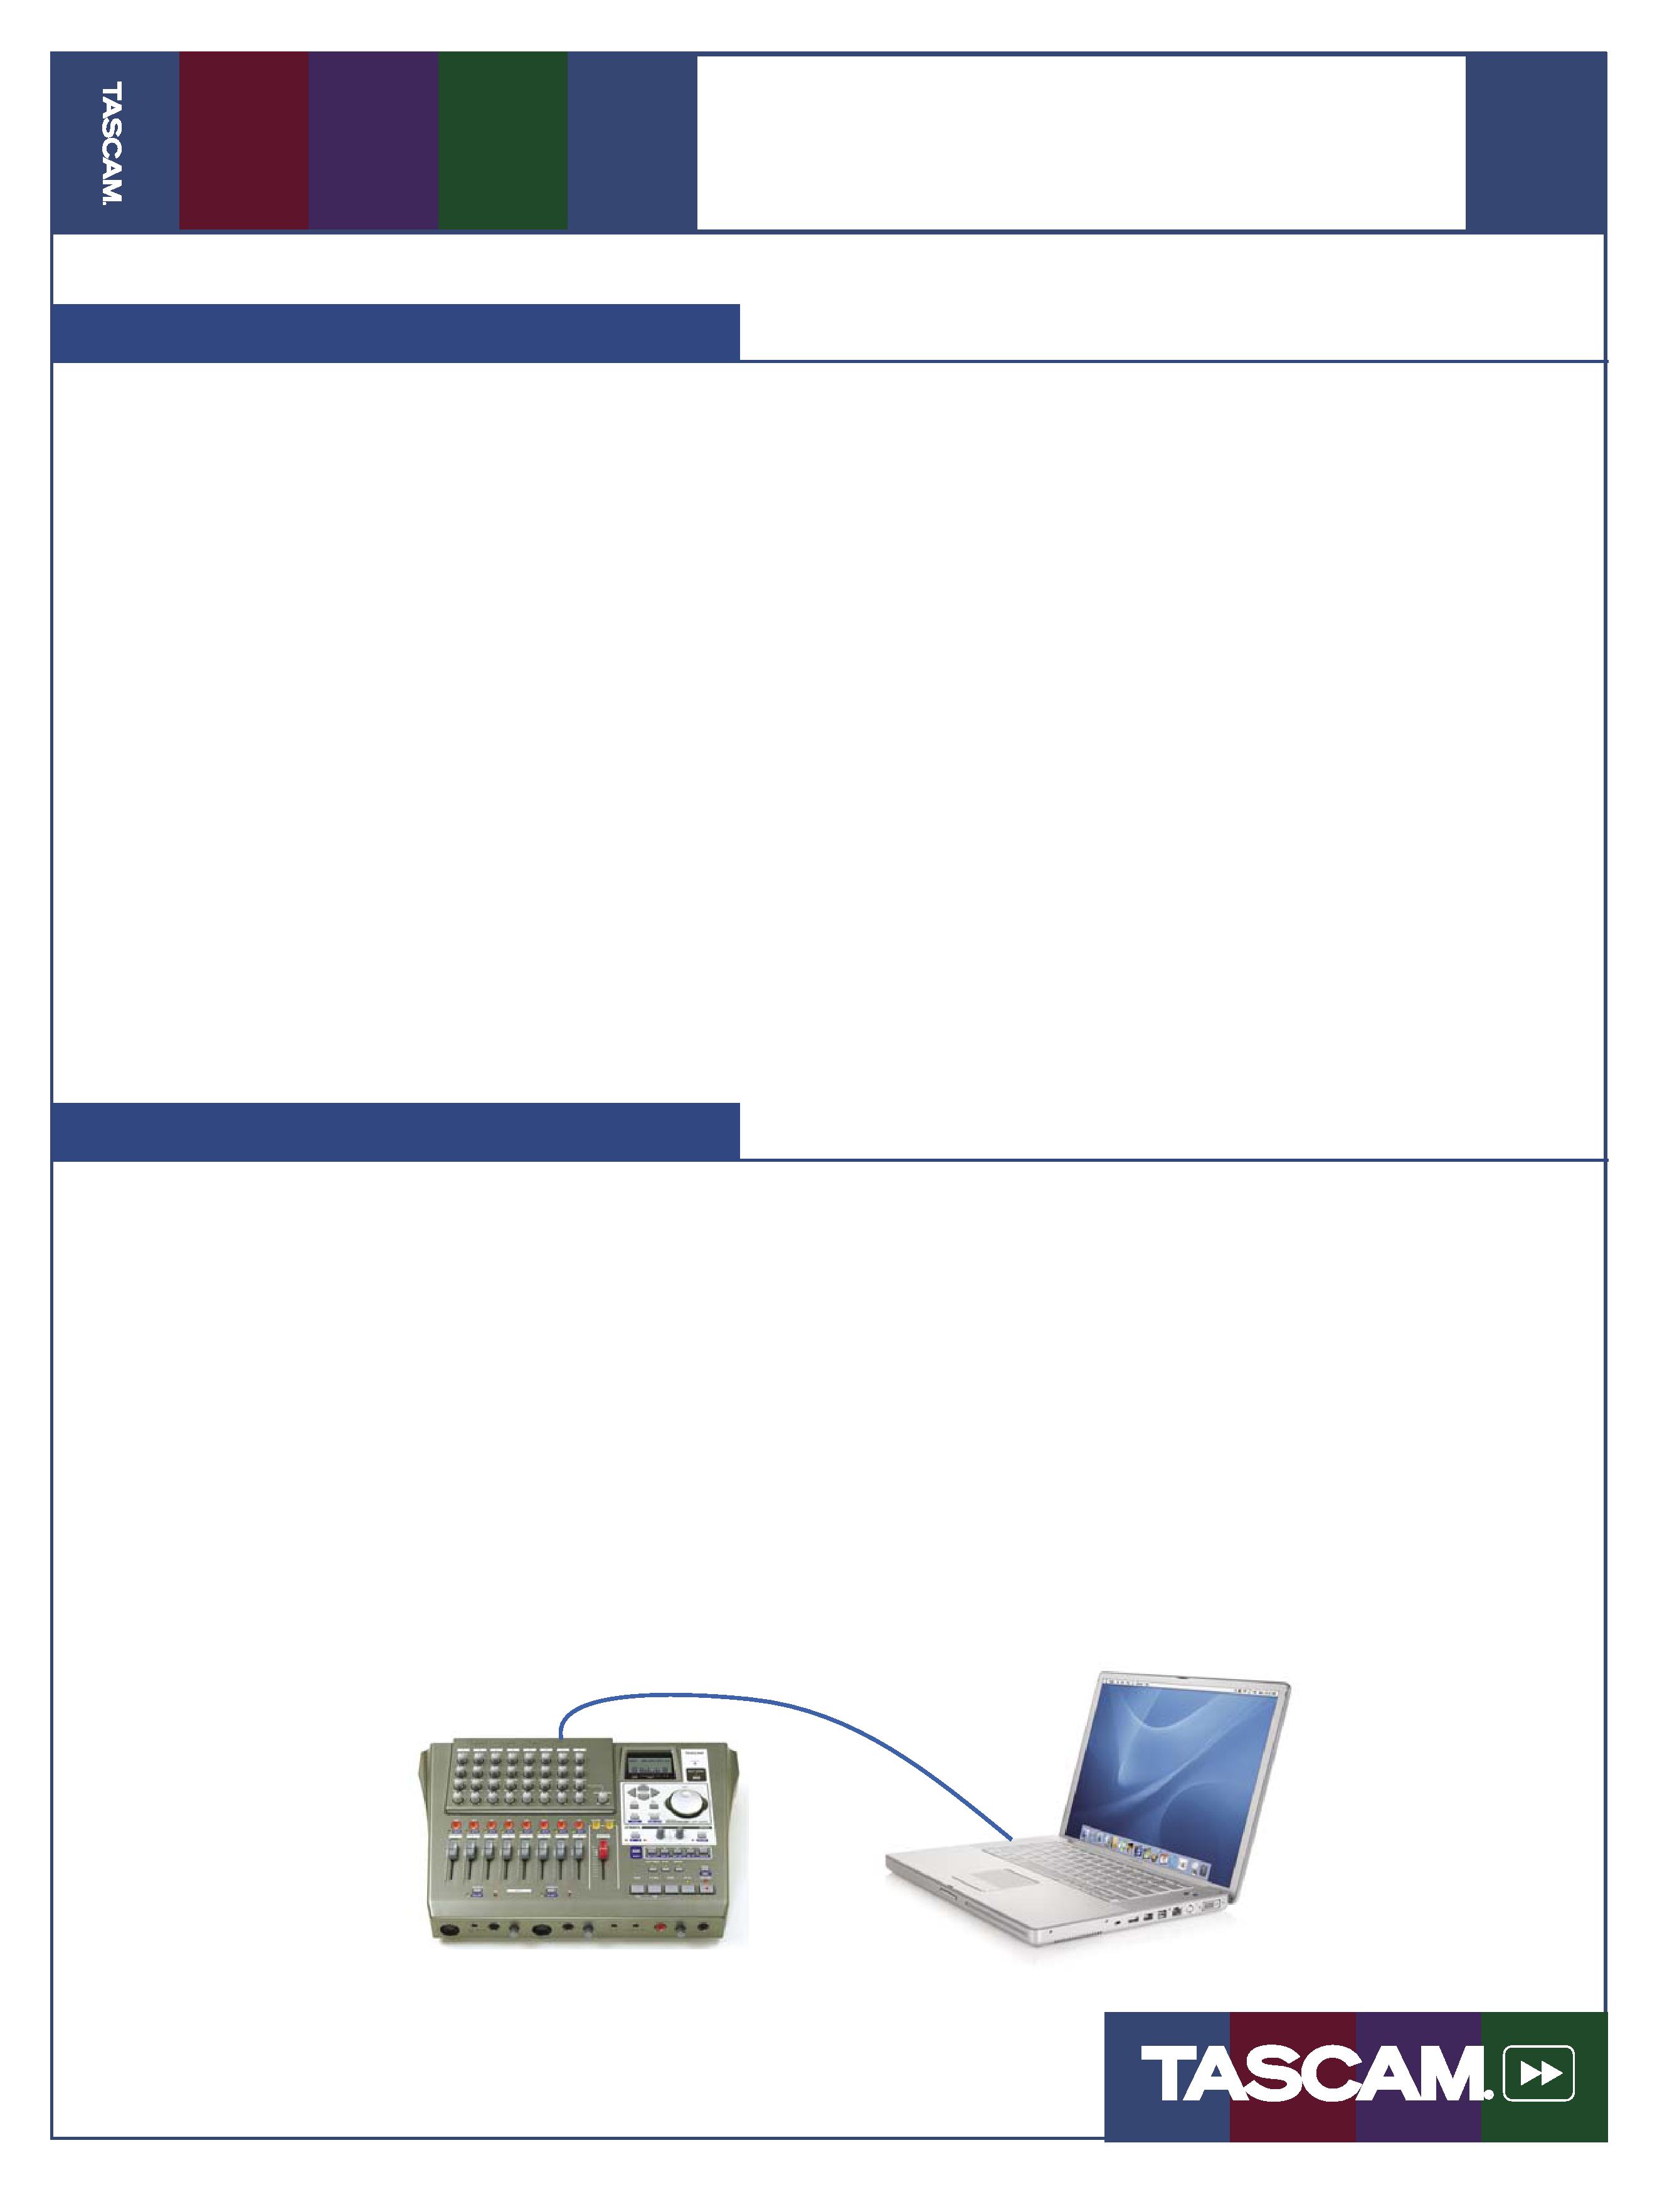
Transfer Your Song to a Computer
Once you create a Master Recording,as
described in the previous section, you're
ready to burn it to an audio CD or encode an
MP3. This section tells you how to transfer a
single song to your computer. For information
on creating a playlist with multiple songs,
consult the User's Guide.
1. Press the MENU button. Turn the data wheel
until you reach WAVE and press the right
cursor button.
2. Turn the data wheel to select EXPORT MSTR.
and press the right cursor button. (If the
MASTER button is lit, press it until it goes
out.)
3. Use the DATA WHEEL to name your song
mix and then press ENTER.
4. The DP-01 will copy the song to a file on an-
other part of the hard drive accessible by your
computer. You now need to put the DP-01 in
USB mode so that you can copy this file to
your computer for backup onto a CD.
5. Press MENU to get back to the main screen,
then press MENU again.
6. Select DISK and press the right cursor but-
ton.
7. Select USB OPN/CLS and press the right cursor
button. (If the DP-01 is not in USB mode, you
may see an error message when connecting
it to your computer.)
8. You can now connect the DP-01 to your com-
puter using a USB cable. The DP-01 will show
up on your computer as another hard drive.
Copy the song backup file ending in ".001" to
your computer and burn it to a CD. Press the
EXIT button when you are finished.
Backup Your Song
Youshouldbackupyourharddrivetoar-
chive old projects and prevent data loss.
(You should also floss daily and wear a seat
belt.) To back up your song to a CD:
1. Press the MENU button. Turn the data wheel
until you reach BACKUP and press the right
cursor button.
2. Turn the data wheel to select SONG BACKUP
and press the right cursor button.
3. Use the DATA WHEEL to select a song for backup
and press ENTER.
4. The DP-01 will copy the song to a file on an-
other part of the hard drive accessible by your
computer.
You now need to put the DP-01 in USB mode
so that you can copy this file to your computer
for backup onto a CD. See steps 5 through 8 of
"Transfer Your Song to a Computer" (above) to
put the DP-01 into USB mode.