Operating Instructions
Manual de instrucciones
############
© 1997 by Sony Corporation
ES
C
WX-C570
EN
Changer Control
Audio Master
For installation and connections, see the supplied installation/connections
manual.
Con respecto a la instalación y las conexiónes, consulte el manual de Instalación/
conexiones suministrado.
##########.

2
EN
Welcome!
Thank you for purchasing the Sony Changer
Control Audio Master. This unit lets you enjoy
a variety of features by using an optional
rotary remote.
In addition to tape playback and radio
operation you can expand your system by
connecting an optional CD/MD changer.

3
EN
With Optional Equipment
CD/MD Changer
Playing a CD/MD ............................................. 11
Scanning the tracks
-- Intro scan .................................................. 11
Playing tracks repeatedly
-- Repeat play .............................................. 11
Playing tracks in random order
-- Shuffle play .............................................. 12
Additional Information
Precautions ......................................................... 12
Maintenance ....................................................... 14
The rotary remote labels .................................. 14
Location of controls .......................................... 15
Specifications ..................................................... 16
Troubleshooting guide ..................................... 17
Index ................................................................... 19
Table of contents
This Unit Only
Getting Started
Resetting the unit ................................................ 4
Using the decoy cover ........................................ 4
Setting the clock .................................................. 4
CD Player
Listening to a CD ................................................ 5
Playing a CD in various modes ........................ 5
Cassette Player
Listening to a tape ............................................... 6
Playing a tape in various modes ....................... 7
Radio
Memorizing stations automatically
-- Best Tuning Memory (BTM) ................... 8
Memorizing only desired stations .................... 8
Receiving memorized stations ......................... 8
Other Functions
Using the rotary remote ..................................... 9
Adjusting the sound characteristics ............... 10
Changing the sound and beep tone ............... 10

4
EN
Getting Started
Resetting the unit
Before operating the unit for the first time or
after replacing the car battery, you must reset
the unit.
Press the reset button with a pointed object,
such as a ball-point pen.
Note
Pressing the reset button will erase all the memorized
program and memory functions.
Using the decoy cover
To deter theft of this unit, use the decoy black
ashtray cover when not using your car.
Setting the clock
The clock has a 12-hour digital indication.
For example, to set to 10:08
1 Press (OFF) or (DSPL) during operation.
2 Press (DSPL) for two seconds.
1 Set the hour digits.
2 Press (SOUND) momentarily.
3 Set the minute digits.
3 Press (DSPL) momentarily.
Note
If the POWER SELECT switch on the bottom of the unit is
set to the B position, the clock cannot be set unless the
power is turned on. Set the clock after you have turned on
the radio.
The hour digit flashes.
To go backward
To go forward
The minutes digits flashes.
To go backward
To go forward
The clock starts.
Reset button
L
Note
If the unit does not extend 6 mm from the dash panel, you
may not be able to use the decoy cover.
5
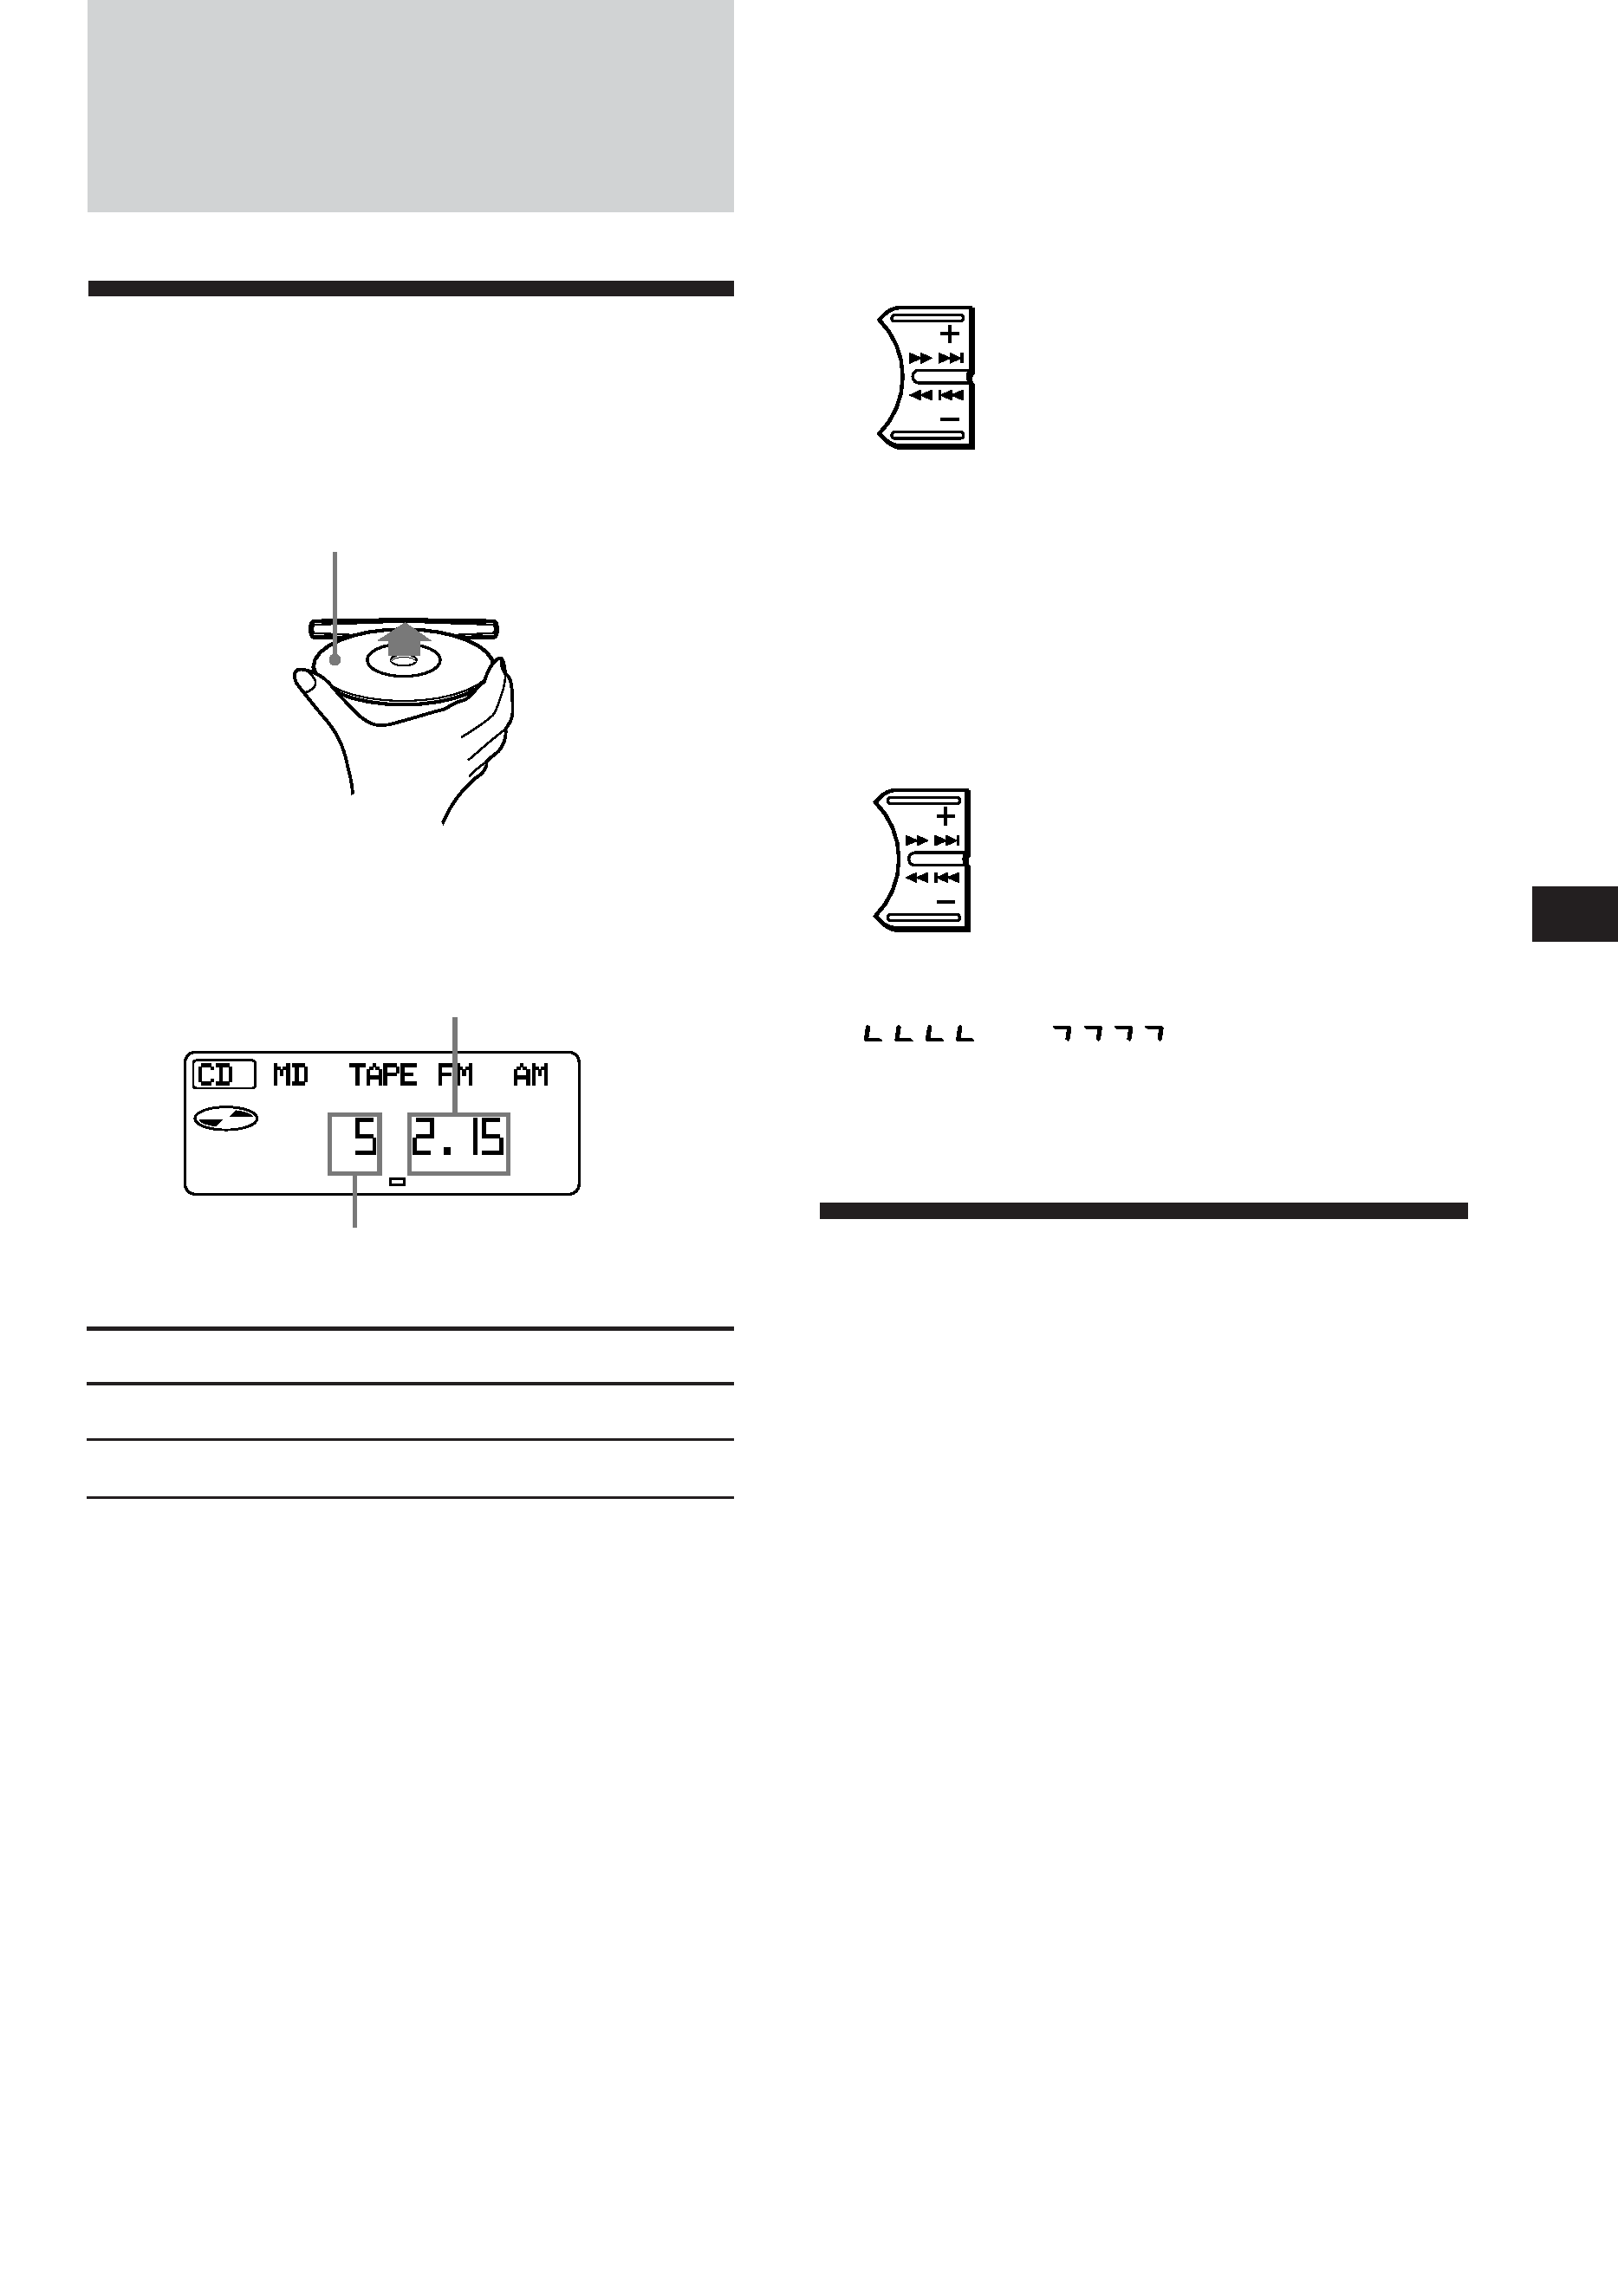
EN
Labelled side up
To locate succeeding tracks
To locate preceding tracks
To search forward
To search backward
L
TRACK
R
Elapsed playing time
SEEK/AMS
SEEK/AMS
Getting
Started/CD
Player
Locating a specific track
-- Automatic Music Sensor (AMS)
During playback, press either side of
(SEEK/AMS) momentarily.
Locating a specific point in a track
-- Manual Search
During playback, press and hold either
side of (SEEK/AMS) for two seconds.
Release the button when you have
found the desired point.
Note
If "
" or "
" appears on the display,
you have reached the beginning or the end of the disc and
you cannot go any further.
Playing a CD in various
modes
Searching for the desired track
-- Intro Scan
Press (1) during playback.
"INTRO" appears on the display.
The first 10 seconds of all tracks are played.
When you find the desired track, press (1)
again. The unit returns to the normal playback
mode.
Playing tracks repeatedly
-- Repeat Play
Press (2) during playback.
"REPEAT" appears on the display.
When the currently track is over, the tape
rewinds to the beginning of the track and
plays it again.
To cancel this mode, press (2) again.
Track number
CD Player
Listening to a CD
Simply insert the CD.
Playback starts automatically.
If a CD is already inserted, press (CD/MD)
repeatedly until "CD" appears.
To
Press
Stop playback
6
or (OFF)
Eject the CD
6
Notes
· If you cannot insert a CD when the POWER SELECT
switch is set to B position, try turning on the power to
the radio or cassette first.
· If you leave the disc in the insertion door for more than
15 seconds after pressing 6, the disc will reinsert
automatically to protect the disc.
Changing the displayed items
Each time you press (DSPL), the item changes
as follows:
Track number ~ Clock