1
SERVICE MANUAL
US Model
Canadian Model
AEP Model
UK Model
E Model
Australian Model
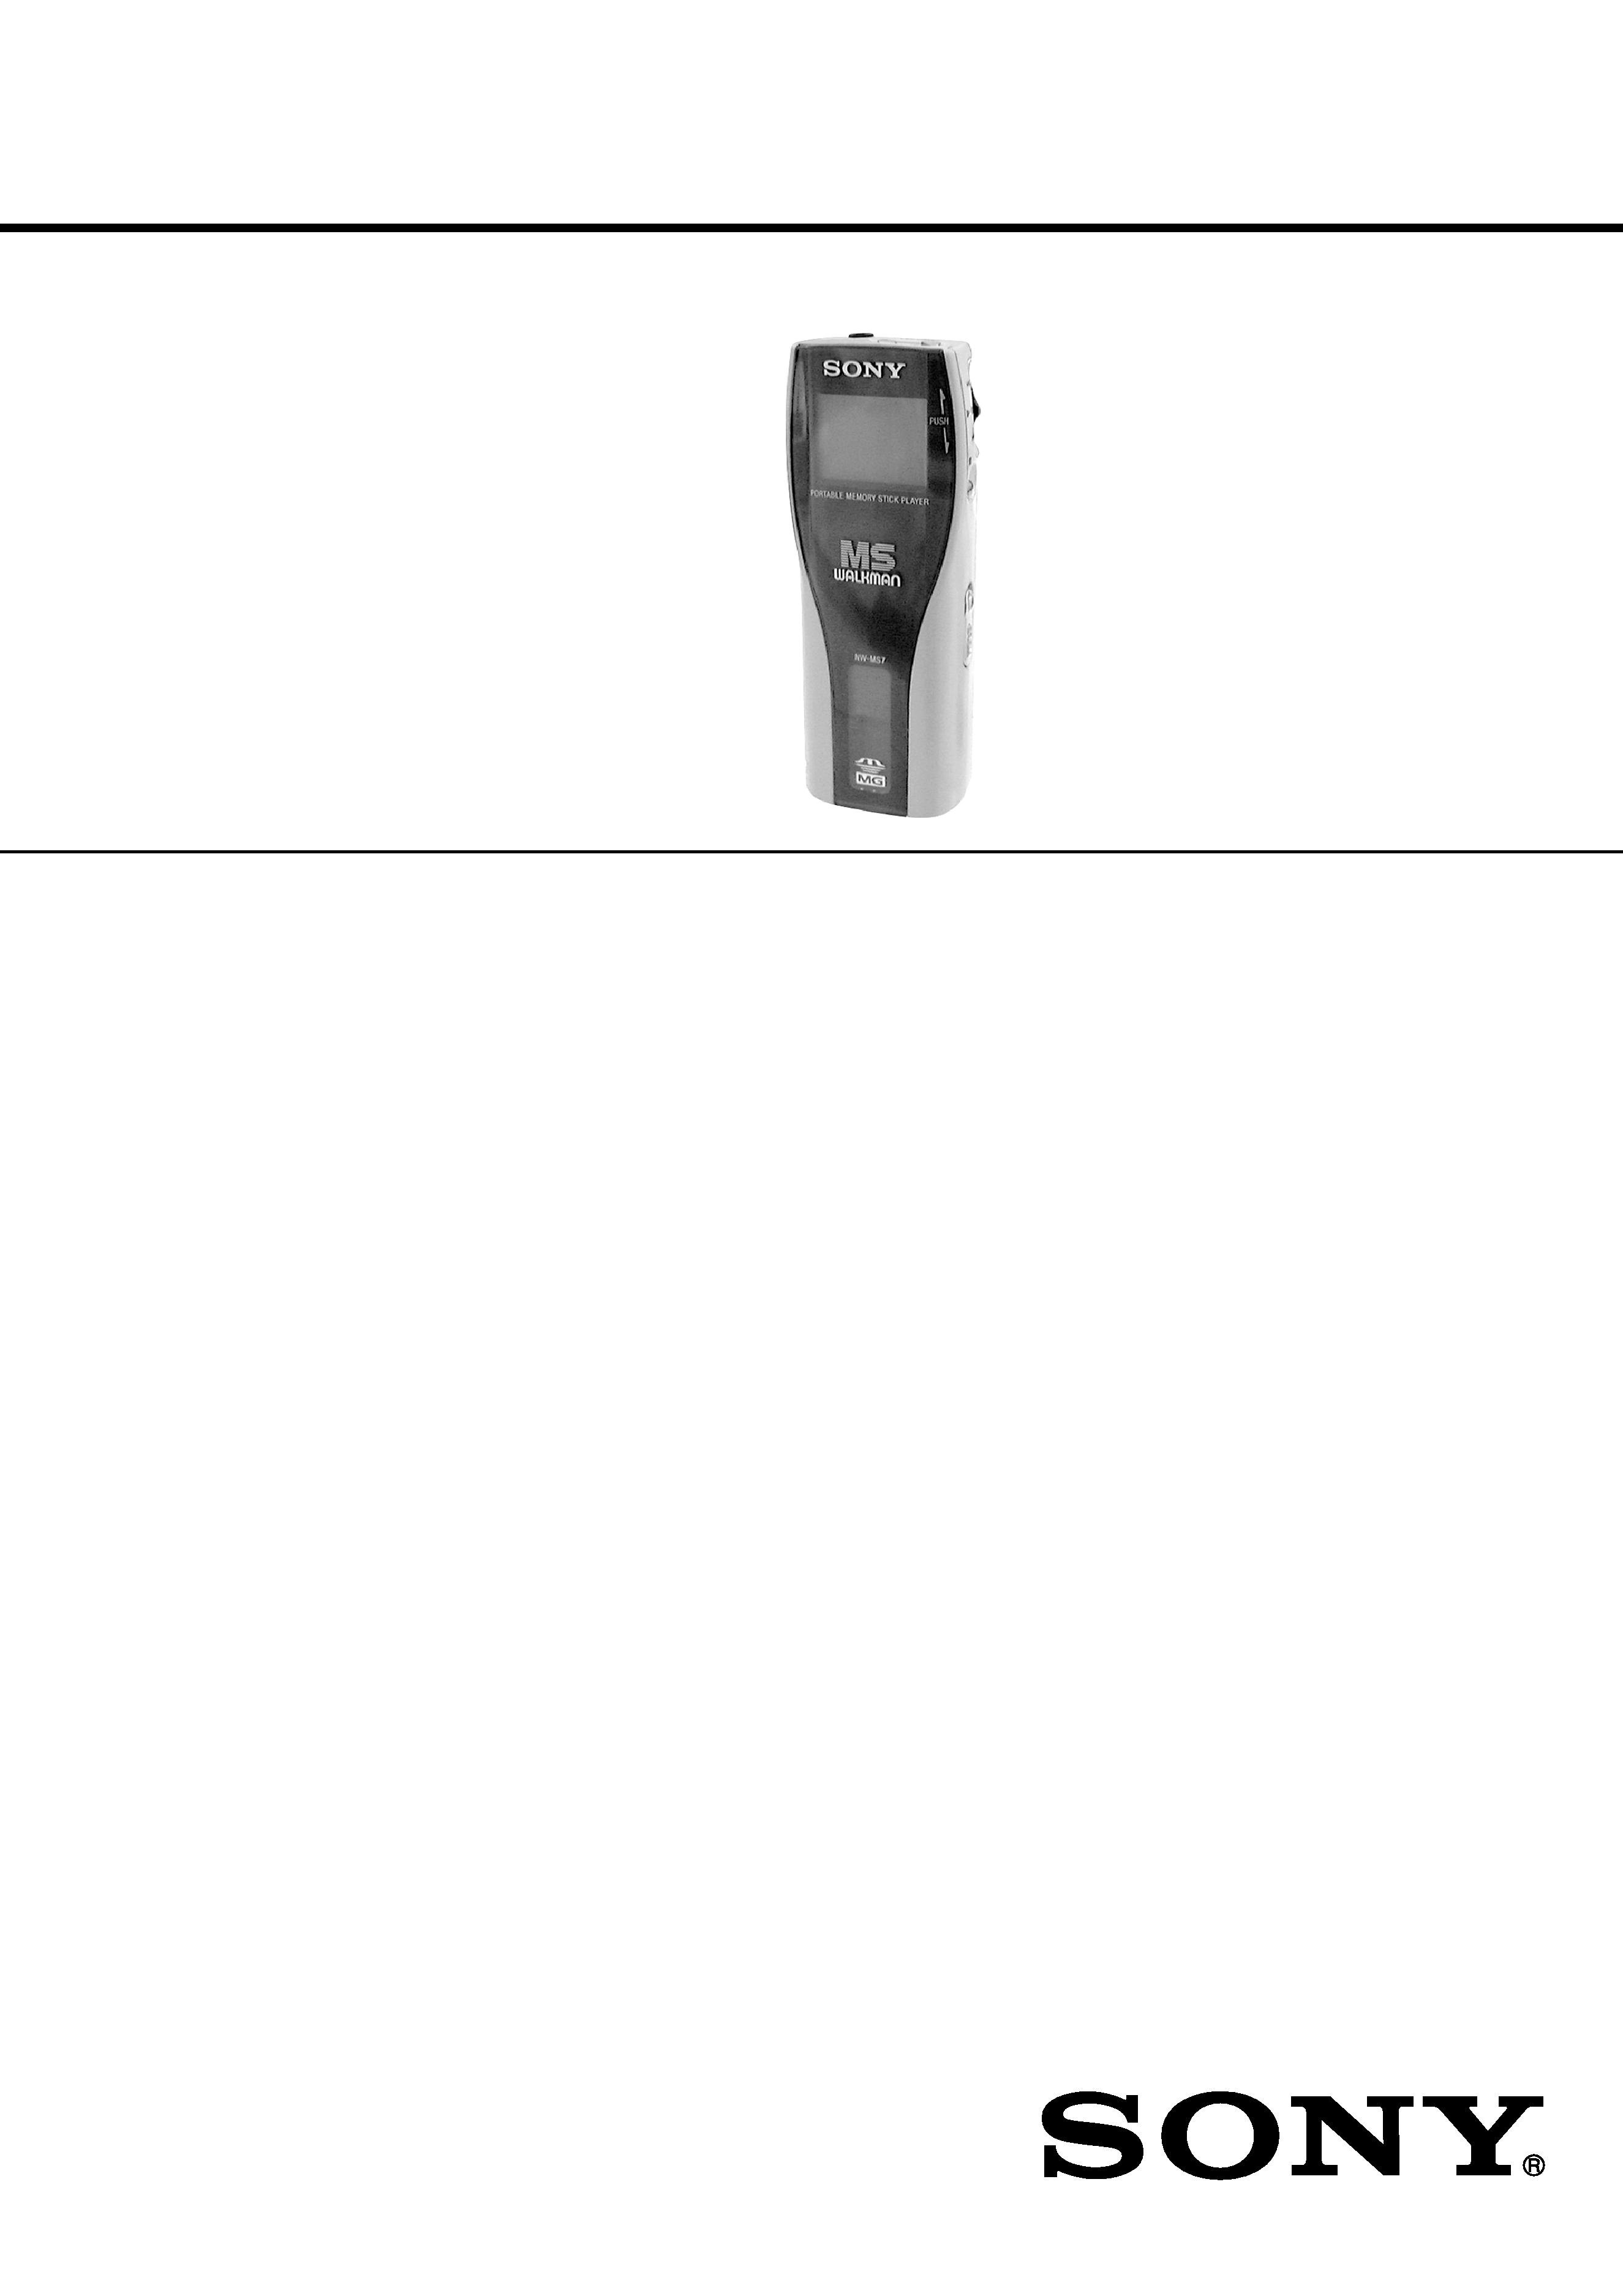
NW-MS7
PORTABLE MEMORY STICK PLAYER
Recording time
About 60 min. (132 kbps)
About 80 min. (105 kbps)
About 120 min. (66 kbps)
Sampling frequency response
44.1 kHz
Recording format
ATRAC3
Frequency response
20 to 20,000 Hz (single signal measurement)
Output
Headphone: stereo mini-jack
Signal-to-noise ratio (S/N)
More than 80 dB (excluding 66 kbps)
Dynamic range
More than 85 dB (excluding 66 kbps)
Operating temperature
5°C to 35°C (41°F to 95°F)
Power source
DC IN 3.7 V (internal Lithium-ion battery)
DC IN 5.5 V (supplied AC power adaptor)
Battery life
About 4 hours
SPECIFICATIONS
Dimensions (approx.)
37
× 96.3 × 19.2 mm
(1 1/2
× 3 7/8 × 25/32 inches)
(w/h/d, projecting parts not included)
Mass (approx.)
70 g (2.5 oz) (internal battery and a
"Memory Stick" included)
Supplied accessories
64 MB "MG Memory Stick" (MSG-64A)
AC power adaptor (AC-NW55NA)
DC/USB adaptor
Headphone
Headphone extension cord
USB cable
CD-ROM
Strap (US model)
Carrying pouch (except US model)
Instruction manual
Design and specifications are subject to change without
notice.
Ver 1.4 2001. 03
Sony Corporation
Audio Entertainment Group
General Engineering Dept.
9-927-626-13
2001C0400-1
© 2001. 3

2
TABLE OF CONTENTS
1. GENERAL
Looking at the controls ............................................................ 3
Installing the OpenMG Jukebox software ............................... 4
Transferring music data from the computer to the
Memory Stick Walkman .......................................................... 4
Listening to music with the Memory Stick Walkman ............. 5
Playing in Various Modes ........................................................ 5
Changing the Display Mode .................................................... 6
Locking the Controls (HOLD) ................................................ 6
Changing the Settings of Memory Stick Walkman ................. 6
Names and Functions of the OpenMG Jukebox Window ....... 7
2. DISASSEMBLY
2-1. Lid, Battery Case ................................................................. 8
2-2. Lid Assy (Service), Upper ................................................... 9
2-3. Main Board ....................................................................... 10
2-4. LCD Block ........................................................................ 11
2-5. HP Board, CN Board ........................................................ 11
3. TEST MODE
3-1. General Information .......................................................... 12
3-2. Tools .................................................................................. 12
3-3. Setting the TEST MODE .................................................. 12
3-4. Releasing the TEST MODE .............................................. 12
3-5. Operations in the TEST MODE ........................................ 12
3-6. Creating the Memory Stick for Operational Check .......... 14
4. DIAGRAMS
4-1. IC Pin Description ............................................................. 16
4-2. Block Diagram Audio Section (1/2) ............................. 19
4-3. Block Diagram Audio Section (2/2) ............................. 21
4-4. Block Diagram Power Supply Section .......................... 23
4-5. Printed Wiring Board Main Board ................................ 25
4-6. Schematic Diagram Main Board (1/4) .......................... 29
4-7. Schematic Diagram Main Board (2/4) .......................... 31
4-8. Schematic Diagram Main Board (3/4) .......................... 33
4-9. Schematic Diagram Main Board (4/4) .......................... 35
4-10. Printed Wiring Boards CN Board, HP Board ................ 37
4-11. Schematic Diagrams CN Board, HP Board .................. 39
4-12. IC Block Diagrams ............................................................ 41
5. EXPLODED VIEWS ....................................................... 45
6. ELECTRICAL PARTS LIST ........................................ 46
SAFETY-RELATED COMPONENT WARNING!!
COMPONENTS IDENTIFIED BY MARK 0 OR DOTTED LINE
WITH MARK 0 ON THE SCHEMATIC DIAGRAMS AND IN
THE PARTS LIST ARE CRITICAL TO SAFE OPERATION.
REPLACE THESE COMPONENTS WITH SONY PARTS WHOSE
PART NUMBERS APPEAR AS SHOWN IN THIS MANUAL OR
IN SUPPLEMENTS PUBLISHED BY SONY.
Flexible Circuit Board Repairing
· Keep the temperature of the soldering iron around 270°C during
repairing.
· Do not touch the soldering iron on the same conductor of the
circuit board (within 3 times).
· Be careful not to apply force on the conductor when soldering
or unsoldering.
Notes on Chip Component Replacement
· Never reuse a disconnected chip component.
· Notice that the minus side of a tantalum capacitor may be
damaged by heat.
IC Repairing
· Replacement of HD64F7198RVBP16 (IC701), MG IC ASSY
(IC702) and CXD1858GA (IC703) on main board used in this
set requires a special tool. Therefore, they cannot be replaced.
3
41
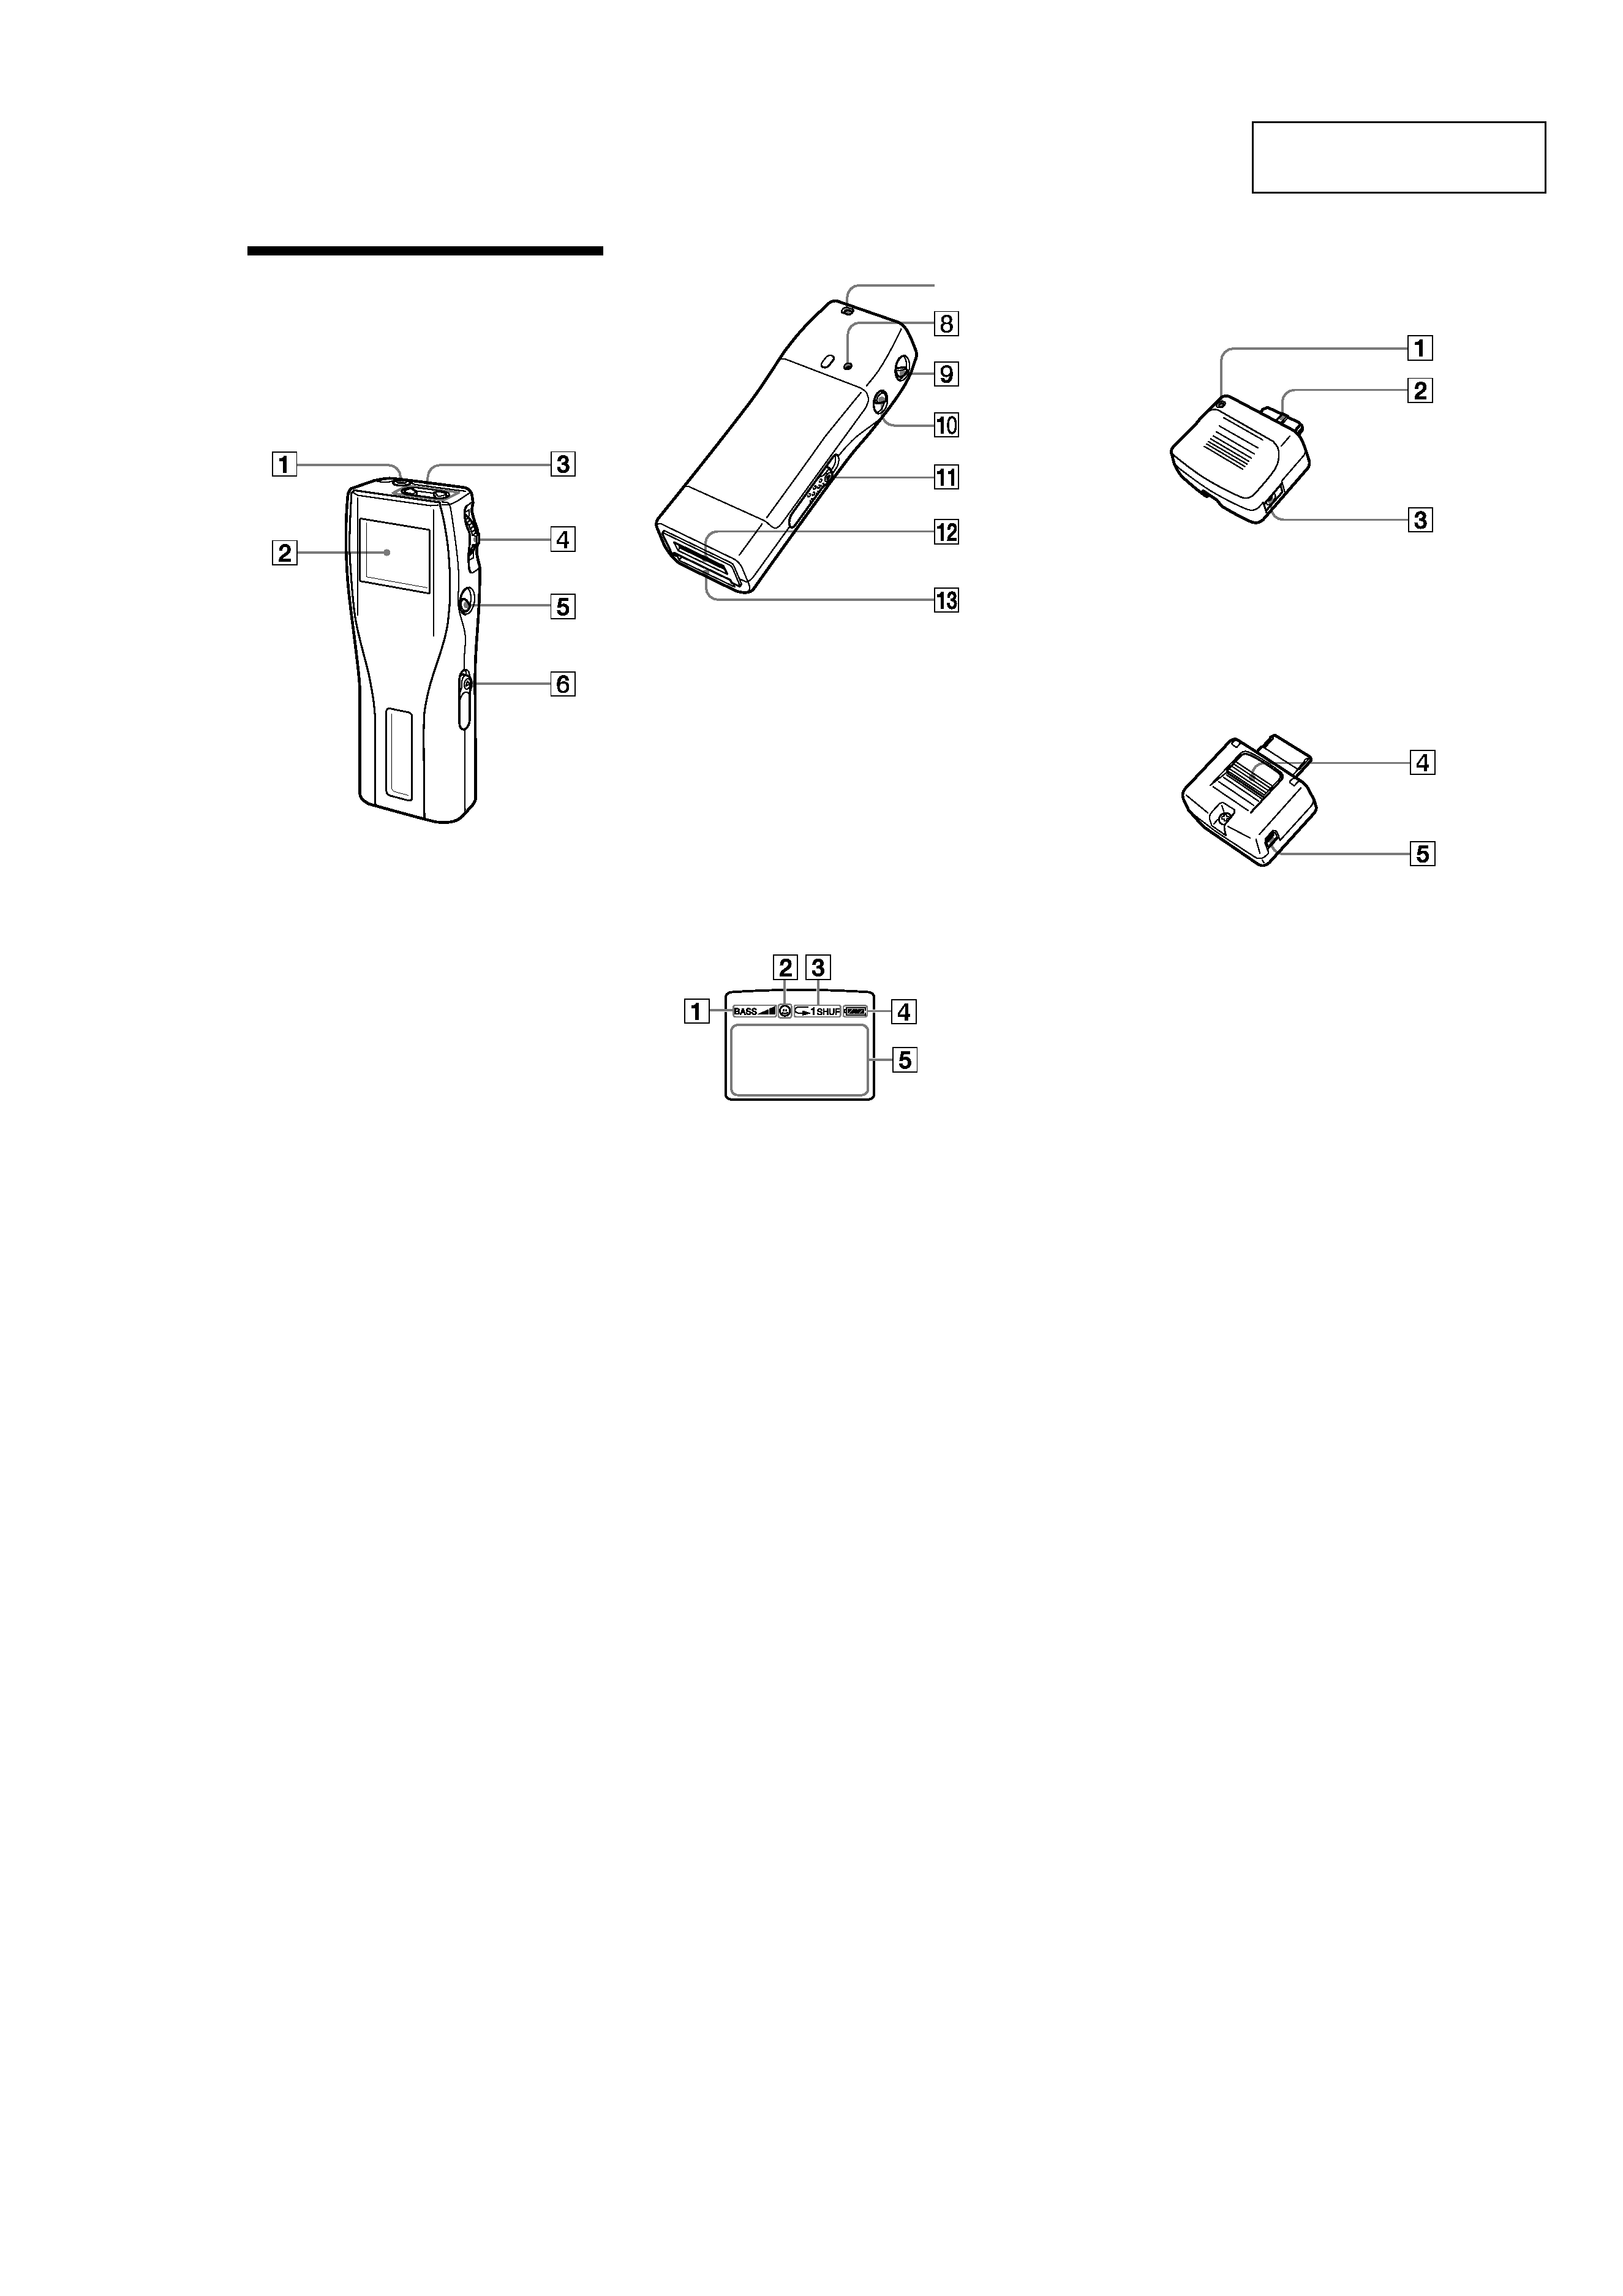
DC/USB adaptor
(front)
1
BATTERY CHARGE lamp (page 10)
2
Connector (page 10)
3
DC IN 5.5 V jack (page 10, 13)
(rear)
4
Release button (page 10)
5
USB jack (for the supplied USB cable)
(page 13)
40
Looking at the
controls
Memory Stick Walkman
(front)
1 i
(Headphones) jack (page 16)
2
Display (page 17, 20)
3
VOLUME +/- button (page 16)
4
Jog lever (page 16 - 25)
5 x
(stop) button (page 16)
6
HOLD switch (page 21)
(rear)
7
Strap hole for attaching the strap
(supplied with U.S.A. model only)
8
RESET button (page 32)
9
MENU button (page 18 - 25)
0
DISPLAY button (page 20)
qa
EJECT lever (page 17)
qs
DC/USB adaptor plug (page 10)
qd
Memory Stick slot (page 13, 16)
Display
1
Mega-bass (page 18)
2
AVLS (page 20)
3
Playback mode (page 19)
4
Battery remain indication (page 10)
5
Information
Track name, track number, counter, menu
items, error messages, etc., are displayed.
(page 17, 20)
7
SECTION 1
GENERAL
This section is extracted
from instruction manual.
4
11
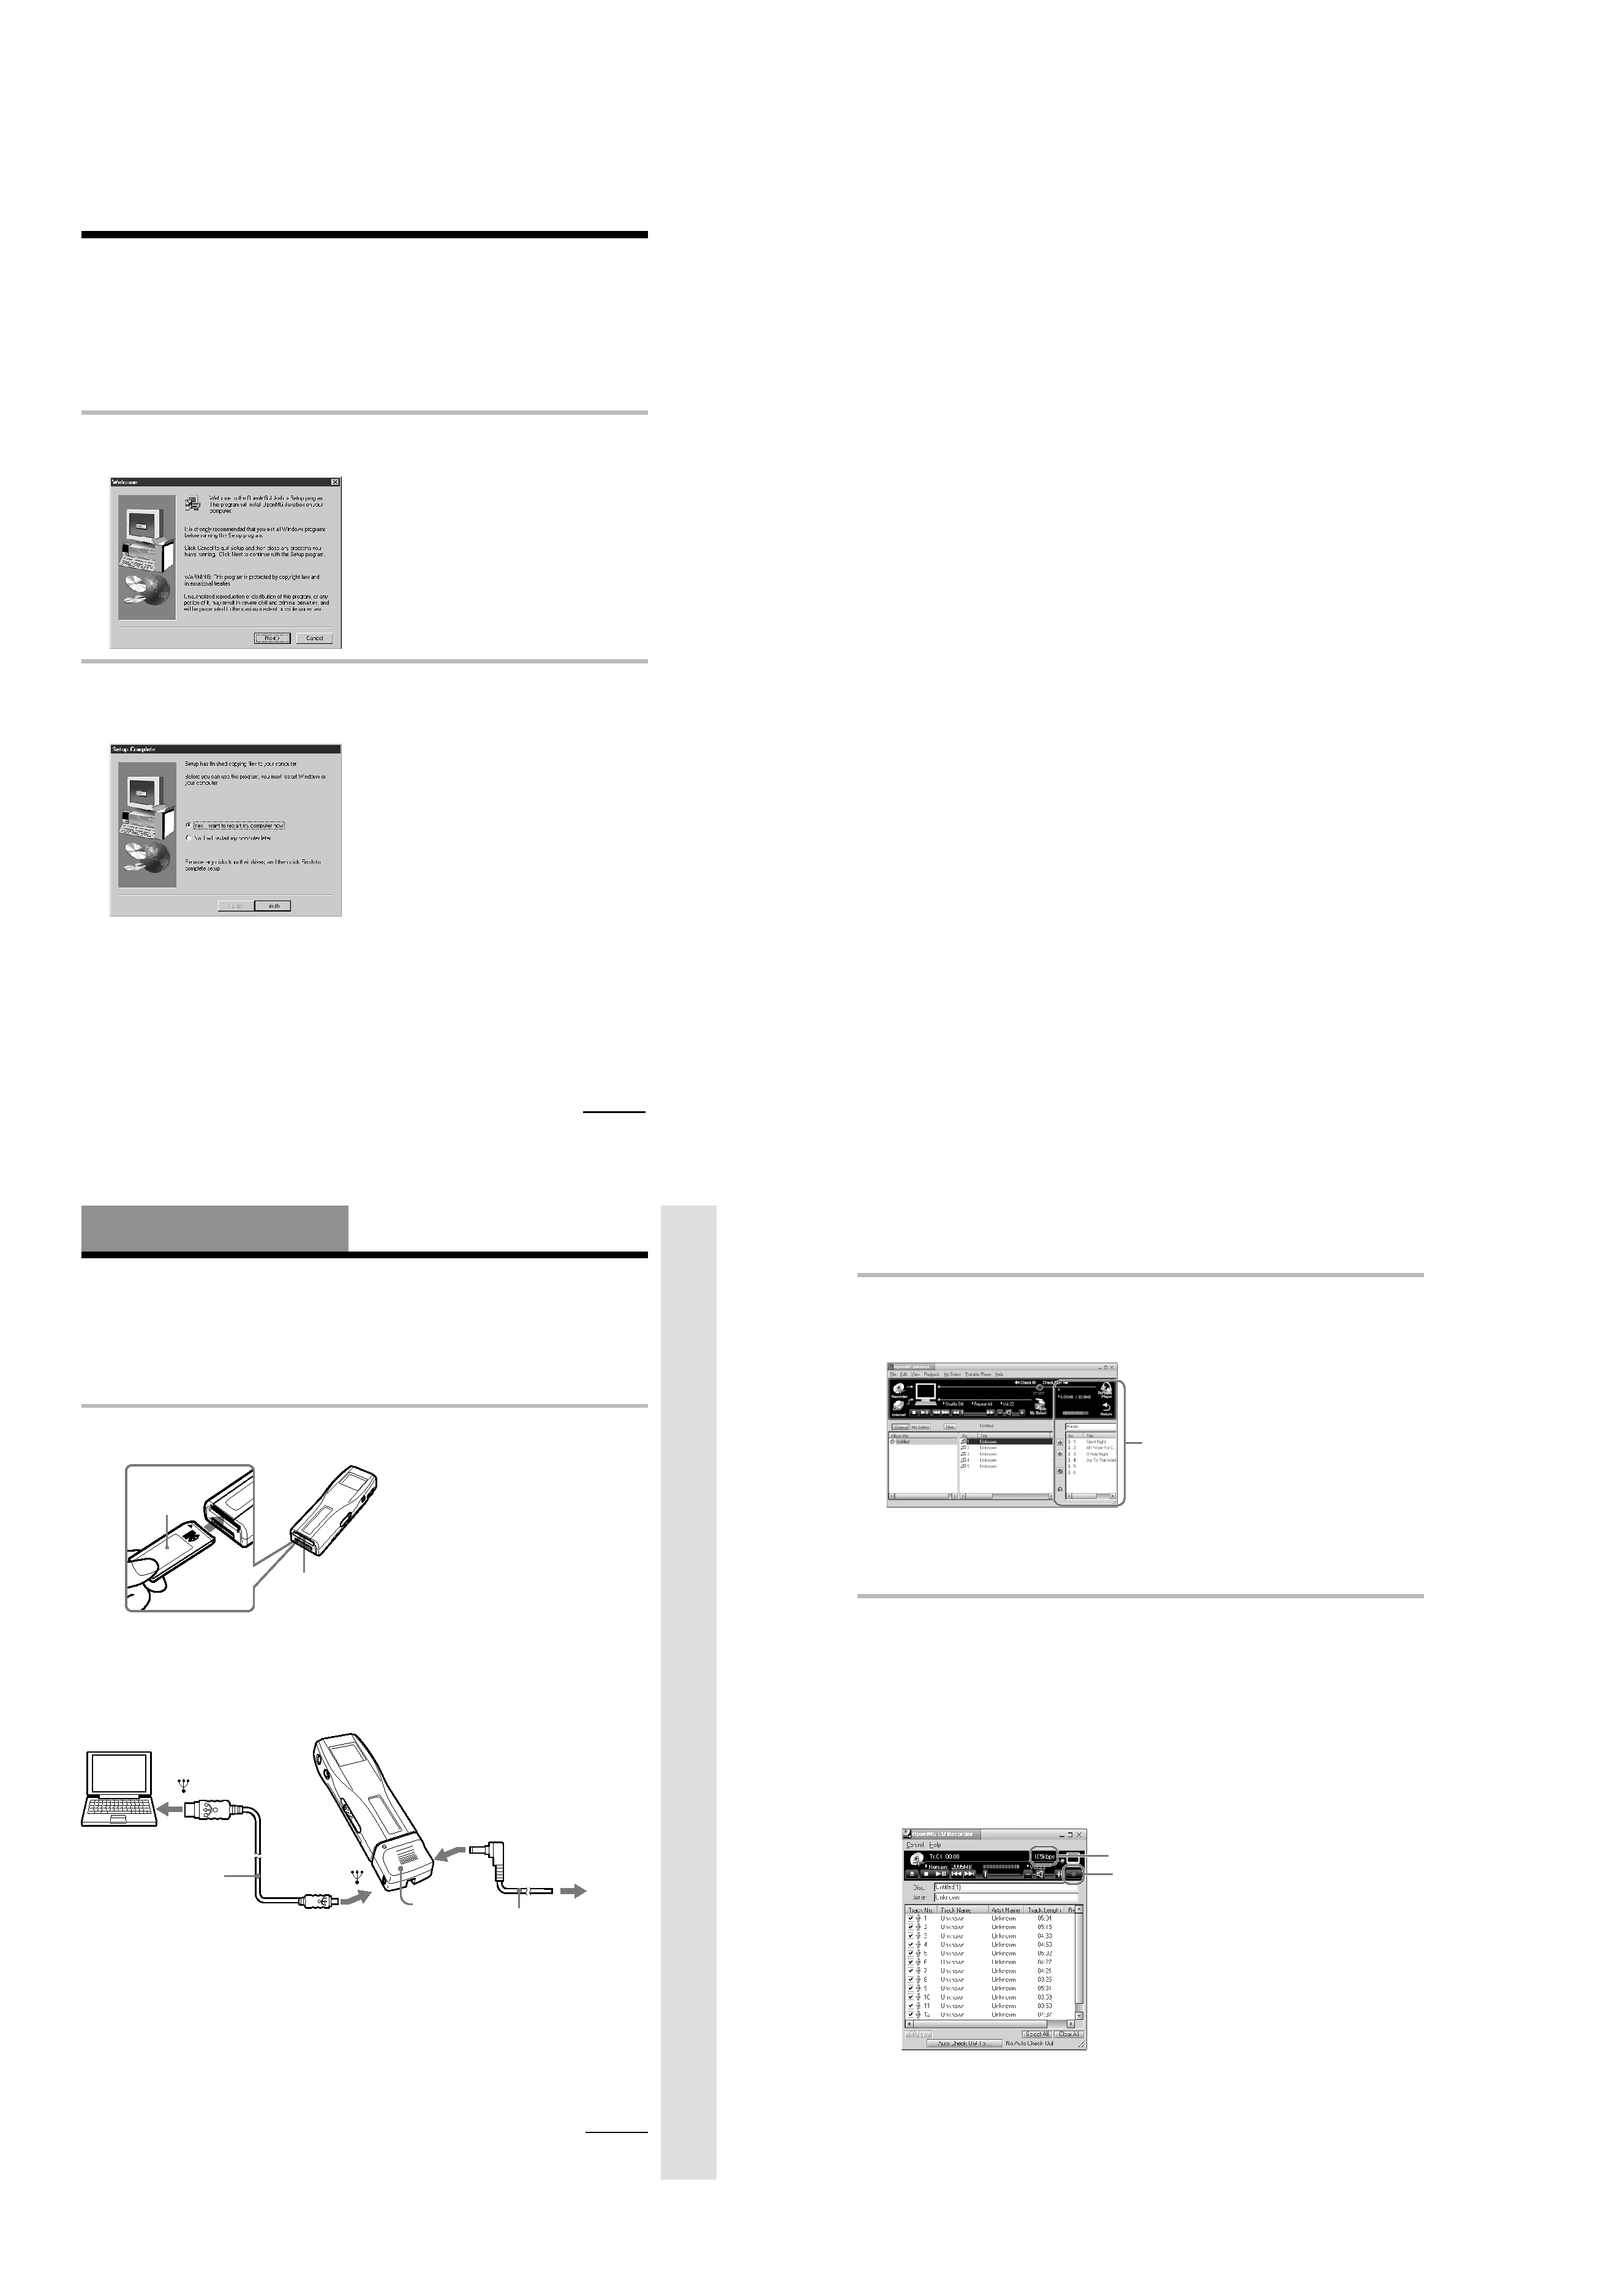
Step 3: Installing the OpenMG Jukebox
software
This section describes how to install the OpenMG Jukebox software to your computer. Before
installation, turn on your computer, and start Windows 98.
Note
Be sure to install the software before connecting with the supplied USB cable. Do not install the software while
connecting the USB cable. Connect the USB cable only after you have restarted the computer after installation.
1 Insert the supplied CD-ROM into the CD-ROM drive of your computer.
The Setup program automatically starts and the following window appears. If the program
does not start, double-click [setup.exe].
2 Follow the instructions in the Installer window to complete the installation.
When the Input window for the CD key appears, input the CD key written on the CD-ROM
case label .
When the installation is finished, the following dialog box appears in the display.
Click Finish to restart the computer.
Note
Do not delete, move or modify the installed folder.
About the "OpenMG Registration" icon on the desktop
When you restart the computer after installing the software, the "OpenMG(NW-MS7)
Registration" icon will appear on the desktop. Make sure that you can connect to Internet, then
double-click this icon to start customer registration for this product (Memory Stick Walkman)
and for the EMD services.
For details on registration, refer to the supplied leaflet.
continued
Basic
Operations
13
Basic Operations
Transferring music data from the
computer to Memory Stick Walkman
This section describes how to record the contents of a compact disc onto the hard drive of your
computer, and then how to transfer it to Memory Stick Walkman (Check-Out).
You can also download by using EMD Services, or convert MP3 files and WAV format audio
files. Please refer to the online help for more information.
1 Connect Memory Stick Walkman to your computer.
1
Insert "MagicGate Memory Stick."
Notes
· Do not connect more than two USB devices to your computer. Normal operation will not be guaranteed.
· Use of this player with a USB hub or a USB extension cable is not guaranteed.
· A malfunction may occur depending on the USB devices connected at any one time.
· Be sure to connect the player to an AC wall outlet when connecting it to your computer.
· When connecting Memory Stick Walkman to your computer for the first time, the USB driver Installer
window appears. Please follow the instructions in the Installer window.
"MagicGate
Memory
Stick"
Memory Stick slot
2
Connect the AC power adaptor.
Connect the supplied AC power adaptor to
an AC wall outlet, then into the DC IN 5.5V
jack on the right side of the DC/USB
adaptor.
3
Connect Memory Stick Walkman to your
computer.
Connect the small connector of the supplied
USB cable into the USB jack on the left side
of the DC/USB adaptor, then the large
connector to the USB jack of your computer.
"PC CONNECT" appears in the display.
USB cable
(supplied)
to
to
DC/USB
adaptor
AC power adaptor
(supplied)
to AC
wall outlet
continued
Notes
· When connecting Memory Stick Walkman
to your computer, make sure the erasure
prevention switch of the "Memory Stick"
(page 30) is OFF .
· Do not start your computer while Memory
Stick Walkman is connected.
to DC IN 5.5V
14
Transferring music data from the computer to
Memory Stick Walkman (continued)
2 Start the OpenMG Jukebox software.
Double click the OpenMG Jukebox icon on the desktop or click [Start][Programs]
[OpenMG Jukebox][OpenMG Jukebox]
The OpenMG Jukebox window appears.
z
If the Start-Up function is ON
The OpenMG Jukebox software automatically starts when Memory Stick Walkman is connected to your
computer. (Please refer to the online help for more information.)
3 Start recording.
You can record music from a compact disc onto the hard drive of your computer, using the
OpenMG CD Recorder software.
1
Insert the compact disc you want to record into the CD-ROM drive of your computer. If
the OpenMG CD Recorder automatically starts, go to 3.
2
Click the [Recorder] button in the OpenMG Jukebox window.
The OpenMG CD Recorder window appears showing the contents of the compact disc.
If the message "Do you want to check your CD Drive to optimize for
recording ?" appears in the display
This message appears when you use the OpenMG CD Recorder for the first time. We recommend you
to choose "Yes." You can optimize the CD drive later, too. Please refer to the online help for more
information. (It may take maximum 20 minutes to optimize the CD drive.)
3
Click z.
The recording begins. When recording is finished, the recorded music will appear in the
OpenMG Jukebox window as a new album.
bit rate
z
button
Portable Player window
(the music files inside the
"Memory Stick" appear)
12
Notes on EMD (Electronic Music Distribution) services
To use OpenMG-enabled EMD services on the Internet, the following conditions are required.
· You need Internet access from your computer. (Sign up an Internet service provider.)
· You need to download several programs (e.g., EMD key installer).
To download these programs, double-click the "OpenMG Registration" icon, then follow the
displayed instructions.
· You need to register yourself with the EMD service provider you are going to use. Consult the
provider for details.
For current OpenMG Jukebox users
1 In order to update your OpenMG Jukebox software, your current software must be registered.
If your software is not registered, please register your current software now. If you are a
registered user, proceed to step 2.
2 Insert the CD-ROM supplied with your new product. This will automatically run. If the
program does not start, double-click [Setup.exe].
Please follow the on-screen instructions to retain all existing music files and update your
software.
3 After your update is completed, restart the computer.
Then double-click the "OpenMG(NW-MS7) Registration" icon on your desktop and follow the
instructions to register.
Notes
· If the OpenMG Jukebox icon is displayed on the task tray, right-click the icon to choose [Remove from the
task tray], then proceed with the installation.
· Be sure to input the CD keys of the CD-ROM you are going to install. If an error message appears in the
display, check if the CD keys are of the correct CD-ROM case label.
5
Basic
Operations
15
To stop the recording
Click x. The recording will be interrupted.
Click z again to continue the recording.
z
To select only certain items
Click the check box of the contents you do not want to record to remove the check, then click z.
z
On the bit rate
You can choose the bit rate among 132kbps, 105kbps, 66kbps. If you choose a higher bit rate, recording
will have better sound quality, however the recordable time will be shorter. If you choose a lower bit
rate, you can record longer, however the sound will not be as good. See below for the recording time
according to the bit rate when using the supplied 64MB "Memory Stick."
· 132kbps: maximum 60 min.
· 105kbps: maximum 80 min.
· 66kbps: maximum 120 min.
(The recording time differs according to the number of songs you are recording.)
To choose the bit rate, click [Control]-[Settings]. The Settings window appears. Click the Recording
Setup tab and choose from the ATARC3 Bit rate list. Please refer to the online help for more
information.
z
To name a new album or song
You can enter the name using the keyboard or bring the name from the Internet database.
Please refer to the online help for more information.
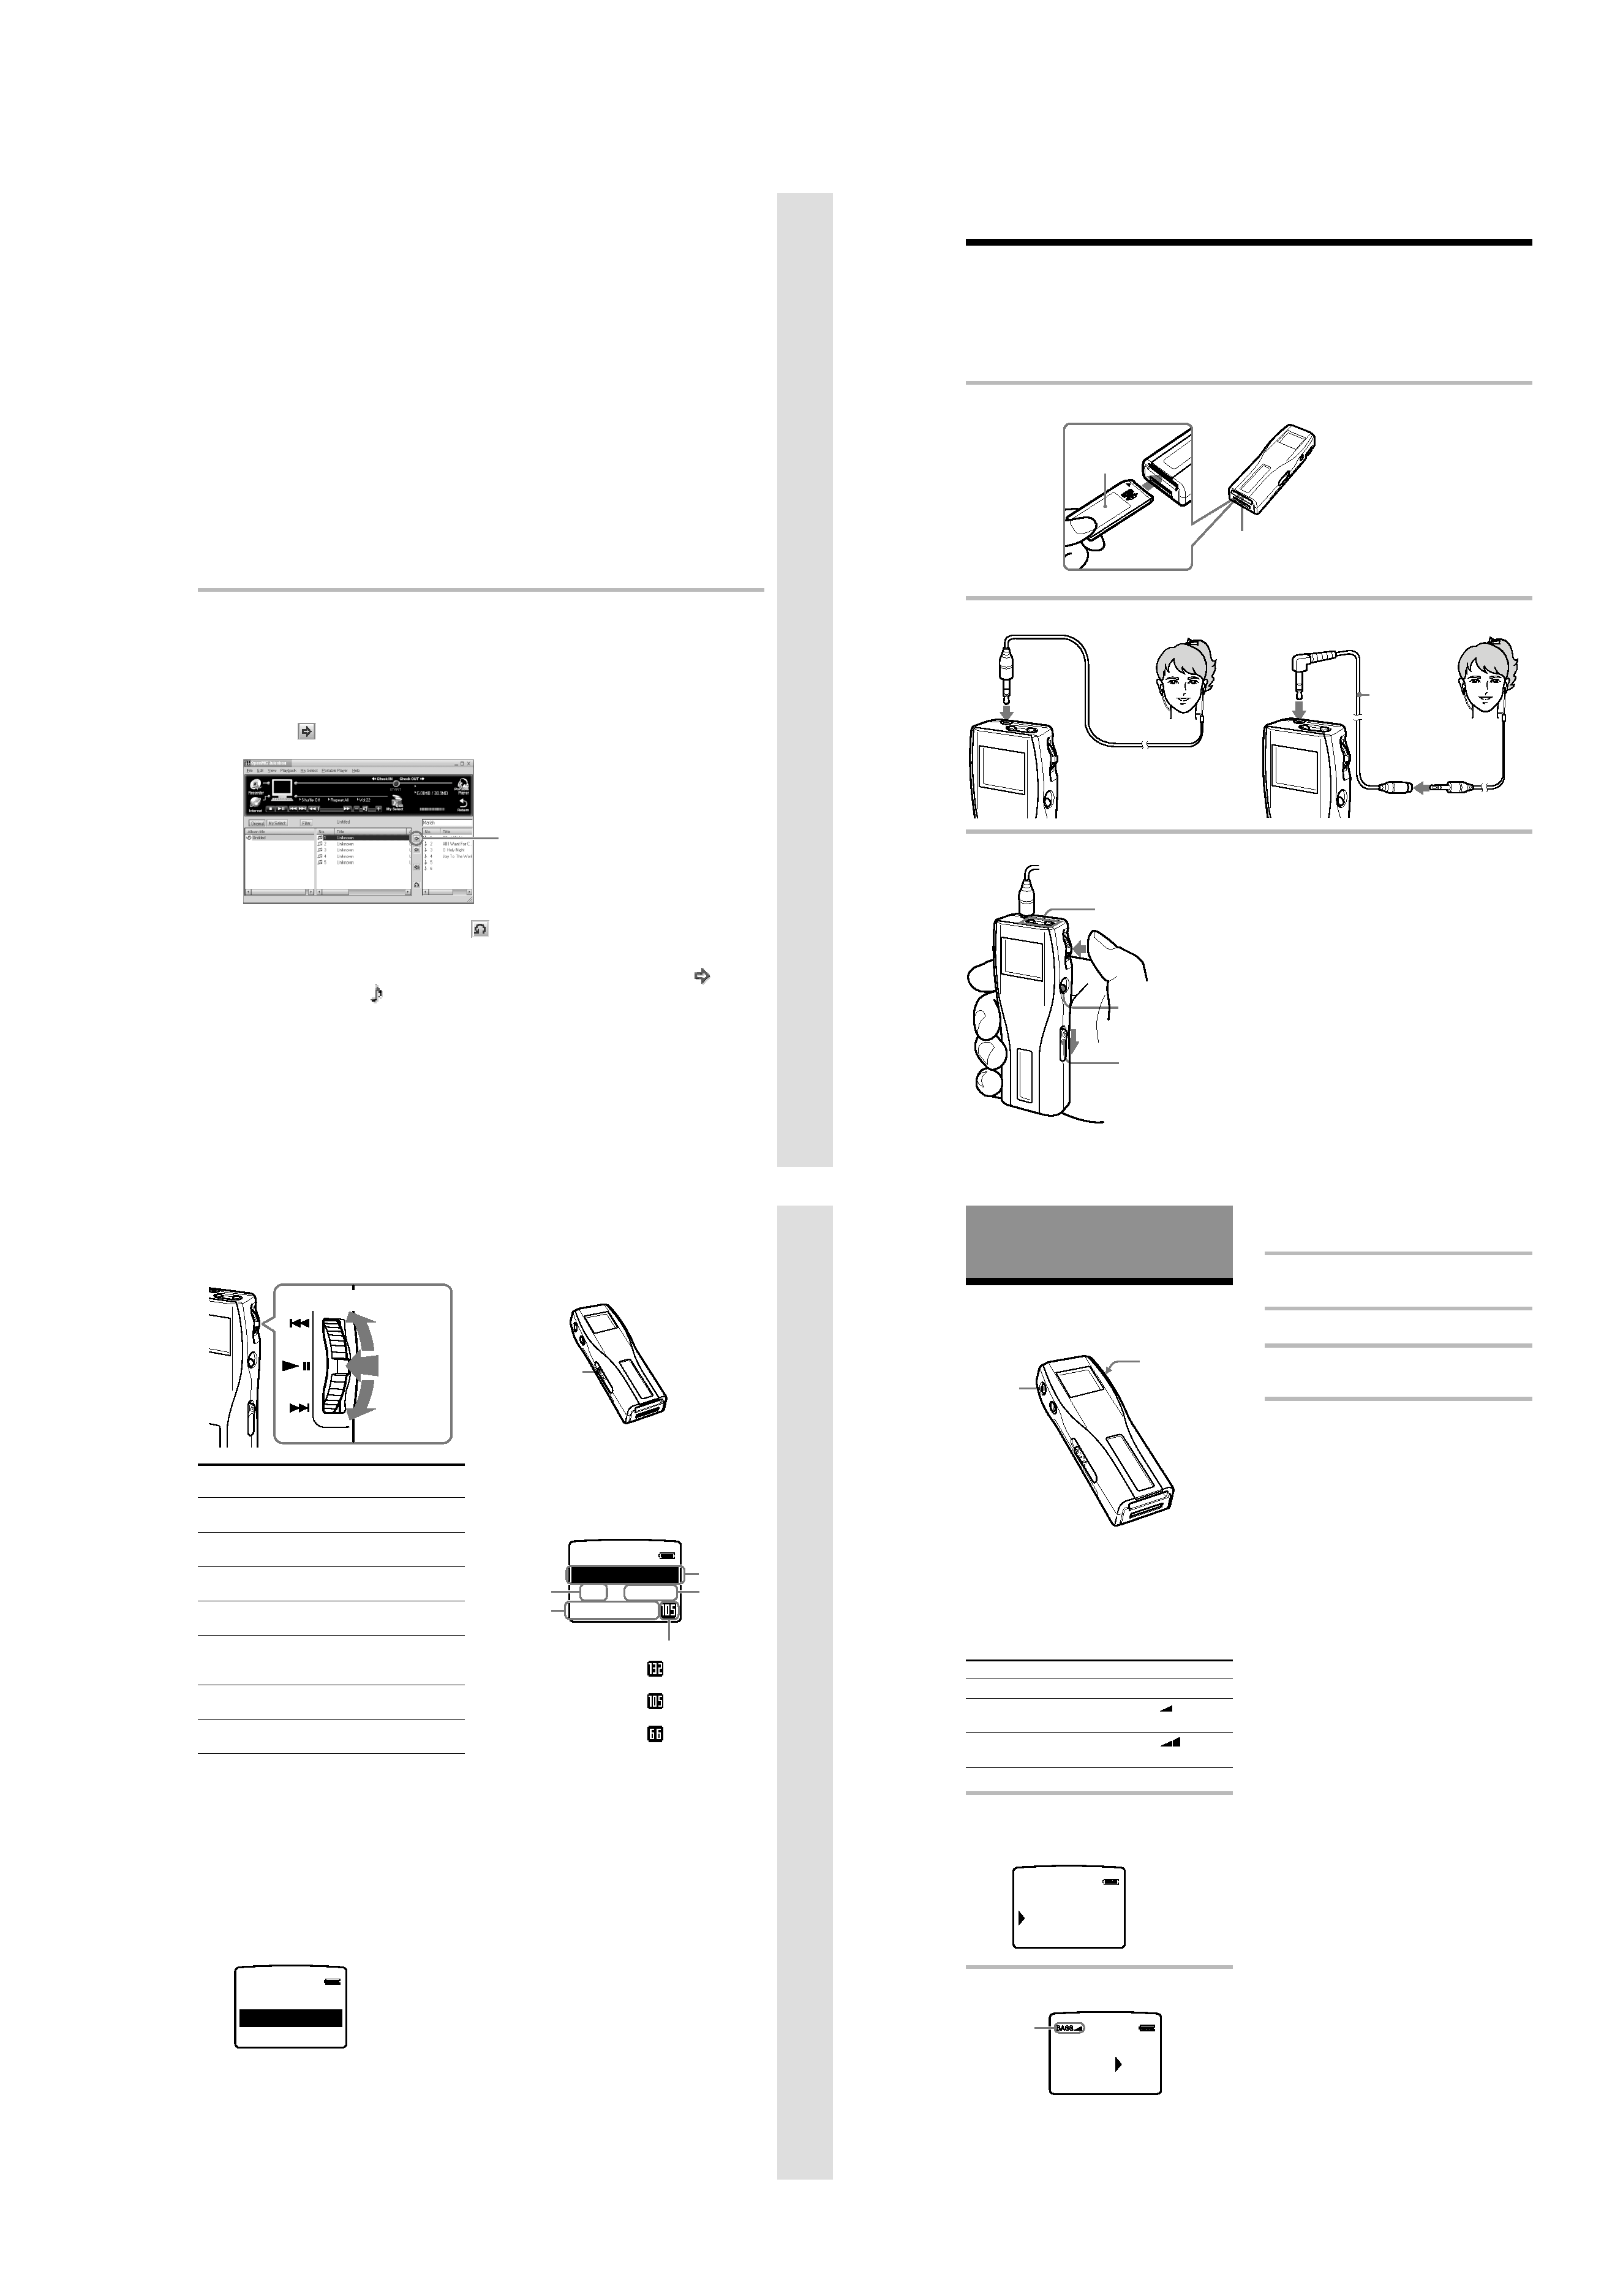
4 Transfer the music file to the "Memory Stick" (Check-Out).
1
Check that the Portable Player window (page 14) is displayed on the right side of the
OpenMG Jukebox window.
2
Click the album which contains the songs you want to Check-Out.
The contents of the album appear.
3
Click the music item you want to Check-Out.
Click the music item while pressing the Ctrl key to choose more than one music item.
4
Click the
button.
The desired music item appears in the Portable Player window as Check-Out candidate.
To cancel the song added as Check-Out candidate, click the respective song in the
Portable Player window, then click the
button.
5
Click the START button.
The desired music item is Checked-Out to Memory Stick Walkman.
During Check-Out the STOP button flashes. When Check-Out is finished, the
indication changes to
.
To quit Check-Out
Click the STOP button.
To Check-In
See page 28.
Click here
16
Listening to music with Memory Stick
Walkman
Please charge the battery before use (see page 10).
Note
When using Memory Stick Walkman, be sure to disonnect it from the computer.
1 Insert a recorded "MagicGate Memory Stick" into Memory Stick Walkman.
2 Connect the headphones.
3 Start playback.
"MagicGate
Memory
Stick"
Memory Stick
slot
to i jack
to i jack
To use the headphones extension cord
Headphones
extension
cord
1
Press the Jog lever.
2
Press the VOLUME
+/- button up or
down to adjust the
volume.
x
button
HOLD switch
Playback stops automatically when the music
reaches the end (only when REPEAT OFF is
selected).
If playback does not start
The HOLD switch may be switched down. Please
release it up (page 21).
To stop playback
Press the x button.
Tip
If you do not operate the player for 10 seconds while
in stop mode, the display automatically turns off.
Basic
Operations
17
On other operations
To
Pause 1)
Go to the beginning
of the actual track
Go to previous
tracks
Go to the beginning
of the next track
Go to the beginning
of the succeding
tracks
Go backward 2)
Go forward 2)
1) If you do not operate the player for 10 seconds
while in pause mode, the player automatically
switches to stop mode.
2) To go backward or forward without listening to
the sound, press upwards or downwards and hold
while in pause mode.
To select by track name
While in stop mode, press the Jog lever up or down
and hold it still. Three track names are displayed.
Press the Jog lever upwards or downwards to select
the track, then press the Jog lever to playback.
Press
downwards
Jog lever
Press
upwards
Press
Operation of
the Jog lever
Press while in playback
mode.
Press upwards once.
Press upwards
continuously.
Press downwards once.
Press downwards
continuously.
While playback, press up
and hold still.
While playback, press
down and hold still.
2
3
BB B
CC C
1TRACKAA A
To take out the "Memory Stick"
Slide the EJECT lever in the direction of the arrow as
shown below.
On the display
Press the DISPLAY button to change the
display mode. See "Changing the display
mode" (page 20) for more information.
* Song title and album title are displayed when
information is recorded on the "Memory Stick."
l
EJECT lever
E
RIT
MY FAVOU
HAP Y B RT
001
02: 01
PI
0
Track
number
Song
title*
Album
title*
Elapsed
time
Bit rate
: songs recorded
at 132kbps
: songs recorded
at 105kbps
: songs recorded
at 66kbps
18
Advanced Operations
(Memory Stick Walkman)
Playing in various
modes
Emphasizing the bass
sound (BASS)
Mega Bass function intensifies low frequency
sound for richer quality audio reproduction.
Menu
OFF
ON-1
ON-2
1 Press the MENU button.
The menu is displayed.
Check that "BASS" is selected.
2 Press the Jog lever.
Jog lever
MENU
button
Sound quality
normal play
Mega Bass
(moderate effect)
Mega Bass
(strong effect)
Display indication
none
BASS
BASS
REPEAT OFF
BASS
OFF
[RETURN]
O
BASS
OFF
N 1
-
ON 2
-
Display
indication
3 Select ON-1 or ON-2 using the Jog
lever.
4 Press the Jog lever.
5 Press the MENU button.
The display returns to normal.
Note
If the sound becomes distorted when emphasizing
the bass, turn down the volume.
To exit from the Menu mode
Select [RETURN] in the menu or press the MENU
button.
To cancel the MEGA BASS effect
Select OFF in step 3.