3-866-796-12(1)
MiniDisc Deck
Operating Instructions
Mode d'emploi
© 1999 Sony Corporation
GB
FR
MDS-PC2
2GB
WARNING
To prevent fire or shock
hazard, do not expose the
unit to rain or moisture.
Do not install the appliance in a confined
space, such as a bookcase or built-in
cabinet.
This appliance is classified as a CLASS 1
LASER product.
The CLASS 1 LASER PRODUCT
MARKING is located on the bottom
exterior.
The following caution label is located
inside the unit.
IN NO EVENT SHALL SELLER BE
LIABLE FOR ANY DIRECT,
INCIDENTAL OR CONSEQUENTIAL
DAMAGES OF ANY NATURE, OR
LOSSES OR EXPENSES RESULTING
FROM ANY DEFECTIVE PRODUCT OR
THE USE OF ANY PRODUCT.
For the customers in the U.S.A.
This symbol is intended to alert the user to
the presence of uninsulated "dangerous
voltage" within the product's enclosure
that may be of sufficient magnitude to
constitute a risk of electric shock to
persons.
This symbol is intended to alert the user to
the presence of important operating and
maintenance (servicing) instructions in the
literature accompanying the appliance.
Declaration of Conformity
Trade name:
SONY
Model No.:
CAV-50C
Responsible Party: Sony Electronics Inc.
Address:
1 Sony Drive, Park
Ridge, NJ. 07656 USA
Telephone No.:
201-930-6970
This device complies with Part 15 of the
FCC Rules. Operation is subject to the
following two conditions: (1) This device
may not cause harmful interference, and
(2) this device must accept any interference
received, including interference that may
cause undesired operation.
INFORMATION
This equipment has been tested and found
to comply with the limits for a Class B
digital device, pursuant to Part 15 of the
FCC Rules. These limits are designed to
provide reasonable protection against
harmful interference in a residential
installation. This equipment generates,
uses, and can radiate radio frequency
energy and, if not installed and used in
accordance with the instructions, may
cause harmful interference to radio
communications. However, there is no
guarantee that interference will not occur
in a particular installation. If this
equipment does cause harmful
interference to radio or television
reception, which can be determined by
turning the equipment off and on, the user
is encouraged to try to correct the
interference by one or more of the
following measures:
· Reorient or relocate the receiving
antenna.
· Increase the separation between the
equipment and receiver.
· Connect the equipment into an outlet on
a circuit different from that to which the
receiver is connected.
· Consult the dealer or an experienced
radio/TV technician for help.
CAUTION
You are cautioned that any changes or
modification not expressly approved in
this manual could void your authority to
operate this equipment.
Owner's Record
The model and serial numbers are located
on the bottom of the unit. Record the
serial number in the space provided below.
Refer to them whenever you call upon
your Sony dealer regarding this product.
Model No. MDS-PC2
Serial No.
For the customers in Canada
CAUTION
TO PREVENT ELECTRIC SHOCK, DO
NOT USE THIS POLARIZED AC PLUG
WITH AN EXTENSION CORD,
RECEPTACLE OR OTHER OUTLET
UNLESS THE BLADES CAN BE FULLY
INSERTED TO PREVENT BLADE
EXPOSURE.
Welcome!
Thank you for purchasing the Sony
MiniDisc Deck. Before operating the
deck, please read this manual
thoroughly and retain it for future
reference.
About This
Manual
The instructions in this manual are for
the MDS-PC2 MiniDisc Deck.
Conventions
· Controls in these instructions are
those on the supplied remote; these
may, however, be substituted by
controls on the deck that are
similarly named, or, when different,
appear in the instructions within
parentheses.
Example: Press H (or NX on the
deck).
· z indicates hints and tips for
making the task easier.
3GB
TABLE OF CONTENTS
Getting Started
4
Before You Start the Hookup 4
Hooking Up the Audio Components 5
Location and Function of Parts
8
Remote Parts Description 8
Front Panel Parts Description 10
Using the Display 11
Recording on MDs
13
Notes on Recording 13
Recording on an MD 14
Adjusting the Recording Level 16
Recording Tips 16
Marking Track Numbers While Recording
(Track Marking) 18
Starting Recording With Six Seconds of Prestored
Audio Data (Time Machine Recording) 19
Synchro-recording With the Audio Component of
Your Choice (Music Synchro-recording)
19
Synchro-recording With a Sony CD Player
(CD Synchro-recording)
20
Playing MDs
22
Playing an MD 22
Playing a Specific Track 23
Locating a Particular Point in a Track 24
Playing Tracks Repeatedly 25
Playing Tracks in Random Order (Shuffle Play) 26
Creating Your Own Program (Program Play) 26
Tips for Recording From MDs to Tape 28
Editing Recorded MDs
29
Erasing Tracks 30
Dividing Tracks 32
Combining Tracks 33
Moving Tracks 33
Naming Tracks or MDs 34
Undoing the Last Edit 37
Other Functions
38
Fade In and Fade Out Recording 38
Falling Asleep to Music (Sleep Timer) 39
About the CONTROL A1 Control System 39
Additional Information
42
Precautions 42
Handling MDs 43
System Limitations 43
Troubleshooting 44
Specifications 44
Display Messages 45
Edit Menu Table 46
Setup Menu Table 47
Self-Diagnosis Function 47
Index 48
4GB
Before You Start the
Hookup
Checking the supplied accessories
This MD deck comes with the following items:
· Audio connecting cords
(pin-plug
× 2 y pin-plug × 2) (2)
· Optical cable (1)
· Remote commander (remote) RM-D35M (1)
· R6 (size-AA) batteries (2)
· Connector (RS-232C
y monaural mini-jack)* (1)
· Monaural (2P) mini-plug cord
* (1)
· Audio connecting cord
*
(pin-plug
× 2 y stereo mini-plug) (2)
· CD-ROM
* (1)
* Required for operation by personal computer. For details, refer to the
operating instructions supplied with the MD Editor 2 software.
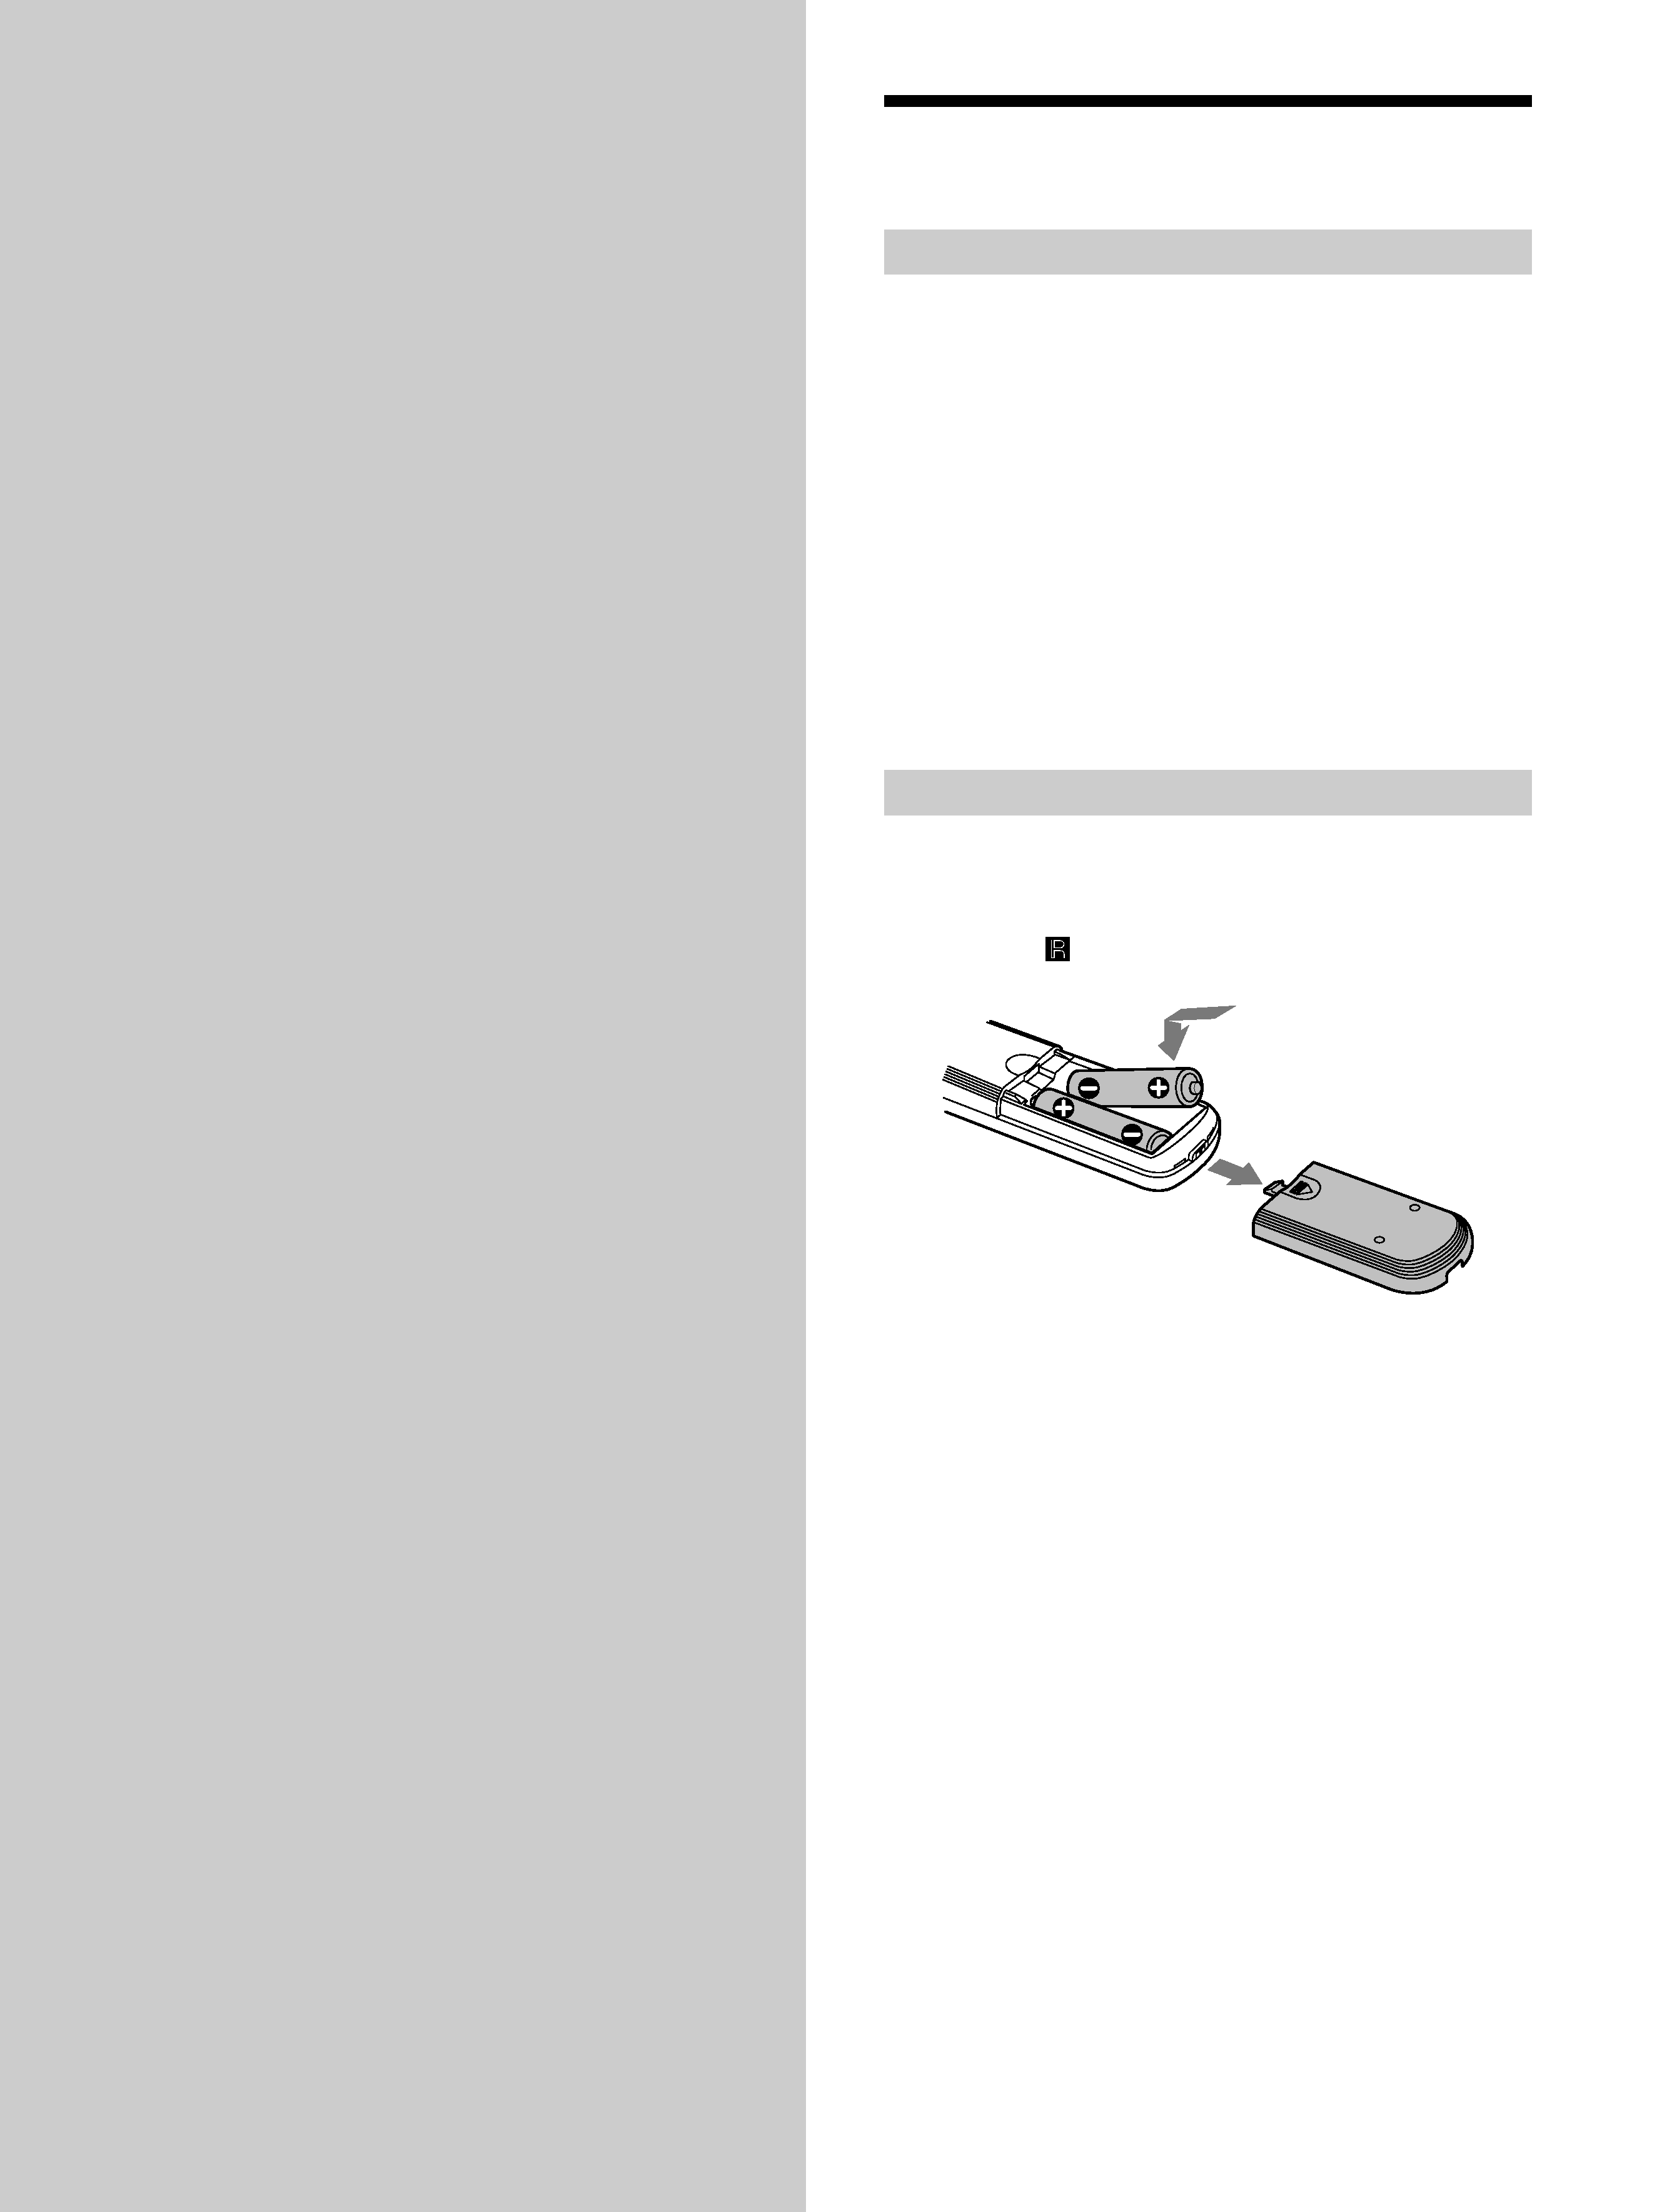
Inserting batteries into the remote
Insert two R6 (size-AA) batteries with the + and
properly oriented to the markings into the battery
compartment. When using the remote, point it at the
remote sensor
on the deck.
z When to replace the batteries
Under normal conditions, the batteries should last for about six
months. When the remote no longer operates the deck, replace
both batteries with new ones.
Notes
· Do not leave the remote in an extremely hot or humid place.
· Do not drop any foreign object into the remote casing,
particularly when replacing the batteries.
· Do not use a new battery with an old one.
· Do not expose the remote sensor to direct sunlight or lighting
apparatus. Doing so may cause a malfunction.
· If you don't use the remote for an extended period of time,
remove the batteries to avoid possible damage from battery
leakage and corrosion.
Getting
Started
This chapter provides information on
the supplied accessories, things you
should keep in mind while hooking
up the system, and how to connect
various audio components to the MD
deck. Be sure to read this chapter
thoroughly before you actually
connect anything to the deck.
5GB
Getting
Started
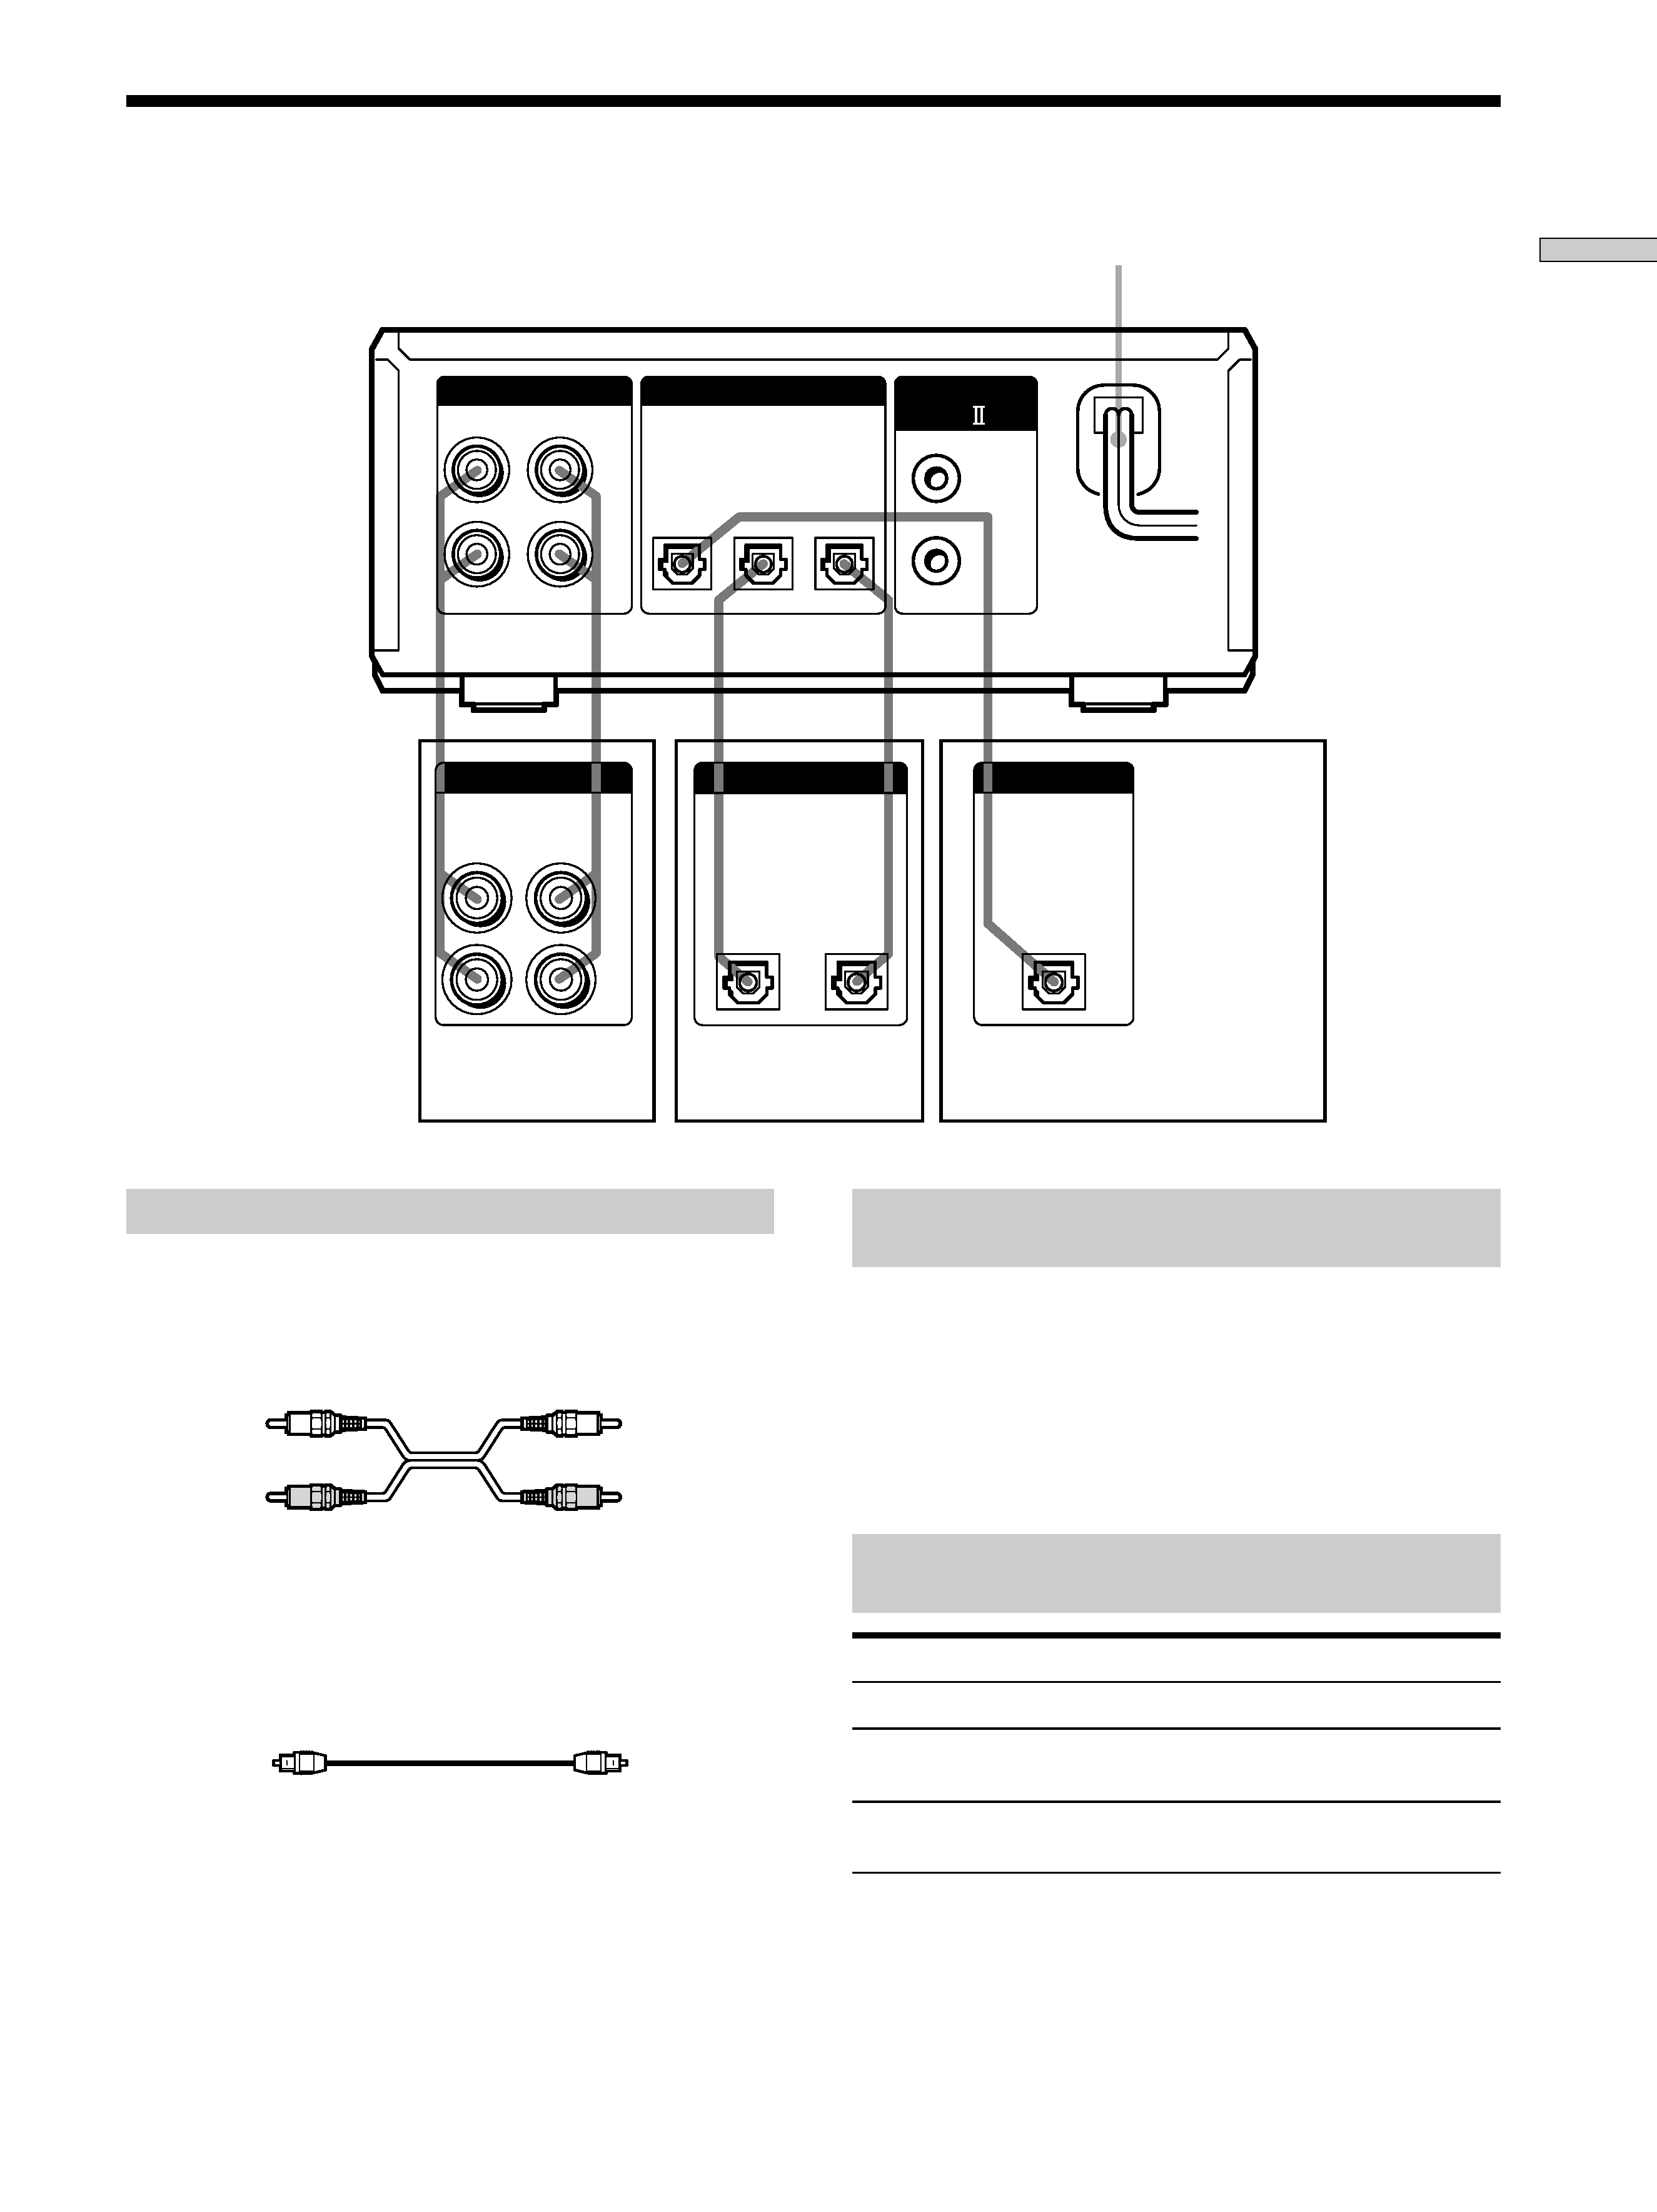
Hooking Up the Audio Components
DIGITAL
(OPTICAL)
OUT
IN
MD
IN
L
R
OUT
DIGITAL
(OPTICAL)
OUT
DIGITAL
CONTROL
A1
(VARIABLE)
IN1
OUT
IN2
LINE (ANALOG)
OUT
(OPTICAL)
L
R
IN
Required cords
Audio connecting cords (2) (supplied)
When connecting an audio connecting cord, be sure to match the
color-coded pins to the appropriate jacks: white (left) to white
and red (right) to red.
Optical cable (2) (only one supplied)
· When connecting an optical cable, take the caps off the
connectors and insert the cable plugs straight in until they click
into place.
· Do not bend or tie the optical cable.
White (L)
White (L)
Red (R)
Red (R)
Things you should keep in mind while
hooking up the system
· Turn off the power to all components before making
any connections.
· Do not connect any AC power cord until all the
connections are completed.
· Be sure the connections are firm to prevent hum and
noise.
Jacks (connectors) for connecting audio
components
Connect
To the
Amplifiers
LINE (ANALOG) IN/OUT jacks
Digital amplifiers
DIGITAL (OPTICAL) IN2/OUT
connectors
Amplifier, etc.
Digital amplifier, etc.
AC power cord
DAT decks, another MD deck,
CD players, or DBS tuners
DIGITAL (OPTICAL) IN1
connector
DAT deck, MD deck, CD player,
DBS tuner, etc.