4-229-130-12(1)
MiniDisc Deck
Operating Instructions ____________________________________________
Mode d'emploi _________________________________________________
GB
FR
©2000 Sony Corporation
MDS-JA333ES
2
GB
WARNING
To prevent fire or shock
hazard, do not expose the unit
to rain or moisture.
This appliance is classified as a CLASS 1
LASER product.
The CLASS 1 LASER PRODUCT
MARKING is located on the rear exterior.
The following caution label is located
inside the unit.
For customers in the U.S.A.
This symbol is intended to alert the user to
the presence of uninsulated "dangerous
voltage" within the product's enclosure
that may be of sufficient magnitude to
constitute a risk of electric shock to
persons.
This symbol is intended to alert the user to
the presence of important operating and
maintenance (servicing) instructions in the
literature accompanying the appliance.
CAUTION
You are cautioned that any changes or
modification not expressly approved in
this manual could void your authority to
operate this equipment.
INFORMATION
This equipment has been tested and found
to comply with the limits for a Class B
digital device, pursuant to Part 15 of the
FCC Rules. These limits are designed to
provide reasonable protection against
harmful interference in a residential
installation. This equipment generates,
uses, and can radiate radio frequency
energy and, if not installed and used in
accordance with the instructions, may
cause harmful interference to radio
communications. However, there is no
guarantee that interference will not occur
in a particular installation. If this
equipment does cause harmful
interference to radio or television
reception, which can be determined by
turning the equipment off and on, the user
is encouraged to try to correct the
interference by one or more of the
following measures:
· Reorient or relocate the receiving
antenna.
· Increase the separation between the
equipment and receiver.
· Connect the equipment into an outlet on
a circuit different from that to which the
receiver is connected.
· Consult the dealer or an experienced
radio/TV technician for help.
Owner's Record
The model and serial numbers are located
on the rear of the unit. Record the serial
number in the space provided below. Refer
to them whenever you call upon your Sony
dealer regarding this product.
Model No. MDS-JA333ES
Serial No.__________
ENERGY STAR® is a U.S. registered
mark.
As an
ENERGY STAR® Partner, Sony
Corporation has determined that this
product meets the
ENERGY STAR®
guidelines for energy efficiency.
For customers in Canada
This Class B digital apparatus complies
With Canadian ICES-003.
CAUTION
TO PREVENT ELECTRIC SHOCK, DO
NOT USE THIS POLARIZED AC PLUG
WITH AN EXTENSION CORD,
RECEPTACLE OR OTHER OUTLET
UNLESS THE BLADES CAN BE
FULLY INSERTED TO PREVENT
BLADE EXPOSURE.
Welcome!
Thank you for purchasing the Sony
MiniDisc Deck. Before operating the
deck, please read this manual
thoroughly and retain it for future
reference.
About this
manual
Conventions
· Controls in these instructions are
those on the deck; these may,
however, be substituted by controls
on the supplied remote that are
similarly named, or, when different,
appear in the instructions within
parentheses.
Example: Turn AMS clockwise (or
press
> repeatedly).
· The following icons are used in this
manual:
IN NO EVENT SHALL SELLER BE
LIABLE FOR ANY DIRECT,
INCIDENTAL OR
CONSEQUENTIAL DAMAGES OF
ANY NATURE, OR LOSSES OR
EXPENSES RESULTING FROM
ANY DEFECTIVE PRODUCT OR
THE USE OF ANY PRODUCT.
Z
Indicates a procedure that requires
use of the remote.
z
Indicates hints and tips for making
the task easier.

3 GB
TABLE OF CONTENTS
Location and Function of
Controls
Front panel description 4
Remote control description 6
Display window description 8
Rear panel description 9
Getting Started
Before you start the hookup 10
Hooking up the audio components 11
Setting the clock 12
Recording to MDs
Recording to an MD 14
Notes on recording 16
Recording for long times 16
Adjusting the recording level 17
Recording tips 18
Marking track numbers while recording (Track
Marking) 19
Starting recording with six seconds of prestored audio
data (Time Machine Recording) 20
Synchro-recording with the audio component of your
choice (Music Synchro-recording) 21
Synchro-recording with a Sony CD player (CD Synchro-
recording) 21
Playing MDs
Playing an MD 23
Playing a specific track 24
Locating a particular point in a track 25
Playing tracks repeatedly (Repeat Play) 26
Playing tracks in random order (Shuffle Play) 27
Creating your own program (Program Play) 27
Tips for recording from MDs to tape 29
Editing Recorded MDs
Before you start editing 30
Erasing tracks (ERASE) 31
Dividing tracks (DIVIDE) 33
Combining tracks (COMBINE) 34
Moving tracks (MOVE) 34
Naming a track or MD (NAME) 35
Undoing the last edit (UNDO) 37
Changing the recorded level after recording
(S.F EDIT) 38
Other Functions
Changing the pitch (Pitch Control Function) 39
Fading in and fading out 40
Falling asleep to music (Sleep Timer) 41
Using a timer 42
Switching the bit length 43
Playing with different tones (Digital Filter) 43
Using the CONTROL A1
control system 44
Additional Information
Precautions 46
Handling MDs 47
System limitations 47
Troubleshooting 48
Self-diagnosis function 49
Display messages 49
Specifications 50
Edit menu table 52
Setup menu table 52
Index 54
GB
4
GB
Front panel description
Location and
Function of
Controls
This chapter describes the location and
function of the various buttons,
controls, and jacks on the deck and the
supplied remote. Further details are
provided on the pages indicated in the
parentheses.
It also describes the information that
appears in the display window.
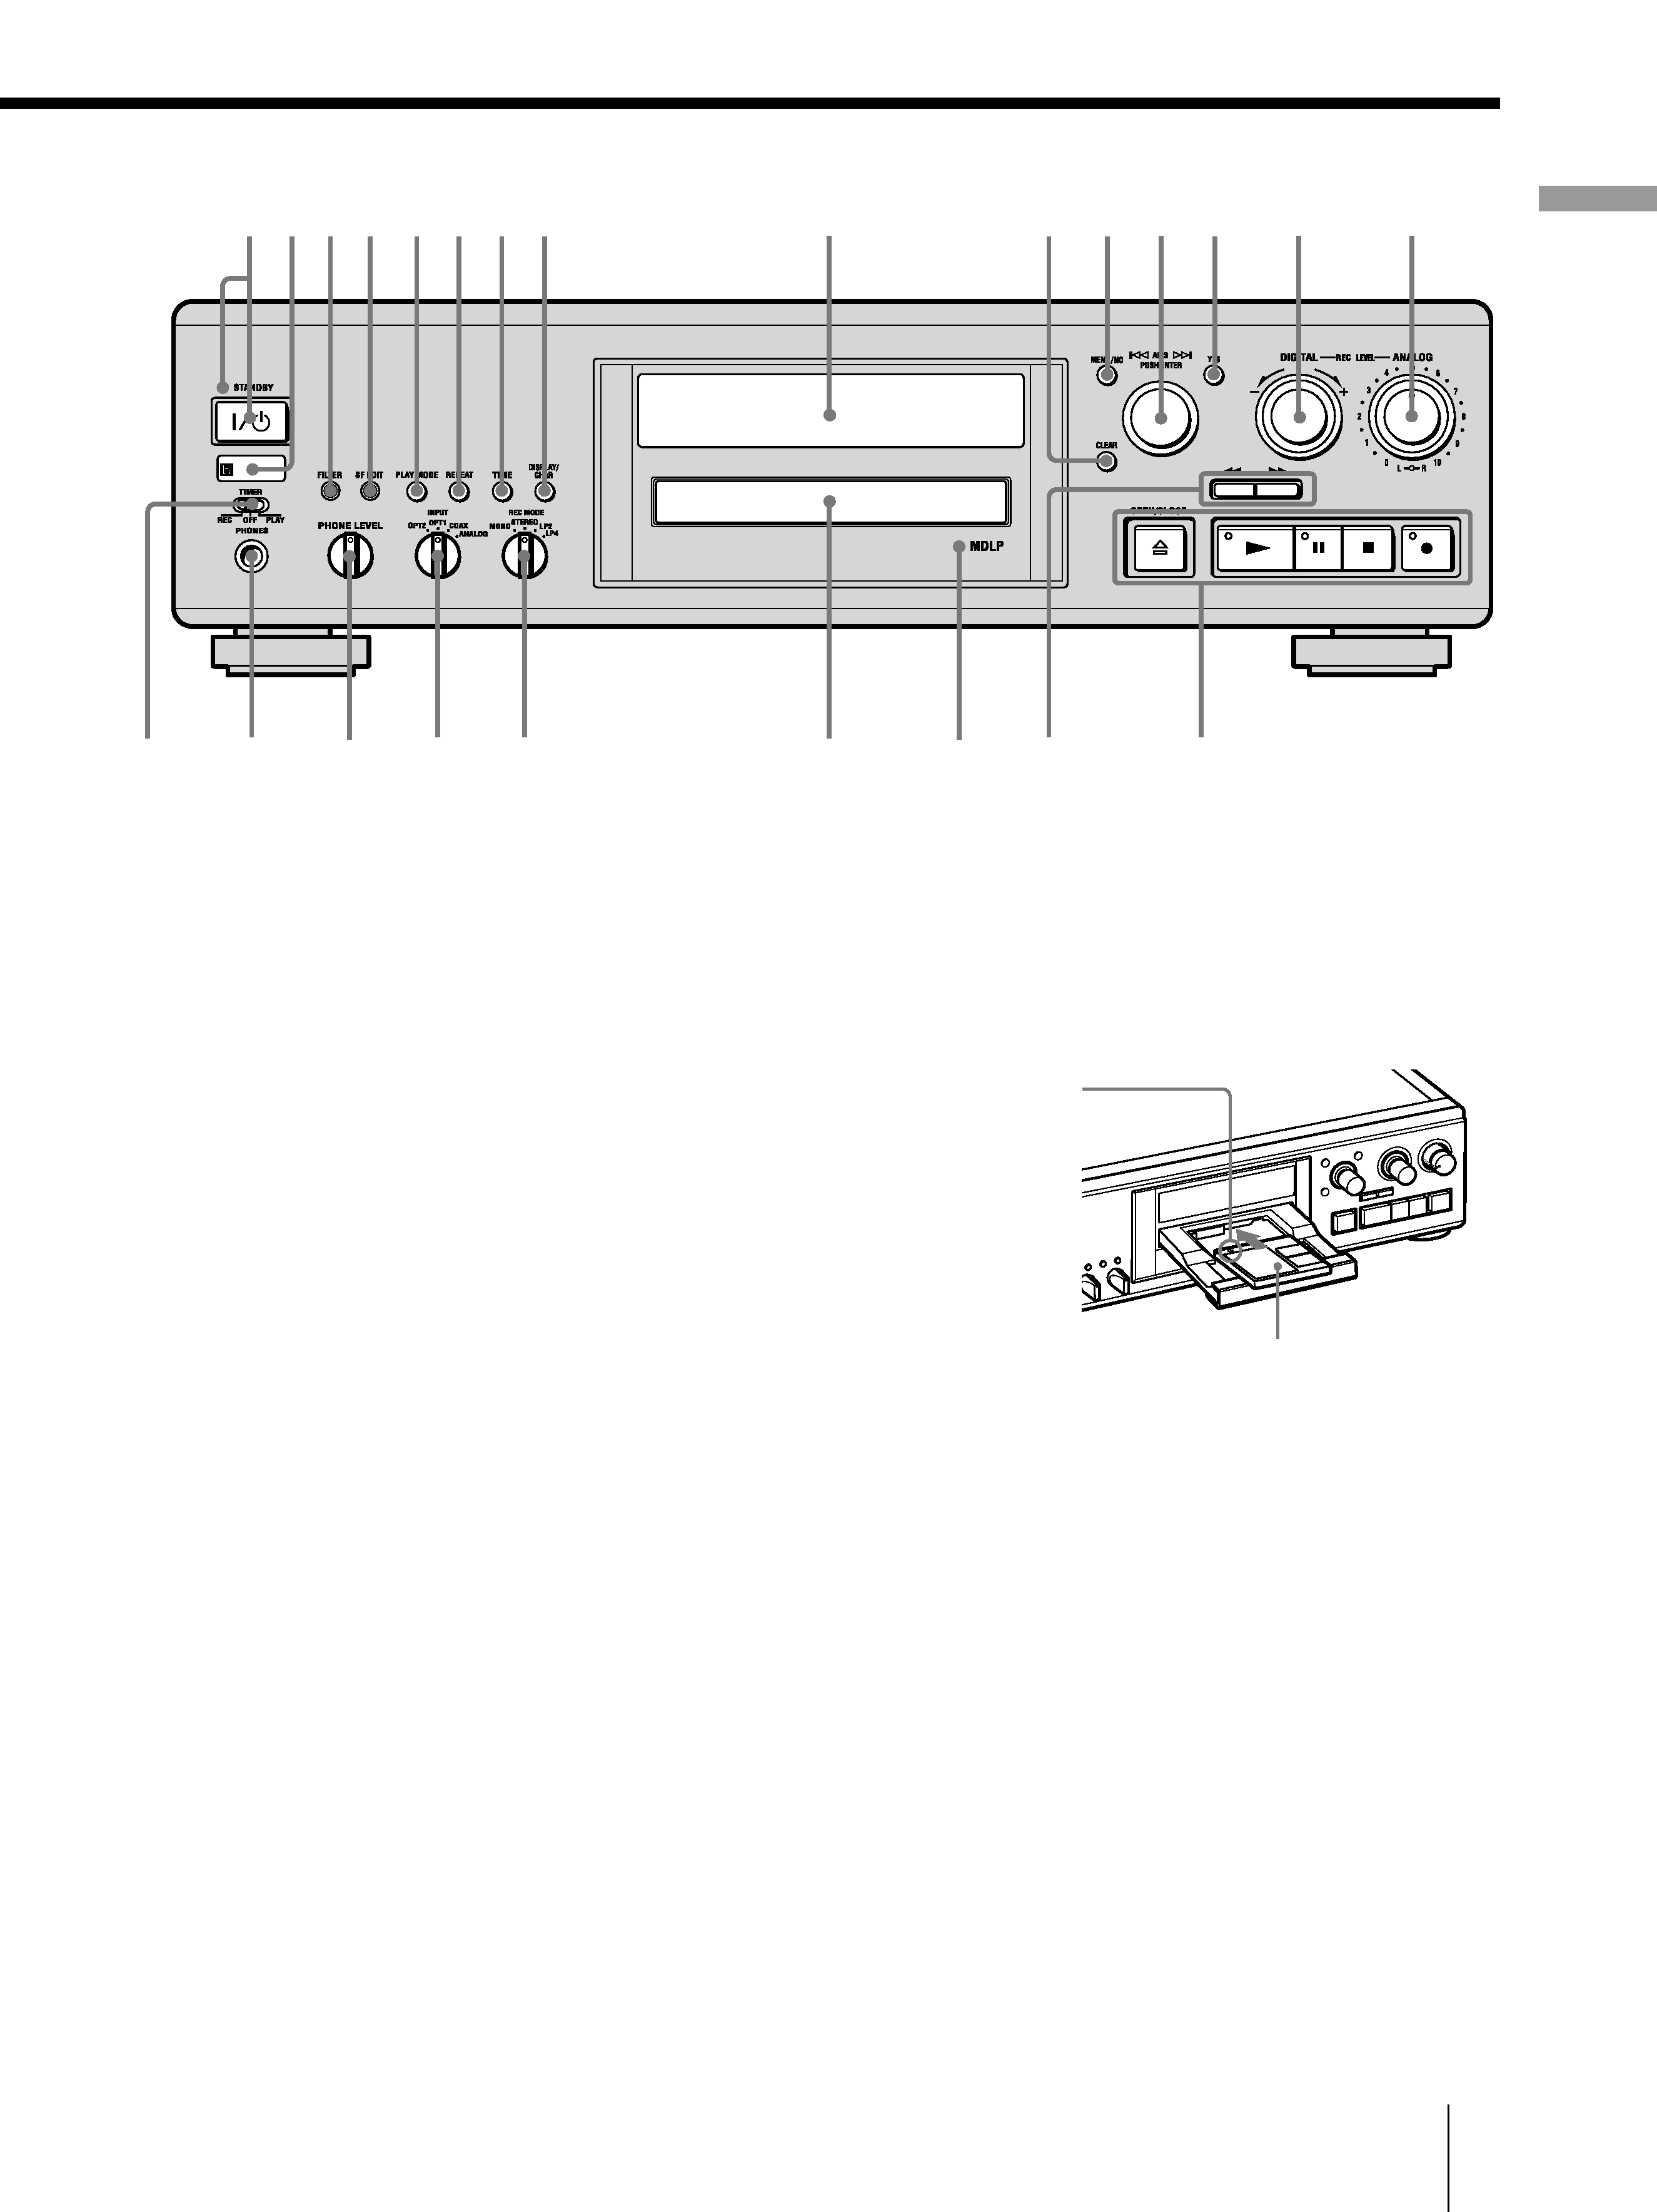
Front panel description
A ?/1 (power) switch/STANDBY indicator (14) (23)
Press to turn on the deck. When you turn on the deck,
the STANDBY indicator turns off. When you press the
switch again, the deck turns off and the indicator lights
up.
B Remote sensor (10)
Point the remote toward this sensor (
) for remote
operations.
C FILTER button (43)
Press to select the type of the digital filter.
D S.F EDIT button (38)
Press to change the recorded level after recording.
E PLAY MODE button (27) (42)
Press to select Shuffle Play or Program Play or resume
normal play.
F REPEAT button (26)
Press to play tracks repeatedly.
G TIME button (18) (22)
Press to display the remaining time.
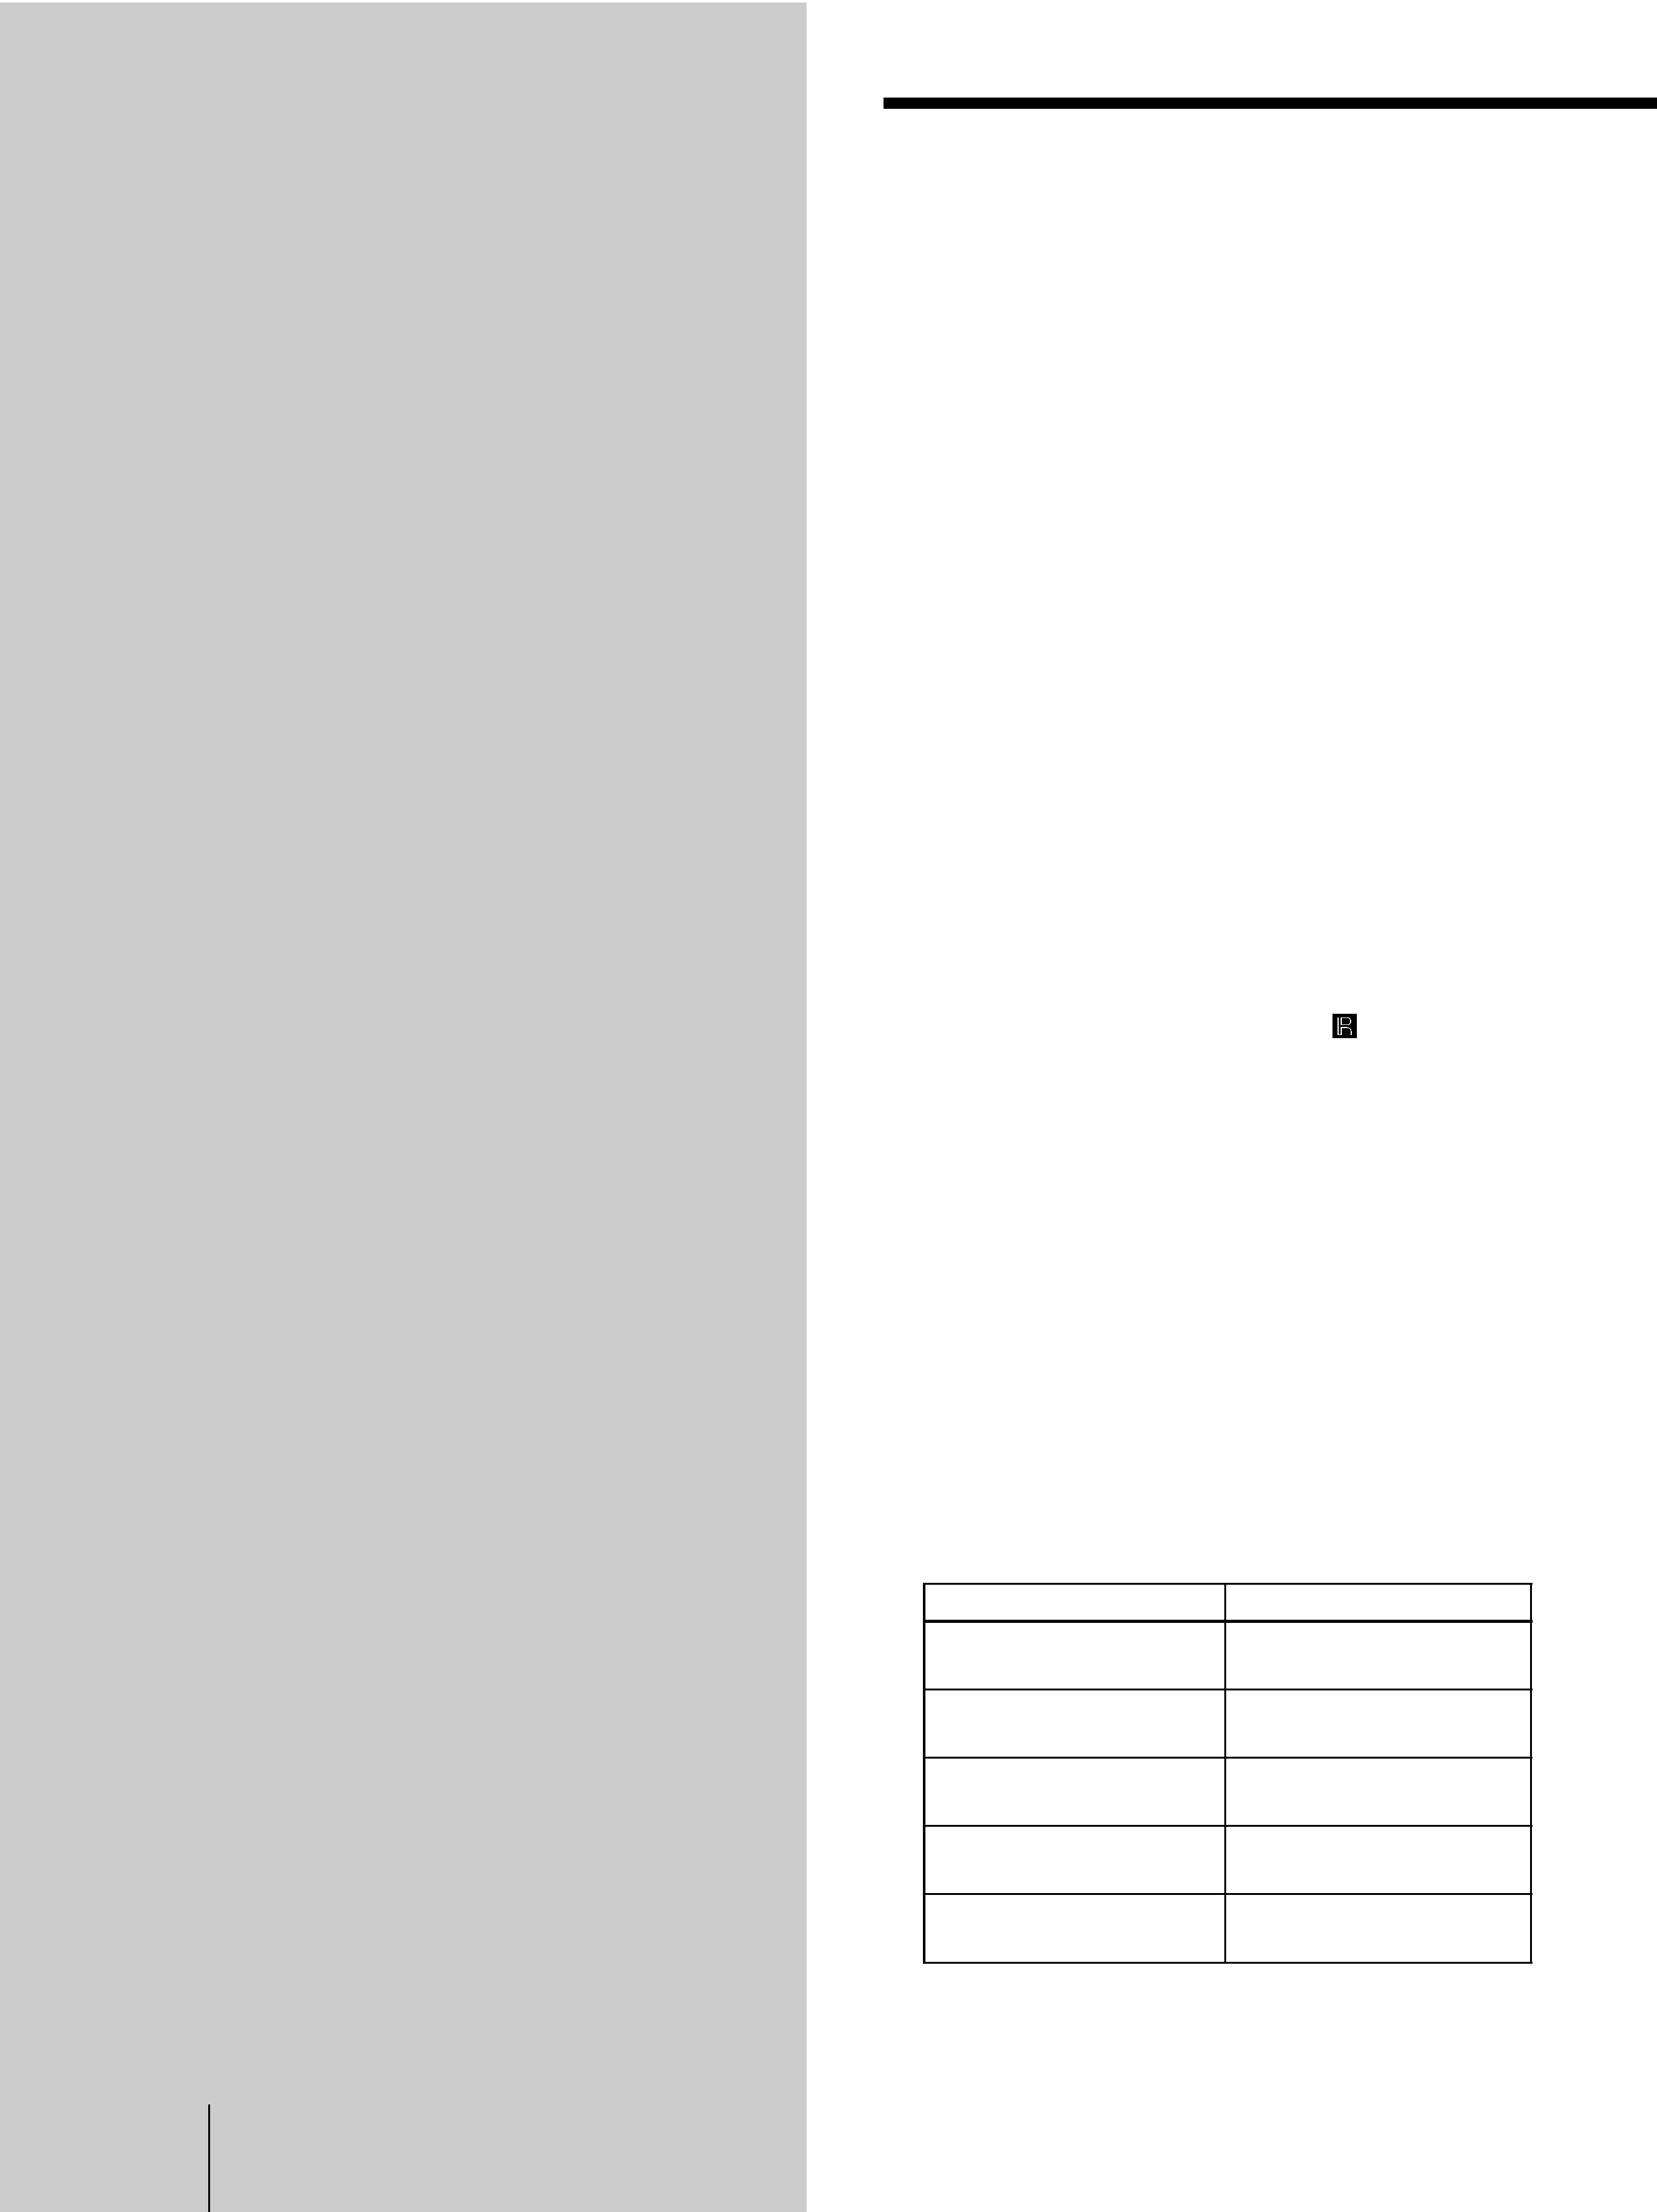
H DISPLAY/CHAR button (9) (15) (17) (24) (27) (35)
I Display window (8)
Shows various information.
Press while the deck is
To
Recording or recording
pause
Adjust the recording level
Stopped
Display disc information or
the contents of a program
Recording
Display information on the
track being recorded
Playing
Display information on the
current track
Editing
Select the type of characters
to be input
5 GB
Front panel description
L
o
ca
tion
and
Func
tion
of
Contr
o
ls
ws
w;
wd
wf
wa
90
qh
qj
qk
ql
qs
qa
qd
qf
qg
78
34 5 6
2
1
J CLEAR button (27) (35)
Press to cancel the selection.
K MENU/NO button (19) (27) (30) (39) (52)
Press to display the Edit Menu or Setup Menu.
L AMS control (12) (14) (23) (30) (39)
Turn to locate tracks, set the clock, select the input
characters, or select a menu item and a setting value.
M YES button (18) (27) (30) (39)
Press to carry out the selected operation.
N DIGITAL REC LEVEL control (17)
Turn to adjust the digital recording level.
O ANALOG REC LEVEL L/R control (18)
Turn to adjust the analog recording level.
P OPEN/CLOSE A button (14) (23)
Press to insert or eject the MD.
N button (14) (23)
Press to start play.
X button (14) (23)
Press to pause play or recording. Press again to resume
play or recording.
x button (15) (23)
Press to stop play or recording, or cancel the selected
operation.
z button (14) (18) (19)
Press to record to the MD, monitor the input signal, or
mark track numbers.
Q m/M buttons (25) (27) (30) (35)
Press to locate a portion within a track, change the
contents of a program, or change the input character.
R MDLP indicator (16) (23)
Lights when the deck is playing or recording to an MD
in LP2 or LP4 Stereo mode.
S MD disc tray (14) (23)
Insert an MD as illustrated below.
T REC MODE selector (16)
Use to set the REC MODE to STEREO, MONO, LP2
or LP4.
U INPUT selector (14)
Use to select the input jack (or connector) of the
program source to be recorded.
V PHONE LEVEL control (23)
Turn to adjust the volume of the headphones.
W PHONES jack (23)
Connect headphones to this jack.
X TIMER selector (42)
Use to set the timer for recording (REC) or playing
(PLAY). Set to OFF to turn off the timer.
With the arrow
pointing toward
the deck
With the labeled side up