© 2001 Sony Corporation
Operating Instructions
Mode d'emploi
Manual de instrucciones
GB
CDX-454XRF
CDX-454RF
For installation and connections, see the supplied installation/connections
manual.
En ce qui concerne l'installation et les connexions, consulter le manuel
d'installation/connexions fourni.
Con respecto a la instalación y a las conexiones, consulte el manual de
instalación/conexiones suministrado.
3-237-554-13 (2)
FR
Compact Disc Changer
System
Sistema de Cambiador de
discos compactos
ES
Owner's Record
The model and serial numbers are located at the rear of the CD changer.
Record the serial number in the space provided below.
Refer to these numbers whenever you call upon your Sony dealer regarding this product.
Model No. CDX-454RF Serial No.

2
Welcome!
Thank you for purchasing the Sony CD
changer system. This unit lets you enjoy CD
sound with the changer.
The CDX-454XRF/454RF is a compact disc
changer system comprised of the wired remote
commander, the relay box, and the CD
changer. The CD changer modulates the audio
signal into the RF (Radio Frequency) signal so
that it can be received by the existing FM tuner
of your car audio. Therefore you will be able to
enjoy CD play with your car audio even if it
has no input terminals for a compact disc
player.
·Compact and space saving CD changer for
vertical, horizontal, suspended, or inclined
installation in your car.
·Supplied wired remote enables you to
control the CD changer installed in the trunk
room of your car.
·Repeat play function for playing a track or a
disc repeatedly.
·Shuffle play function for playing tracks of
one disc or of all discs in random order.
·D-BASS function for dynamic bass boot.
For the customers in the USA
(CDX-454RF only)
WARNING
This equipment has been tested and found to
comply with the limits for a Class B digital
device, pursuant to Part 15 of the FCC Rules.
These limits are designed to provide
reasonable protection against harmful
interference in a residential installation. This
equipment generates, uses, and can radiate
radio frequency energy and, if not installed
and used in accordance with the instructions,
may cause harmful interference to radio
communications. However, there is no
guarantee that interference will not occur in a
particular installation. If this equipment does
cause harmful interference to radio or
television reception, which can be determined
by turning the equipment off and on, the user
is encouraged to try to correct the interference
by one or more of the following measures:
-- Reorient or relocate the receiving antenna.
-- Increase the separation between the
equipment and receiver.
-- Connect the equipment into an outlet on a
circuit different from that to which the
receiver is connected.
-- Consult the dealer or an experienced radio/
TV technician for help.
You are cautioned that any changes or
modifications not expressly approved in this
manual could void your authority to operate
this equipment.
CAUTION
The use of optical instruments with this
product will increase eye hazard.

3
Table of contents
Getting Started
Resetting the unit ................................................. 4
Preparing the CD changer .................................. 4
Changing the transmitting frequency ............... 5
CD Changer
Listening to a CD ................................................. 6
Playing tracks in random order
-- Shuffle Play ................................................. 7
Playing tracks repeatedly
-- Repeat Play ................................................. 7
Boosting the bass sound
-- D-bass .......................................................... 7
Changing the output level .................................. 8
Additional Information
Precautions ............................................................ 9
Notes on handling discs ...................................... 9
Maintenance ........................................................ 10
Location of controls ........................................... 11
Specifications ...................................................... 12
Troubleshooting guide ...................................... 13
4
Getting Started
Resetting the unit
Before operating the unit for the first time or
after replacing the car battery, you must reset
the unit.
Press the reset button with a pointed object,
such as a ball-point pen, etc.
Preparing the CD changer
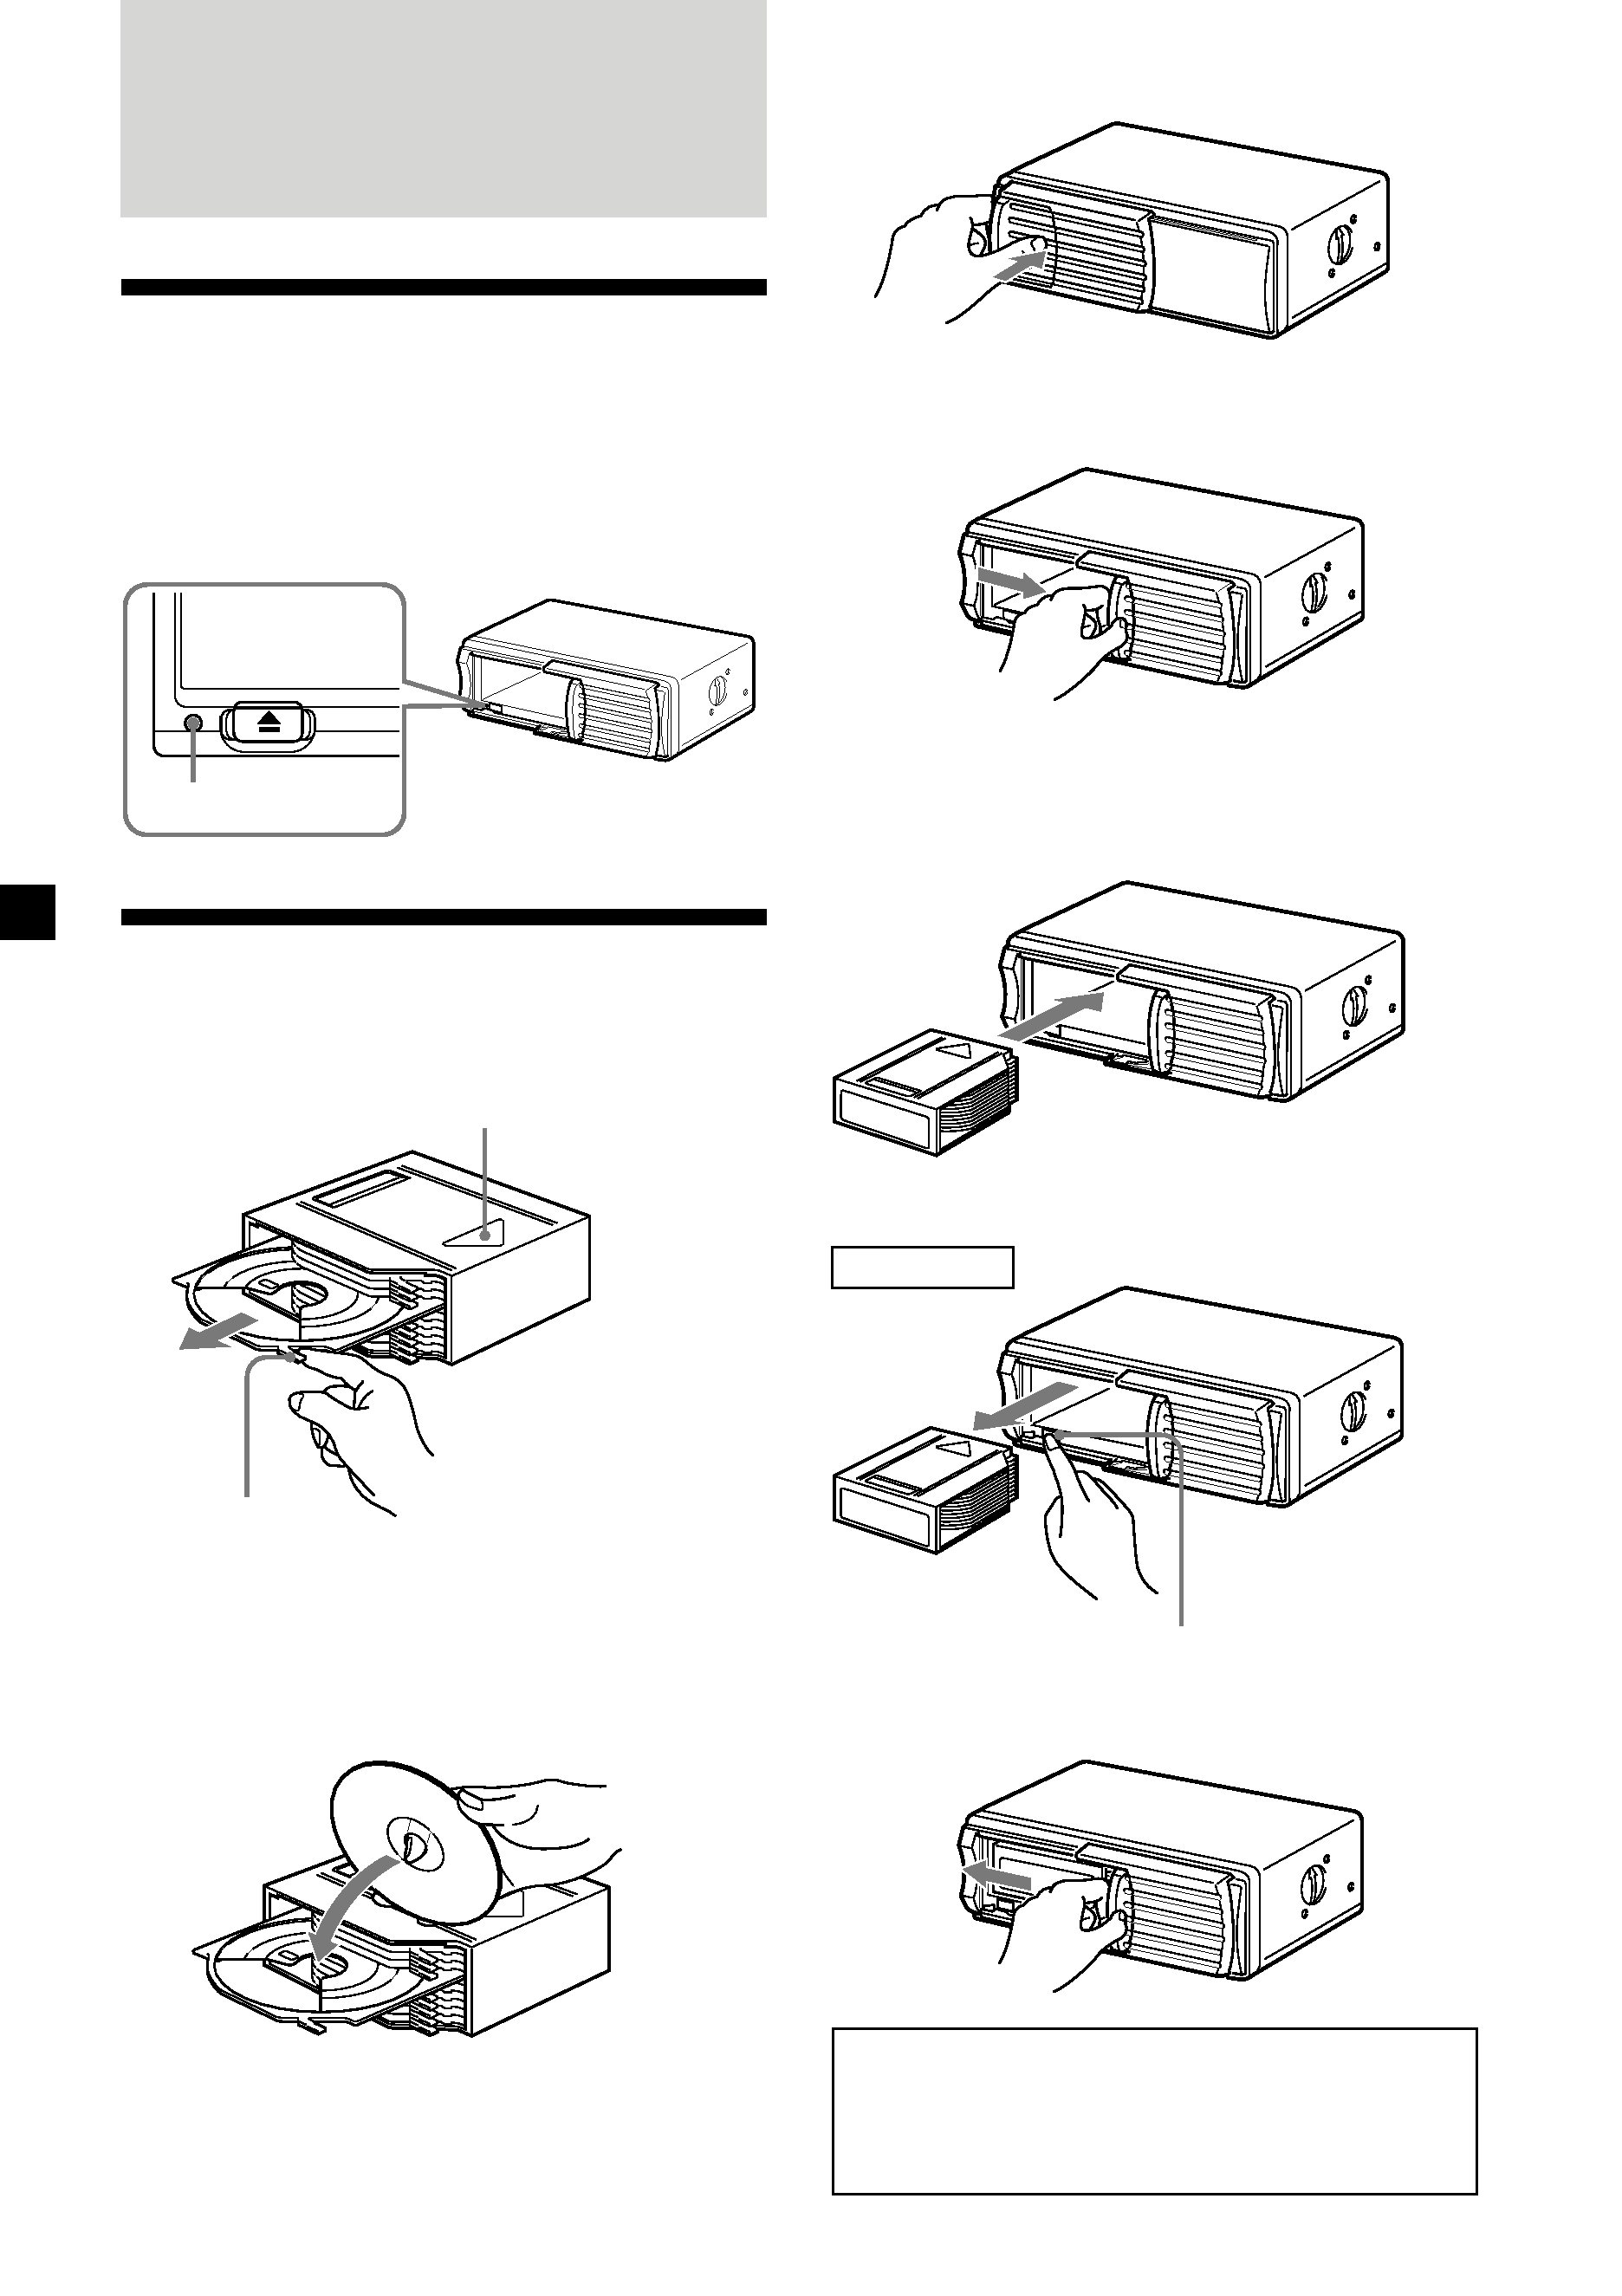
1
x
Disc magazine
To remove
Z
(EJECT)
Tab
Labelled surface up
10 discs, one in each tray
With the arrow side facing up
Reset button
x
Push to unlock the door
Slide open
2
Note
To prevent injury, do not insert your hand in the
CD changer.
3
4
Use the supplied disc magazine or the disc
magazine XA-250. The disc magazine XA-10B/
XA-350 cannot be used with this unit. If you
use any other disc magazine, it may cause a
malfunction.
5
Note
You cannot play 8cm (3in.) CDs.
If the disc magazine does not lock properly
Take out the disc magazine, press Z, and re-
insert it.
Use the unit with the door closed
completely
Otherwise, foreign matter may enter the unit
and contaminate the lenses inside the CD
changer.
Notes on the disc magazine
·Do not leave the disc magazine in locations
with high temperature and high humidity,
such as on a car dashboard or in the rear
window where the disc magazine will be
subject to direct sunlight.
·Do not place more than one disc at a time
onto a tray, otherwise the CD changer and
the discs may be damaged.
·Do not drop the disc magazine or subject it to
a violent shock.
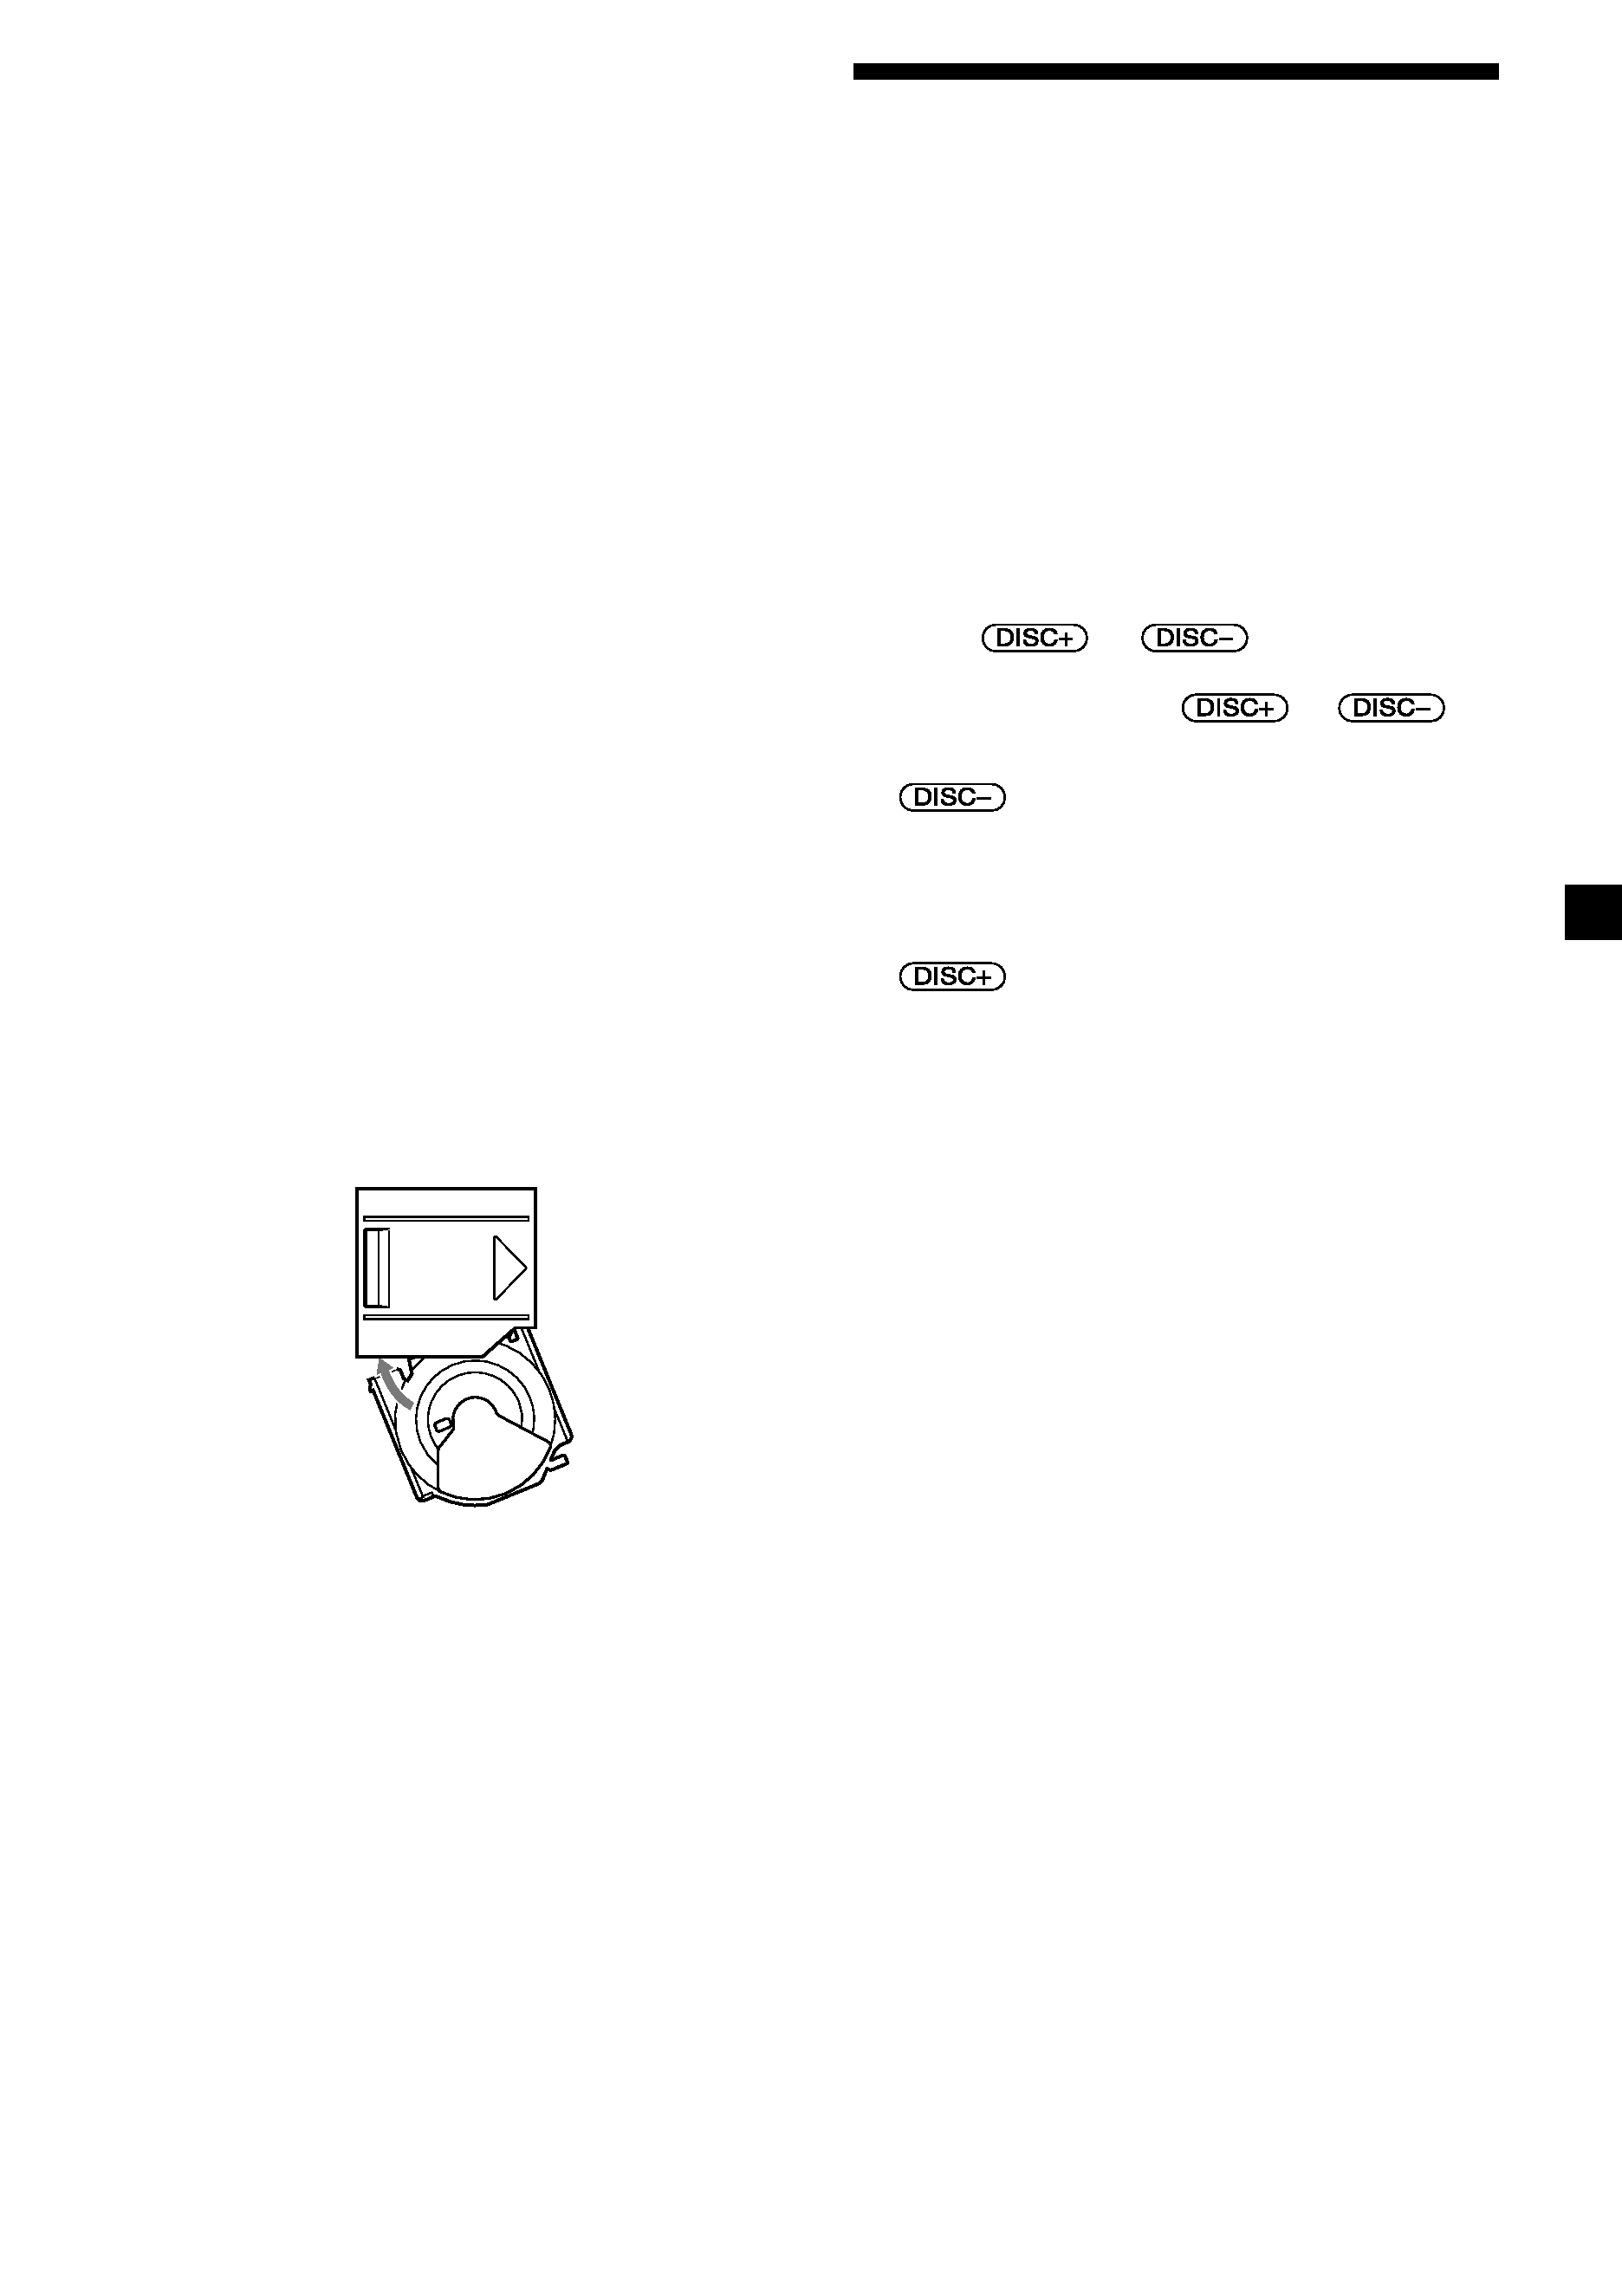
When the tray comes out
Normally, the trays will not come out of the
disc magazine. However, if they are pulled out
of the disc magazine, it is easy to re-insert
them.
With the cut-away portion of the tray facing you,
insert the right corner of the tray in the slot, then
push in the left corner until it clicks.
Note
Do not insert the tray upside down or in the
wrong direction.
Changing the transmitting
frequency
Because this unit processes CD playback
sound through an FM tuner, there may be
interference noise during CD playback. In such
a case, change the frequency of the modulated
RF signal transmitted from the unit. The initial
setting is 88.3 MHz.
1 Press (SHUF/REP) for two seconds until
frequency appears.
2 Press
or
repeatedly to
select the frequency.
Each time you press
or
,
the frequency changes as follows:
:
88.3 MHz
t 89.9 MHz t 89.7 MHz t
89.5 MHz
t 89.3 MHz t 89.1 MHz t
88.9 MHz
t 88.7 MHz t 88.5 MHz t
88.3 MHz
:
88.3 MHz
t 88.5 MHz t 88.7 MHz t
88.9 MHz
t 89.1 MHz t 89.3 MHz t
89.5 MHz
t 89.7 MHz t 89.9 MHz t
88.3 MHz
3 Press (SHUF/REP) for two seconds.
Notes
· When you change the transmitting frequency on
the unit, be sure to tune your FM tuner to the
newly selected one.
· Press u on the wired remote before changing
the frequency if the power to the unit is turned
off.