MKE 400
Bedienungsanleitung
Instructions for use
Notice d`emploi
Istruzioni per l`uso
Instrucciones de uso
Gebruiksaanwijzing
MKE400_516599_0607_SP6.book Seite 1 Freitag, 2. November 2007 12:16 12

MKE400_516599_0607_SP6.book Seite 2 Freitag, 2. November 2007 12:16 12
1
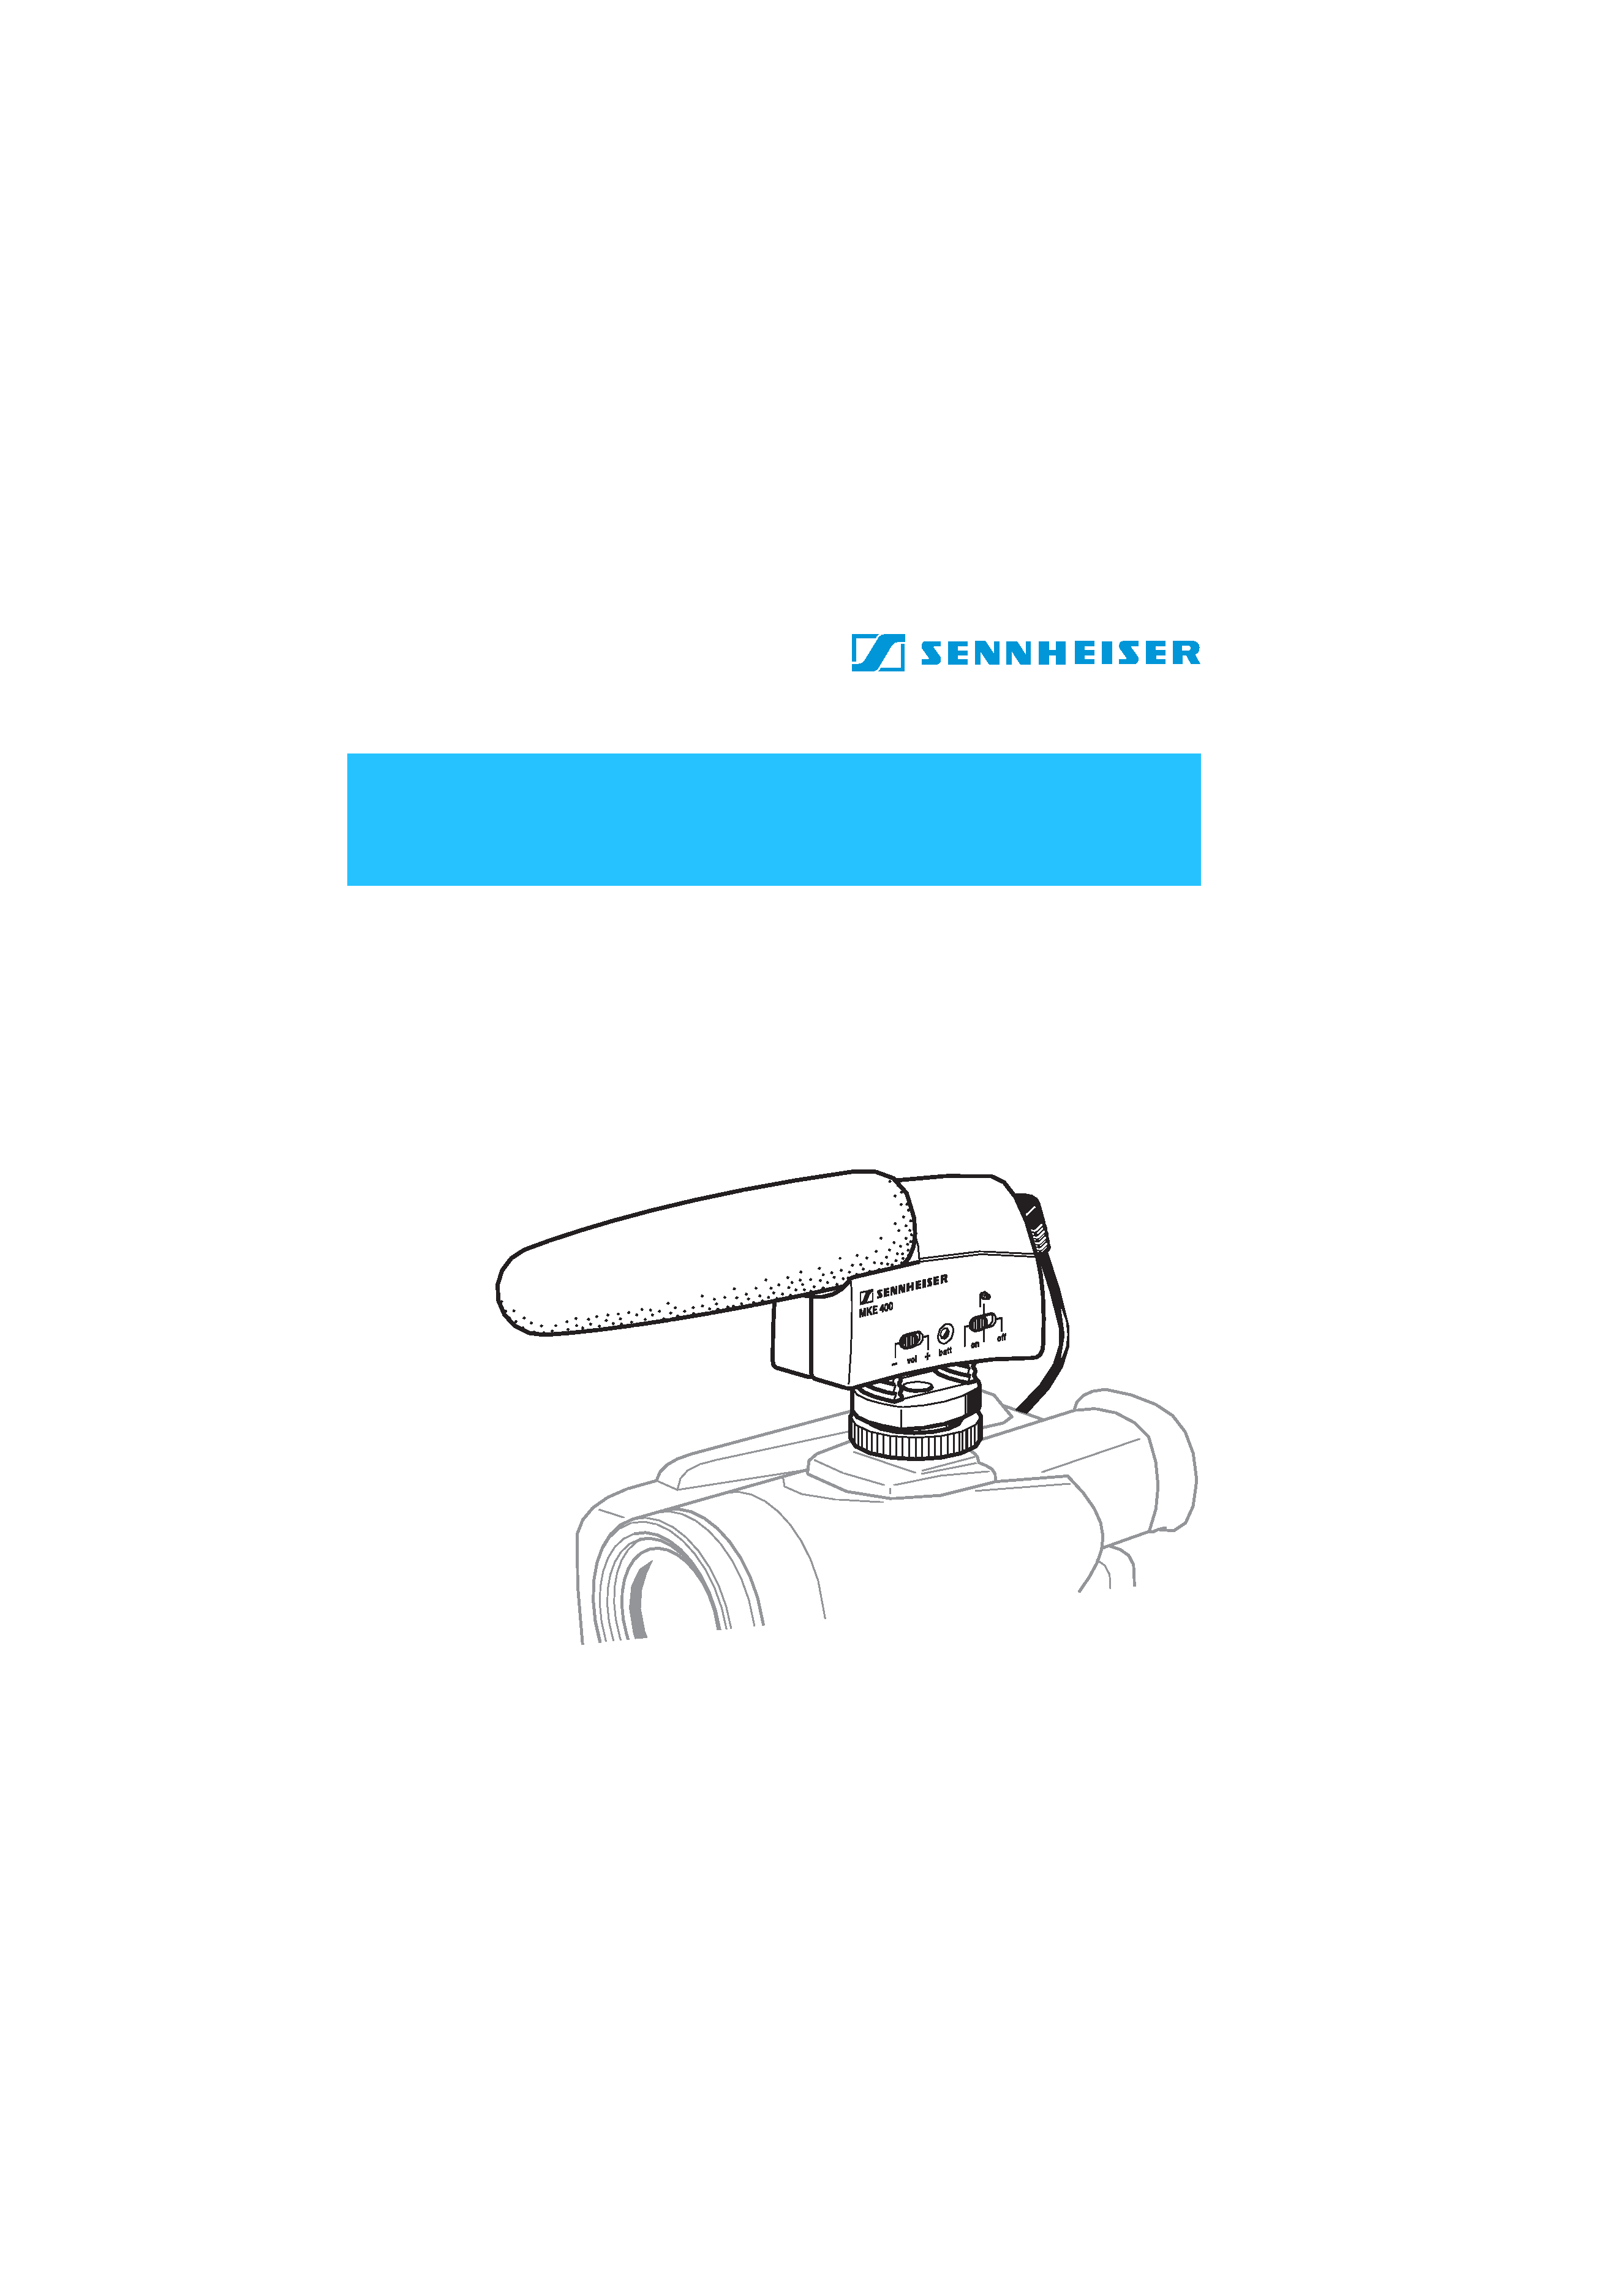
The MKE 400
Important safety information
Keep liquids (such as rain, etc.) away from the microphone!
Features
Rugged all-metal housing
Maximal rejection of side noise, designed for use on film and video
cameras/camcorders
Volume switch adjusts the sensitivity to cope with varying distances from
the sound source
Switchable low-cut filter minimizes wind noise
More than 300 hours operating time (with only one AAA size battery)
Integrated shock mount ensures effective suppression of handling and
camera noise
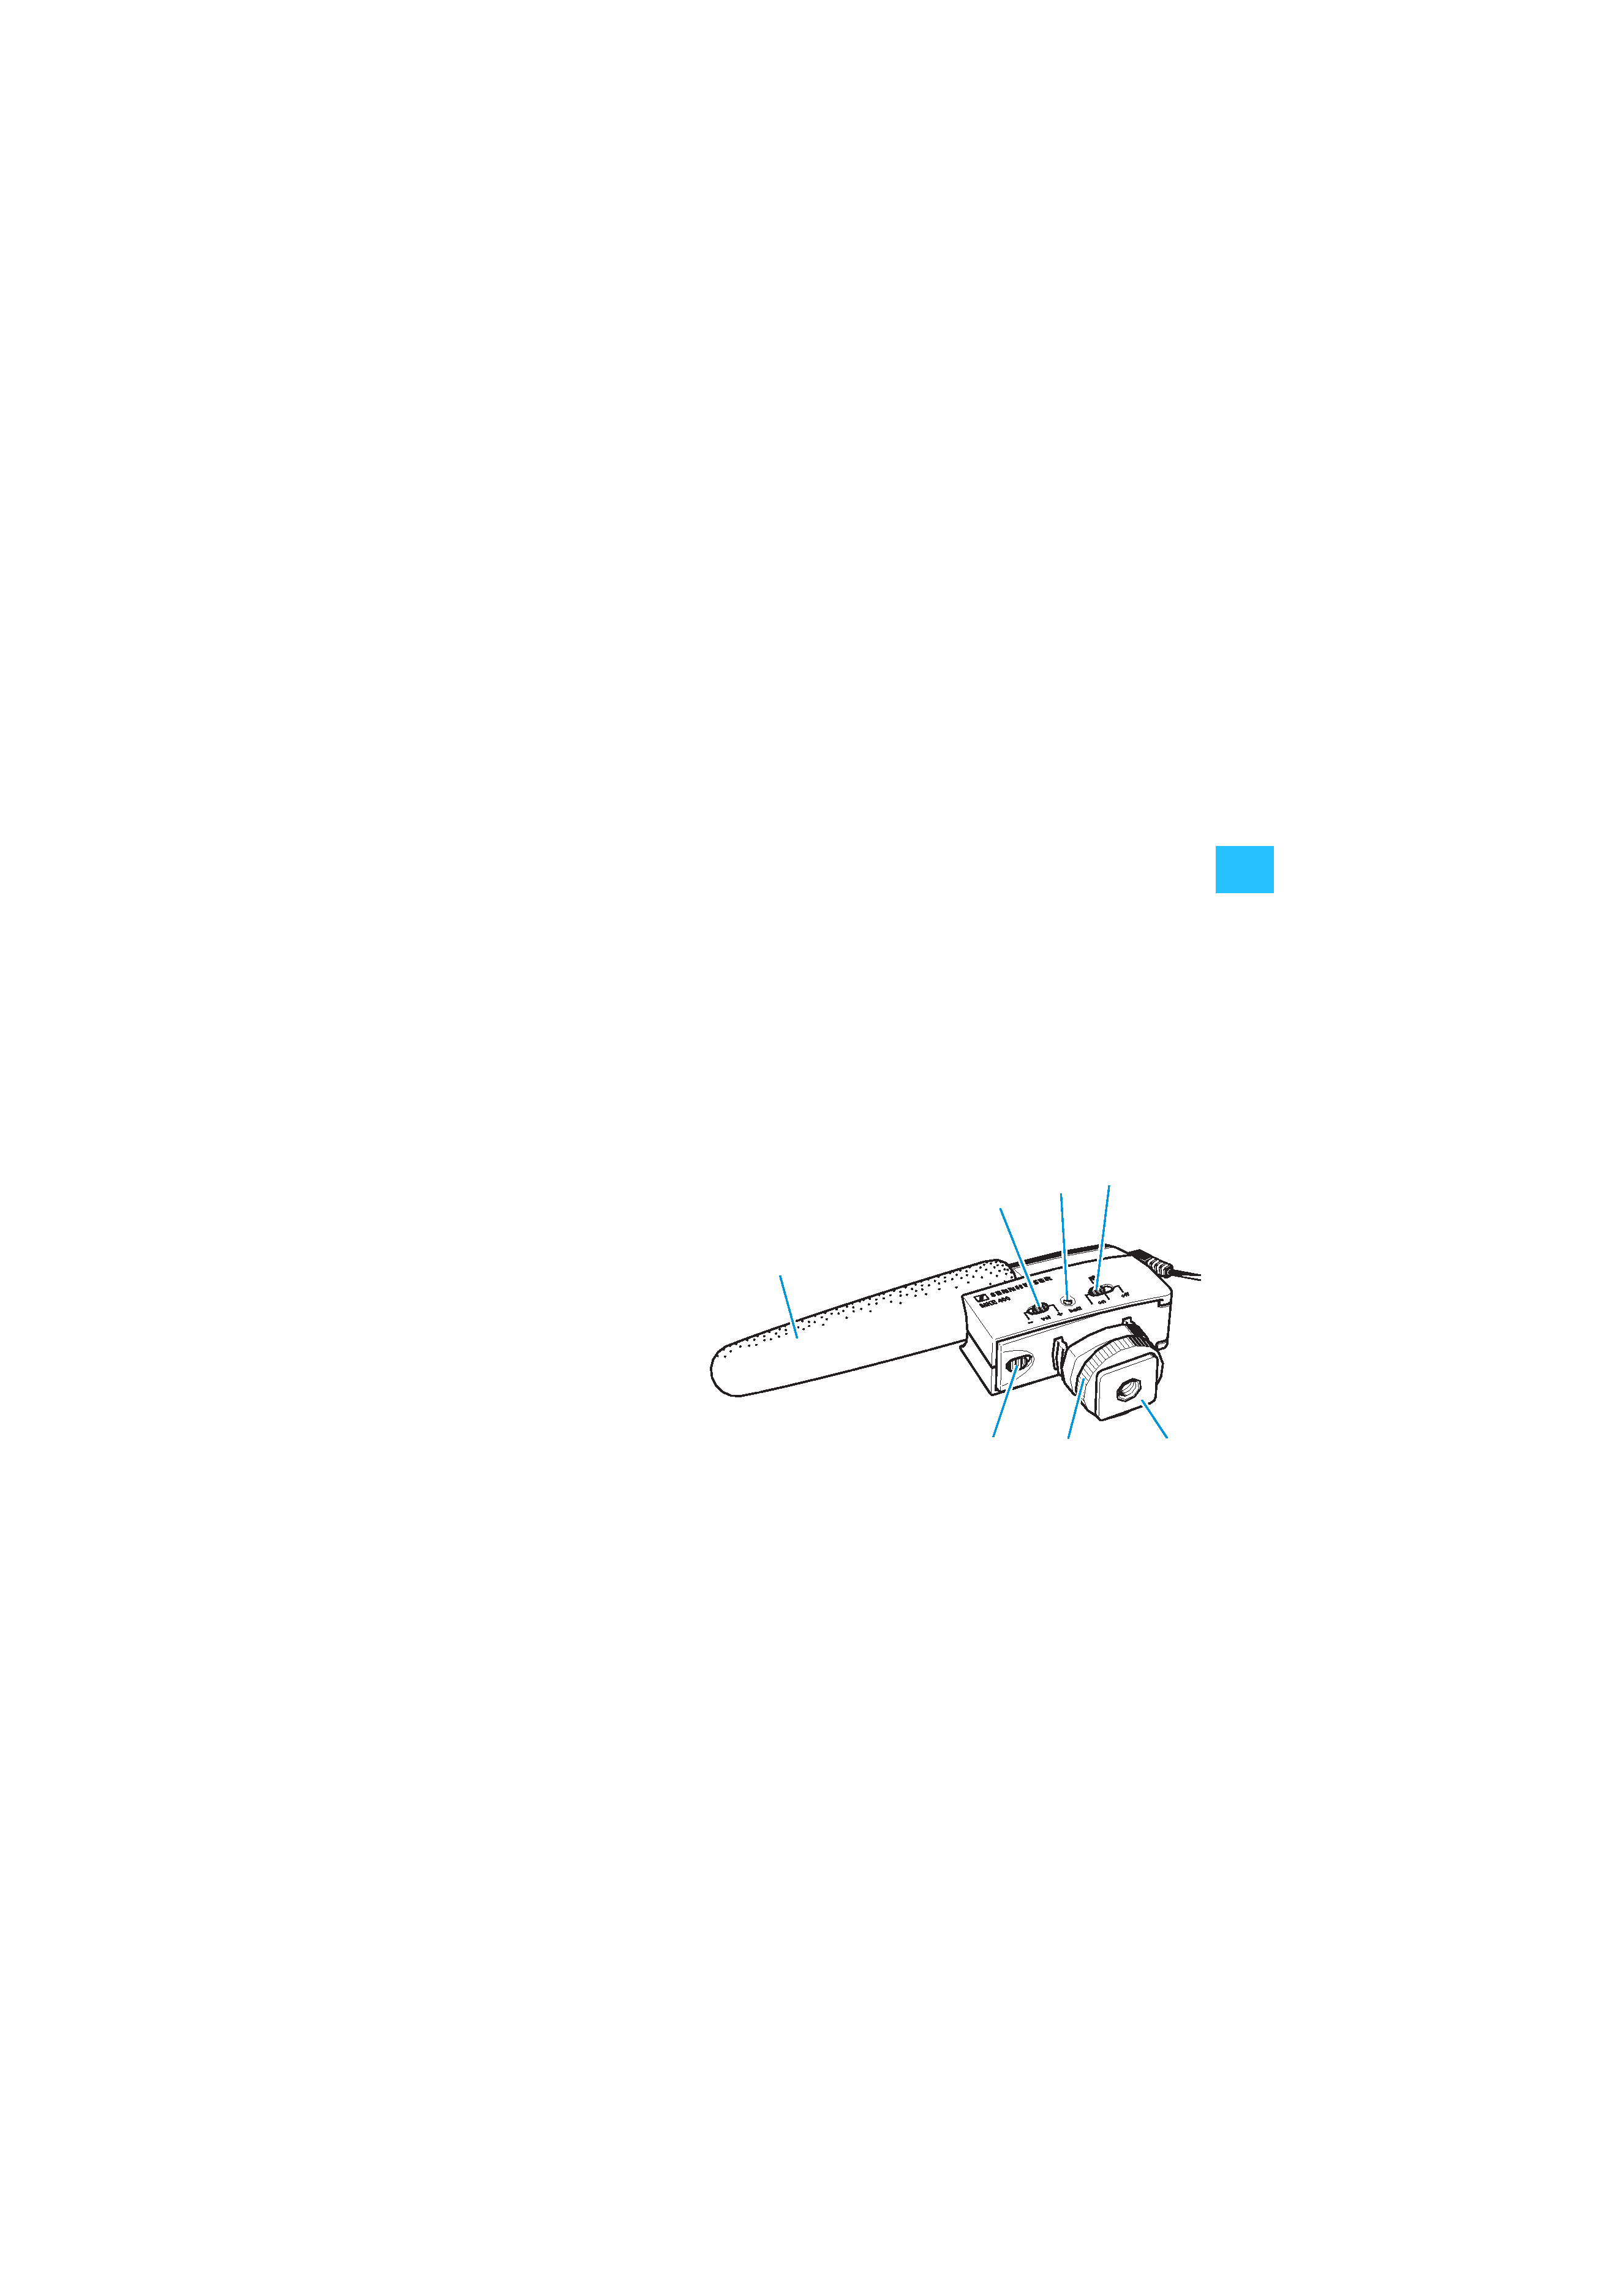
Operating elements
³ Microphone with
removable windshield
· "vol" switch
» "batt" LED
¿ "on/off" switch
´ Flashmount adapter
with mounting thread
² Knurled washer
¶ Battery compartment
catch
Delivery includes
1 MKE 400 camera/camcorder microphone with
connection cable (3.5 mm stereo jack plug)
1 AAA size battery
1 foam windshield
³
·
» ¿
´
²
MKE400_516599_0607_SP6.book Seite 1 Freitag, 2. November 2007 12:16 12
2
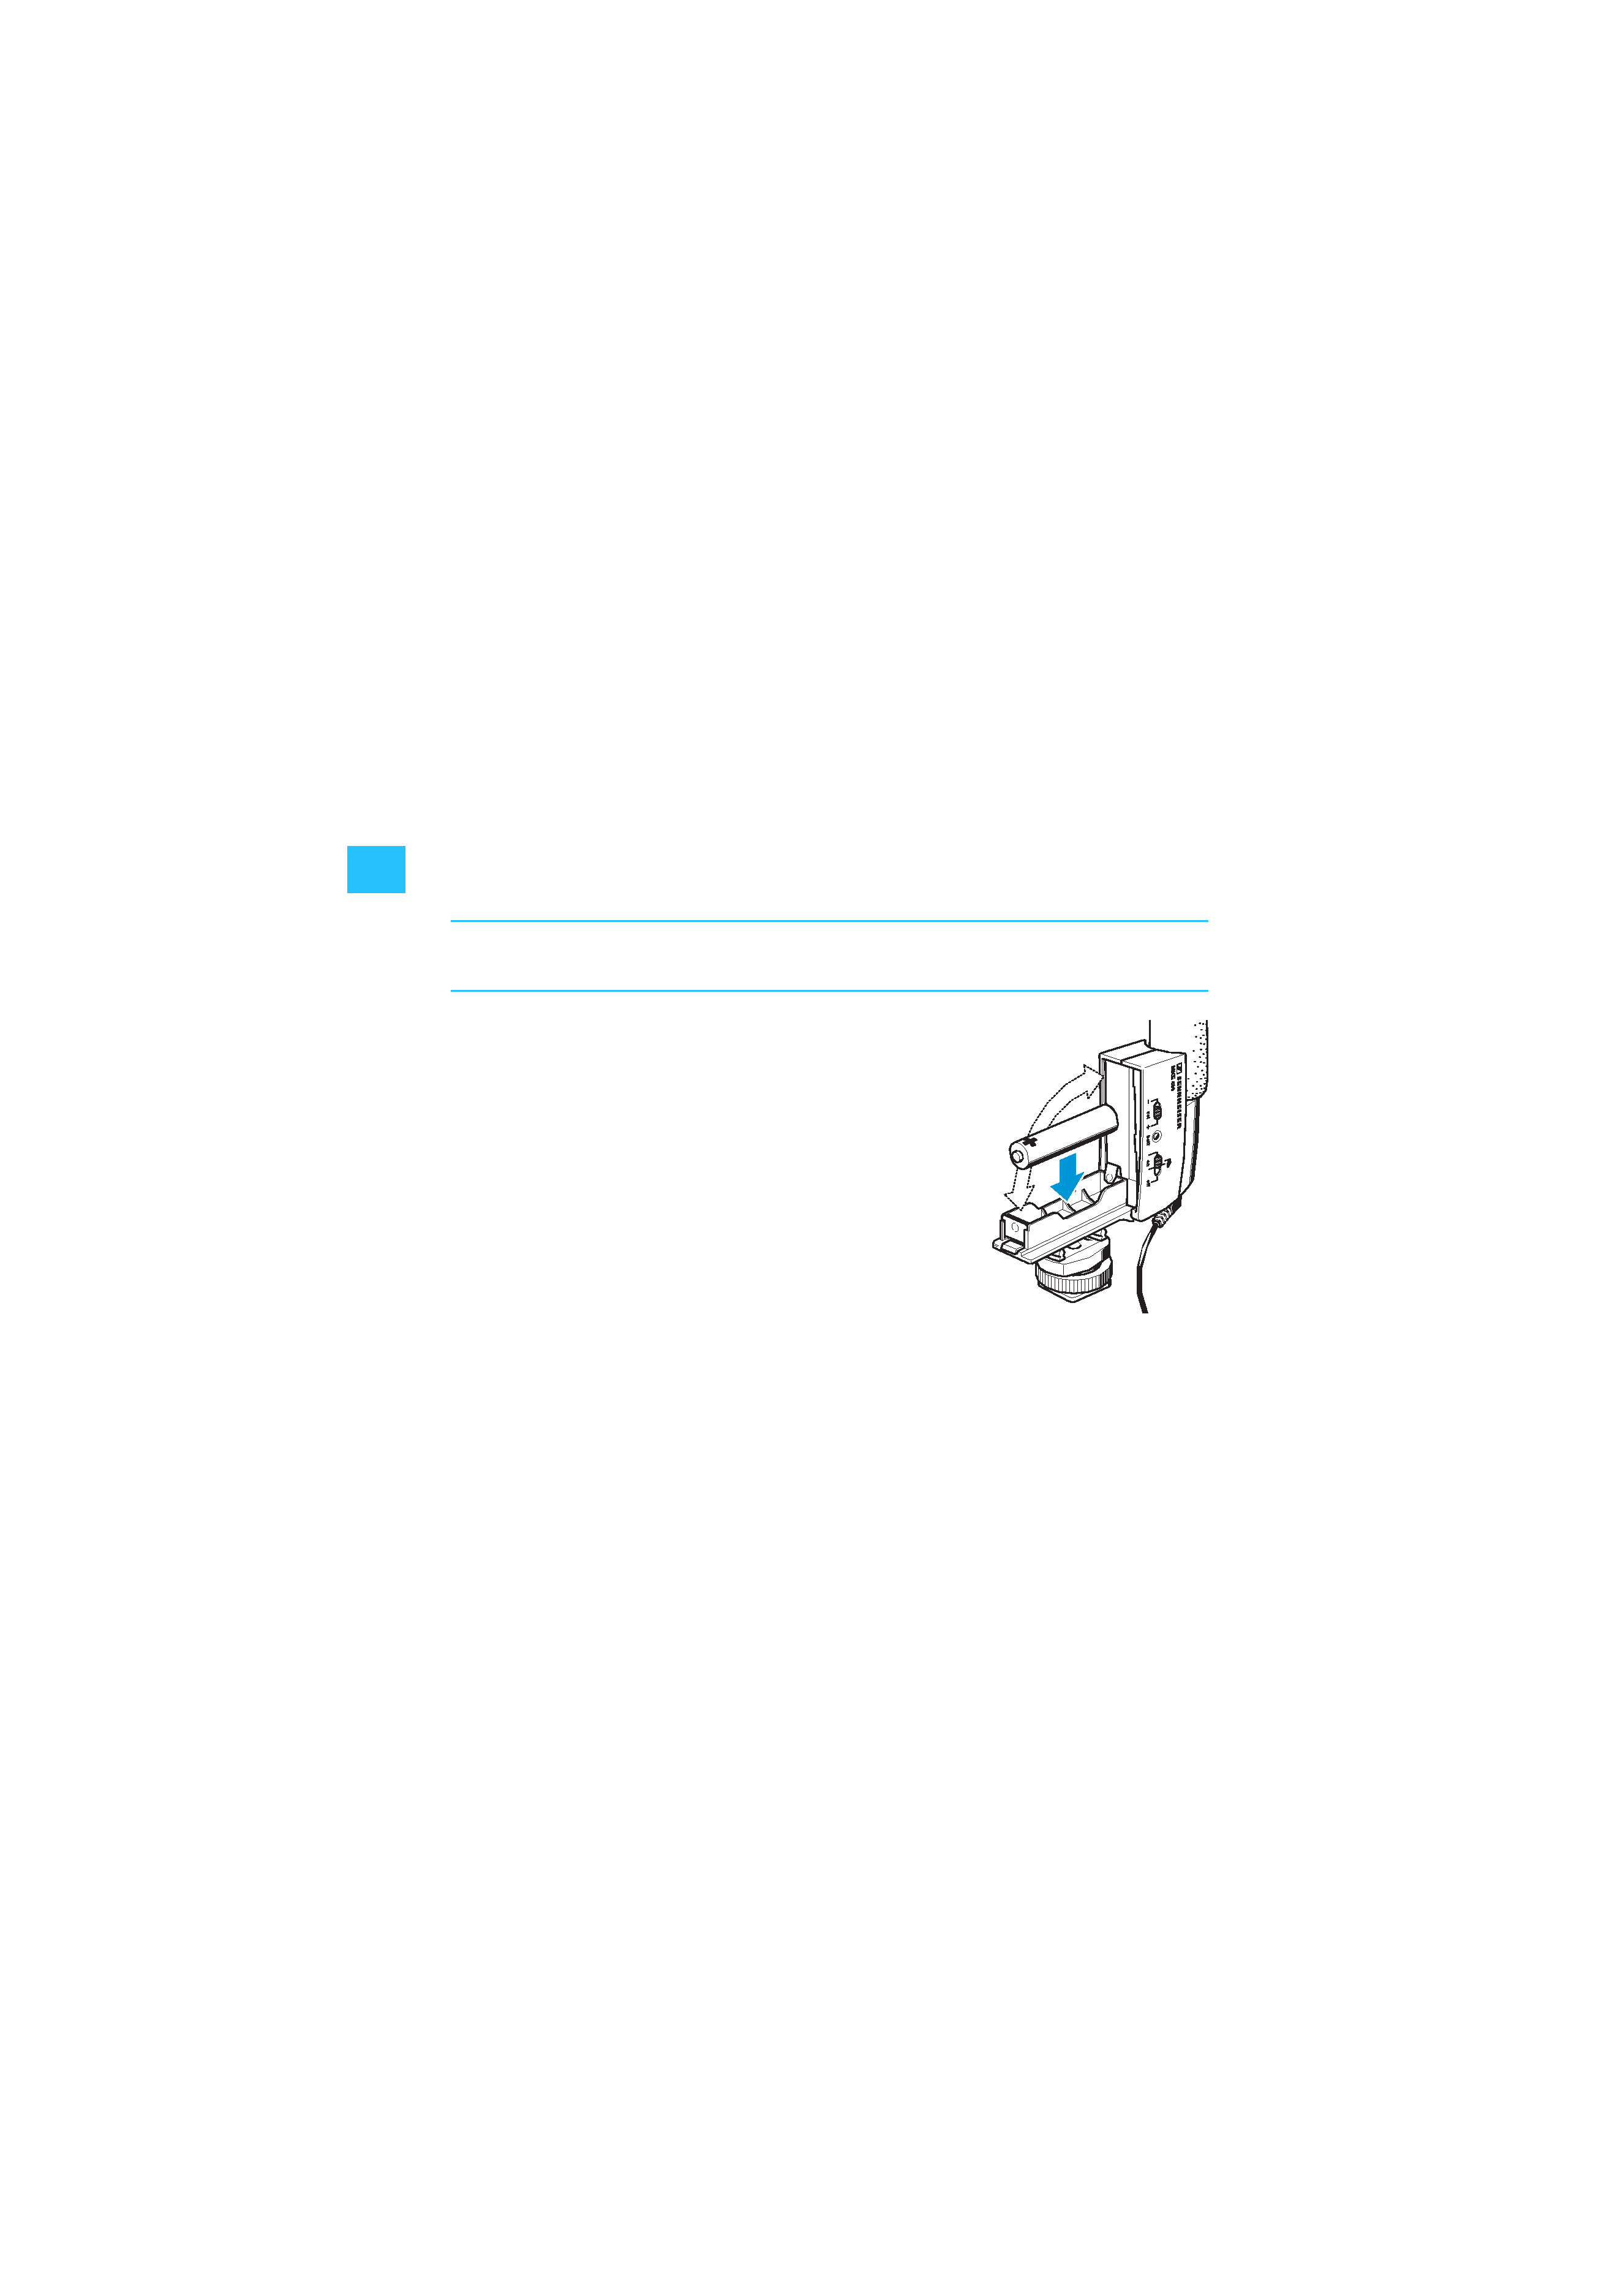
Inserting/replacing the battery
If the battery voltage is sufficient, the "batt" LED
» flashes briefly when you
switch on the microphone. A new, unused battery has an operating time of
approx. 300 hours.
When the battery voltage decreases, the "batt" LED
» lights up
permanently. You should replace the battery. When the "batt" LED
» lights
up permanently for the first time, the remaining operating time is approx. 50
hours.
Note:
When not using the microphone for extended periods of time,
remove the battery from the battery compartment!
To insert or replace the battery:
Push the catch of the battery compartment
¶ in
the direction of the flashmount adapter and open
the battery compartment.
Insert the AAA size battery as shown in the
diagram on the right. Observe correct polarity
when inserting the battery.
Close the battery compartment until the catch
locks into place.
Puting the microphone into operation
Slide the microphone onto the video camera's flashmount and lock the
microphone by screwing down the knurled washer
².
Insert the 3.5 mm stereo jack plug into the microphone input socket of the
video camera.
MKE400_516599_0607_SP6.book Seite 2 Freitag, 2. November 2007 12:16 12
3
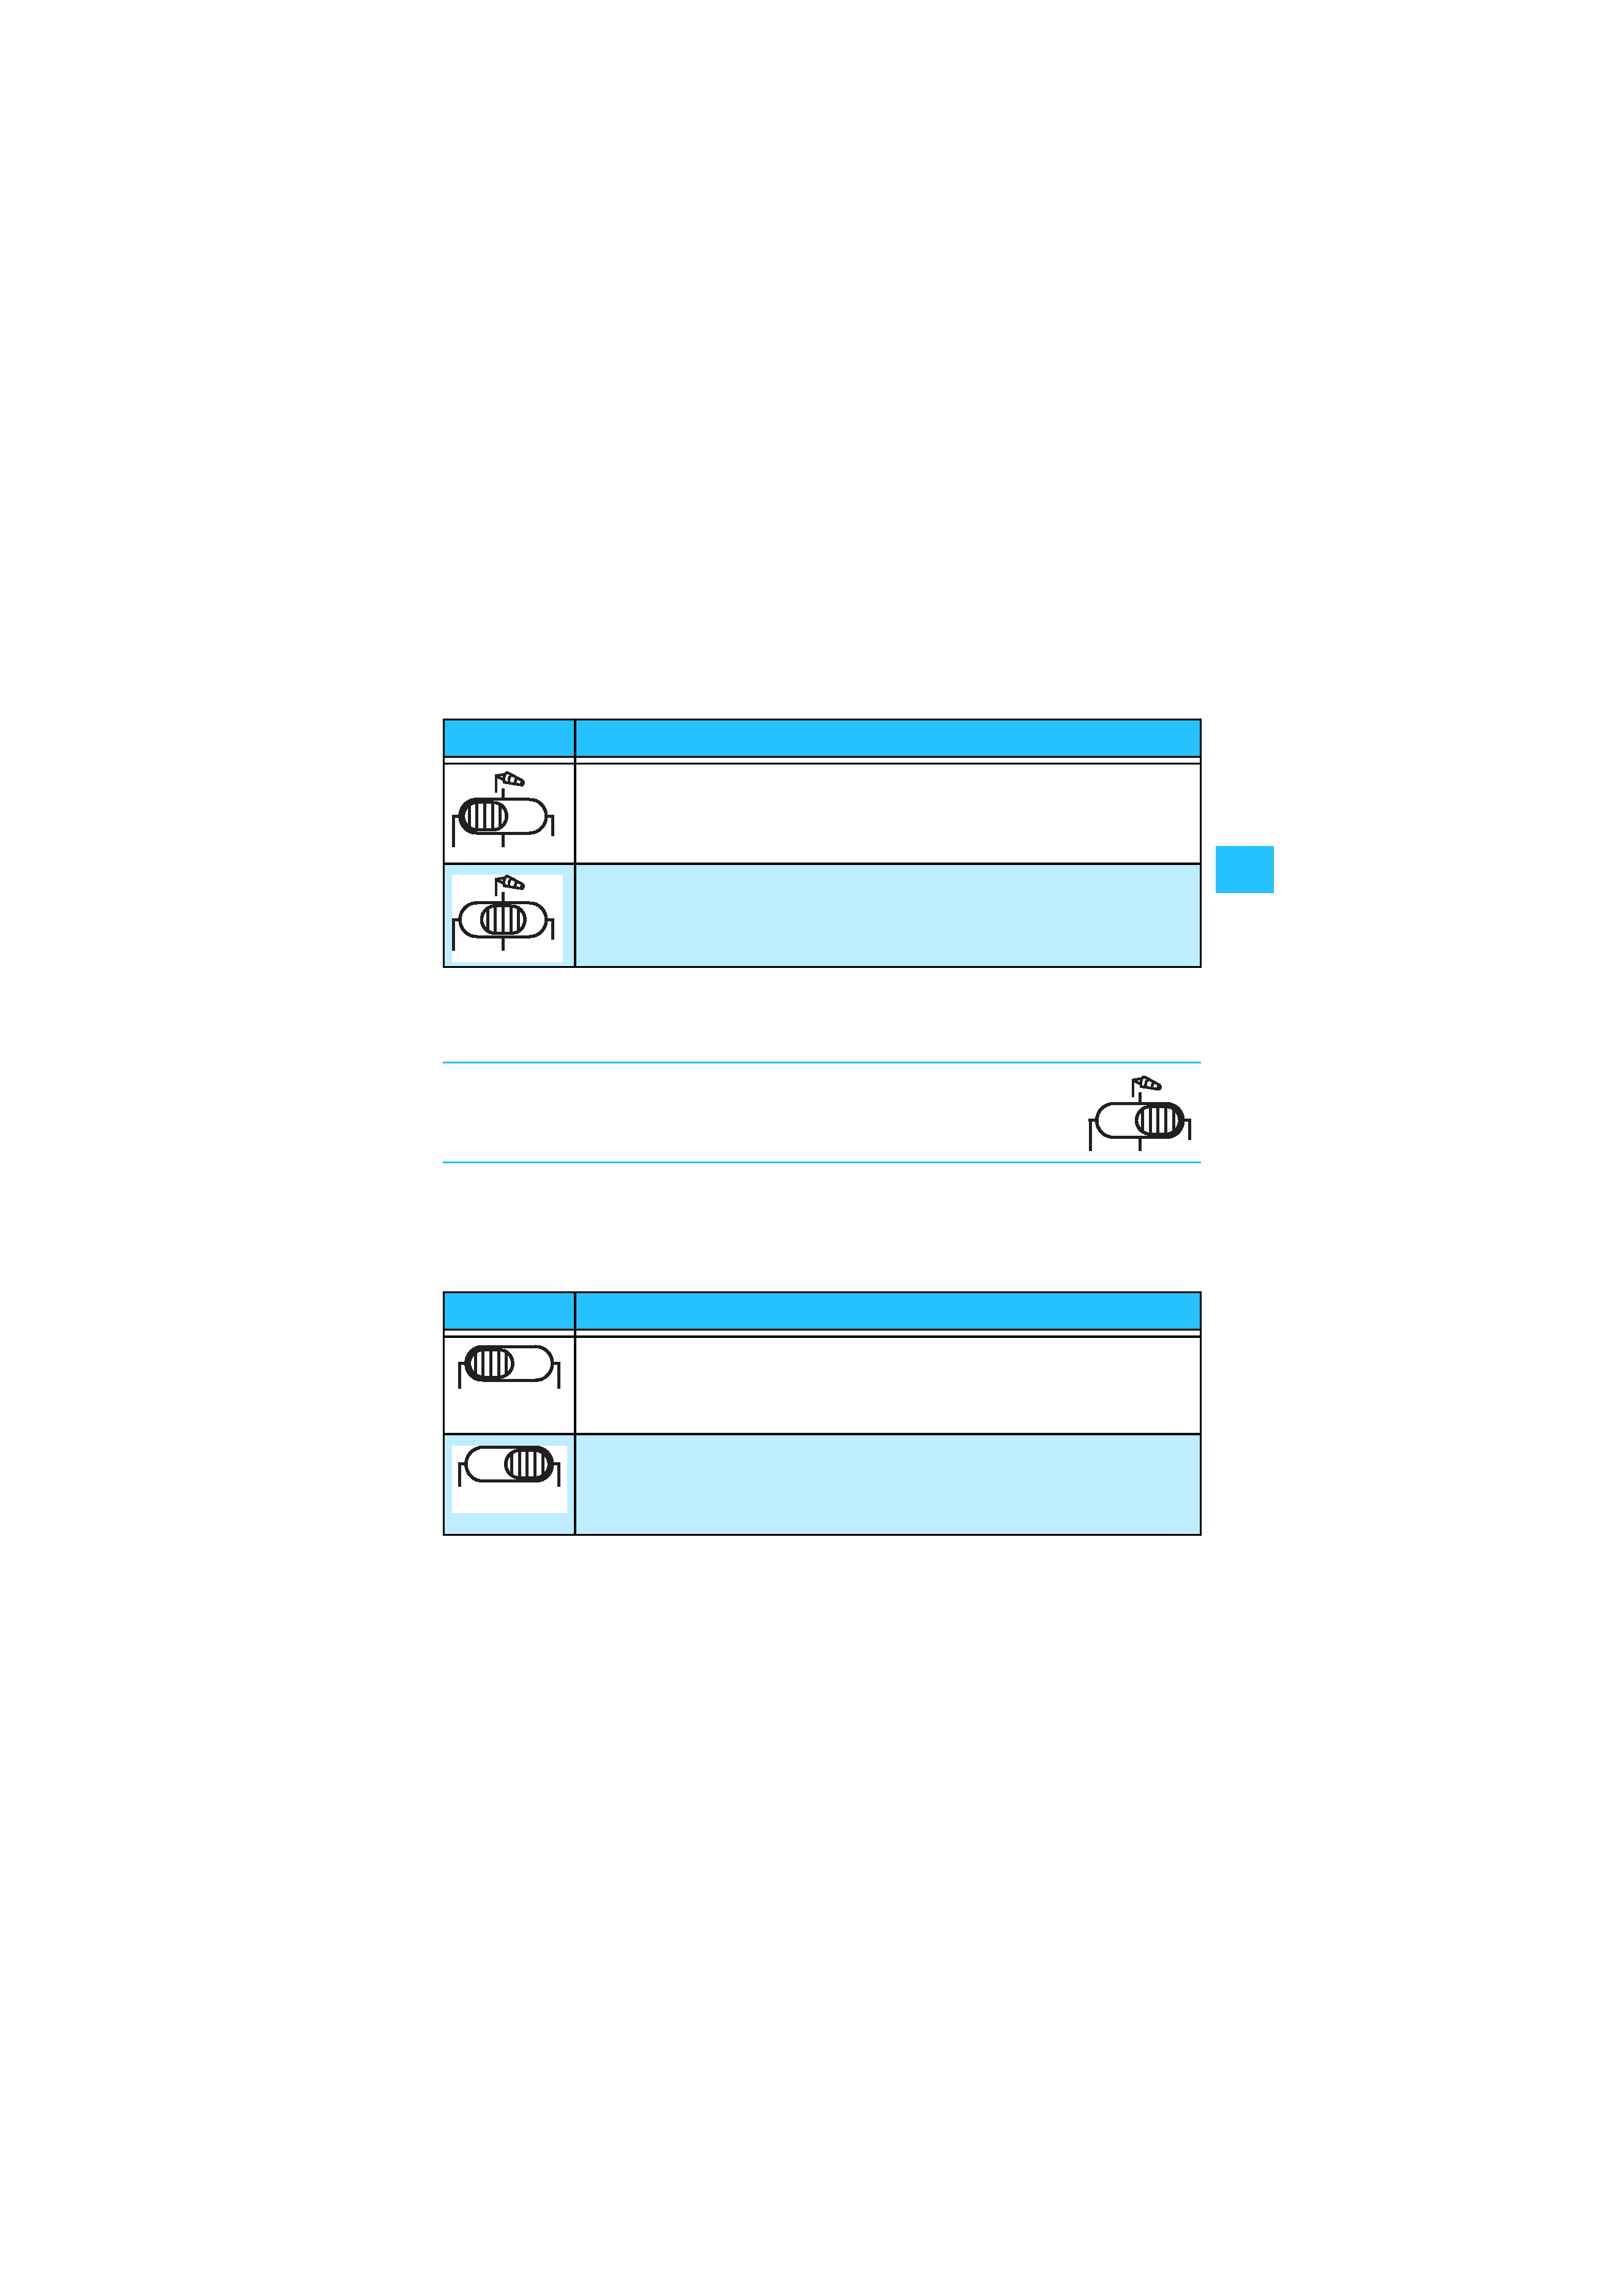
Switch the microphone on by setting the "on/off" switch
¿ to one of the
two positions:
On switch-on, the "batt" LED
» flashes briefly, indicating that the battery
is operational.
Note:
When you have finished using the microphone, it is
vital that you switch it off by setting the "on/off"
switch
¿ to the "off" position!
Adjust the microphone senstivity to the volume of the sound source and
to the input sensitivity of the camera/camcorder by setting the "vol"
switch
· to the correct position:
"on/off"
Setting
switched on
(linear frequency response)
switched on
(low-cut filter is activated for minimizing wind noise)
"vol"
Setting
Normal sensitvity:
for normal or very loud sound sources and cameras/
camcorders with high input sensitivity
High sensitvity:
for extremely quiet or very distant sound sources and
cameras/camcorders with low input sensitivity
on
off
on
off
on
off
+
vol
+
vol
MKE400_516599_0607_SP6.book Seite 3 Freitag, 2. November 2007 12:16 12