VENTILATION: When installing this
unit, make sure to leave space around the
unit for ventilation to improve heat
radiation (at least 15 cm at top, 15 cm at
rear, and 15 cm at each side).
WARNING: Slot and openings in the
cabinet are provided for ventilation and to
ensure reliable operation of the product
and to protect it from overheating, to
prevent fire hazard, the openings should
never be blocked and covered with items,
such as newspapers, table-cloths, curtains,
etc. Also do not put the apparatus on the
thick carpet, bed, sofa, or fabric having a
thick pile.
H040 En
Operating Environment H045 En
Operating environment temperature and
humidity:
+5
°C +35°C (+41°F +95°F); less than
85%RH (cooling vents not blocked)
Do not install in the following locations
·
Location exposed to direct sunlight or
strong artificial light
·
Location exposed to high humidity, or
poorly ventilated location
Energy-saving design
This system is designed to use 0.5W of
electricity when power is switched to
standby.
CONGRATULATIONS ON YOUR PURCHASE
OF THIS FINE PIONEER PRODUCT.
Pioneer is on the leading edge of DVD
research for consumer products and this unit
incorporates the latest technological
developments.
We are sure you will be fully satisfied with this
DVD system.
Thank you for your support.
Please read through these operating
instructions so you will know how to
operate your model properly. After you
have finished reading the instructions, put
them away in a safe place for future
reference.
· This player is not suitable for commercial
use.
This product incorporates copyright
protection technology that is protected by
method claims of certain U.S. patents and
other intellectual property rights owned by
Macrovision Corporation and other rights
owners. Use of this copyright protection
technology must be authorized by
Macrovision Corporation, and is intended
for home and other limited viewing uses
only unless otherwise authorized by
Macrovision Corporation. Reverse
engineering or disassembly is prohibited.
This product is for general household
purposes. Any failure due to use for other
than household purposes (such as long-
term use for business purposes in a
restaurant or use in a car or ship) and which
requires repair will be charged for even
during the warranty period.
RISK OF ELECTRIC SHOCK
DO NOT OPEN
CAUTION
These labels can be found on the
DVD/CD tuner rear panel and bottom
panel and on the powered subwoofer
rear panel.
Inside the bonnet of XV-DV1000
CAUTION
:
VORSICHT :
ADVARSEL :
VARNING
:
VARO!
:
VISIBLE AND INVISIBLE LASER RADIATION WHEN OPEN. AVOID EXPOSURE TO BEAM.
SICHTBARE UND UNSICHTBARE LASERSTRAHLUNG, WENNABDECKUNG GEÖFFNET
NICHT DEM STRAHL AUSSETZEN!
SYNLIG OG USYNLIG LASERSTRÅLING VED ÅBNING UNDGÅ UDSÆTTELSE FOR
STRÀLING.
SYNLIG OCH OSYNLIG LASERSTRÅLNING NÄR DENNA DEL ÄR ÖPPNAD BETRAKTA
EJ STRÅLEN.
AVATTAESSA ALTISTUT NÄKYVÄ JA NÄKYMÄTTÖMÄLLE LASERSATEIL YLLE. ÄLÄ
KATSO SÄTEESEN.
VRW1872
CUIDADO : RADIACIÓN LÁSER VISIBLE E INVISIBLE AL ESTAR ABIERTO. EVITAR EXPOSICIÓN AL
RAYO.
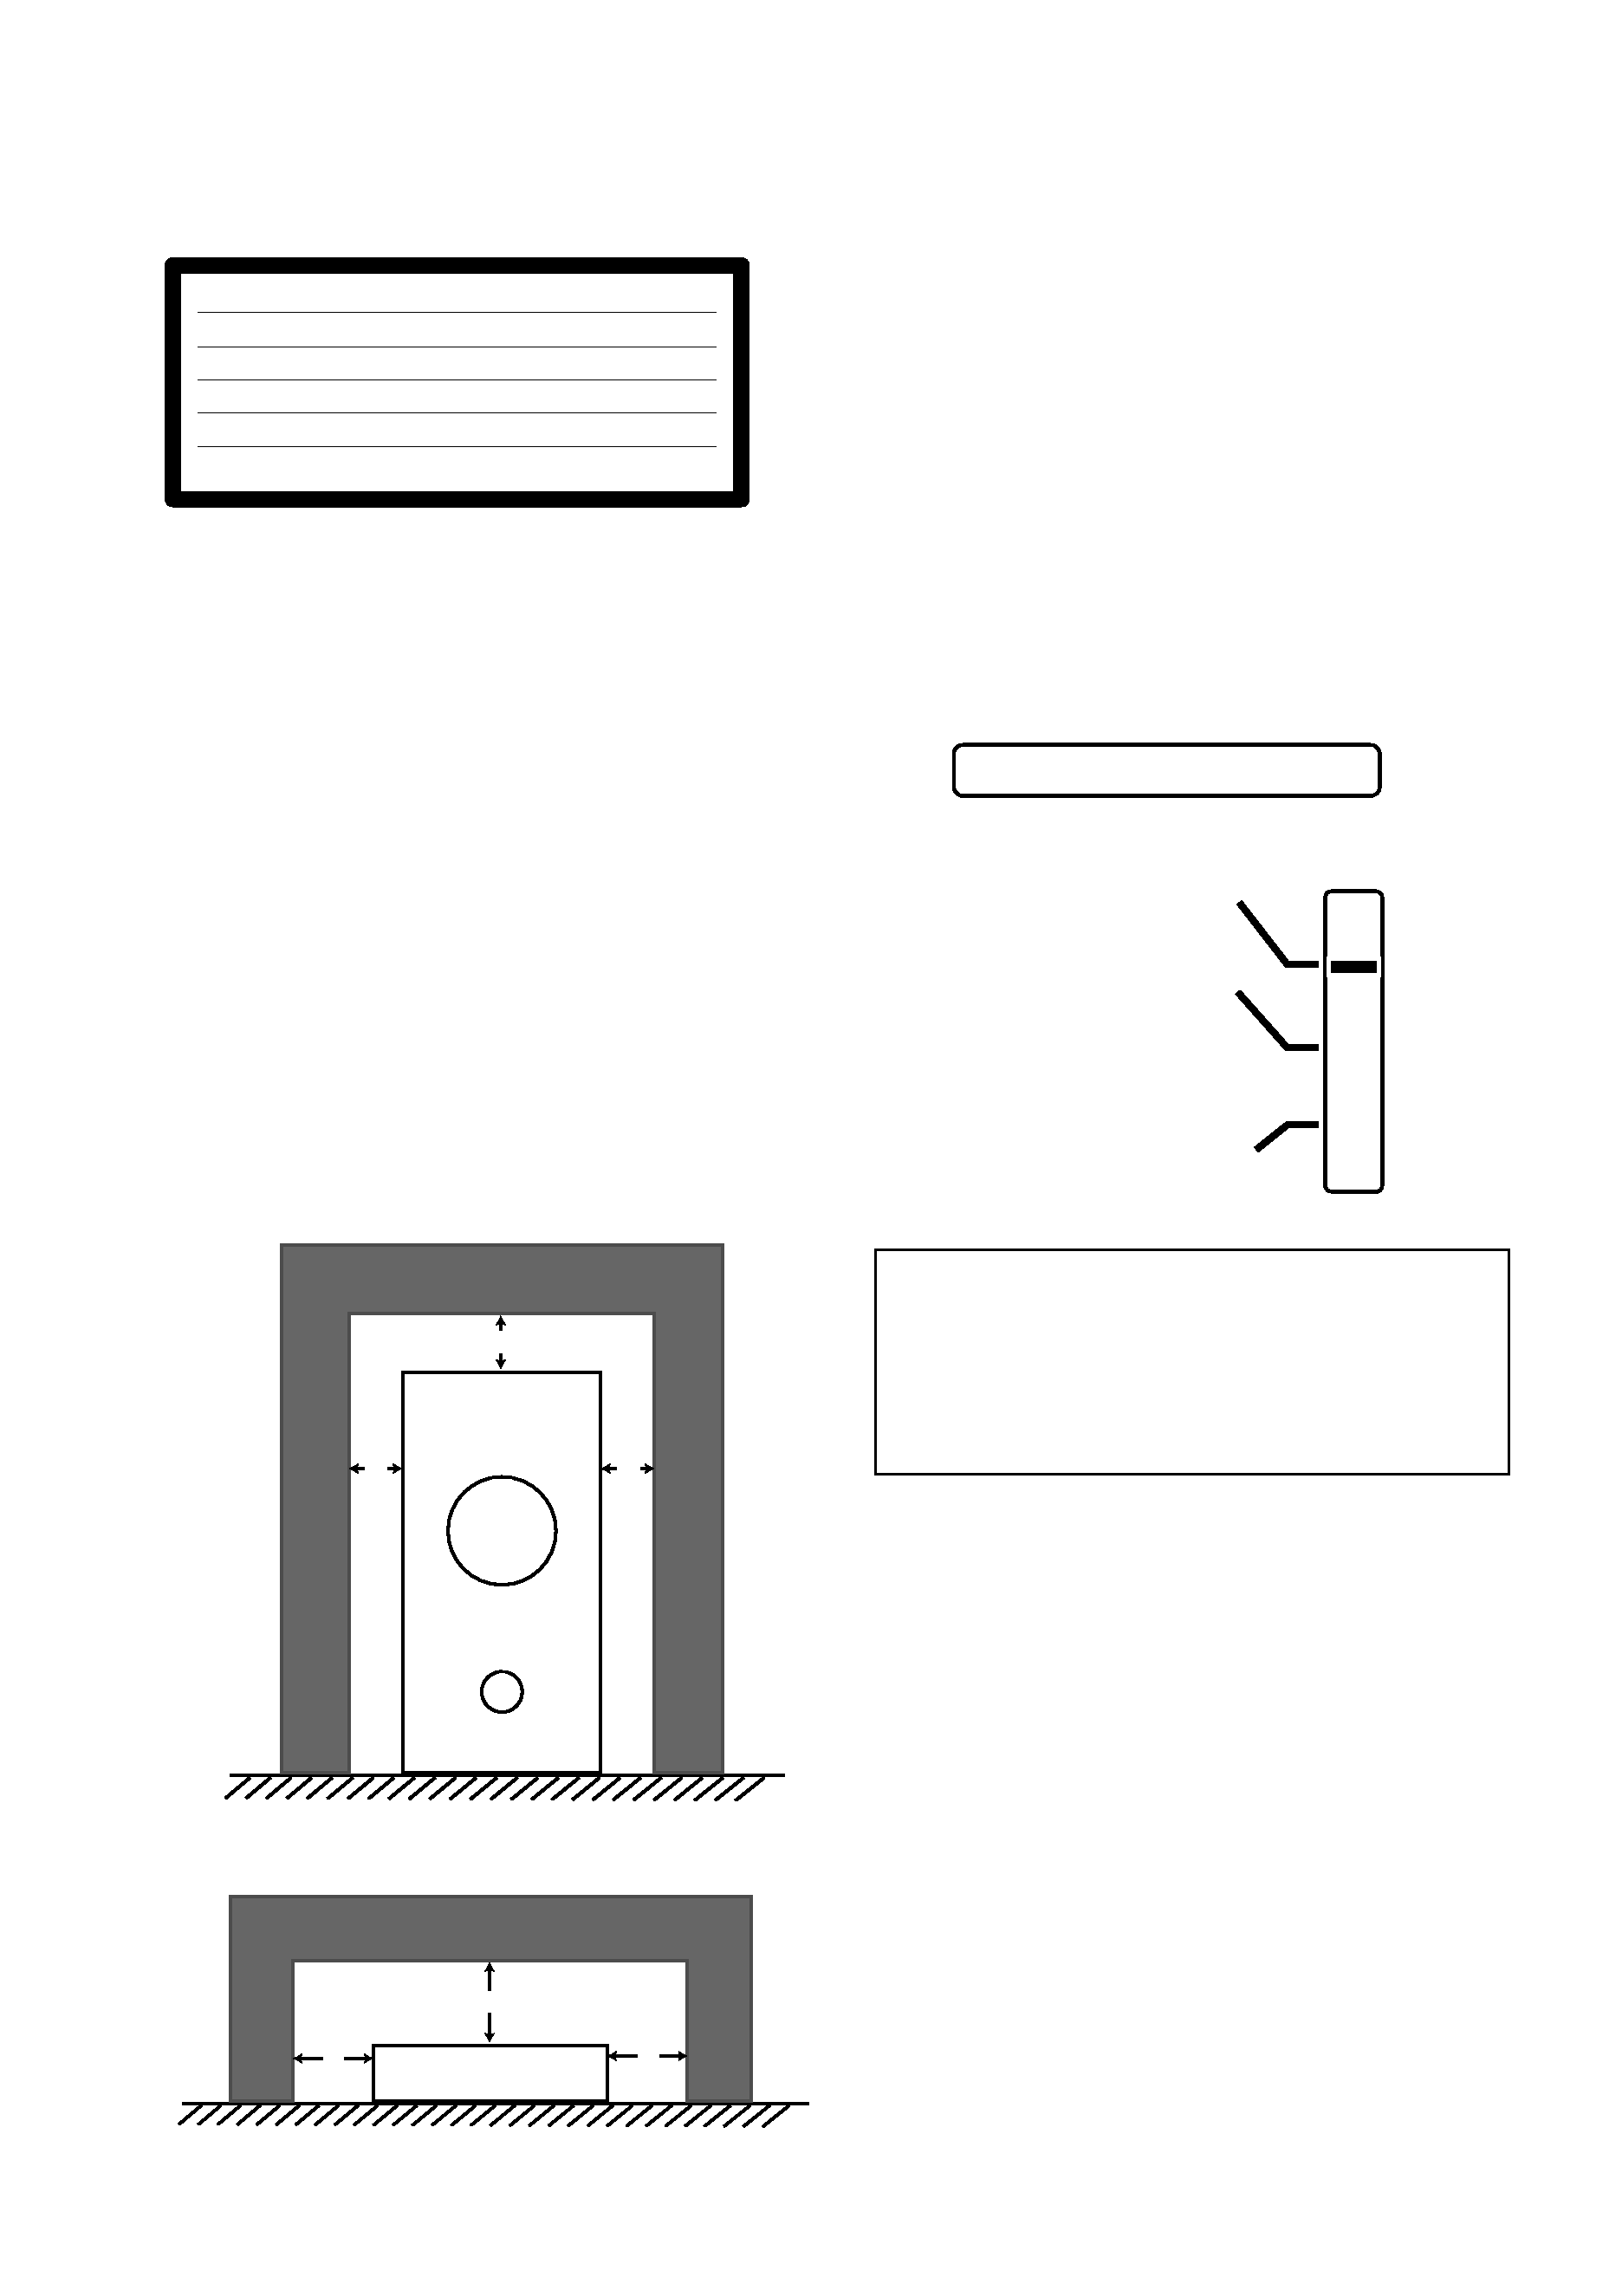
Installation precautions
· Install components so that there are no
obstructions above or either side, and
nothing blocking ventilation holes.
· Leave at least 5 cm of free space around
the subwoofer and at least 15 cm
around the DVD/CD Tuner, as shown
below. Remember to also leave this
amount of space at the rear.
· Components have ventilation holes on
the bottom so do not install on thick pile
carpets or other surfaces that may block
them.
· Use a vacuum cleaner periodically to
clean the port of the subwoofer to keep
it free of dust.
5 cm
5
cm
5
cm
Powered subwoofer unit (S-DV1000SW)
DVD/CD Tuner unit (XV-DV1000)
15 cm
15
cm
15
cm
VOLTAGE SELECTOR SWITCH
Only multi-voltage model is provided
with these switches.
Always check that selector are set properly
before plugging the power cord into the wall
outlet.
1. Disconnect the power cord.
2. Use a small-sized screwdriver.
3. Insert the screwdriver into the groove on
the voltage selector, and adjust the
VOLTAGE SELECTOR.
240 V
VOLTAGE SELECTOR
220V
230V
110V
120V
CAUTION 240 V
Power source voltage is factory adjusted
at 240 volts. If your area is different,
change the voltage selector's setting.
H039En
Wall mounting the speakers
· If you are unsure of the qualities and
strength of the walls, consult a
professional for advice.
· PIONEER is not responsible for any
accidents or damage that result from
improper installation.

Contents
01 Before you start
Features .............................................................. 9
Supplied accessories ....................................... 10
Putting the batteries in the remote control ... 10
Using the remote control ................................ 11
Disc / Content Format
Playback Compatibility .................................... 11
General Disc Compatibility ........................ 11
CD-R/RW Compatibility ............................. 12
DVD-R/RW Compatibility ........................... 12
Compressed Audio Compatibility ............. 12
PC Created Disc Compatibility .................. 12
Titles, chapters, groups and tracks ........... 13
DVD-Video regions ...................................... 13
02 Controls and displays
Front panel ........................................................ 14
Remote control ................................................. 15
Display (discs) .................................................. 18
Display (tuner) .................................................. 19
Display (other) .................................................. 20
03 Getting started
Switching on ..................................................... 21
Automatic power on buttons ..................... 21
Setting the unit to match your TV system ...... 21
Switching off the demo ................................... 22
Using the Room Setup guide .......................... 22
Setting the clock .............................................. 23
Setting up the remote to control your TV ....... 23
Using the on-screen displays .......................... 24
Playing discs .................................................... 25
Basic playback controls ............................. 26
DVD disc menus ......................................... 27
Navigating DVD-RW (VR mode)
disc menus .................................................. 28
Video CD PBC menus ................................ 28
04 Playing discs
Introduction ...................................................... 29
Using the Disc Navigator to browse
the contents of a disc ...................................... 29
Scanning discs ................................................. 30
Playing in slow motion .................................... 30
Frame advance/frame reverse ........................ 31
Looping a section of a disc ............................. 31
Using repeat play ............................................. 32
Using the OSD ............................................ 32
Using the display unit ................................ 33
Using random play ........................................... 33
Using the OSD ............................................ 33
Using the display unit ................................ 33
Creating program lists ..................................... 34
Using the OSD ............................................ 34
Other functions available from
the OSD program menu ....................... 35
Using the display unit ................................ 36
Clearing the program list ........................... 36
Searching a disc .............................................. 36
Playing DVD-Audio `Bonus Groups' ............... 37
Switching subtitles .......................................... 37
Switching DVD-Video audio languages ......... 38
Switching DVD-Audio audio channels ........... 38
Switching CD/MP3/Video CD/Super
VCD audio channels ........................................ 38
Switching camera angles ................................ 39
Displaying disc information ............................ 39
Using the front panel display .................... 40