
High power CD player with FM/MW/LW tuner
Manual
DEH-P3110


&RQWHQWV
Installation ............................................. 4
Installation with the Rubber Bush ...................... 5
Removing the Unit ............................................. 5
Connecting the Units ............................ 6
Connection Diagram ............................. 8
Key Finder ........................................... 10
·Head Unit
Before Using This Product ................. 11
About This Product ........................................... 11
About This Manual ........................................... 11
Precaution ......................................................... 11
In Case of Trouble ............................................ 11
Basic Operation .................................. 12
To Listen to Music ............................................ 12
Basic Operation of Tuner ................................. 13
· Manual and Seek Tuning
·Preset Tuning
·Band
Basic Operation of Built-in CD Player ............. 14
·Eject
· Track Search and Fast Forward/Reverse
· Disc Loading Slot
Corresponding Display Indications
and Buttons .....................................................15
Entering the Function Menu ............................. 16
Function Menu Functions ................................. 17
Tuner Operation .................................. 18
· Local Seek Tuning (LOCAL)
· Best Stations Memory (BSM)
Using the Built-in CD Player .............. 19
· Repeat Play (REPEAT)
· Random Play (RANDOM)
· Scan Play (T-SCAN)
· Pause (PAUSE)
Audio Adjustment ............................... 21
Selecting the Equalizer Curve .......................... 21
Entering the Audio Menu ................................. 21
Audio Menu Functions .................................... 22
· Balance Adjustment (FADER)
· Equalizer Curve Adjustment
(EQ-LOW/MID/HIGH)
· Equalizer Curve Fine Adjustment
· Loudness Adjustment (LOUD)
· Front Image Enhancer Function (FIE)
· Source Level Adjustment (SLA)
Detaching and Replacing
the Front Panel ................................ 28
Theft Protection ............................................... 28
· Detaching the Front Panel
· Replacing the Front Panel
Other Functions .................................. 29
Setting the Time ............................................... 29
Time Display .................................................... 30
· Displaying the Time
Using the PROGRAM Button (PGM-FUNC) . 30
· Setting the PROGRAM Button
· Using the PROGRAM Button
Cellular Telephone Muting .............................. 32
CD Player and Care ............................. 33
Precaution ........................................................ 33
Built-in CD Player's Error Message ................. 34
Specifications ...................................... 35
1RWH
· Before finally installing the unit, connect the wiring temporarily, making sure it is all connected up
properly, and the unit and the system work properly.
· Use only the parts included with the unit to ensure proper installation. The use of unauthorized parts
can cause malfunctions.
· Consult with your nearest dealer if installation requires the drilling of holes or other modifications of
the vehicle.
· Install the unit where it does not get in the driver's way and cannot injure the passenger if there is a
sudden stop, like an emergency stop.
· The semiconductor laser will be damaged if it overheats, so don't install the unit anywhere hot -- for
instance, near a heater outlet.
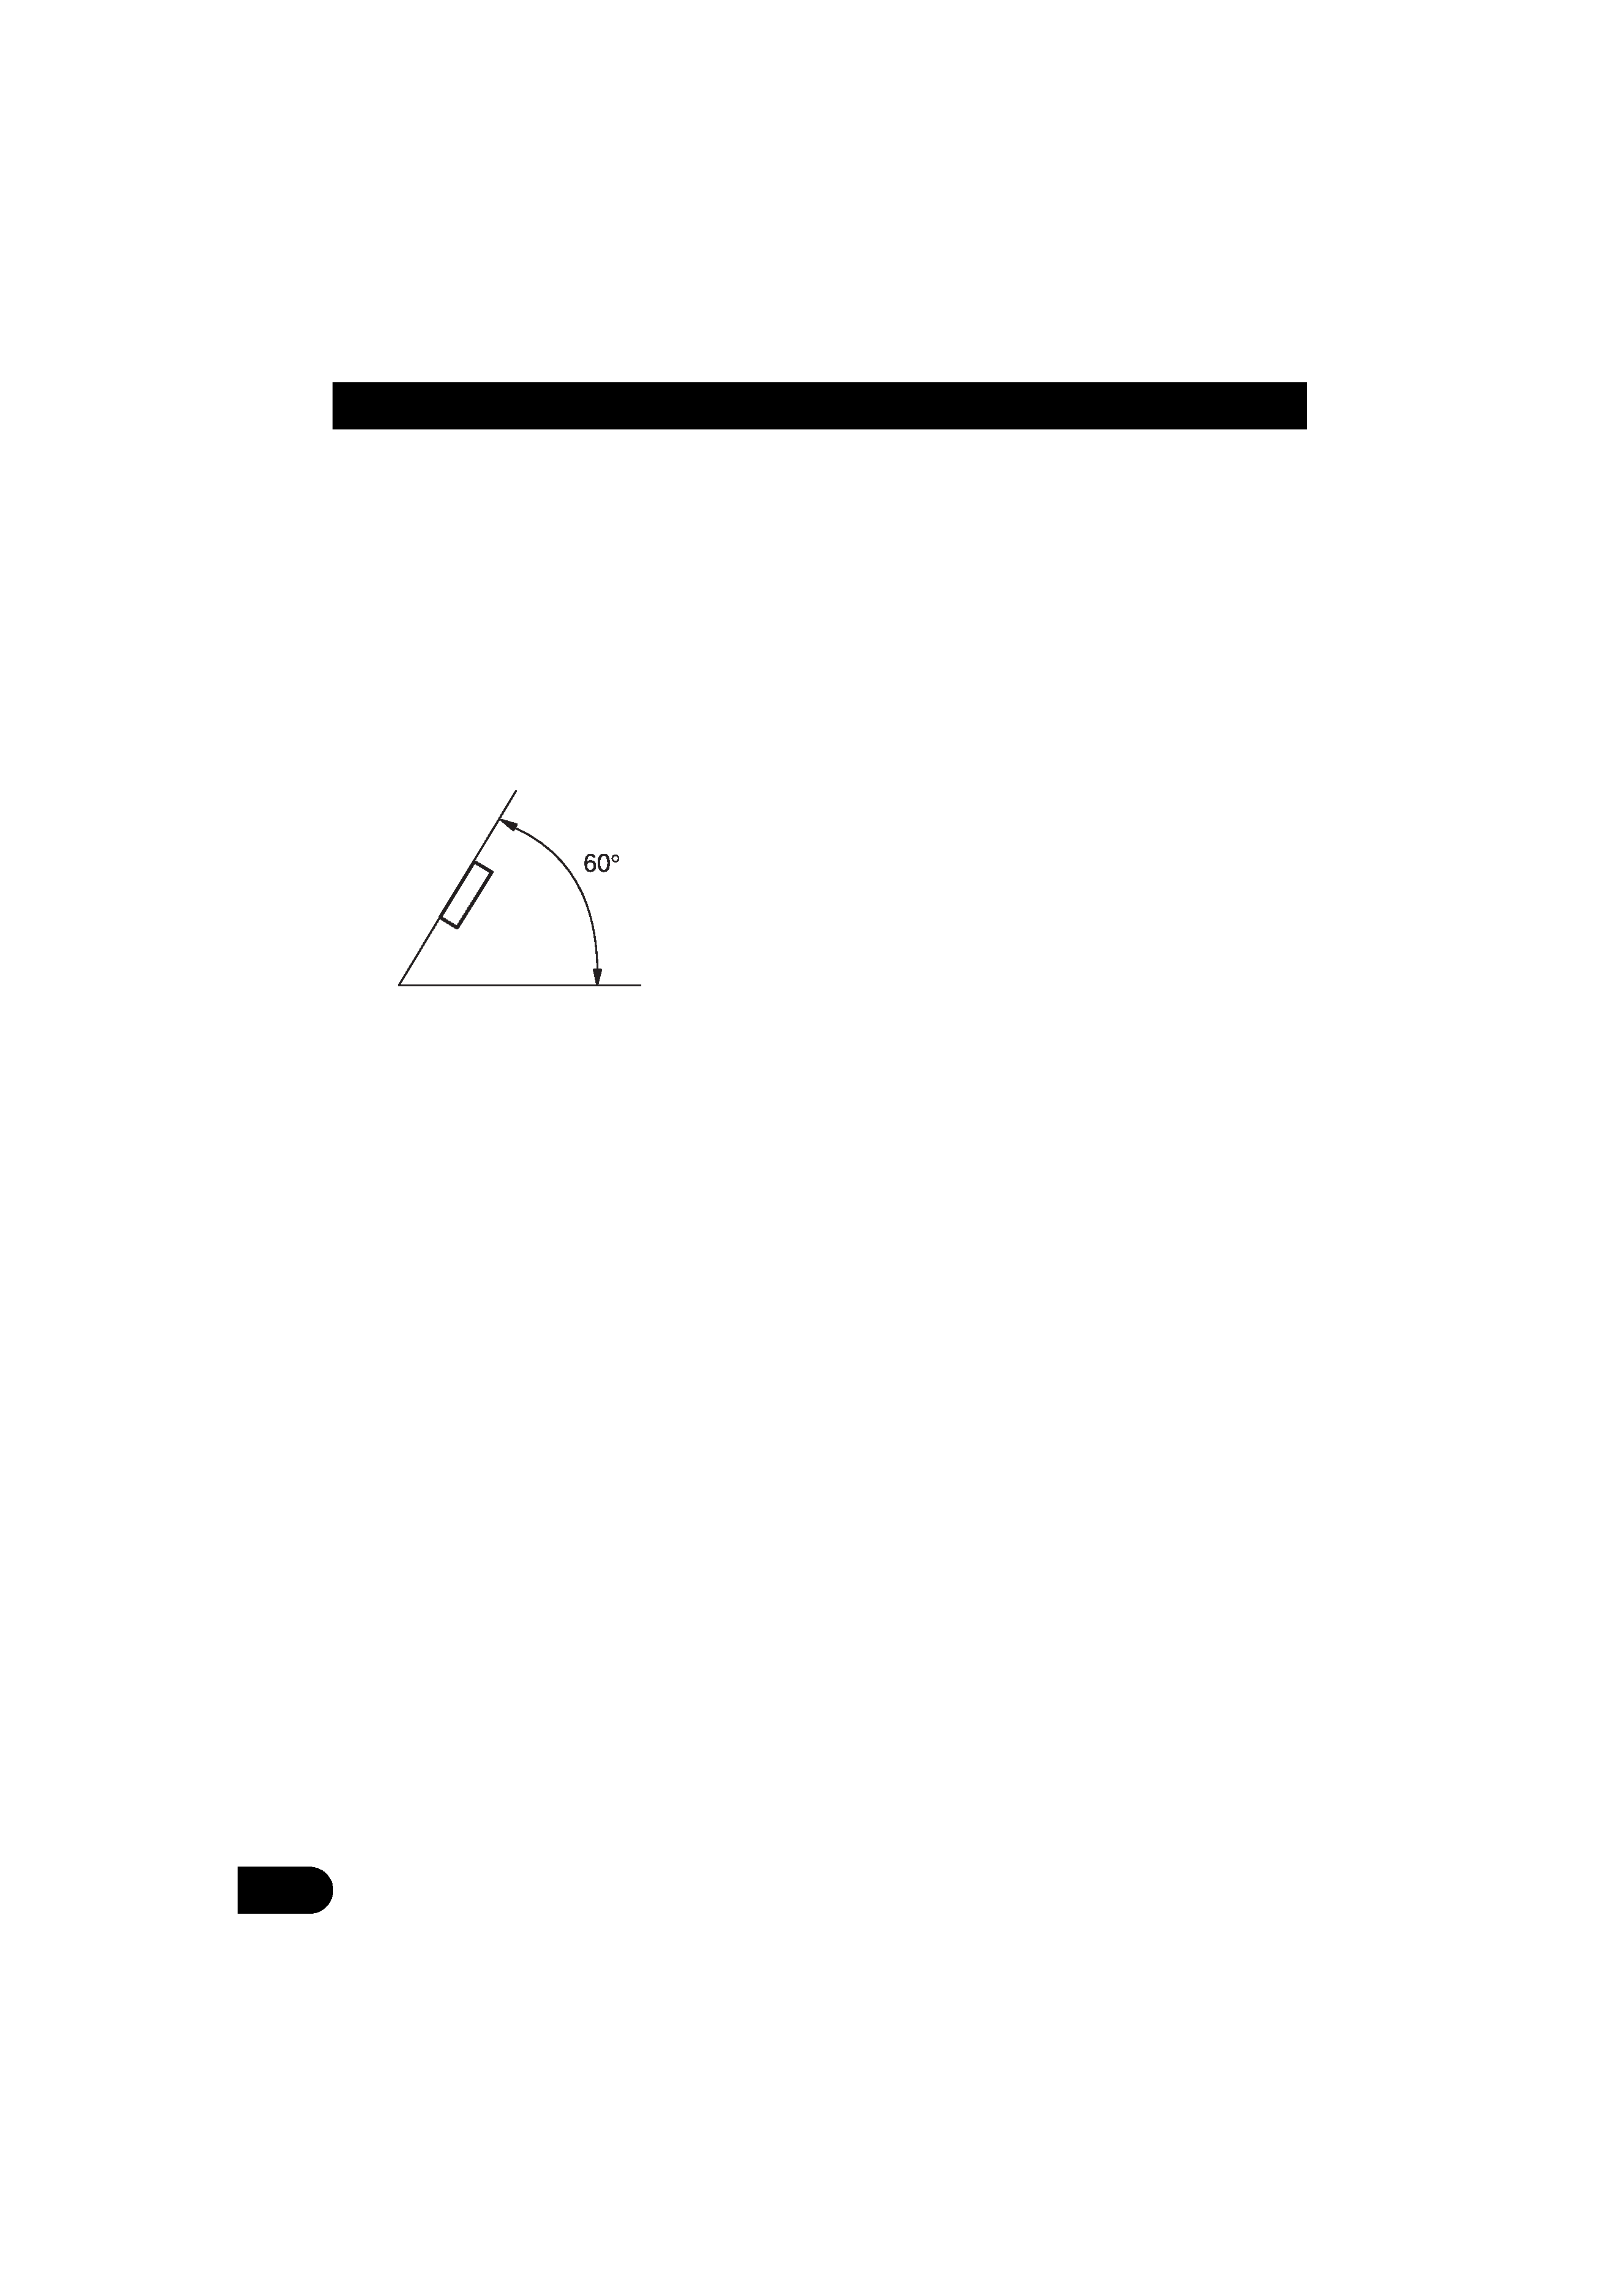
· If installation angle exceeds 60° from horizontal, the unit might not give its optimum performance.
,QVWDOODWLRQ
Installation with the Rubber Bush
Removing the Unit
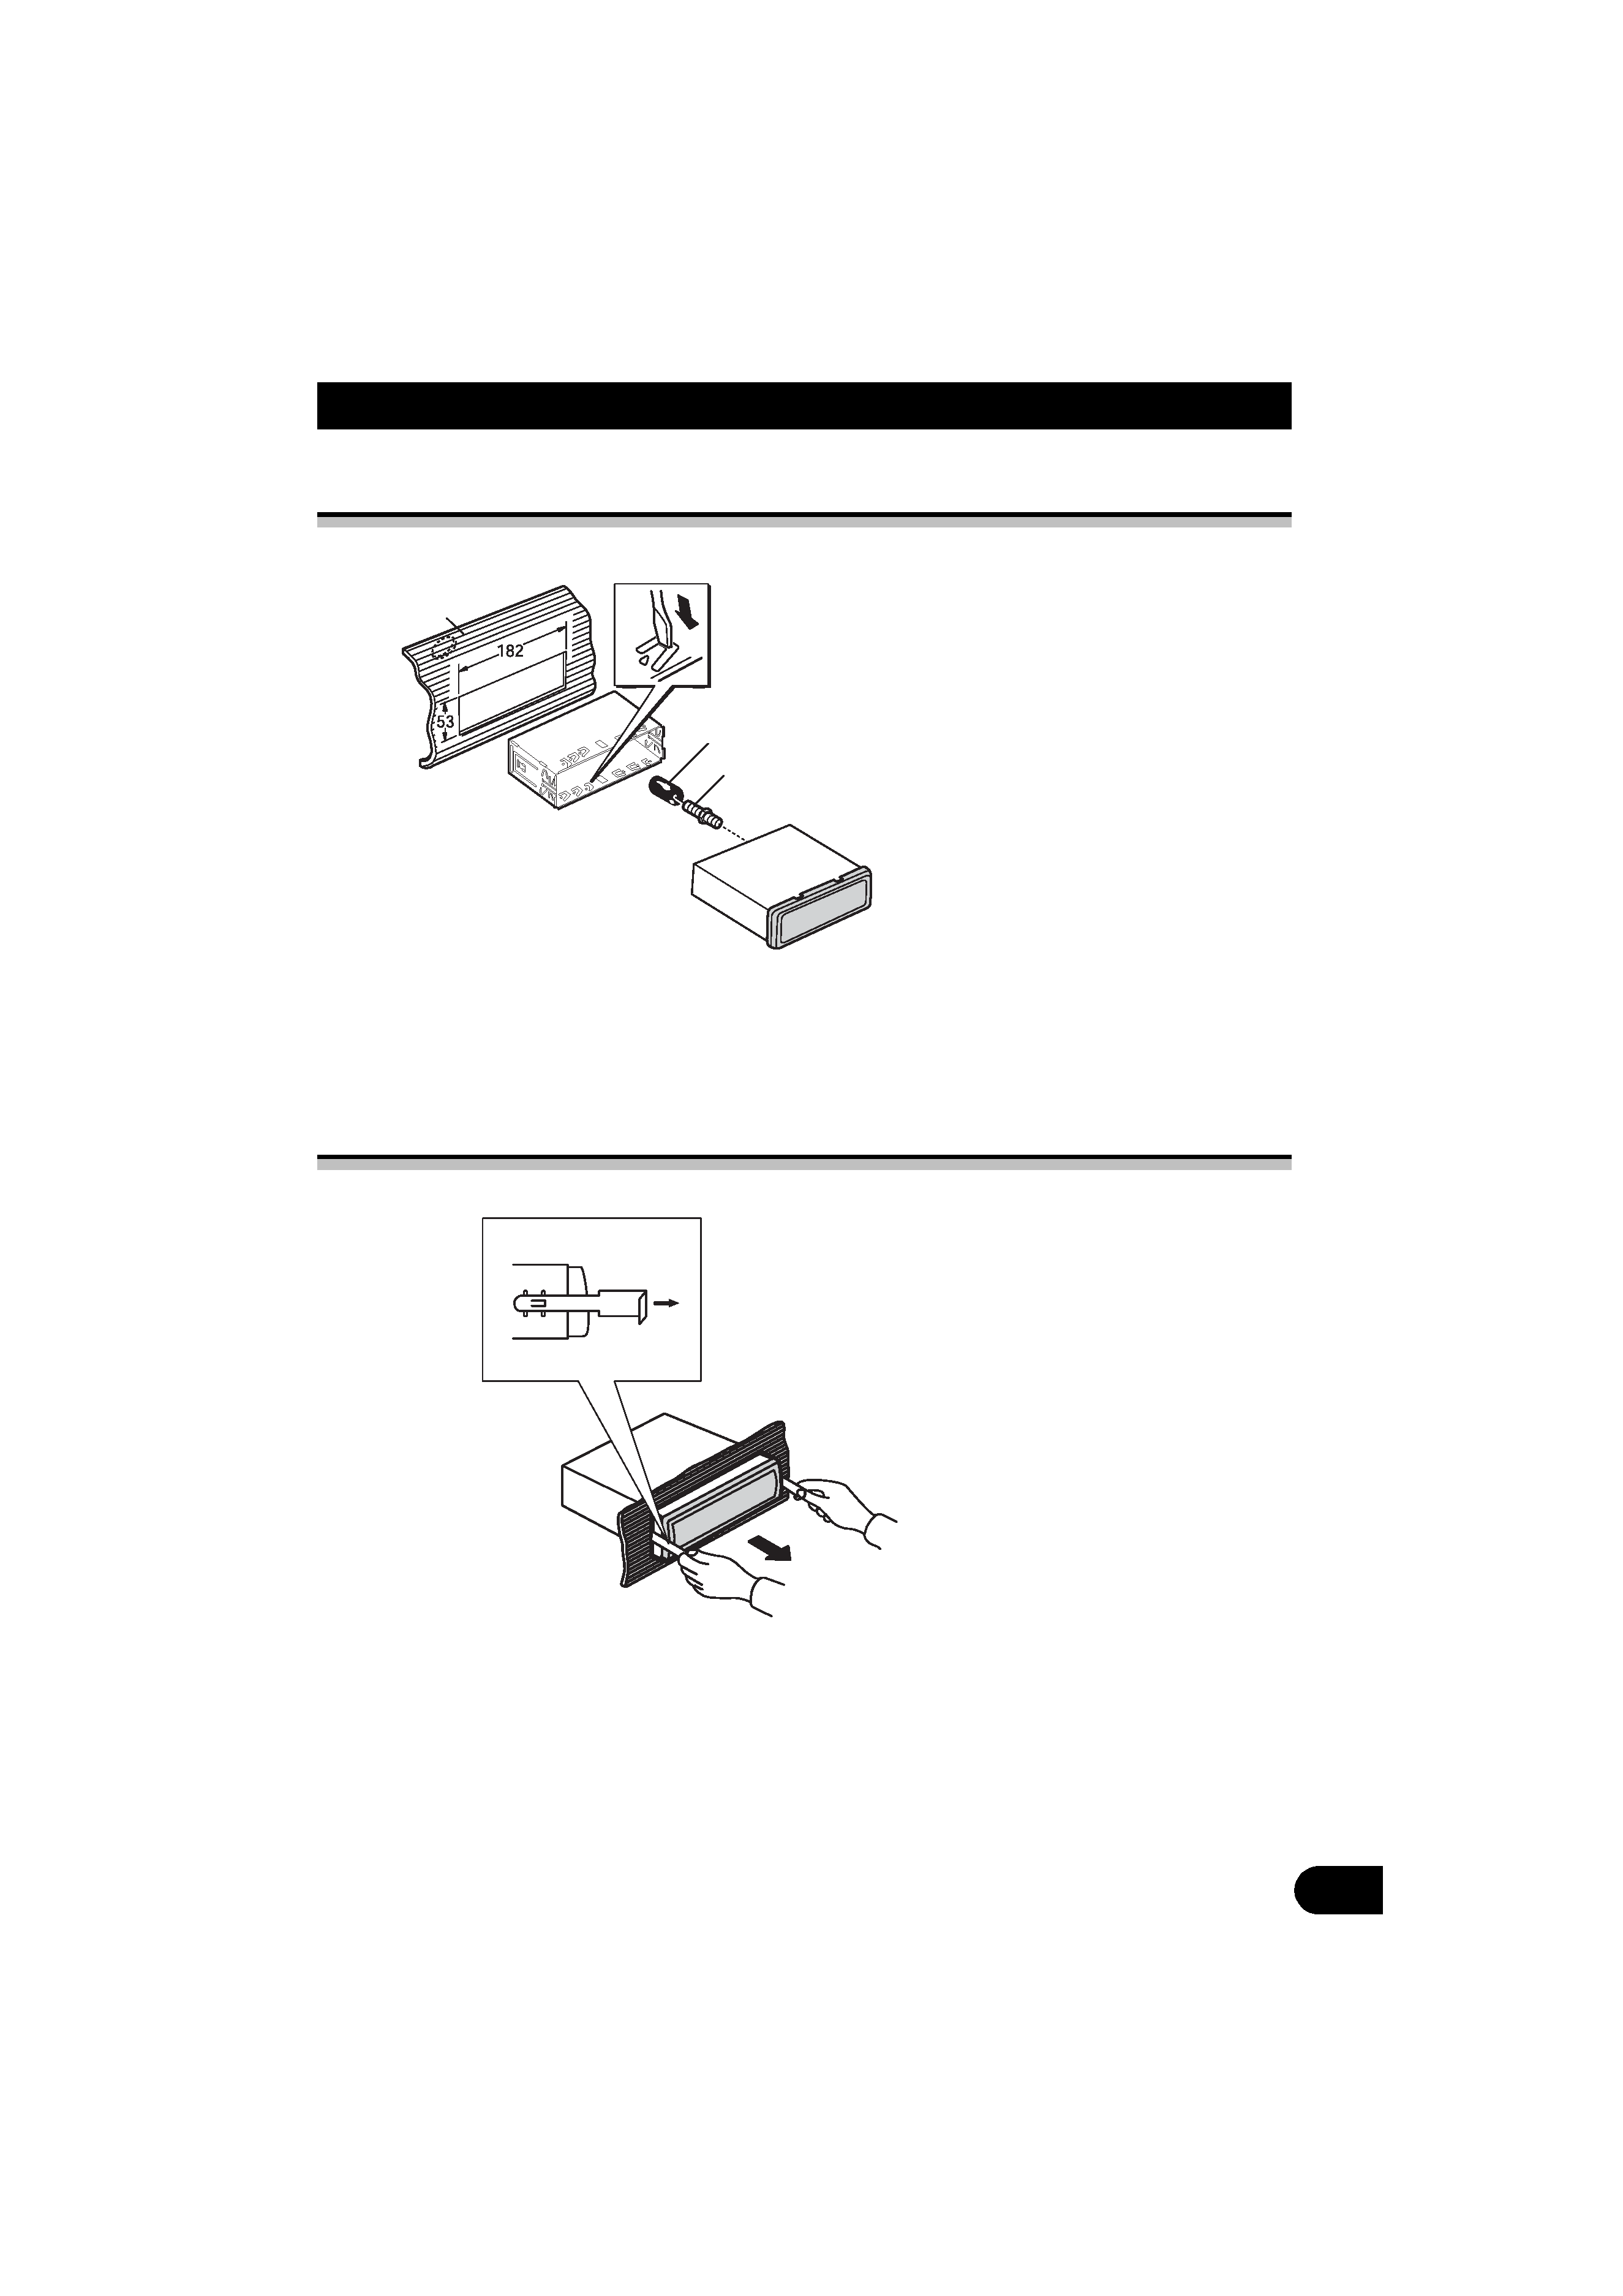
Holder
After inserting the holder into the dashboard, then select the
appropriate tabs according to the thickness of the dashboard
material and bend them. (Install as firmly possible using the
top and bottom tabs. To secure, bend the tabs 90 degrees.)
Screw
Rubber bush
Dashboard
Insert the supplied extraction keys into the unit, as
shown in the figure, until they click into place.
Keeping the keys pressed against the sides of the unit,
pull the unit out.