Quick Start
AVIC-F500BT
! Be sure to charge the battery before using this product.
! Read "Important Information for the User" before using this product.
! This guide is intended to guide you through the basic functions of this
navigation system. For details, please refer to the operation manual.
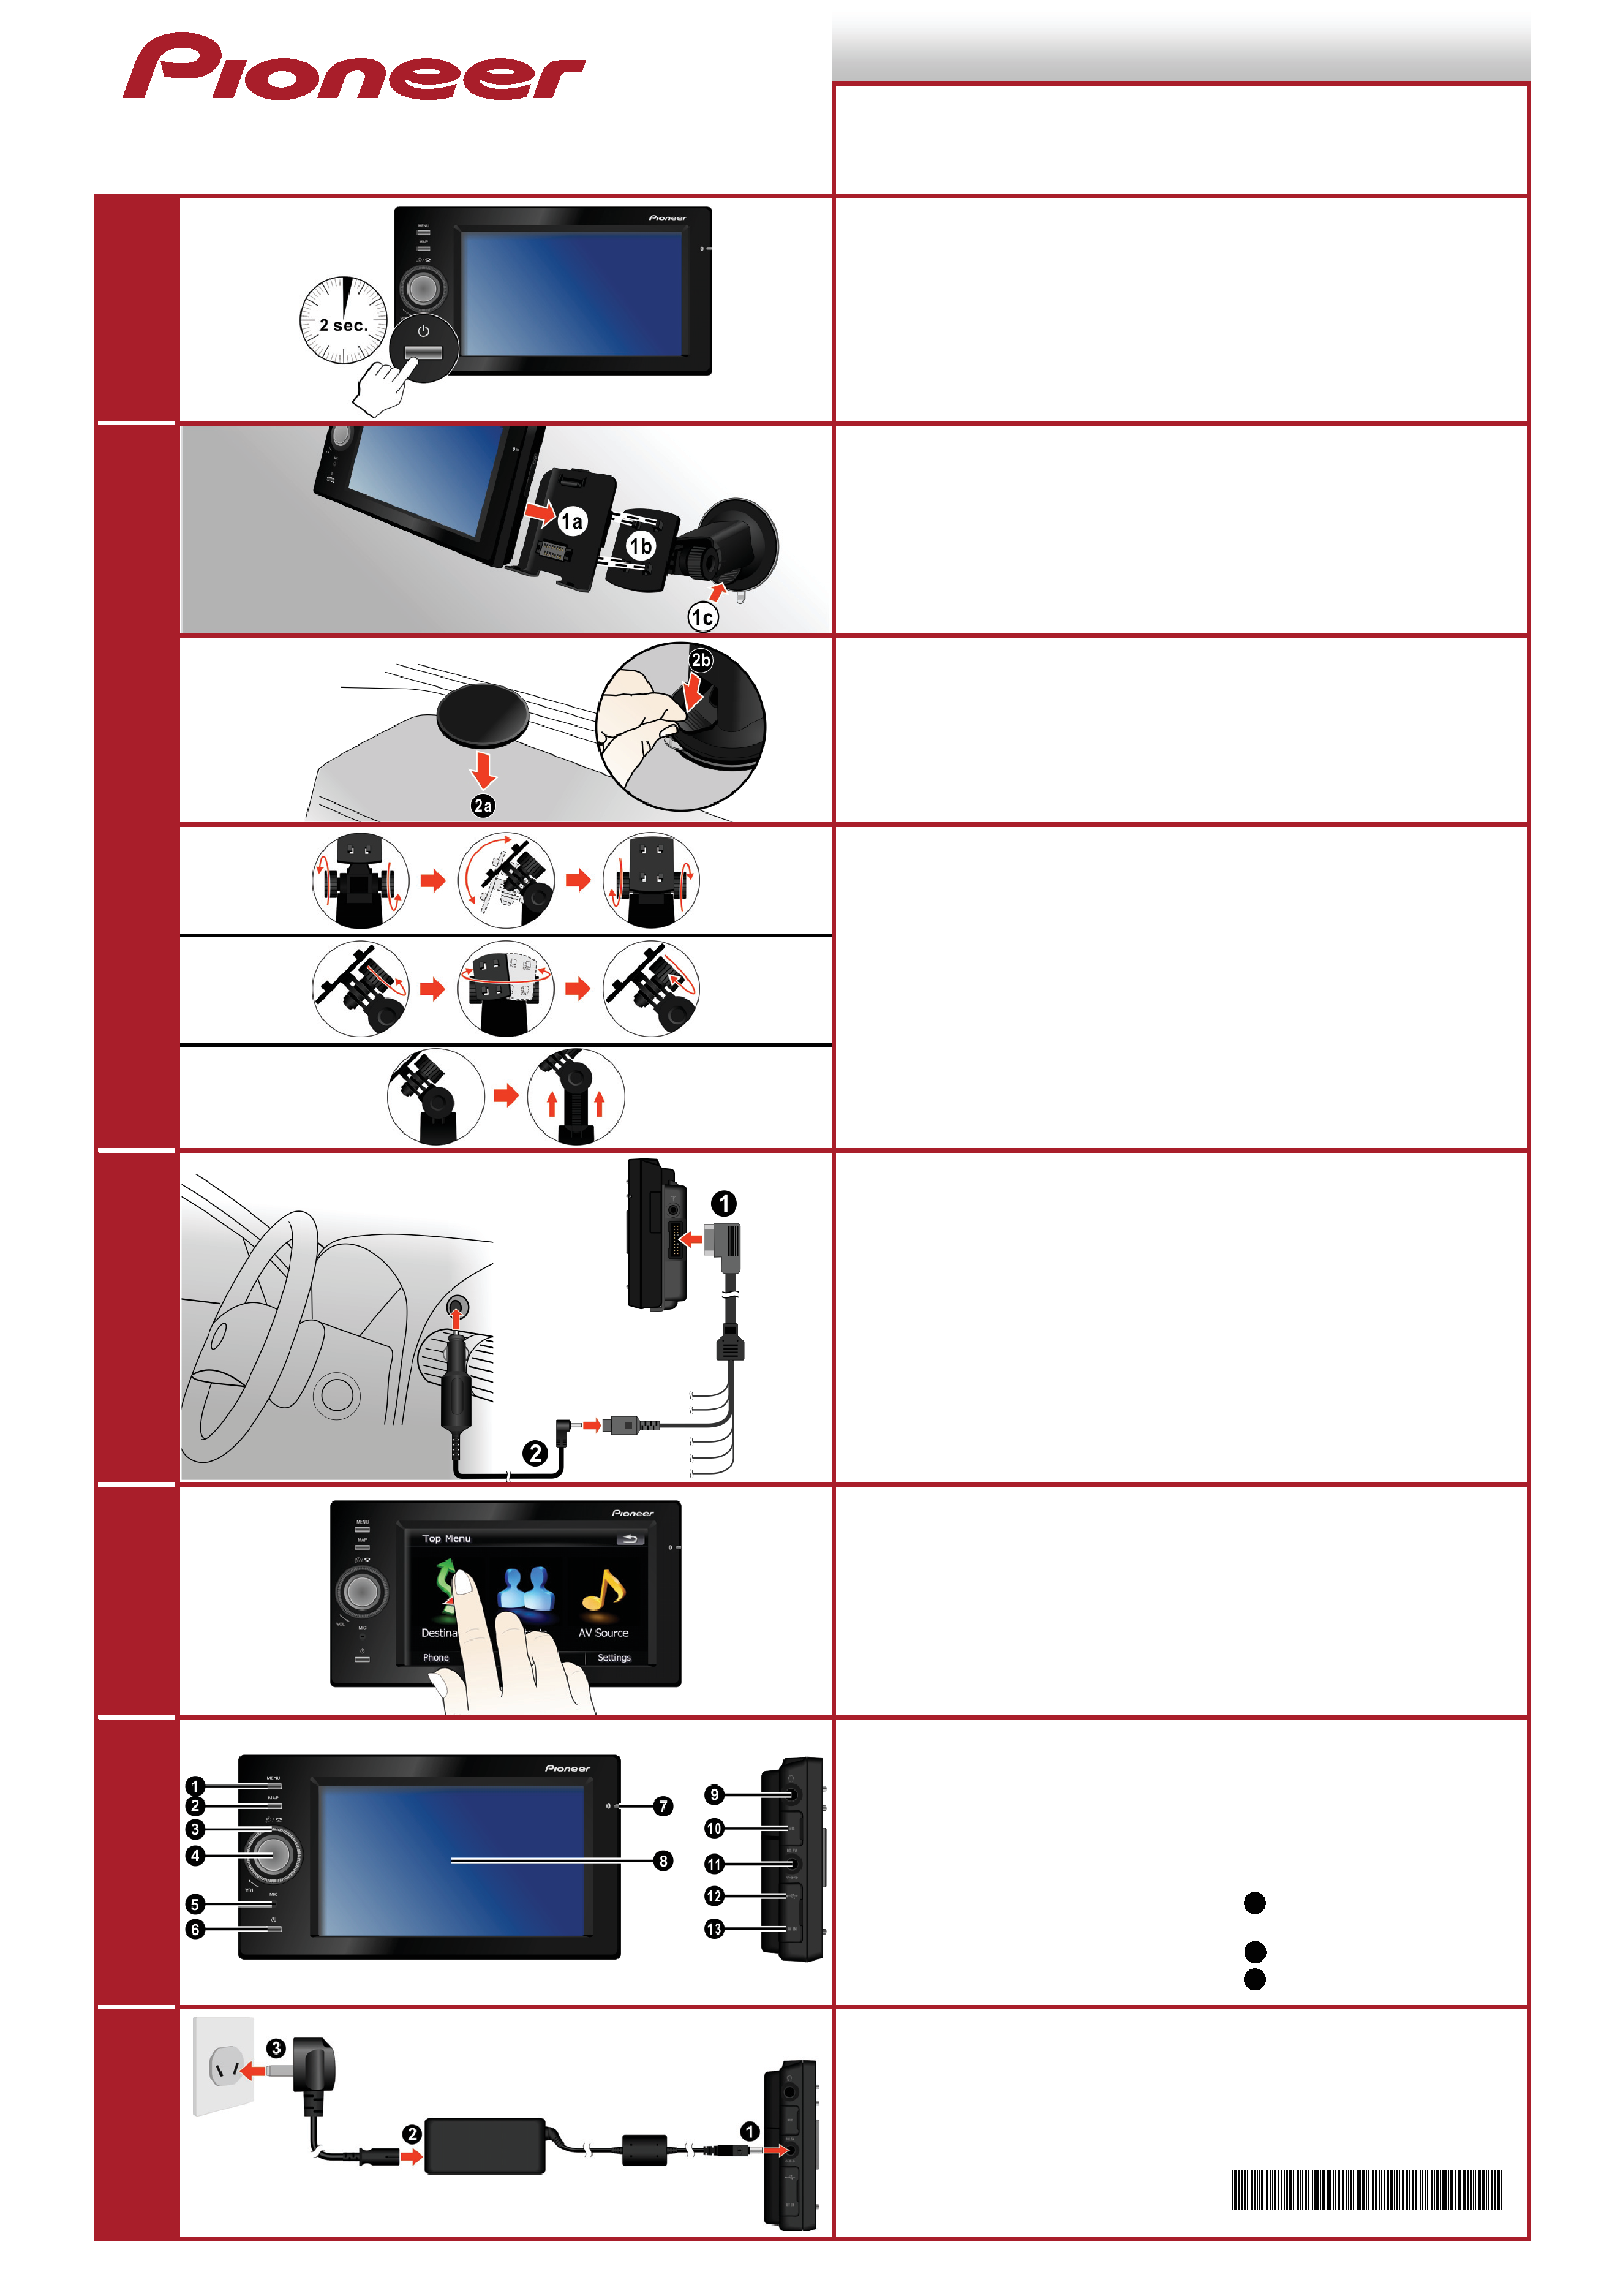
1
Press and hold the power button for 2 seconds to turn on and off your
device.
! Pressing the power button for less than 2 seconds enters the Stand-by
mode.
! Pressing the power button for more than 2 seconds enters the Power Off
mode.
Windshield Mount: Attach AVIC-F500BT to the cradle (1a). Then slide
the cradle into the adapter end of the suction mount (1b) and lock into
place by pressing down. Lastly, attach the suction side of the suction
mount to your windshield, and lock by pressing the lever toward the
suction cup (1c).
! To retain adhesion of the suction cup, detach and then re-attach the
suction cup at least once a month.
Dashboard Mount: Attach AVIC-F500BT to the cradle and the adapter
end of the suction mount as described above (1a and 1b). Stick the Dash
Mounting Plate onto your dashboard (2a), and attach the suction side of
the suction mount to the plate (2b).
! To retain adhesion of the suction cup, detach and then re-attach the
suction cup at least once a month.
2
! Make sure thatAVIC-F500BT does not obstruct the driver's view, or
interfere with the operation of vehicle airbags and safety devices.
! Adjust the viewing angle with the thumb screws (as the first two pictures
shown).
! Pull the suction mount upward or downward to adjust the height of the
mount (as the last picture shown).
3
Connect the power: Connect the cradle cable to the cradle connection
socket ( ). Then connect the black cradle cable to the car charger ( ) or
to a DC (5V) power source.
! Be sure to attach the cradle to yourAVIC-F500BT before connecting the
car charger.
4
To navigate and select objects on the screen, use your finger to touch on
the screen.
5
Menu Button
Press to show Main Menu.
Map Button
Press to show Map Menu.
Volume
Scroll to adjust the volume.
Control Button
Up/Down:
Map scale change
Left/Right:
Track Up/Down for AV
Center:
Activation of Bluetooth
Microphone
Power Button
Bluetooth Indicator
Touch Screen
Headphone Connector
External Microphone
Connector
11
Power Connector for AC
adapter
12
Mini-USB Connector
13
AV IN Connector
6
At Home
Connect the AC adapter to charge the battery.
5 6151 6670 00 3 R 0 0
Dashboard
Mount
Windshield
Mount
or DC 5V