÷
÷
÷
÷
÷
÷
AP
Precaution for use
This unit is designed for domestic use only, and it is very dangerous
to use the attached AC adaptor abrord. Never use it out of Japan.
Ni-MH
÷
÷
÷
÷
÷
÷
÷
÷
1
2
3
4
÷
^
*
÷
÷
÷
^
^
1
2
÷
÷
÷
(
2
1
÷
&
)
1
2
1
÷
÷
÷
÷
÷
2
1
2
DPC-X337/X330 (JA)

÷
÷
÷
÷
÷
÷
÷
÷
÷
÷
÷
÷
÷
÷
÷
÷
÷
÷
÷
÷
÷
÷
÷
÷
÷
÷
÷
÷
÷
4
2
1 3
5
1
2
÷
3
4
5
÷
~
÷
÷
Å
i
Ç
Î
4 ¢
Ï
38
1
38
7
4 ¢
Ç
Ì
Î
Ï
i
Å
Ó¬
ÔÒ
~^
ø
Ì
7
Ó
¬
Ô
Ò
~
^
Ø
÷
2
3
÷
38
÷
÷
÷
4
÷
7
^
÷
¢
÷
÷
4
÷
4
¢
5
6
4
¢
÷
¢
÷
4
÷
4¢
4¢
3
1 22
21
9
1
2
1
2
÷ 1
2
÷
4¢
3
8
÷
7
÷
÷
÷
38
÷
÷
1
2
3
4
5
-
7
=
÷
÷
7
~
÷
0
1
2
3
1
2
4¢
÷
2
3
÷
7
÷
7
!
#
$
÷
÷
÷
÷
@
÷
÷
÷
÷
÷
÷
÷
÷
÷
÷
÷
÷
÷
÷
÷
÷
÷
÷
÷
÷
÷
÷
÷
÷
÷
÷
÷
÷
÷
÷
÷
÷
÷
÷
÷
÷
÷
÷
÷
÷
%
÷
÷
÷
÷
1
2
Ò
Operating instructions
Please refer to the illustrations in the Japanese instruction when operating this unit. The numbers which appear at the end of each title are corresponded on each language.
÷ When the SKIP/SEARCH 4 key is pressed once dur-
ing playback, the played position returns to the begin-
ning of the current track being played.
Fast forward, fast reverse
6
÷ Hold the SKIP/SEARCH 4 key or the ¢ key pressed
during playback.
÷ Playback resumes from the position where the key is
released.
Selecting Play Mode
7
Press during playback or stop status.
Each press of the P.MODE key switches the mode as
follows:
1One-track repeat
The track being played or the selected track will be played
repeatedly.
2All-track repeat
All tracks on the disc will be played repeatedly.
3Intro Scan
The disc will then begin playing the first ten seconds of
all tracks once and then stops automatically.
4Random play
All tracks on the disc will be played in a random order.
5Returns to the normal playback is mode.
÷ If Intro Scan or Random Play is selected while playback is in
progress, Intro Scan or Random Play operation will com-
mence when the track being played back is over.
÷ If Intro Scan or Random Play is selected during stop, Intro
Scan or Random play will start when the PLAY/PAUSE
38 key is pressed.
÷ Up to 99 tracks can be played back in Random Play op-
eration.
÷ The program of tracks is also valid in Repeat or Intro Scan
playback.
Changing the tone 8
The low frequencies sound, which is felt in headphone,
can be boosted.
Slide the B.BOOST switch to select the desired setting:
1 B.BOOST On position :
Low frequencies are boosted.
2 B.BOOST Off position :
Normal tone reproduction.
Playback from the first track
1
Connect hedphones
÷ Accepts the supplied headphones, or other optional head-
phones with a mini plug.
1 Open the top cover.
2 Insert a disc and close the top cover.
÷ Secure the disc by pushing a position near the center
hole until it clicks.
÷ Press down on the central front portion of the lid until it
clicks.
3 Make sure the HOLD switch has been released.
÷ For the Hold function, read "Hold function ~".
÷ Set the HOLD switch to off (HOLD Off).
4 Start playback.
÷ The power comes on and playback begins.
÷ Certain CD-R/CD-RW discs may not be played due to re-
cording conditions of the discs.
5 Adjust the volume.
To increase volume.
To decrease volume.
To pause playback temporarily
2
÷ When the PLAY/PAUSE 38 key is pressed during playback, it
pauses temporarily. Pressing the key again resumes playback.
To stop playback
3
÷ The total number of tracks and the total playing time of
them will be displayed.
÷ When a disc is inserted and the top cover is closed in
stop mode, playback starts automatically.
To turn power Off
4
÷ After stopping playback, press the STOP 7 key again.
Auto power-Off function
÷ If no operation key has been pressed for 30 seconds while
the unit is in the stop mode, the power is turned Off
automatically to prevent battery power consumption.
Skipping to or searching a desired track
Selection by track skip
5
÷ The same number of tracks as the times the key is
pressed can be skipped.
Programming tracks in desired order
9
Favorite tracks (max. 20 tracks) can be programmed in the
desired order during stop mode for later playback.
1 Press the PROGRAM key.
2 Selectthedesiredtracknumbersintheorderyouwanttoplaythem.
1Select a track ...
2and enter it.
Repeat steps
1 and 2 and enter the Track Nos. into
the program in order.
÷ Up to 20 tracks can be programmed in this unit, but not
more than 20 tracks.
3 Start playback.
To change a programmed content
0
1 Press the PROGRAM key.
÷ Stop status is engaged when the STOP 7 key is pressed
while the program is in progress.
2 Call the programmed order to be changed.
÷ Press the PROGRAM key repeatedly until the pro-
grammed order you want to change is displayed.
3 Enter the track number you want to change.
1Select a track ...
2and enter it.
To check the programmed contents
-
Press the
PROGRAM key during Stop status.
÷ Each press of the PROGRAM key displays the next track
number in the programmed order.
÷ Stop status is engaged when the STOP 7 key is pressed
while the program is in progress.
To clear the programmed contents
=
Press the STOP
7 key.
÷ The "PGM" indicator is turned off when the program is
cleared. However, the programmed contents are stored.
÷ Program mode can be canceled when the STOP 7 key is
pressed or the top cover is open while stop status is
engaged. The programmed contents are cleared.
Notes for remote control
÷ Always ensure that the headphone plug is fully inserted
before turning the power On.
DPC-X337/X330 (JA)
Hold function
~
The operation keys of the main unit are deactivated. This
position prevents undesired operation when the unit is put
in a bag, etc.
÷ When the HOLD switch on the unit is switched on (HOLD
On), the unit's keys cannot be operated.
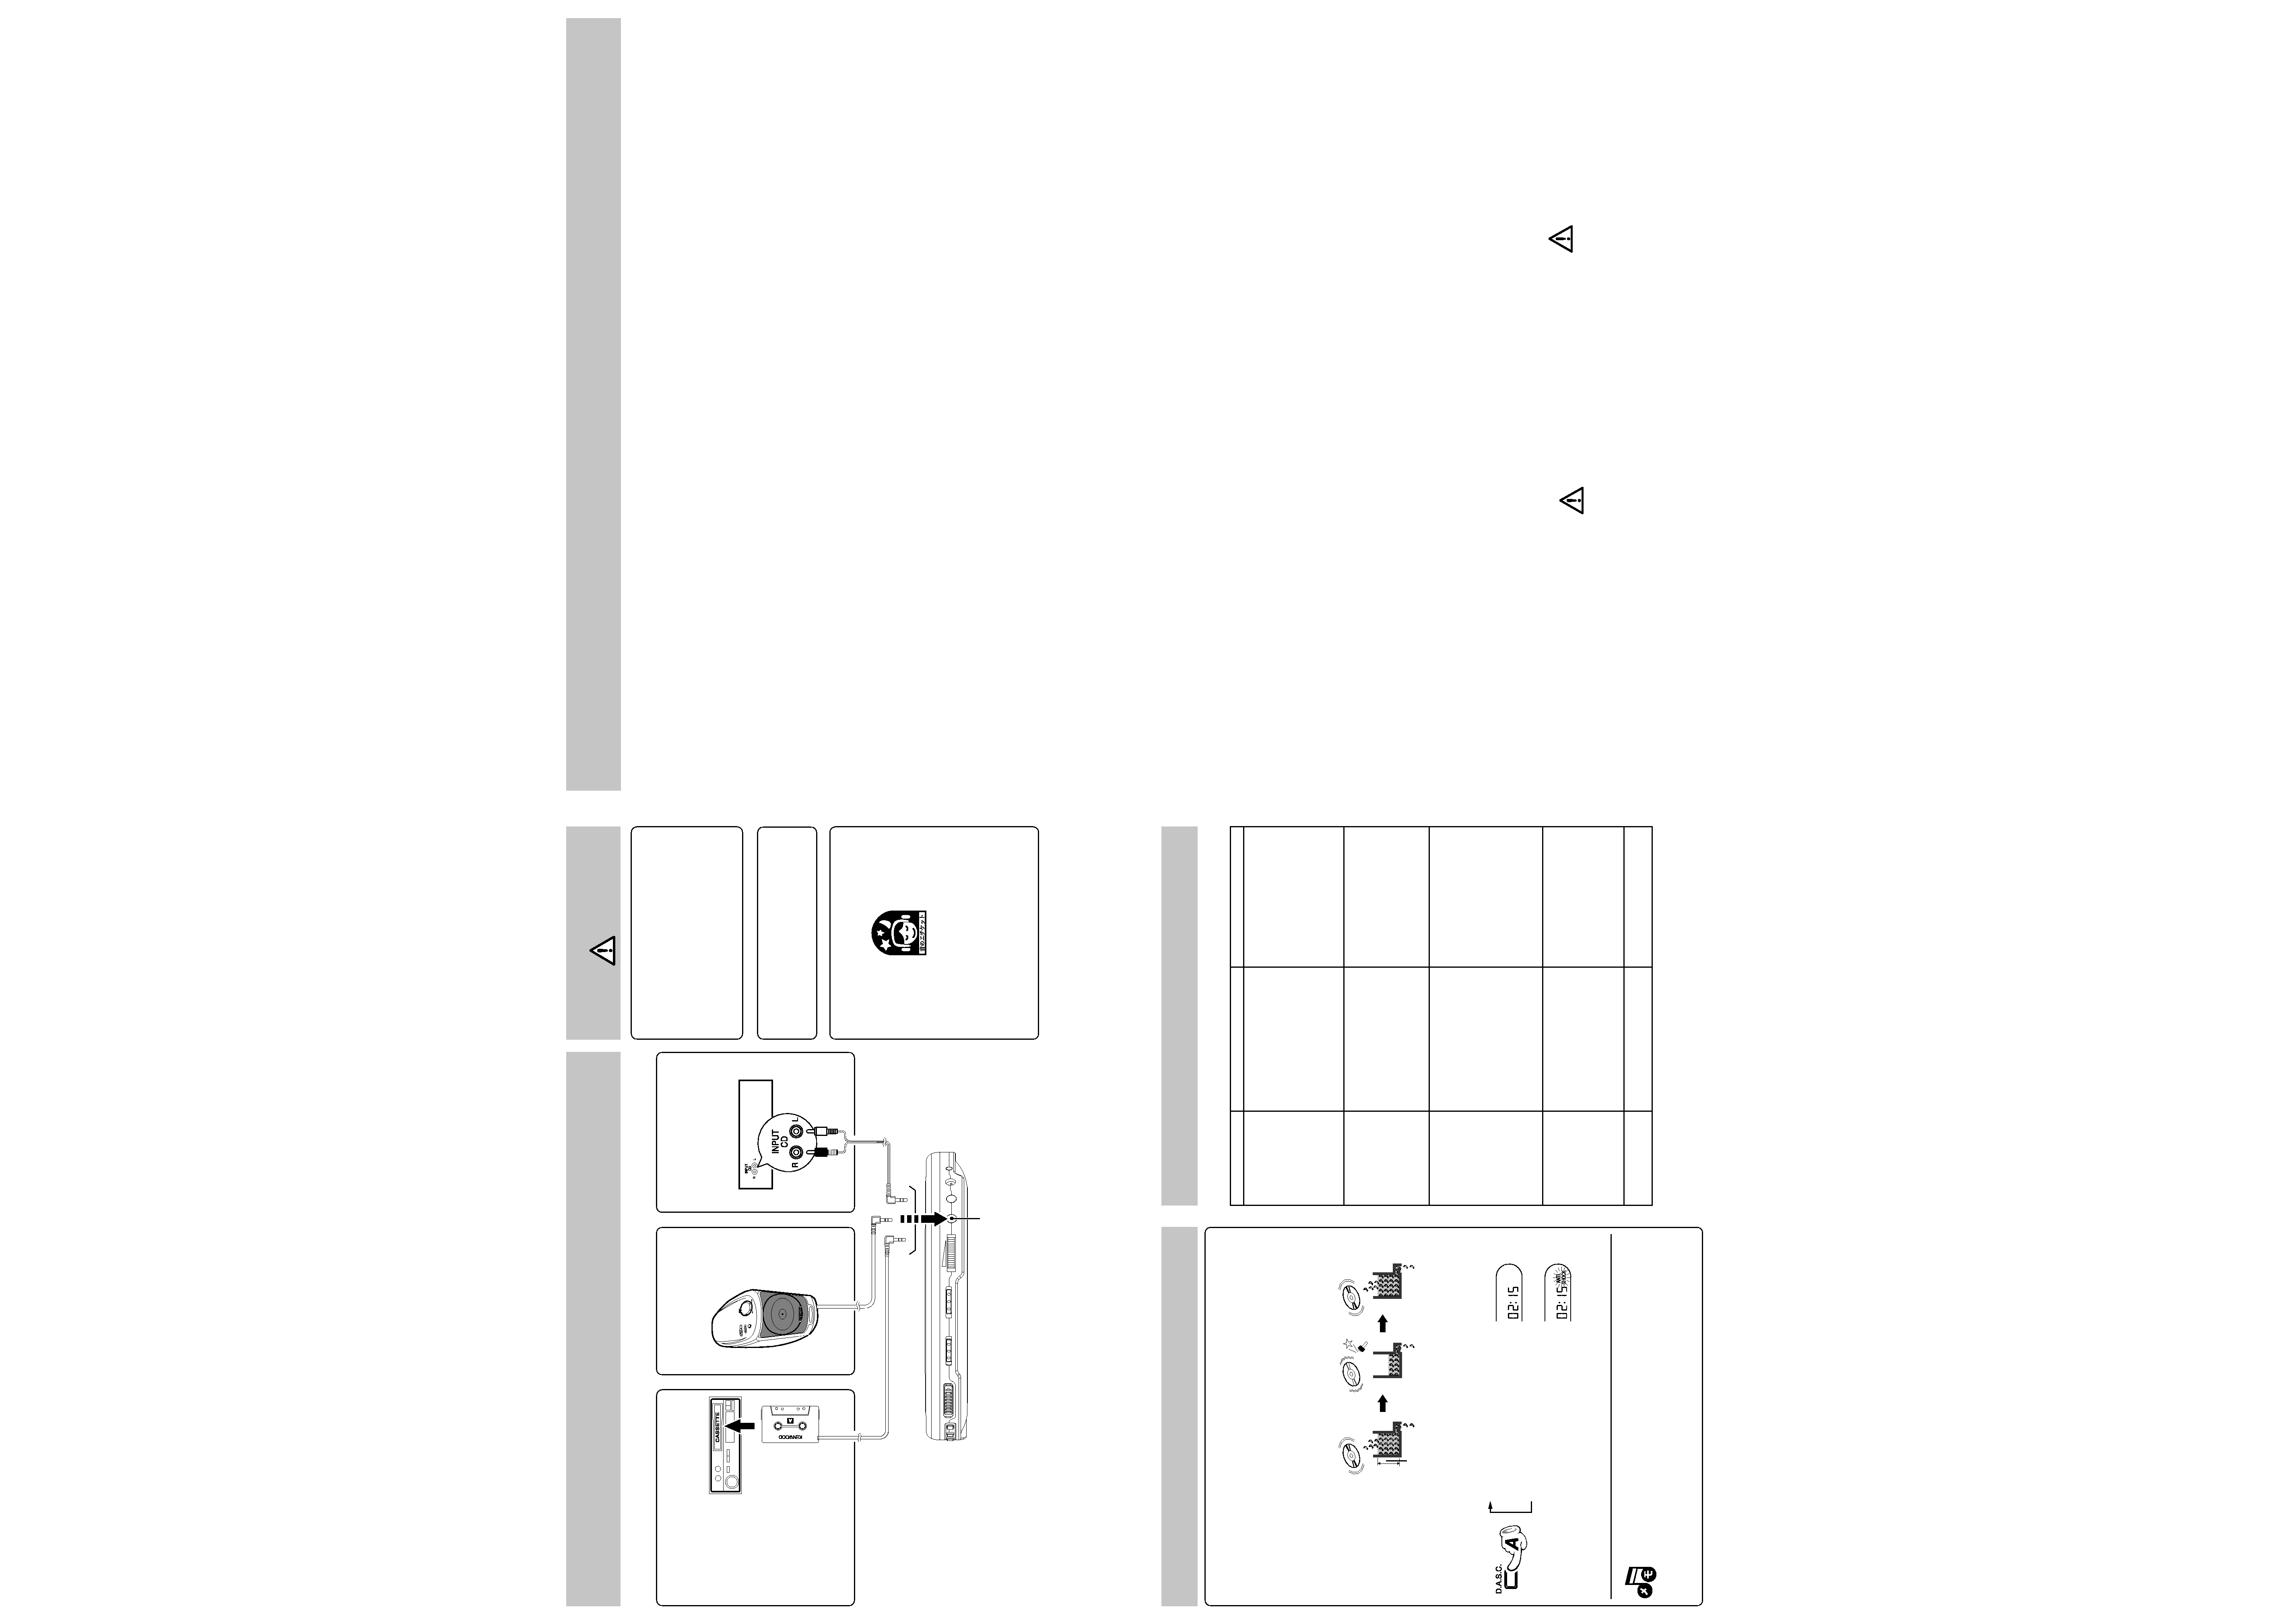
Connections
!
Ensure that the power of the all of the components are off
before connecting the cords.
Listening through car audio
@
÷ If sound is not produced, change the tape playing direc-
tion of the car stereo.
(Sound is not produced if the car stereo is set to play
tape side B.)
÷ Audio reproduction may be impossible with some car
stereo.
Listening through speakers
#
Speakers with built-in amplifier
Listening through an amplifier
with CD input jack
$
÷ Connect the cable to the amplifier's CD input jacks.
÷ This connection may be impossible with some amplifiers.
Sound skip guard function (D.A.S.C.) -%
When the D.A.S.C. function is operating, about a 180 second
portion of signals is always stored in memory. Consequently,
when the unit receives an impact, playback will continue
without interruption even if the signal from the light pickup
is interrupted.
Setting the D.A.S.C.
The mode changes each time the D.A.S.C. key is
pressed.
1D.A.S.C. off :
2D.A.S.C. on : 180 second.
Turn on D.A.S.C. when moving the player
or using it in areas subject to vibration.
÷ Depending on the extent of the impact, the data in the
memory may be used up, so the playback skip protec-
tion may momentarily be ineffective.
÷ When the D.A.S.C. function is activated, the disc may
stop or start to rotate.
÷ The reproduced sound is interrupted during switching.
÷ The D.A.S.C. is set to on when the power turns on.
Power sources
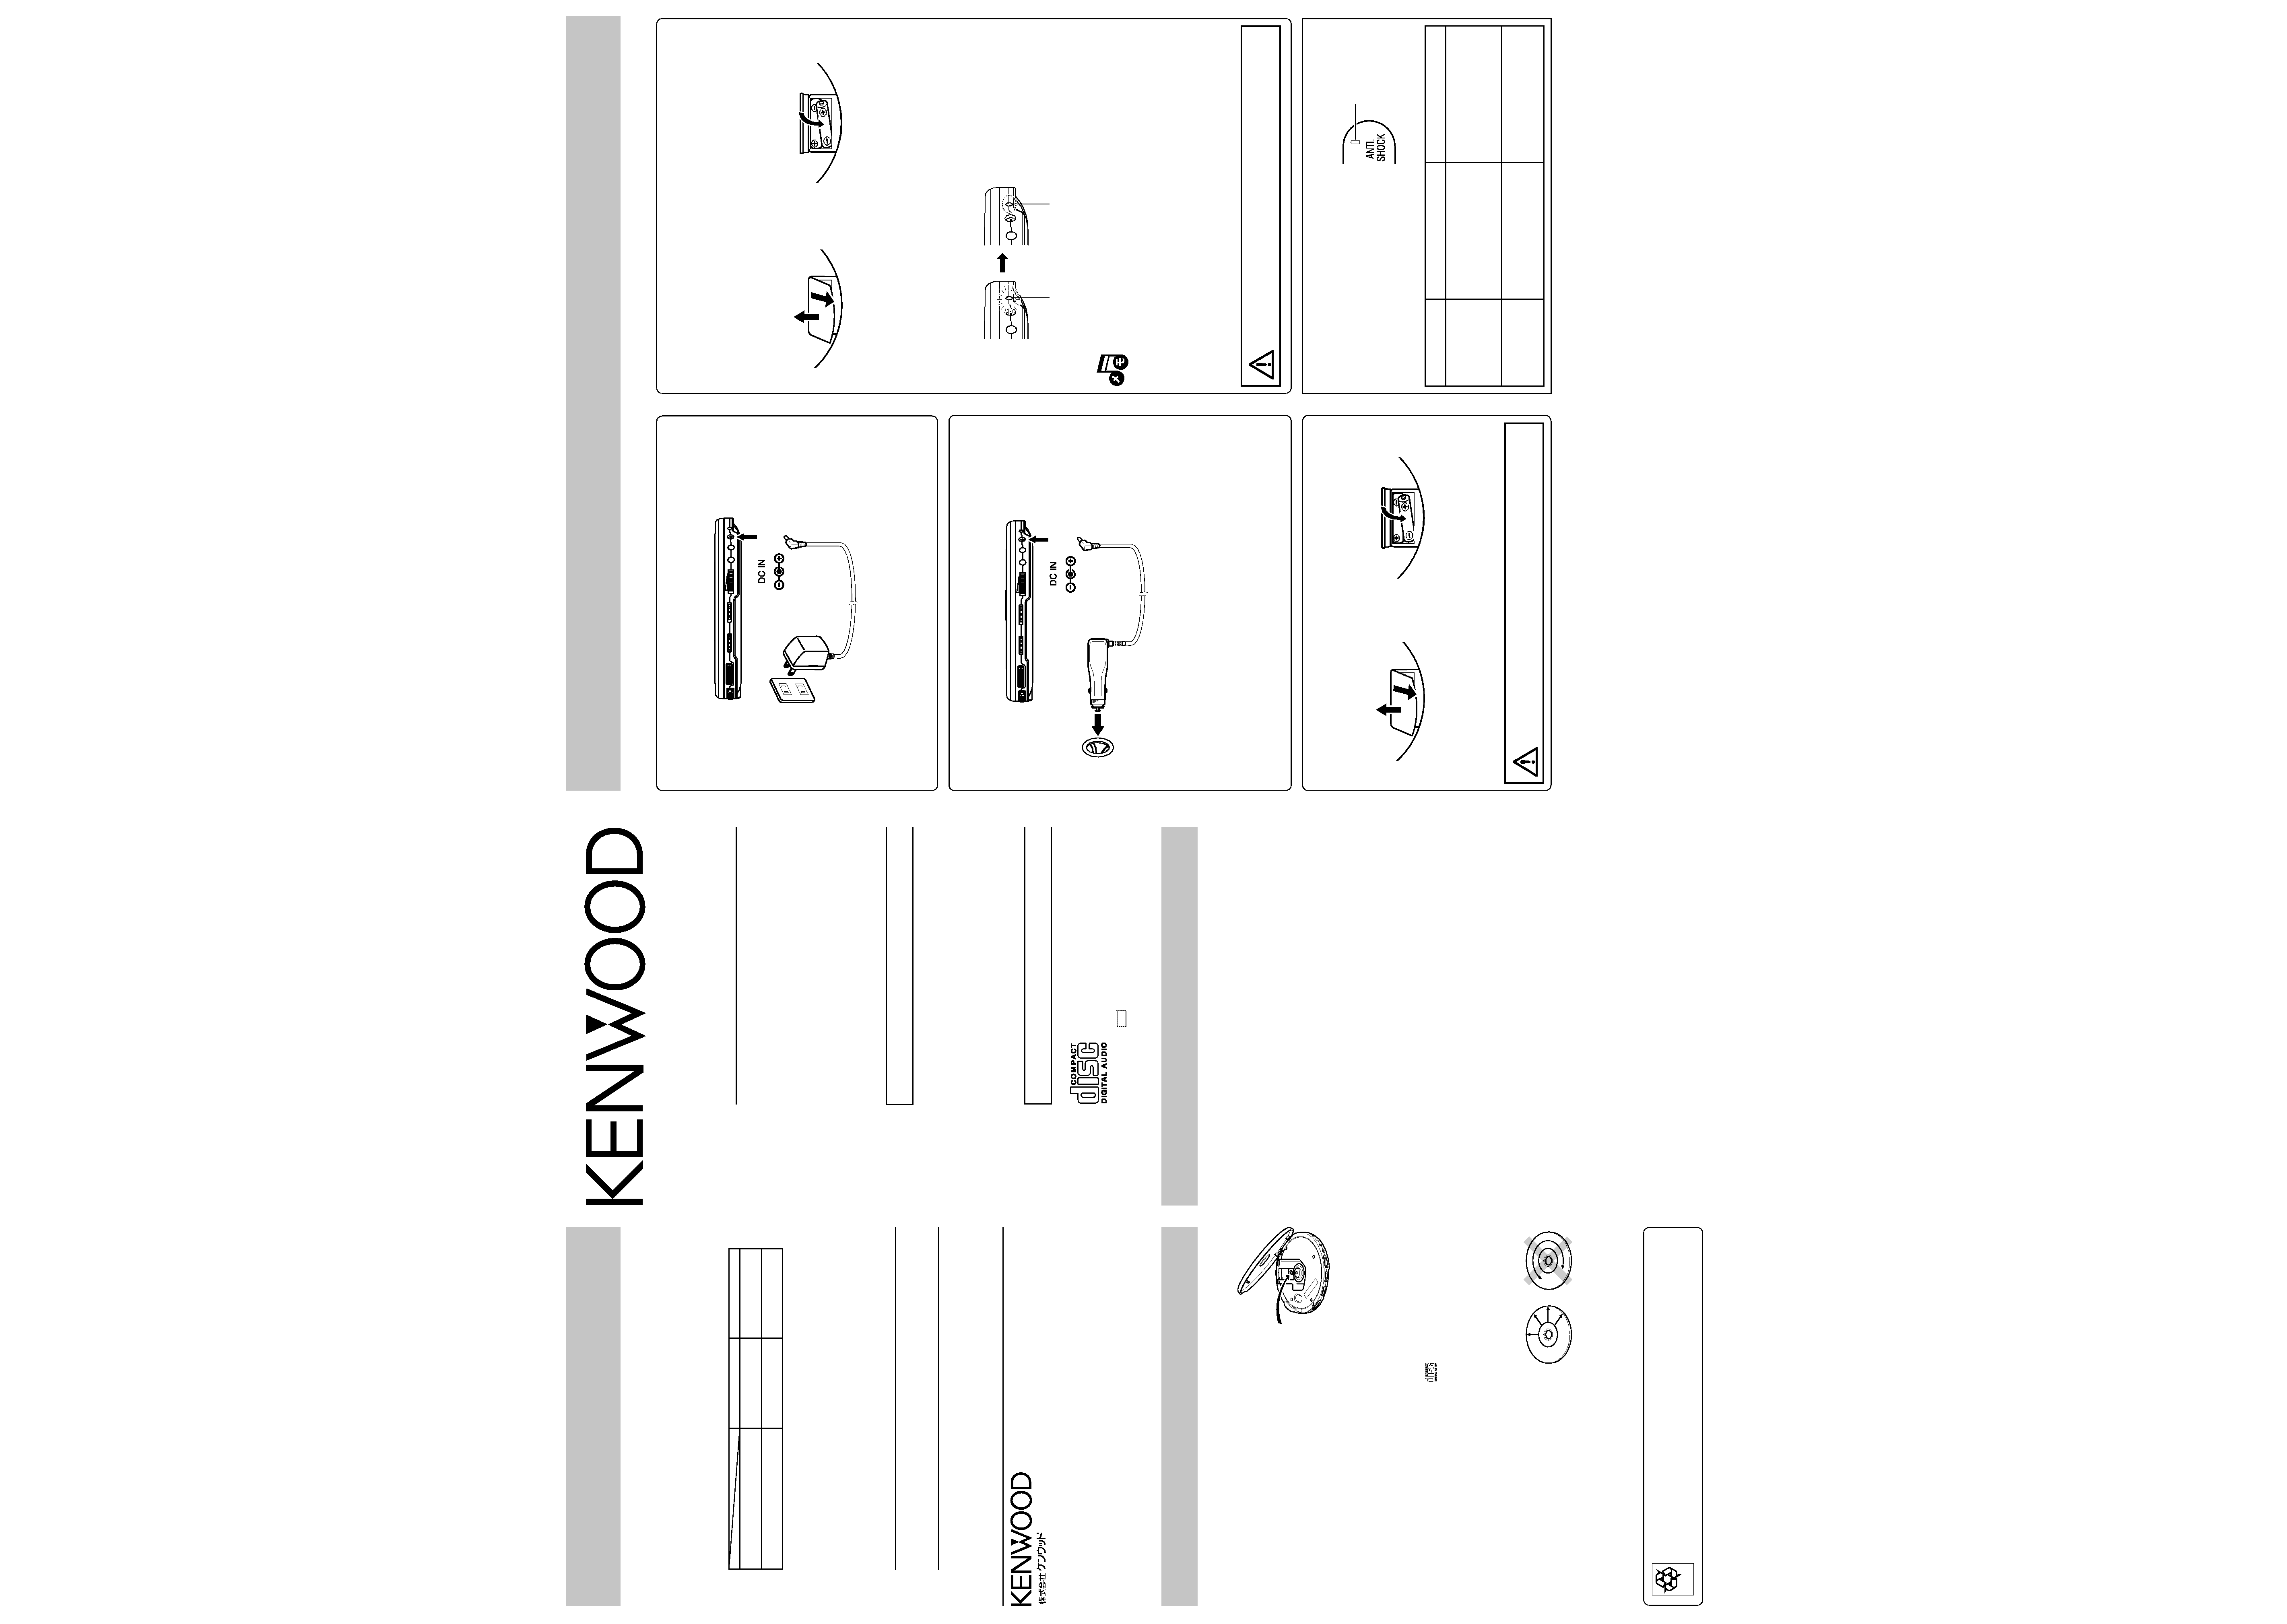
^
This unit can be powered with three kinds of supplies in-
cluding the batteries, household power line and car bat-
tery.
Using the AC adaptor
&
Using the AC adaptor.
Connect to AC power outlet.
÷ Use the enclosed AC adaptor for this product.
Using the car battery adaptor
*
Optional car battery adaptor DC-C3A.
Notes:
÷ When the unit is not used, unplug the car battery adapter.
(Otherwise, the car battery may run out, with some car
models.)
÷ The plug may not match the cigar lighter socket of some
car models.
÷ If the unit cannot be operated with the car battery adapter
connected, suspect the possibility of a blown fuse. The
fuse can be replaced by turning the electrode on the tip
of the adapter plug. When replacing the fuse, be sure to
use a fuse with a rating of 1 A.
When operating the unit with 2 alkaline batteries (Alkaline
batteries are not provided with this unit)
(
1 Open the battery cover.
2 Insert 2 alkaline batteries and close the cover.
÷ Make sure the positive (+) and negative (-) poles are prop-
erly aligned.
÷ Use commercially available AAA (R03) batteries. The unit
may not operate normally if manganese batteries are
used.
÷ Replace both batteries at the same time.
Never use an alkaline battery and non-
alkaline battery together.
Rechargeable battery operation
(Rechargeable batteries are
not provided with this unit)
)
Always use the separately purchased NB-3A70. Never use a
battery other than a battery authorized by Kenwood.
Loading the batteries
1 Open the battery cover.
2 Insert 2 rechargeable batteries and close the cover.
÷ Make sure the positive (+) and negative (-) poles are prop-
erly aligned.
Charging the rechargeable batteries
1 Plug in the AC adaptor to start charging.
2 Removing the AC adapter.
After the batteries have been charged, remove the AC
adapter.
Notes:
÷ When using a rechargeable battery which is new or which
has not been used for more than 2 months, the operat-
ing period may be shorter than nomal. This is due to the
properties of the battery and not a malfunction. After
recharging, use the battery on the unit until it is ex-
hausted. The original performance of the battery perfor-
mance can be recovered by repeating this cycle a few
times.
÷ Be sure to close the top cover of the unit before pro-
ceeding to recharging.
÷ Recharging completes in about 12 hours. Do not attempt
to recharge the batteries after this period.
÷ Rechargeable batteries can be recharged . When the
playable time per recharge reduces, please newly pur-
chase the optional (NB-3A70) rechargeable batteries.
Never use a rechargeable battery and non-
rechargeable battery together.