For Customer Use:
Enter below the Model No. and Serial
No. which are located either on the rear,
bottom or side of the cabinet. Retain this
information for future reference.
Model No.
Serial No.
LVT0876-002A
[C]
MASTER VOLUME
DVD/SUPER VCD/VCD/CD
DVD AUDIO
INPUT ATT.
REC MODE
INPUT
ANALOG/DIGITAL
COMPACT
SUPER VIDEO
SETTING
ADJUST
MEMORY
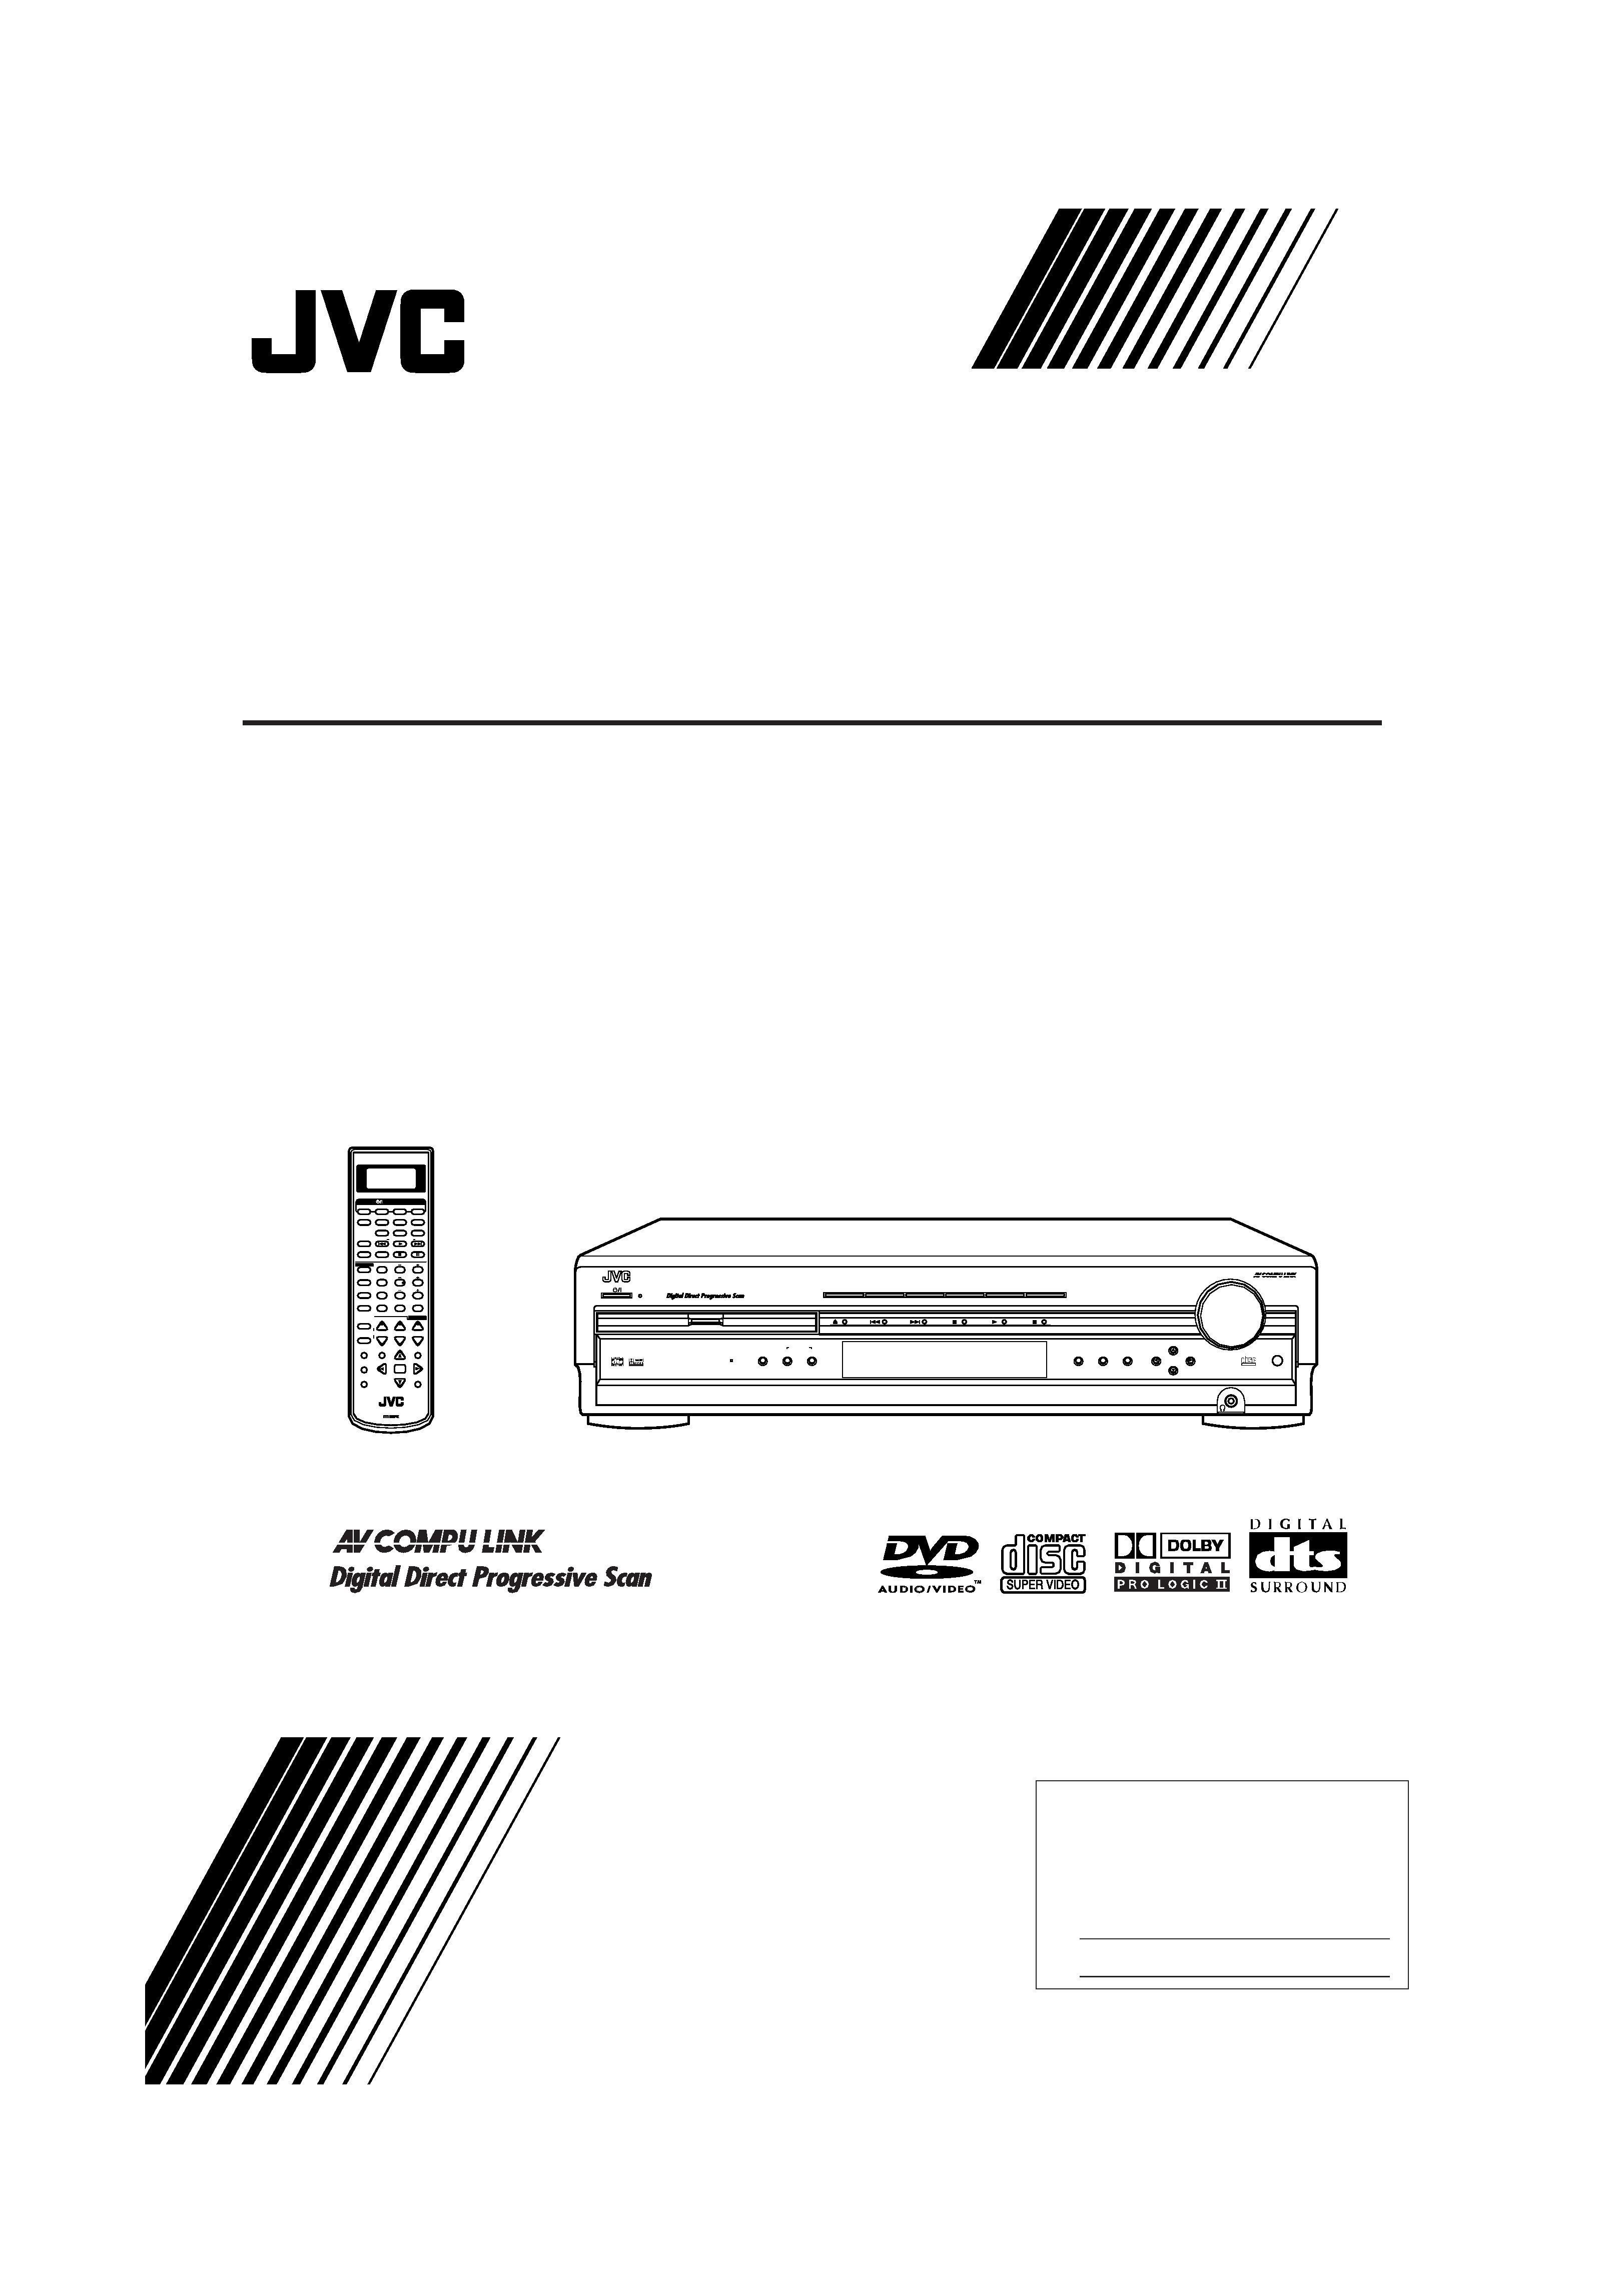
RX-DV5 HOME THEATER DVD-AUDIO/VIDEO RECEIVER
ON/OFF
SURROUND
MODE
FM/AM
TAPE/CDR
SOURCE NAME
TV
VCR
DBS
DVD
CONTROL
STANDBY
STANDBY/ON
+
+
+
23
1
56
4
89
7
VFP
10/0
+10
100+
TV RETURN
VCR
DBS
DVD
TV/VIDEO REW/
( TUNING/GROUP
9/FF
REPEAT
SLEEP
VCR
DBS
TV
AUDIO
TAPE
TV
CDR
FM/AM
FM MODE
STROBE
EFFECT
TV/DBS CH +
ANALOG
/DIGITAL
TEST
AUDIO
INPUT
SUBTITLE
CHOICE
ENTER
ON SCREEN
ANGLE
ZOOM
DIGEST TOP MENU
MENU
RETURN
SURR ON/OFF
SURR MODE
DIMMER
MUTING
PAGE
TV VOL
VOLUME
SUBWOOFER +
CONTROL
STANDBY/ON
CENTER
REAR·L
REAR·R
REMOTE CONTROL RM-SRXDV5J
HOME THEATER
DVD-AUDIO/VIDEO RECEIVER
PROGRESSIVE
INSTRUCTIONS
MANUEL D'INSTRUCTIONS
HOME THEATER DVD-AUDIO/VIDEO RECEIVER
AMPLI-TUNER CINEMA MAISON AVEC LECTEUR DVD AUDIO/VIDEO INTEGRE
RX-DV5SL
RX-DV5SL[C]cover_1.pm5
02.8.5, 5:36 PM
1

G-1
CAUTION:
TO REDUCE THE RISK OF ELECTRIC SHOCK,
DO NOT REMOVE COVER (OR BACK).
NO USER SERVICEABLE PARTS INSIDE.
REFER SERVICING TO QUALIFIED SERVICE PERSONNEL.
RISK OF ELECTRIC SHOCK
DO NOT OPEN
The lightning flash with arrowhead symbol,
within an equilateral triangle is intended to
alert the user to the presence of uninsulated
"dangerous voltage" within the product's
enclosure
that
may
be
of
sufficient
magnitude to constitute a risk of electric
shock to persons.
The exclamation point within an equilateral
triangle is intended to alert the user to the
presence
of
important
operating
and
maintenance (servicing) instructions in the
literature accompanying the appliance.
CAUTION
WARNING: TO REDUCE THE RISK OF FIRE
OR ELECTRIC SHOCK, DO NOT EXPOSE
THIS APPLIANCE TO RAIN OR MOISTURE.
Warnings, Cautions and Others
Mises en garde, précautions et indications diverses
For Canada/pour le Canada
CAUTION: TO PREVENT ELECTRIC SHOCK, MATCH WIDE
BLADE OF PLUG TO WIDE SLOT, FULLY INSERT.
ATTENTION: POUR EVITER LES CHOCS ELECTRIQUES,
INTRODUIRE LA LAME LA PLUS LARGE DE LA FICHE DANS
LA BORNE CORRESPONDANTE DE LA PRISE ET POUSSER
JUSQUAU FOND.
For Canada/pour le Canada
THIS DIGITAL APPARATUS DOES NOT EXCEED THE CLASS
B LIMITS FOR RADIO NOISE EMISSIONS FROM DIGITAL
APPARATUS AS SET OUT IN THE INTERFERENCE-CAUSING
EQUIPMENT STANDARD ENTITLED "DIGITAL APPARATUS,"
ICES-003 OF THE DEPARTMENT OF COMMUNICATIONS.
CET APPAREIL NUMERIQUE RESPECTE LES LIMITES DE
BRUITS RADIOELECTRIQUES APPLICABLES AUX APPAREILS
NUMIRIQUES DE CLASSE B PRESCRITES DANS LA NORME
SUR
LE
MATERIEL
BROUILLEUR:
"APPAREILS
NUMERIQUES", NMB-003 EDICTEE PAR LE MINISTRE DES
COMMUNICATIONS.
RX-DV5SL[C]safety_3.pm5
02.8.5, 5:33 PM
1

G-2
English
Français
Caution
STANDBY/ON button!
Disconnect the mains plug to shut the power off completely.
The
STANDBY/ON button in any position does not disconnect the
mains line.
The power can be remote controlled.
Attention--Touche
STANDBY/ON!
Déconnectez la fiche d'alimentation secteur pour couper
l'alimentation complètement.
La touche
STANDBY/ON, dans n'importe quelle position, ne
déconnecte pas le système du secteur.
Le courant peut être télécommandé.
CAUTION
To reduce the risk of electrical shocks, fire, etc.:
1. Do not remove screws, covers or cabinet.
2. Do not expose this appliance to rain or moisture.
ATTENTION
Afin d'éviter tout risque d'électrocution, d'incendie, etc.:
1. Ne pas enlever les vis ni les panneaux et ne pas ouvrir le coffret
de l'appareil.
2. Ne pas exposer l'appareil à la pluie ni à l'humidité.
IMPORTANT FOR LASER PRODUCTS
IMPORTANT POUR LES PRODUITS LASER
1. CLASS 1 LASER PRODUCT
2. CAUTION: Visible and invisible laser radiation when open and
interlock failed or defeated. Avoid direct exposure to beam.
3. CAUTION: Do not open the top cover. There are no user service-
able parts inside the Unit; leave all servicing to qualified service
personnel.
1. PRODUIT LASER CLASSE 1
2. DANGER: Radiations laser visibles et invisibles lorsque le boîtier
de l'appareil est ouvert et que le verrouillage est défaillant ou a été
annulé.
3. ATTENTION: Ne pas ouvrir le couvercle du dessus. Il n'y a aucune
pièce utilisable à l'intérieur. Laisser à un personnel qualifié le soin
de réparer votre appareil.
RX-DV5SL[C]safety_3.pm5
02.8.5, 6:43 PM
2

1
English
Table of Contents
Parts Identification ...................................... 2
Front Panel ................................................................................. 2
Remote Control .......................................................................... 3
Getting Started ........................................... 4
Before Installation ...................................................................... 4
Checking the Supplied Accessories ........................................... 4
Putting Batteries in the Remote Control .................................... 4
Connecting the FM and AM Antennas ....................................... 5
Connecting the Speakers ............................................................ 6
Connecting Audio/Video Components ....................................... 7
7 About connecting cords ...................................................... 7
7 TV connection .................................................................... 8
7 VCR connection ................................................................. 9
7 DBS tuner connection ......................................................... 9
7 Cassette deck/CD recorder connection ............................. 10
7 Digital connection ............................................................. 10
Basic Operations ....................................... 11
1 Turn On the Power ............................................................... 11
2 Select the Source to Play ..................................................... 11
3 Adjust the Volume ................................................................ 11
Turning Off the Sounds Temporarily ....................................... 12
Turning Off the Power with the Sleep Timer ........................... 12
Changing the Display Brightness ............................................. 12
Changing the Source Name ...................................................... 12
Selecting the Analog or Digital Input Mode ............................ 13
Changing the Digital Input Mode Manually ............................ 13
Attenuating the Input Signal .................................................... 14
Changing the Scanning Mode .................................................. 14
Activating the Recording Mode ............................................... 14
Basic DVD Player Operations ...................... 15
1 Open the Disc Tray .............................................................. 15
2 Load a Disc .......................................................................... 15
3 Start Playback ...................................................................... 15
4 Adjust the Volume ................................................................ 16
5 Activate Realistic Sound Field ............................................. 16
6 Select Surround Mode ......................................................... 16
7 Stop Playback ...................................................................... 16
8 Turn Off the Power (into Standby) ...................................... 16
Tuner Operations ....................................... 17
Tuning into Stations Manually ................................................. 17
Using Preset Tuning ................................................................. 17
Selecting the FM Reception Mode ........................................... 18
Basic Settings ........................................... 19
Operation Buttons .................................................................... 19
Operating Procedure ................................................................. 19
7 Speaker information--"SUBWFR," "FRNT SP,"
"CNTR SP," and "REAR SP" ........................................... 20
7 Speaker distance
--"FRNT D," "CNTR D," and "REAR D" ...................... 20
7 Crossover frequency--"CROSS" ..................................... 21
7 Low frequency effect attenuator--"LFE" ........................ 21
7 Dynamic range compression--"D.COMP" ...................... 21
7 Digital input (DIGITAL IN) terminals--"DGT" ............. 21
7 Auto surround--"AUTO SR" ........................................... 22
7 Video output mode--"VOUT" ......................................... 22
Sound Adjustments.................................... 23
Operation Buttons .................................................................... 23
Operating Procedure ................................................................. 23
7 Front speaker output balance--"BAL"............................. 24
7 Tone--"BASS" and "TREBLE" ...................................... 24
7 Speaker output levels--"SUBWFR," "CENTER,"
"REAR L," and "REAR R" .............................................. 24
7 DAP effect level--"EFFECT" .......................................... 24
Creating Realistic Sound Fields ................... 25
Activating Surround Mode ........................................................ 27
Selecting Surround Modes ........................................................ 27
Adjusting Surround Mode Using Remote Control................... 28
DVD Player Operations .............................. 29
Disc Information ....................................................................... 29
Using the On-screen Bar .......................................................... 31
Basic Operation through the On-screen Bar ............................ 32
Changing the Time Indication .................................................. 32
Locating a Desired Scene from the Disc Menu ....................... 33
Selecting a View Angle--ANGLE ........................................... 34
Changing the Languages--SUBTITLE and AUDIO ............... 35
Playing from a Specified Position on a Disc ............................ 37
7 Locating a desired chapter/track--
Chapter/Track Search ....................................................... 37
7 Locating a desired position--Time Search....................... 37
7 Locating a desired scene--DIGEST................................. 38
Special Picture Playback .......................................................... 39
7 Frame-by-frame playback................................................. 39
7 Showing continuous still pictures--STROBE .................. 39
7 Playing back in slow-motion ............................................ 39
7 Zooming in--ZOOM ........................................................ 39
7 Changing the VFP setting--VFP ...................................... 40
Program Playback and Random Playback ............................... 41
Repeat Playback ....................................................................... 42
Additional Information for DVD AUDIO ................................ 43
Special Playback for DVD AUDIO .......................................... 43
MP3 Disc Playback .................................... 45
Basic Operations ...................................................................... 45
Operations through the MP3 CONTROL Screen .................... 46
Repeat Playback ....................................................................... 46
JPEG Disc Playback ................................... 47
Slide-show Playback ................................................................ 47
Operations through the JPEG CONTROL Screen ................... 48
Repeat Playback ....................................................................... 48
Choice Menu Operations ............................. 49
Operation Buttons .................................................................... 49
Configuration of Choice Menu ................................................ 49
Operating Procedure................................................................. 50
7 LANGUAGE menu .......................................................... 51
7 PICTURE menu ................................................................ 51
7 AUDIO menu .................................................................... 52
· Language code list ......................................................... 52
7 SPK. SETTING menu ...................................................... 53
7 OTHERS menu ................................................................. 54
Restricting Playback by Parental Lock .................................... 55
7 Setting Parental Lock ........................................................ 55
7 Changing the setting of Parental Lock ............................. 56
7 Releasing Parental Lock temporarily................................ 56
· Country/Area codes list for Parental Lock ..................... 57
Glossary for DVD Player............................. 58
AV COMPU LINK Remote Control System .... 59
Operating JVC's Audio/Video Components........ 61
Operating Audio Components .................................................. 61
Operating Video Components .................................................. 62
Operating Other Manufacturers' Equipment ..... 63
Changing the Preset Signal Codes ........................................... 63
Maintenance ............................................. 66
Troubleshooting ......................................... 67
Specifications ............................................ 70
EN01_10RX-DV5SL[C]4.pm5
02.8.5, 5:33 PM
1

2
English
Parts Identification
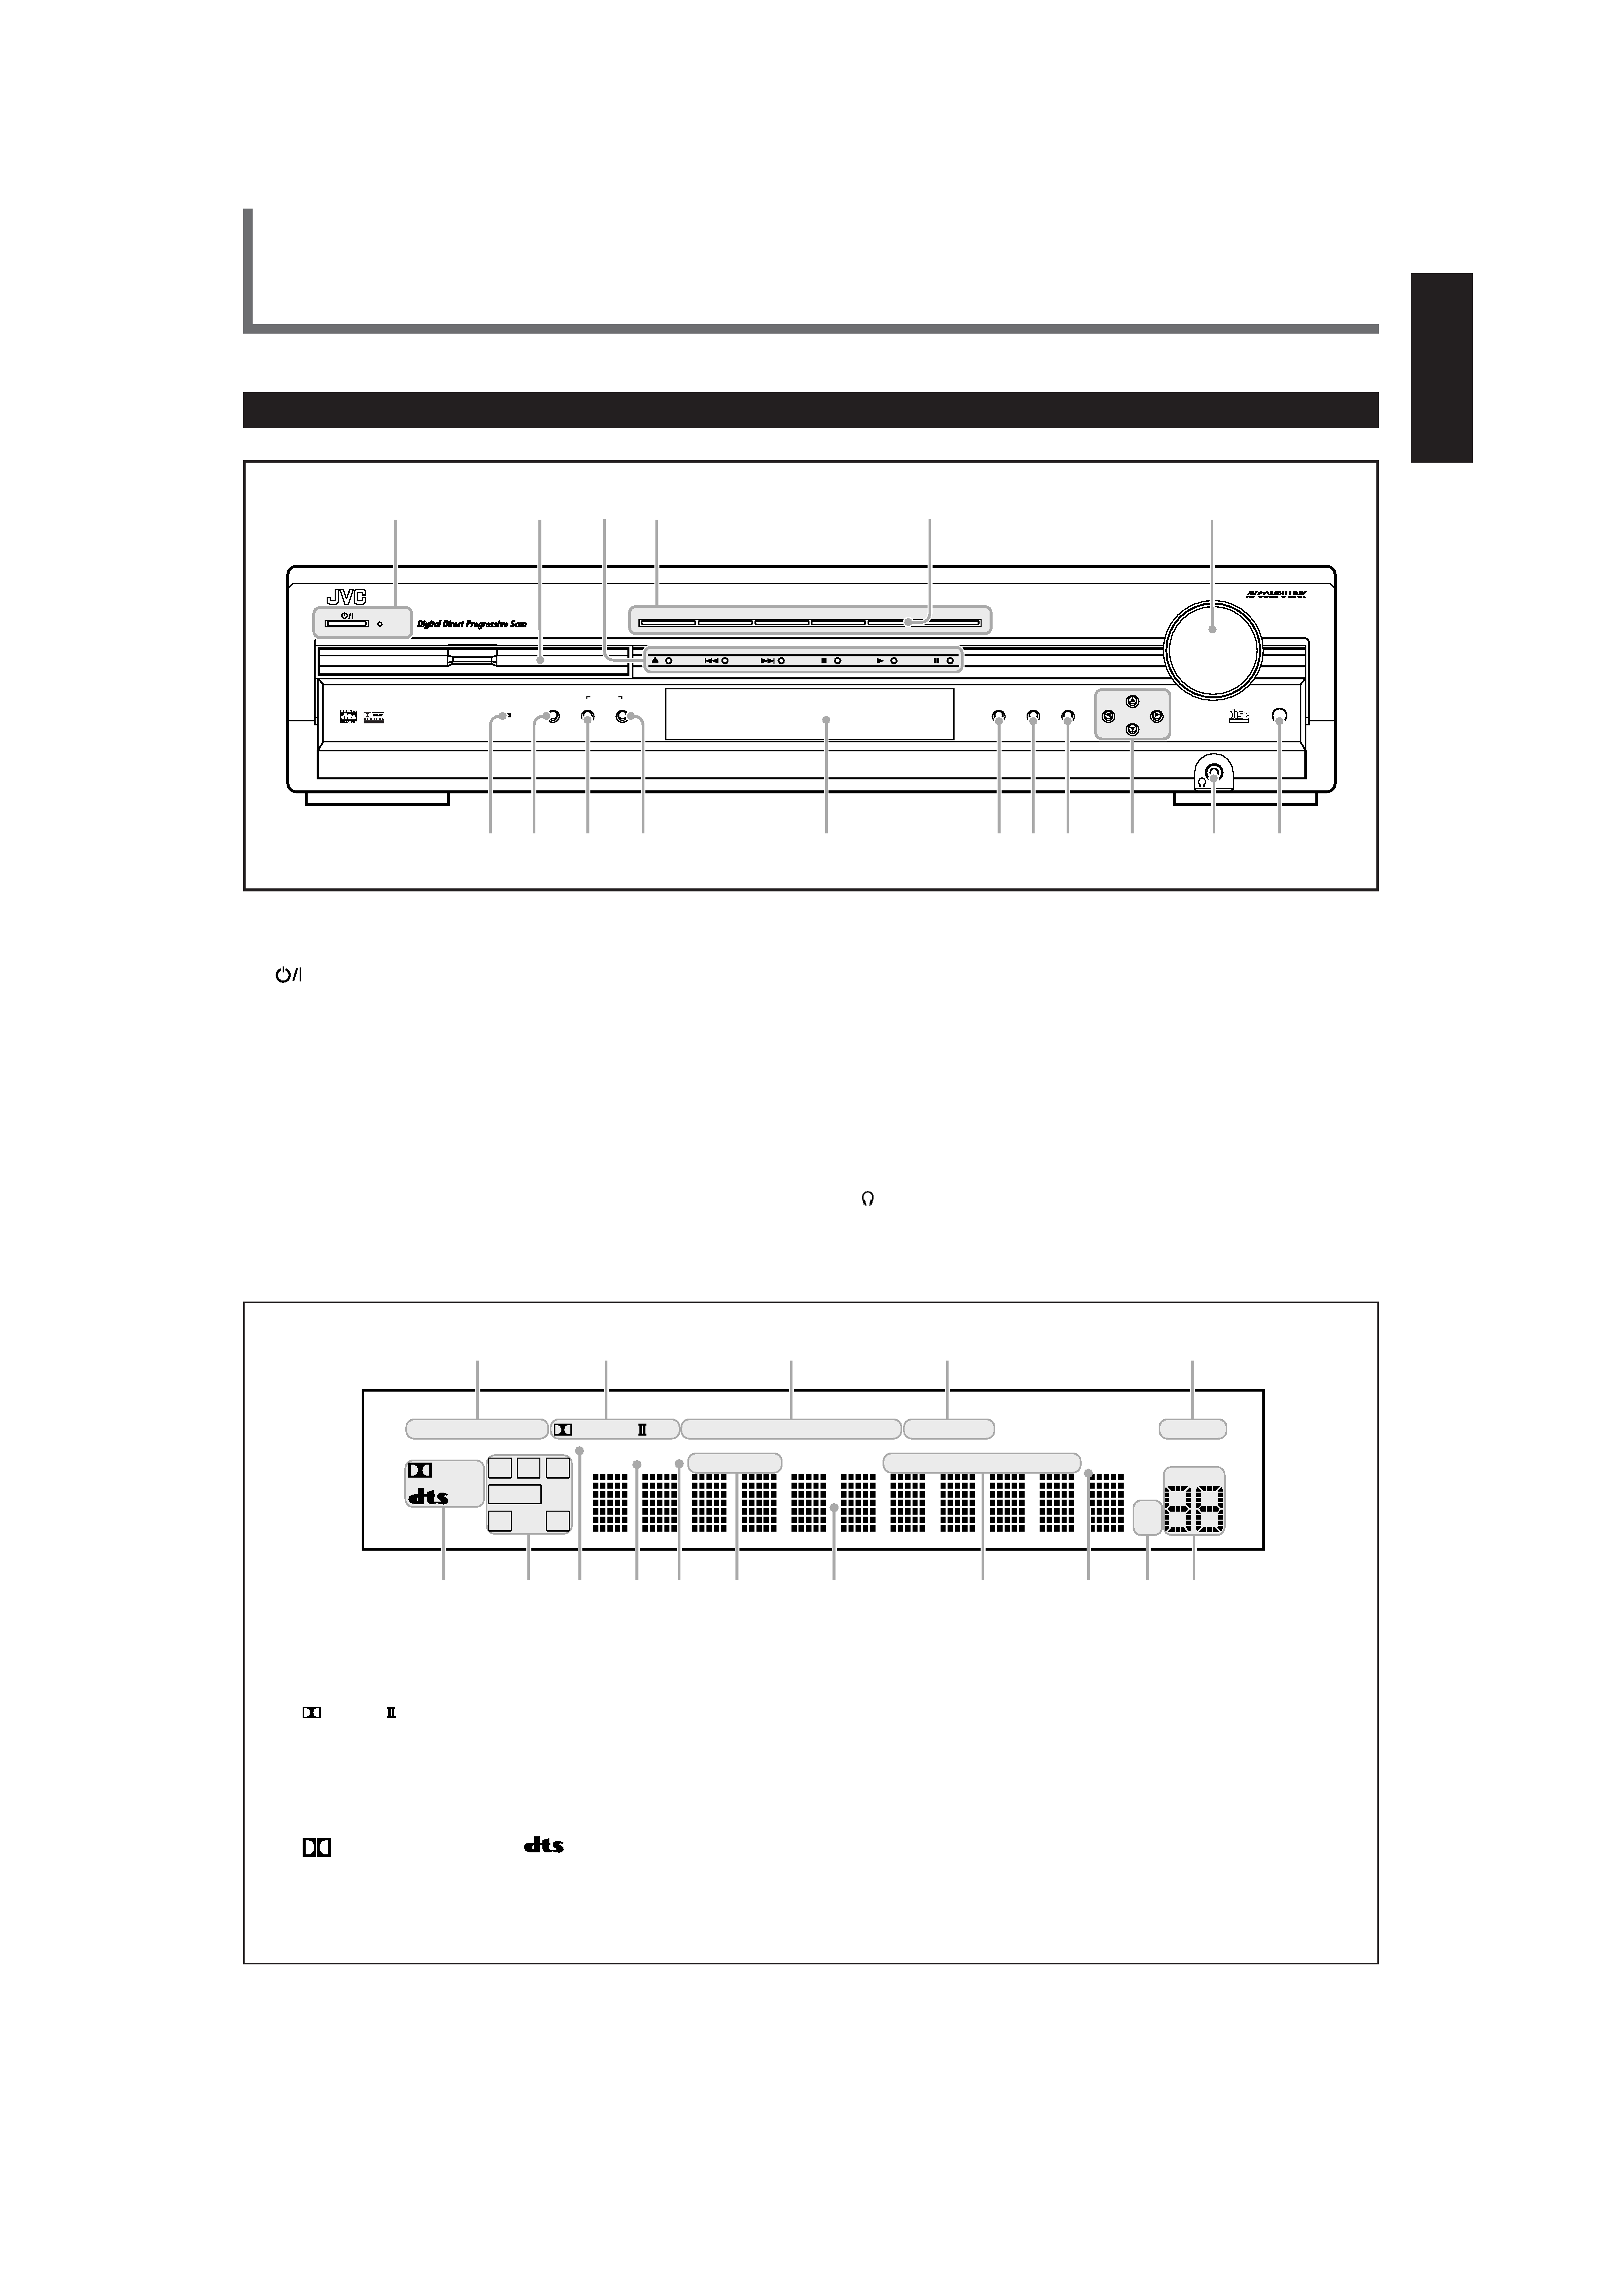
Front Panel
See pages in the parentheses for details.
1
STANDBY/ON button and STANDBY lamp (11)
2 Disc tray and illumination lamp (15)
3 DVD player operation buttons
0 (open/close), 4 (reverse skip), ¢ (forward skip),
7 (stop), 3 (play), 8 (pause)
4 Source selecting buttons (11, 13)
· DVD, DBS, VCR, TV, TAPE/CDR, FM/AM
5 SOURCE NAME button (12)
6 MASTER VOLUME control (11, 16)
7 DVD AUDIO lamp (43)
8 INPUT ANALOG/DIGITAL button (13)
INPUT ATT. (attenuator) button (14)
9 SURROUND ON/OFF button (16, 27)
p SURROUND MODE button (16, 27)
REC MODE button (14)
q Display
· For details, see "Display" below.
w SETTING button (19 22)
e ADJUST button (23, 24)
r MEMORY button (17)
t CONTROL
5 / / 2 / 3 buttons (17 24)
y
(phones) jack (11)
u Remote sensor
Display
MASTER VOLUME
DVD/SUPER VCD/VCD/CD
DVD AUDIO
INPUT ATT.
INPUT
ANALOG/DIGITAL
COMPACT
SUPER VIDEO
SETTING
ADJUST
MEMORY
RX-DV5 HOME THEATER DVD-AUDIO/VIDEO RECEIVER
ON/OFF
SURROUND
MODE
FM/AM
TAPE/CDR
SOURCE NAME
TV
VCR
DBS
DVD
CONTROL
STANDBY
STANDBY/ON
12
4
6
REC MODE
5
3
8
7q
e r
t
y
u
w
9p
AUTO SURROUND
12
3
4
5
ANALOG DIGITAL AUTO
PRO LOGIC
DSP PROGRAM REPEAT
RANDOM
1A-B
PROGRESSIVE
INPUT ATT
LS
RS
S
LFE
LCR
SUBWFR
VOLUME
RESUME
SPK.
B.S.P
BONUS
kHz
MHz
TUNED STEREO AUTO MUTING SLEEP
67
9
8=
~
-!
@
#
0
DIGITAL
1 Input mode indicators (13)
· ANALOG, DIGITAL AUTO
2 Surround mode indicators (25, 26)
·
PRO LOGIC
, DSP
3 Play mode indicators (41, 42, 46, 48)
· PROGRAM, REPEAT 1A-B, RANDOM
4 PROGRESSIVE indicator (14)
5 INPUT ATT indicator (14)
6 Sound signal indicators (13)
·
DIGITAL (Dolby Digital),
(DTS Digital Surround)
7 Signal and speaker indicators (27)
· L, C , R, SUBWFR (Subwoofer), LFE (Low Frequency Effect),
LS, S, RS
8 Surround indicators (27)
· AUTO SURROUND, SURROUND
9 RESUME indicator (16)
0 SPK. (speaker) indicator (11)
- DVD AUDIO indicators (43)
· B.S.P, BONUS
= Main display
~ Tuner mode indicators (17, 18)
· TUNED, STEREO, AUTO MUTING
! SLEEP indicator (12)
@ Frequency unit indicators
· MHz (for FM station), kHz (for AM station)
# VOLUME indication
EN01_10RX-DV5SL[C]4.pm5
02.8.5, 5:33 PM
2
