For Customer Use:
Enter below the Model No. and Serial
No. which are located either on the rear,
bottom or side of the cabinet. Retain this
information for future reference.
Model No.
Serial No.
LET0052-001A
[J]
INSTRUCTIONS
RX-772VBK
AUDIO/VIDEO CONTROL RECEIVER
O
N
SC
REEN CON
TR
O
L
RM-SR772U REMOTE CONTROL
/SAT POWER
CD
DISC
CD
TRACK
SOUND
CONTROL
VCR
POWER
AUDIO
POWER
SLEEP
VIDEO
TAPE
VCR
TVSOUND
TEST
REAR
SEA MODE
SURR MODE
FM/AM
PHONO
CD
5
46
2
13
8
7/P
9
0
10
AUDIO/TV
/VCR
MENU
EXIT
MENU
TAPE
VCR
CONTROL
VOLUME
CHANNEL
MUTE
FF / ¢
PLAY
STOP
REC
TV/VIDEO
TV VOLUME
PAUSE
4
/ REW
TV/CATV
CNTR
DELAY
CATV
/SAT
FM MODE/MUTE
100+
RETURN
+10
ONE TOUCH
OPERATION
RX-772V
AUDIO/VIDEO CONTROL RECEIVER
STANDBY
POWER
MASTER VOLUME
+
SEA MODE
PHONES
SPEAKERS
MEMORY
TUNER
SURROUND MODE
VIDEO
VCR
TV SOUND
FM
AM
CD
PHONO
TAPE
SURROUND
ADJUST
SETTING
ONE TOUCH
OPERATION
12
SOURCE
_ON --OFF
MEMORY
SEA
ADJUST
SEA Graphic Equalizer
RX-772VBK[J]_0052-001A.Cover
97.4.8, 3:22 PM
1
G-1
Warnings, Cautions and Others
Caution POWER switch!
Disconnect the mains plug to shut the power off completely. The
POWER switch in any position does not disconnect the mains line.
The power can be remote controlled.
CAUTION:
TO REDUCE THE RISK OF ELECTRIC SHOCK.
DO NOT REMOVE COVER (OR BACK)
NO USER SERVICEABLE PARTS INSIDE.
REFER SERVICING TO QUALIFIED SERVICE PERSONNEL.
RISK OF ELECTRIC SHOCK
DO NOT OPEN
The lightning flash with arrowhead symbol,
within an equilateral triangle is intended to
alert the user to the presence of uninsulated
"dangerous voltage" within the product's
enclosure
that
may
be
of
sufficient
magnitude to constitute a risk of electric
shock to persons.
The exclamation point within an equilateral
triangle is intended to alert the user to the
presence
of
important
operating
and
maintenance (servicing) instructions in the
literature accompanying the appliance.
CAUTION
WARNING: TO REDUCE THE RISK OF FIRE
OR ELECTRIC SHOCK, DO NOT EXPOSE
THIS APPLIANCE TO RAIN OR MOISTURE.
CAUTION
To reduce the risk of electrical shocks, fire, etc.:
1. Do not remove screws, covers or cabinet.
2. Do not expose this appliance to rain or moisture.
Caution SPEAKER LOAD SELECTOR switch!
Match the position of SPEAKER LOAD SELECTOR switch on the
back panel to the impedance of the speaker connected, to protect
from overheating.
RX-772VBK[J]_0052-001A.Warranty
97.4.8, 3:21 PM
1
G-2
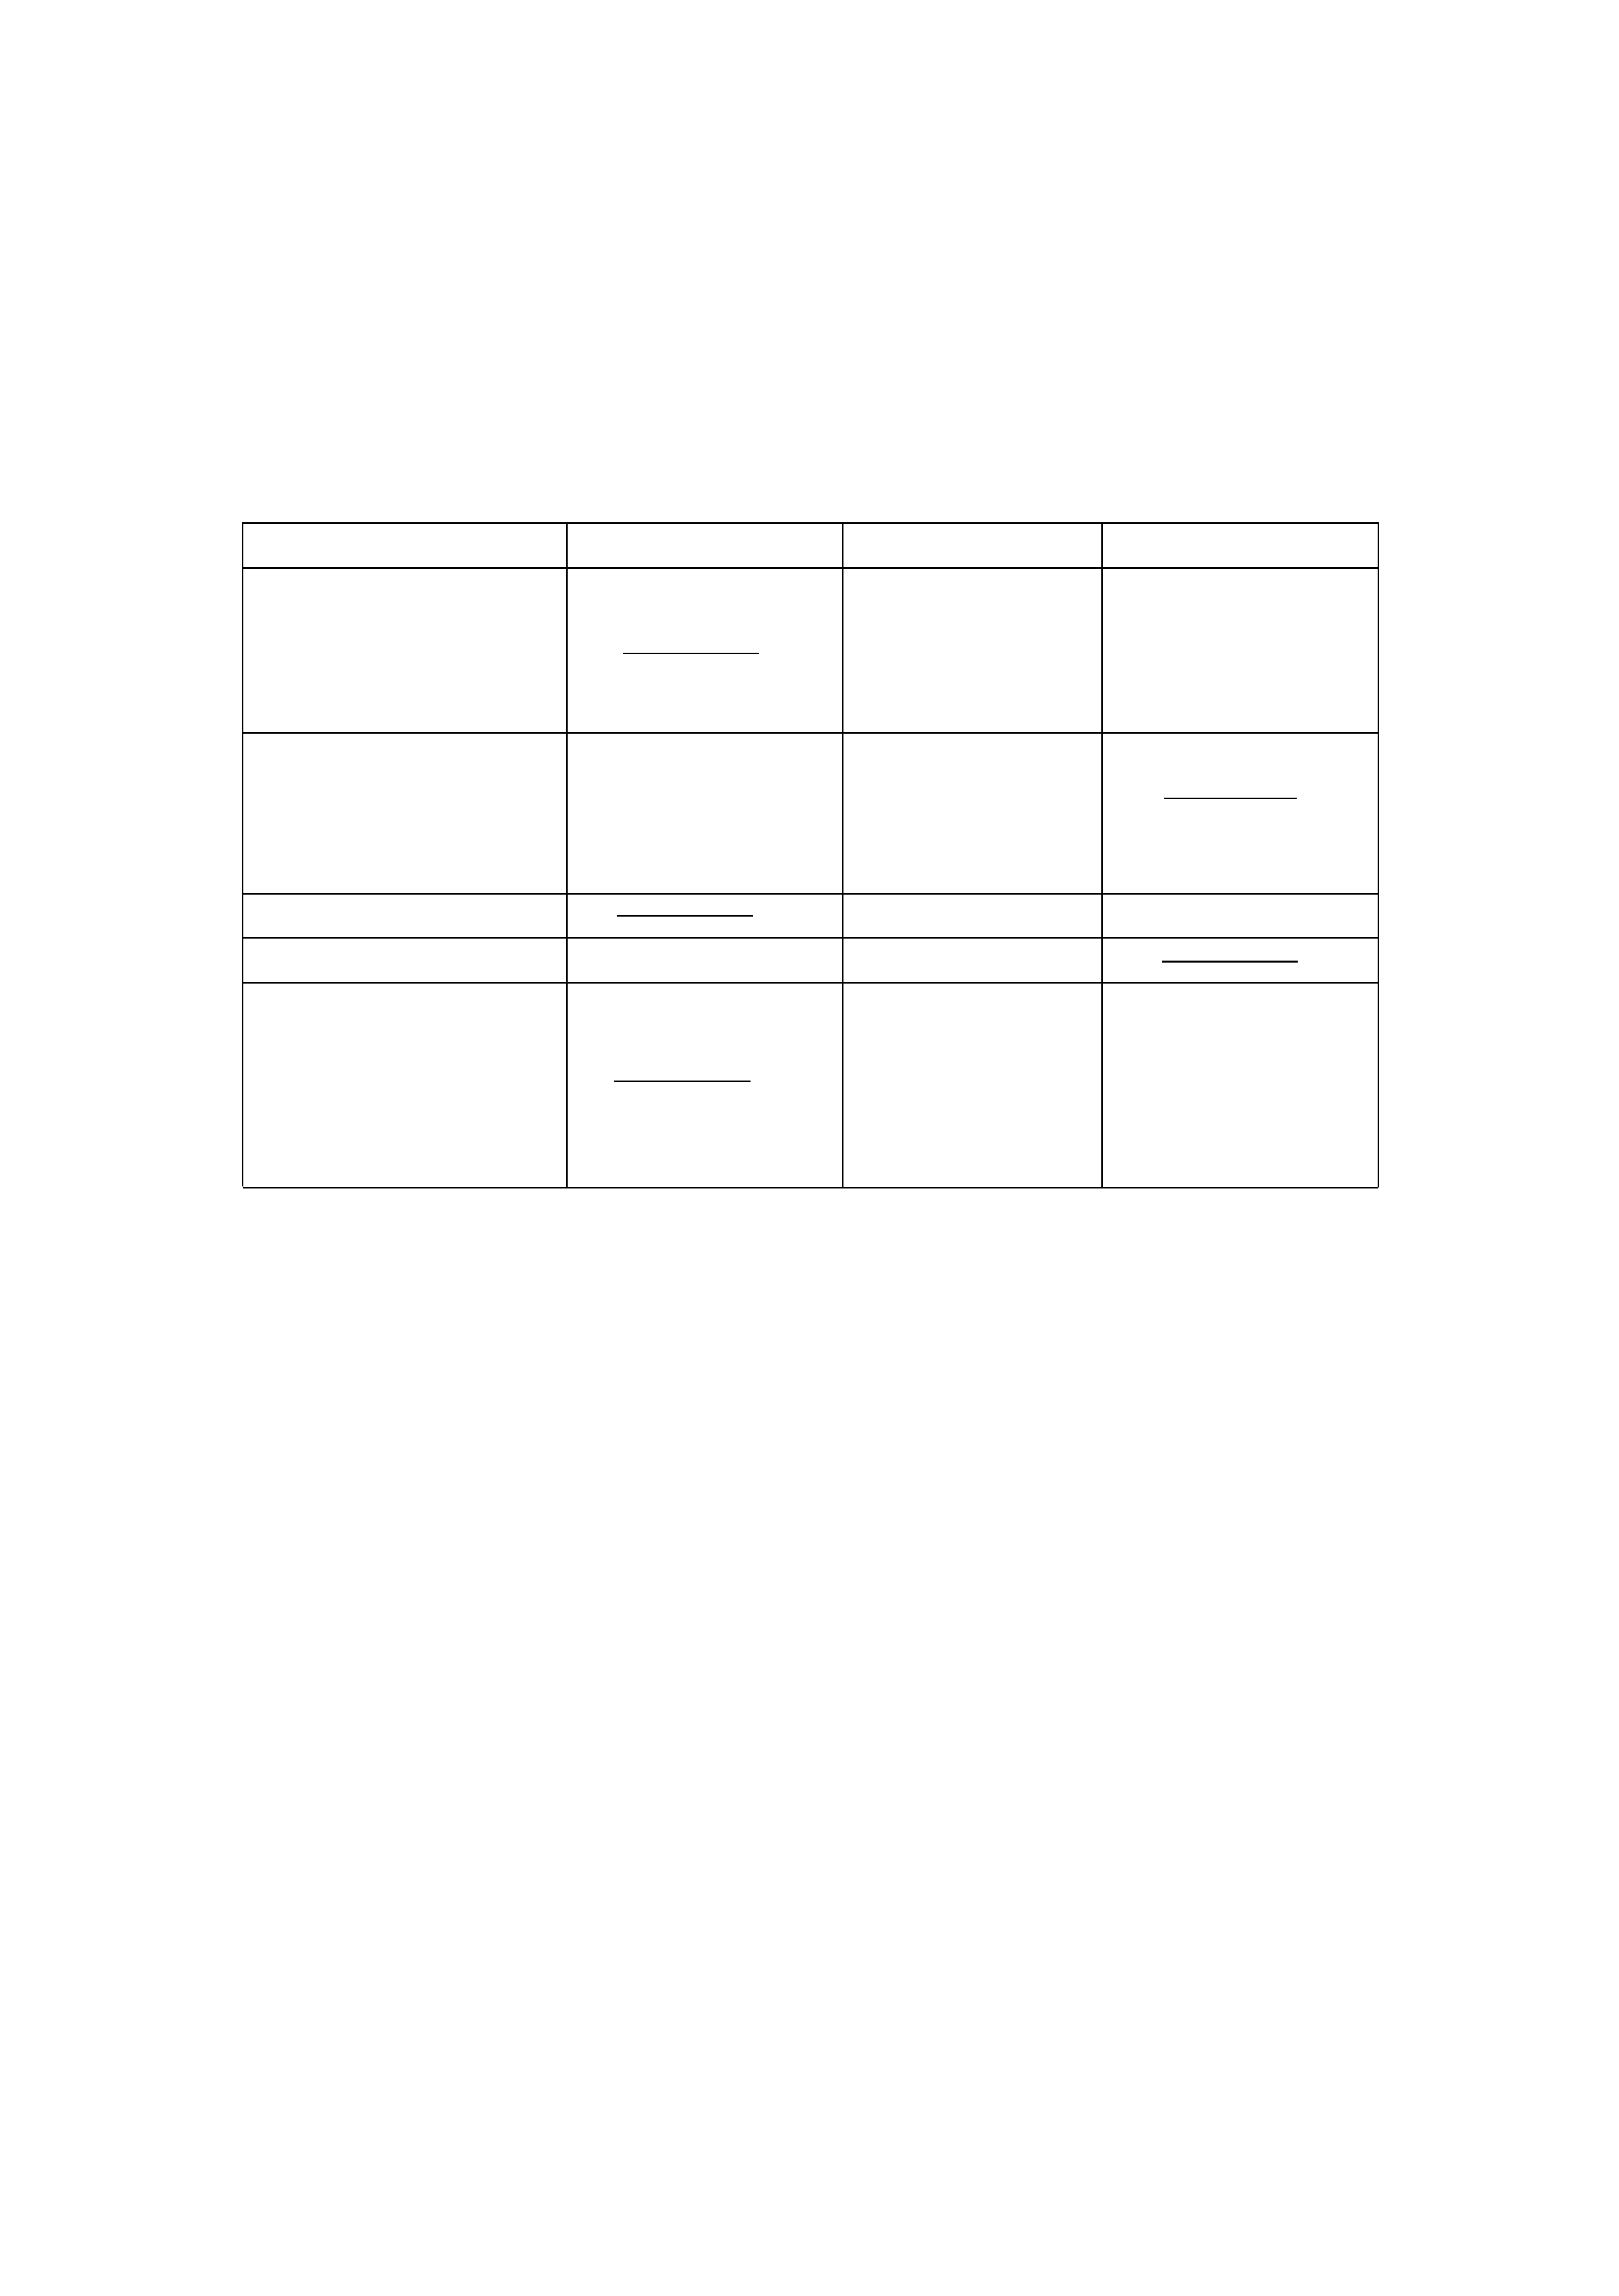
Once you have found the best Surround settings for your listening
room, note them in the table below for future reference (even
though the receiver memorizes the settings until you change
them).
For actual setting procedures, see pages 24 to 30.
Surround Mode
Hall Surround
Dolby Pro Logic
Dolby 3ch Logic
Center Mode
WIDE
WIDE
NORMAL
NORMAL
PHANTOM
OFF
OFF
Delay Time
DELAY 1
DELAY 1
DELAY 2
DELAY 2
DELAY 3
DELAY 3
DELAY 4
DELAY 4
Center Speaker Level
Rear Speaker Level
Center Tone
SOFT2
SOFT2
SOFT1
SOFT1
FLAT
FLAT
SHARP1
SHARP1
SHARP2
SHARP2
RX-772VBK[J]_0052-001A.Warranty
97.4.8, 3:21 PM
2

Page 1
Table of Contents
Getting Started ........................................................................................................................... 2
Before Installation .................................................................................................................... 2
Checking the Supplied Accessories ......................................................................................... 2
Switches, Buttons and Controls ............................................................................................... 3
Connecting the FM and AM Antennas .................................................................................... 5
Connecting the Speakers .......................................................................................................... 6
Connecting Audio/Video Components .................................................................................... 8
Connecting the Power Cord ................................................................................................... 10
Putting Batteries in the Remote Control ................................................................................ 10
Basic Operations ...................................................................................................................... 11
Turning the Power On and Off .............................................................................................. 11
Selecting the Source to Play ................................................................................................... 11
Adjusting the Volume ............................................................................................................ 12
Selecting the Front Speakers .................................................................................................. 12
Muting the Sound ................................................................................................................... 13
Recording a Source ................................................................................................................ 13
Basic Settings ........................................................................................................................... 14
Adjusting the Front Speaker Output Balance ........................................................................ 14
Listening at Low Volume (Loudness) ................................................................................... 14
Using the Sleep Timer ............................................................................................................ 15
Selecting the Center Speaker Size ......................................................................................... 16
Using Visual Confirmation .................................................................................................... 17
One Touch Operation .............................................................................................................. 18
About the One Touch Operation ............................................................................................ 18
Using the One Touch Operation ............................................................................................ 18
Receiving Radio Broadcasts ................................................................................................... 19
Tuning in Stations Manually .................................................................................................. 19
Using Preset Tuning ............................................................................................................... 19
Selecting the FM Reception Mode ......................................................................................... 20
Assigning Names to Preset Stations ....................................................................................... 21
Using the SEA Modes .............................................................................................................. 22
Selecting Your Favorite SEA Mode ...................................................................................... 22
Creating Your Own SEA Mode ............................................................................................. 23
Using the Surround Processor ................................................................................................ 24
Using JVC's Hall Surround ................................................................................................... 24
Speaker arrangements for Dolby Surround ............................................................................ 26
Preparing for Dolby Surround ................................................................................................ 27
Using Dolby Surround ........................................................................................................... 30
Using the On-Screen Display to Control the Receiver ......................................................... 31
COMPU LINK Remote Control System ............................................................................... 35
AV COMPU LINK Remote Control System ........................................................................ 36
Using the Remote Control for Operating JVC's Audio/Video Components ..................... 38
Operating Other Manufactures' VCR, TV, CATV Converter, and Satellite Tuners ...... 40
Troubleshooting ....................................................................................................................... 46
Specifications ............................................................................................................................ 47
MENU
This mark indicates that you can also use the menu function to do the
same operations.
Actual operations using the menu function are explained on the pages
indicated next to the marks.
RX-772VBK[J]_0052-001A.En.01-23
97.4.8, 3:23 PM
1

Page 2
Getting Started
This section explains how to connect audio/video components and speakers to the receiver, and how to connect
the power supply.
Before Installation
General
· Be sure your hands are dry.
· Turn the power off to all components.
· Read the manuals supplied with the components you are going to connect.
Locations
· Install the receiver in a location that is level and protected from moisture.
· The temperature around the receiver must be between 23° and 95° F (5° and 35° C).
· Make sure there is good ventilation around the receiver. Poor ventilation could cause overheating and
damage the receiver.
Handling the receiver
· Do not insert any metal object into the receiver.
· Do not disassemble the receiver or remove screws, covers, or cabinet.
· Do not expose the receiver to rain or moisture.
Checking the Supplied Accessories
Check to be sure you have all of the following items, which are supplied with the receiver.
The number in the parenthesis indicates the quantity of the pieces supplied.
· Remote Control (1)
· Batteries (2)
· AM Loop Antenna (1)
· FM Antenna (1)
If anything is missing, contact your dealer immediately.
RX-772VBK[J]_0052-001A.En.01-23
97.4.8, 3:23 PM
2