LVT1140-004A
[US]
RX-6042S
RX-5042S
AUDIO/VIDEO CONTROL RECEIVER
RECEPTOR DE CONTROL DE AUDIO/VÍDEO
RECEPTOR DE COMANDO AUDIO/VÍDEO
TA/NEWS/INFO
DISPLAY MODE
INSTRUCTIONS
MANUAL DE INSTRUCCIONES
INSTRUÇÕES
English
Espa
ñ
ol
Portugu
ê
s
cover_6042&5042[US].p65
04.2.4, 0:01 PM
1
G-1
CautionSTANDBY/ON
button!
Disconnect the mains plug to shut the power off completely. The
STANDBY/ON
button in any position does not disconnect the
mains line. The power can be remote controlled.
PrecauciónInterruptor STANDBY/ON
!
Desconectar el cable de alimentación para desactivar la alimentación
totalmente. Cualquier que sea la posición de ajuste del interruptor
STANDBY/ON
, la alimentación no es cortada completamente.
La alimentación puede ser controlada remotamente.
PrecauçãoInterruptor STANDBY/ON
!
Desconectar o cabo de alimentação para desligar a alimentação
por completo. Qualquer que seja a posição de ajuste do
interruptor STANDBY/ON
, a alimentação não é
completamente cortada. A alimentação pode ser controlada
remotamente.
Warnings, Cautions, and Others/Avisos, precauciones y otras notas/
Advertêcias, precauções e outras notas/
Safety_RX-6042&5042[US].p65
04.2.5, 1:03 PM
1
CAUTION
·
Do not block the ventilation openings or holes.
(If the ventilation openings or holes are blocked by a
newspaper or cloth, etc., the heat may not be able to
get out.)
·
Do not place any naked flame sources, such as
lighted candles, on the apparatus.
·
When discarding batteries, environmental problems
must be considered and local rules or laws governing
the disposal of these batteries must be followed strictly.
·
Do not expose this apparatus to rain, moisture,
dripping or splashing and that no objects filled with
liquids, such as vases, shall be placed on the
apparatus.
AVISO
·
Não obstrua as aberturas e orifícios de ventilação. (Se
os orifícios ou aberturas de ventilação estiverem
obstruídos por qualquer papel ou tecido, não haverá
circulação do ar quente.)
·
Não coloque nenhum objeto com chamas, como velas
acesas, sobre o aparelho.
·
Ao descartar as baterias, leve em consideração os
problemas que possam ser causados ao meio ambiente
e os regulamentos e leis locais e governamentais sobre
recolhimento dessas baterias devem ser rigorosamente
seguidos.
·
Não exponha este aparelho à chuva, umidade, pingos
ou esguichos de água, nem coloque em cima do
mesmo qualquer tipo de recipiente que contenha
líquidos, como por exemplo vasos.
CAUTION
To reduce the risk of electrical shocks, fire, etc.:
1. Do not remove screws, covers or cabinet.
2. Do not expose this appliance to rain or moisture.
AVISO
Para reduzir riscos de choques eléctricos, incêndio, etc.:
1.
Não retire parafusos nem desmonte as tampas ou o gabinete.
2.
Não exponha este aparelho à chuva nem à umidade.
PRECAUCIÓN
·
No obstruya las rendijas o los orificios de ventilación.
(Si las rendijas o los orificios de ventilación quedan tapados
con un periódico, un trozo de tela, etc., no se podrá disipar
el calor).
·
No ponga sobre el aparato ninguna llama al descubierto,
como velas encendidas.
·
Cuando tenga que descartar las pilas, tenga en cuenta
los problemas ambientales y observe estrictamente los
reglamentos o las leyes locales sobre disposición de las
pilas.
·
No exponga este aparato a la lluvia, humedad, goteos
o salpicaduras. Tampoco ponga recipientes conteniendo
líquidos, como floreros, encima del aparato.
PRECAUCIÓN
Para reducir riesgos de choques eléctricos, incendio, etc.:
1. No extraiga los tornillos, los cubiertas ni la caja.
2. No exponga este aparato a la lluvia o a la humedad.
G-2
Safety_RX-6042&5042[US].p65
04.2.4, 3:18 PM
2
G-3
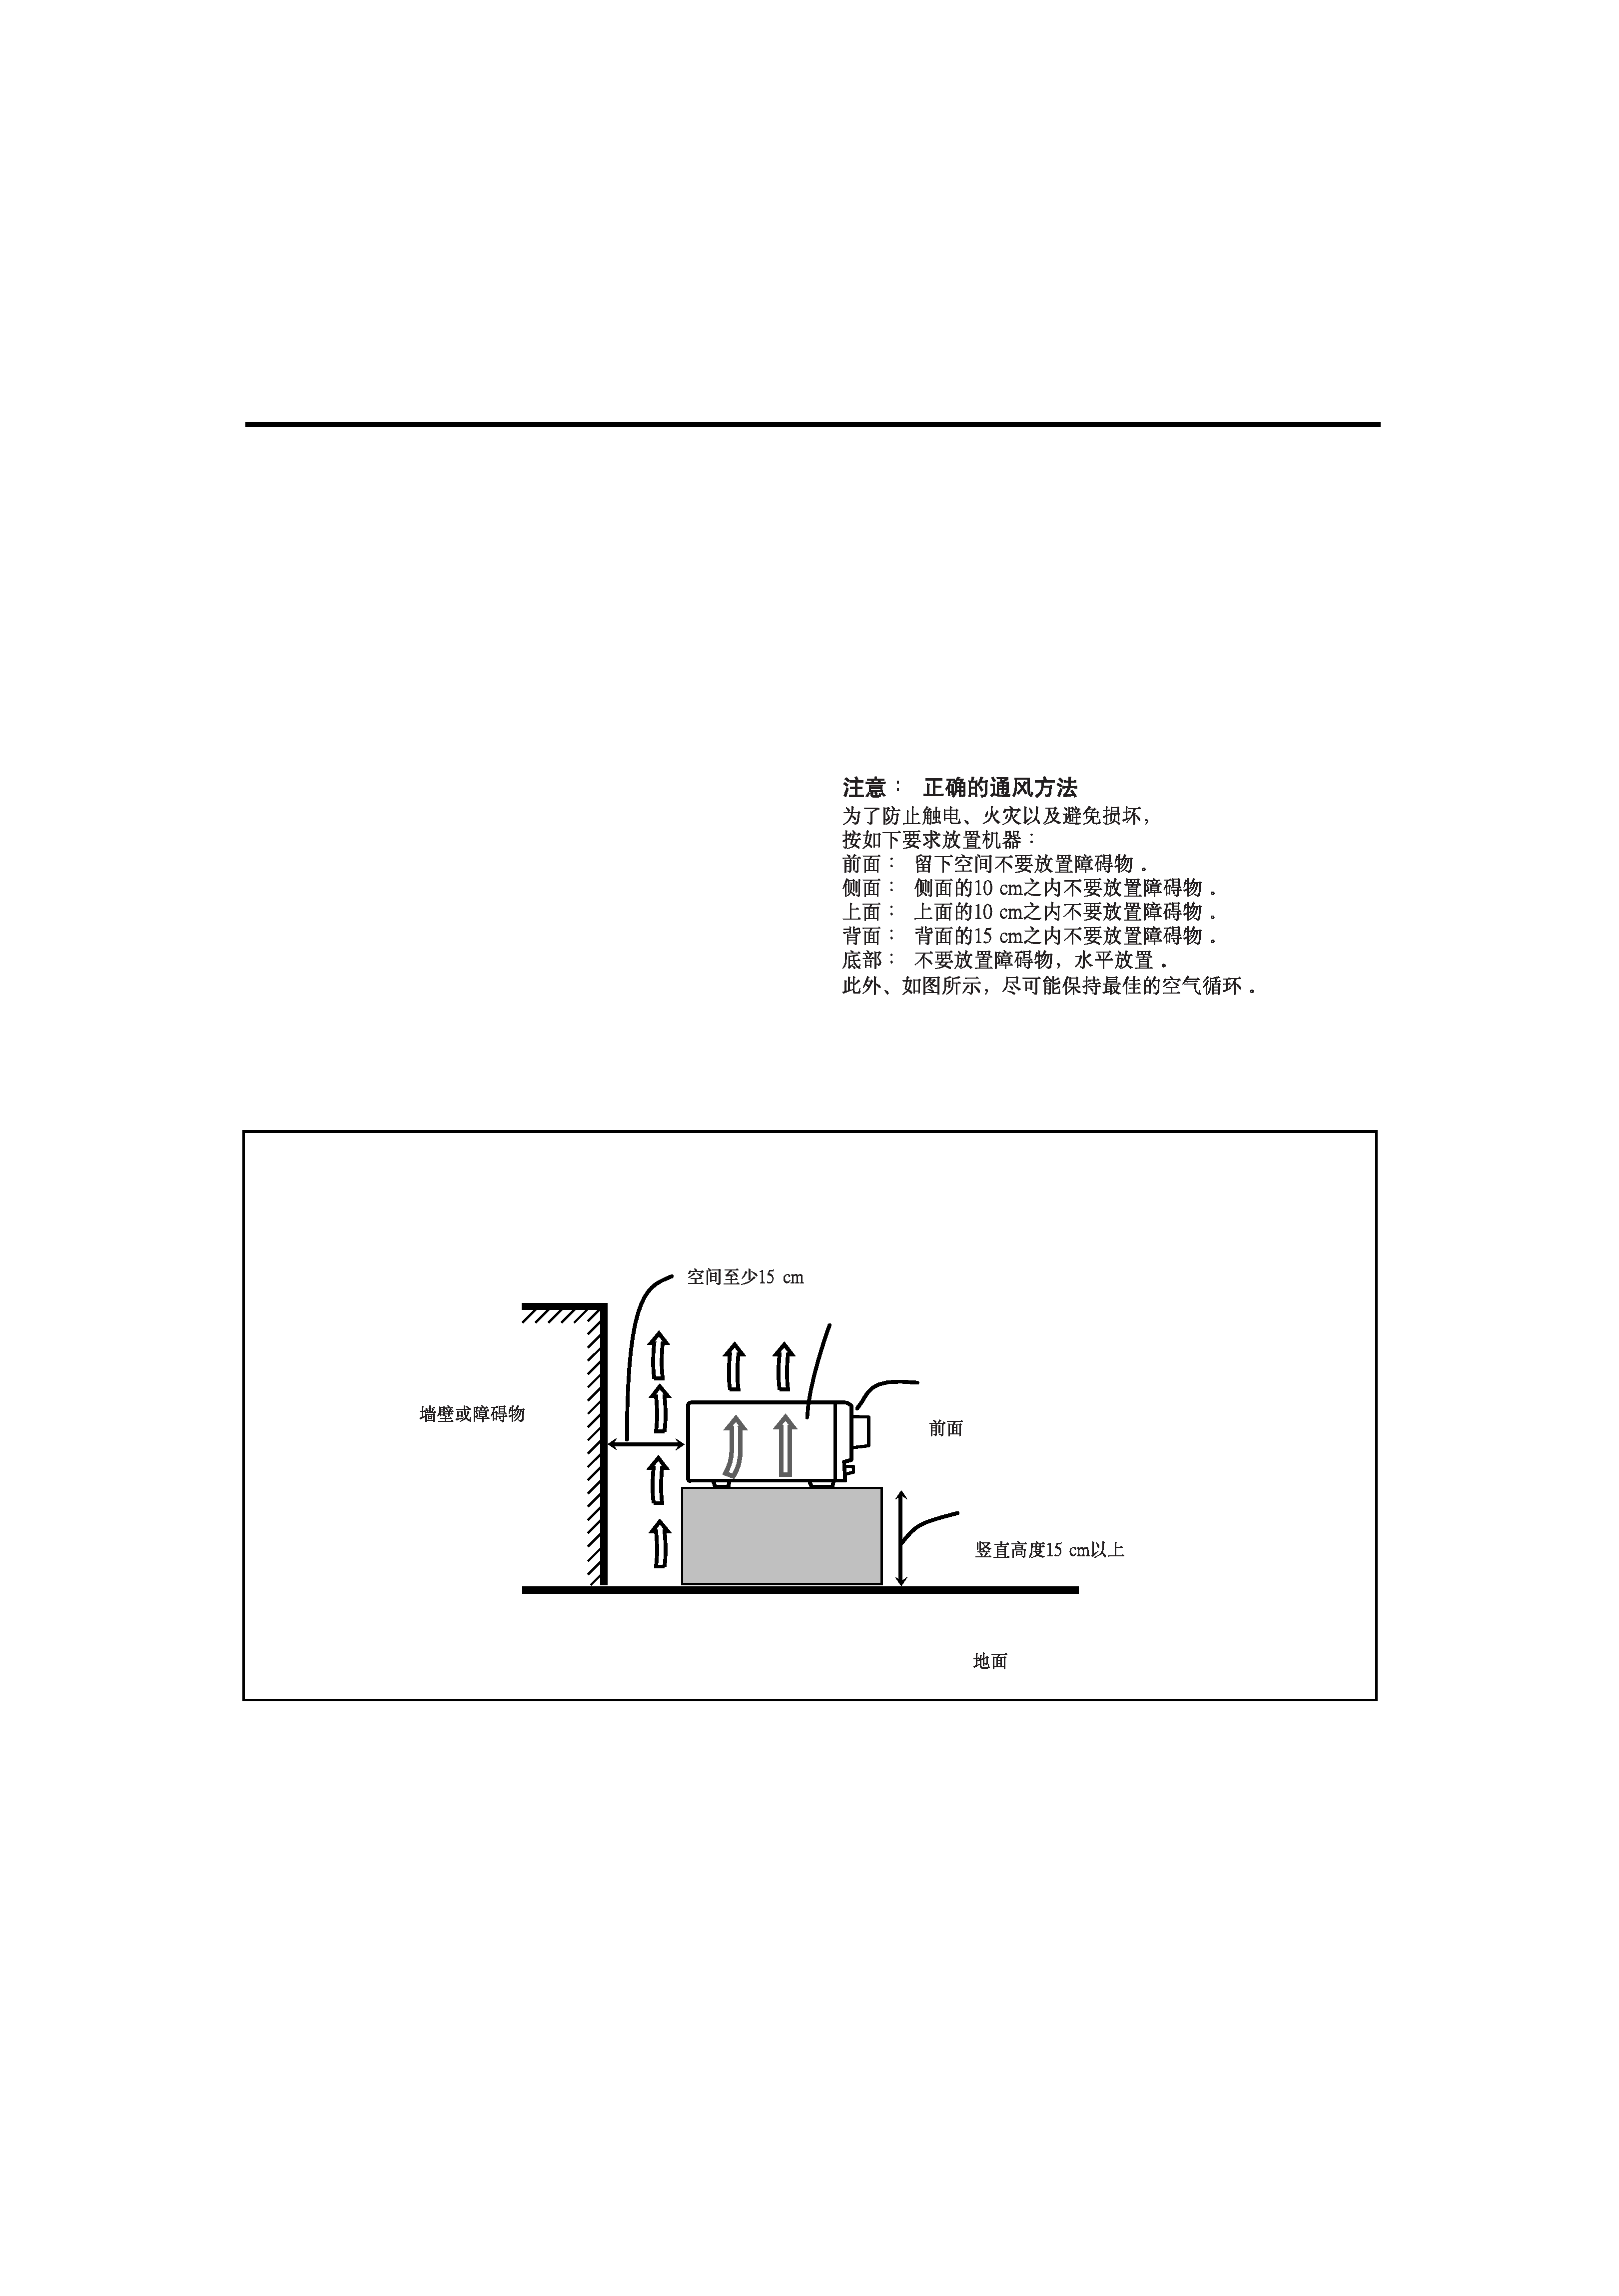
Caution: Proper Ventilation
To avoid risk of electric shock and fire and to protect from damage.
Locate the apparatus as follows:
Front:
No obstructions open spacing.
Sides:
No obstructions in 10 cm from the sides.
Top:
No obstructions in 10 cm from the top.
Back:
No obstructions in 15 cm from the back.
Bottom:
No obstructions, place on the level surface.
In addition, maintain the best possible air circulation as illustrated.
Precaución: Ventilación Adecuada
Para evitar el riesgo de choque eléctrico e incendio y para proteger el
aparato contra daños.
Ubique el aparato de la siguiente manera:
Frente:
Espacio abierto sin obstrucciones
Lados:
10 cm sin obstrucciones a los lados
Parte superior: 10 cm sin obstrucciones en la parte superior
Parte trasera:
15 cm sin obstrucciones en la parte trasera
Fondo:
Sin obstrucciones, colóquelo sobre una superficie
nivelada
Además, mantenga la mejor circulación de aire posible como se
ilustra.
Precaução: ventilação apropriada
Para prevenir o risco de choque elétrico ou incêndio e para proteger o
aparelho contra danos.
Localize-o da seguinte maneira:
Frente:
Espaço aberto, sem obstruções
Lados:
Espaço de 10 cm sem obstruções nos lados
Topo:
Espaço de 10 cm sem obstruções acima
Atrás:
Espaço de 15 cm sem obstruções atrás
Parte inferior:
Sem obstruções. Coloque o aparelho em superfície
nivelada.
Mantenha, além disso, a maior circulação de ar possível, como indica
a ilustração.
Wall or obstructions
Pared u obstrucciones
Parede ou obstáculo
Front
Frente
Frente
Stand height 15 cm or more
Allura del soporte 15 cm o más
Base com altura de 15 cm ou mais
RX-6042S/RX-5042S
Spacing 15 cm or more
Espacio de 15 cm o más
Espaço de 15 cm ou mais
Floor
Piso
Piso
Safety_RX-6042&5042[US].p65
04.2.4, 3:18 PM
3

1
English
Table of Contents
Adjusting Sound ........................................ 23
Basic Adjustment Items ............................................................ 23
Basic Procedure ........................................................................ 23
7 Adjusting the Equalization Patterns ..................................... 24
7 Adjusting the Speaker Output Levels ................................... 24
7 Adjusting the Sound Parameters for the Surround
and DSP Modes .................................................................... 24
Using the Surround Modes .......................... 25
Reproducing Theater Ambience ................................................ 25
Introducing the Surround Modes ............................................. 25
Activating the Surround Modes ............................................... 27
Using the DSP Modes ................................ 28
Reproducing the Sound Field ................................................... 28
Introducing the DSP Modes ..................................................... 28
Activating the DSP Modes ....................................................... 29
COMPU LINK Remote Control System ......... 30
AV COMPU LINK Remote Control System .... 31
Operating JVC's Audio/Video Components ... 33
Operating Audio Components .................................................. 33
Operating Video Components .................................................. 34
Operating Other Manufacturers' Video
Equipment [Only for RX-6042S] .............. 35
Troubleshooting ......................................... 37
Specifications ............................................ 38
Parts Identification ...................................... 2
Getting Started ........................................... 5
Before Installation ...................................................................... 5
Checking the Supplied Accessories ........................................... 5
Putting Batteries in the Remote Control .................................... 5
Connecting the FM and AM Antennas ....................................... 5
Connecting the Speakers and Subwoofer ................................... 6
Connecting Audio/Video Components ....................................... 7
7 Analog Connections ............................................................... 7
7 Digital Connections .............................................................. 10
Adjusting the Voltage Selector ................................................. 10
Connecting the Power Cord ..................................................... 10
Basic Operations ....................................... 11
Daily Operational Procedure .................................................... 11
Turning On the Power .............................................................. 11
Selecting the Source to Play ..................................................... 11
Adjusting the Volume ............................................................... 12
Turning On and Off the Subwoofer Sound .............................. 13
Selecting the Analog or Digital Input Mode ............................ 13
Changing the Display Brightness ............................................. 14
Attenuating the Input Signal .................................................... 14
Changing the Source Name ...................................................... 14
Reinforcing the Bass ................................................................ 15
Muting the Sound ..................................................................... 15
Using the Sleep Timer .............................................................. 15
Receiving Radio Broadcasts ........................ 16
Setting the AM Tuner Interval Spacing .................................... 16
Tuning in to Stations Manually ................................................ 16
Using Preset Tuning ................................................................. 16
Selecting the FM Reception Mode ........................................... 17
Basic Settings ........................................... 18
Quick Speaker Setup ................................................................ 18
Basic Setting Items ................................................................... 19
Basic Procedure ........................................................................ 19
7 Setting the Speakers ............................................................. 20
7 Setting the Speaker Distance ................................................ 20
7 Setting the Bass Sounds ....................................................... 20
7 Selecting the Main or Sub Channel ...................................... 21
7 Setting for Easy and Effective Surround Operations ............ 21
7 Setting the Digital Input Terminals ...................................... 22
7 Setting the Component Video Input ..................................... 22
This mark indicates that ONLY the remote control
CAN be used for the operation explained.
Remote
NOT
This mark indicates that the remote control
CANNOT be used for the operation explained.
Use the buttons and controls on the front panel.
01-10_5042&6042[US]f.p65
04.2.4, 5:44 PM
1