For Customer Use:
Enter below the Model No. and Serial
No. which are located either on the rear,
bottom or side of the cabinet. Retain this
information for future reference.
Model No.
Serial No.
LVT0141-004A
[E]
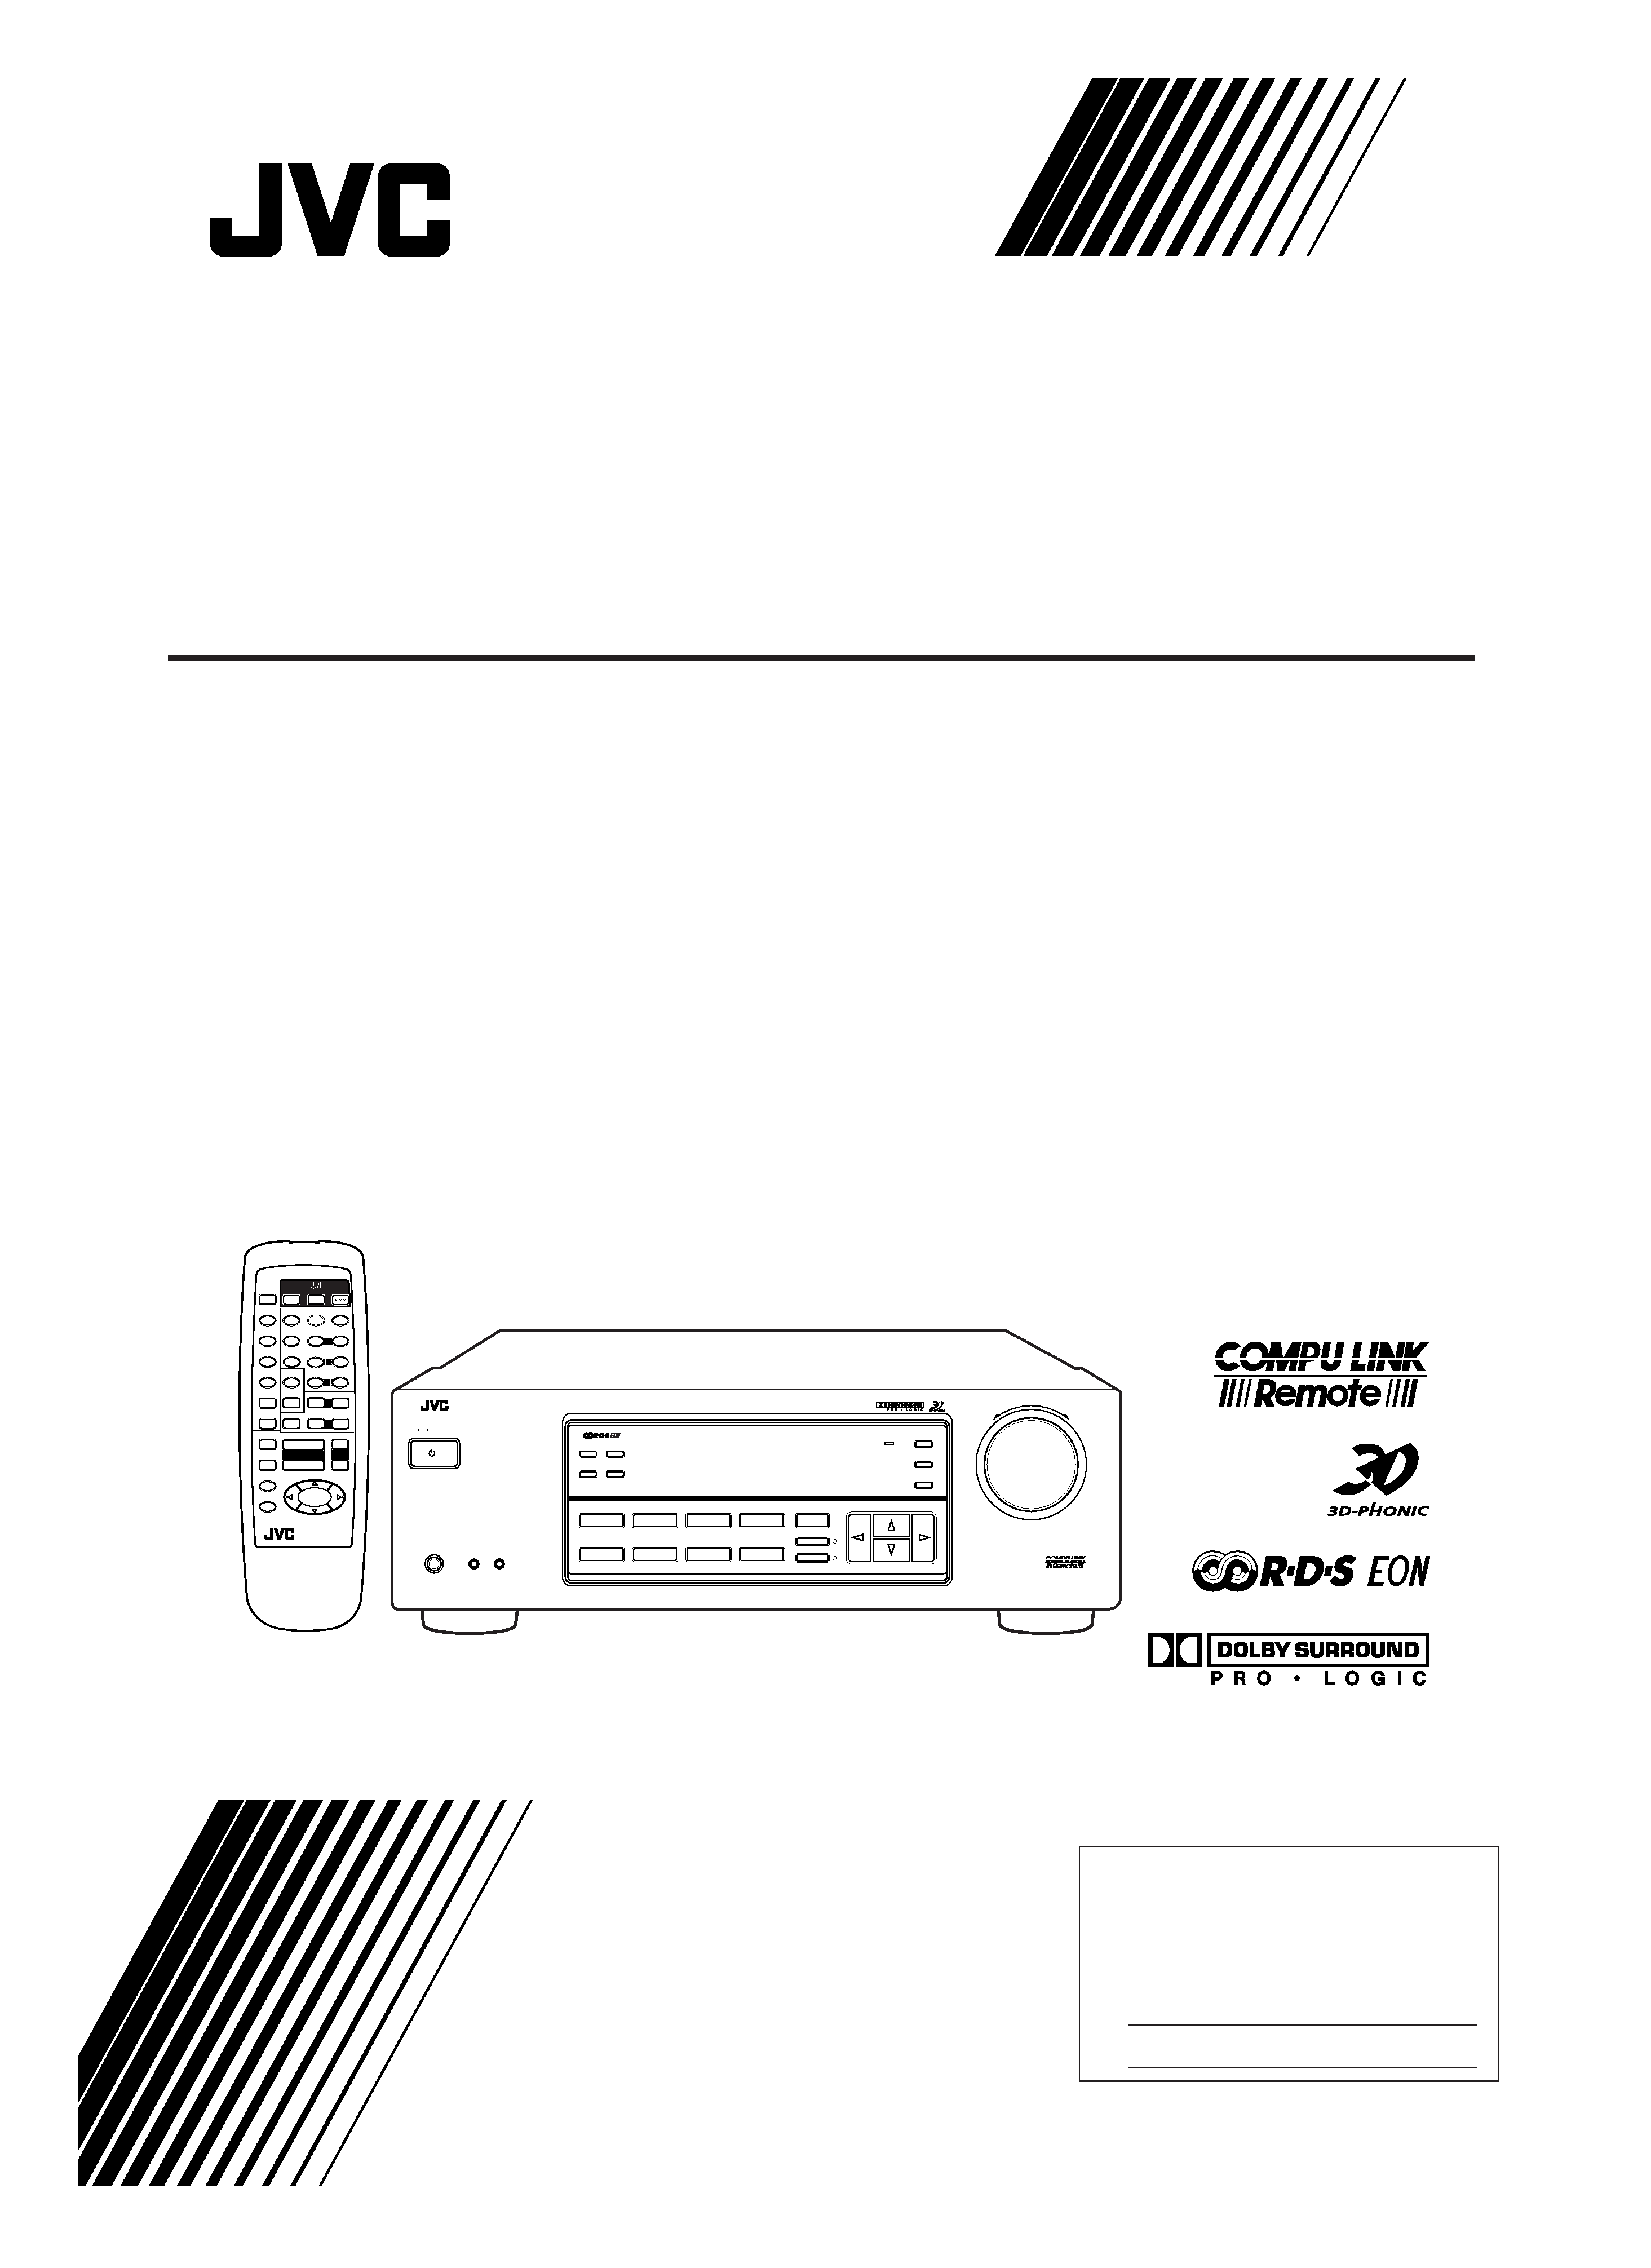
RX-558RBK
INSTRUCTIONS
BEDIENUNGSANLEITUNG
MANUEL D'INSTRUCTIONS
GEBRUIKSAANWIJZING
MANUAL DE INSTRUCCIONES
ISTRUZIONI
FM/MW/LW RECEIVER
UKW/MW/LW-RECEIVER
AMPLI/TUNER FM/PO/GO
FM/MG/LG TUNER/VERSTERKER
RECEPTOR FM/MW/LW
RICEVITORE MF/OM/OL
4
1
7
4
1
RM-SR558RU REMOTE CONTROL
TAPE/MD
FM/AM
VCR
DVD
SOUND
CONTROL
SLEEP
8
3
2
1
5
SURROUND
TEST
DELAY
6
5
4
EFFECT
CENTER +
5
9
8
7/P
REAR·L +
5
TV
VCR
AUDIO
CD
+10
10
REAR·R +
MENU
ENT
5
+
TV CH
TV/VIDEO
PHONO
CD-DISC
+
TV VOL.
DVD MULTI
ONE TOUCH
OPERATION
VCR CH
+
+
MUTING
VOLUME
£ PTY SEARCH
DISPLAY
PTY
+ PTY
RX-558R
FM/MW/LW RECEIVER
STANDBY
STANDBY/ON
PHONES
SPEAKERS
12
/I
PTY SEARCH
ECN
TA/NEWS/INFO
DISPLAY MODE
ADJUST
BASS BOOST
SETTING
MEMORY
DVD MULTI
CD
DVD
PHONO
VCR
TAPE/MD
SOURCE NAME
FM
SURROUND
INPUT ATT.
ONE TOUCH OPERATION
AM
MASTER VOLUME
+
ENHANCED COMPULINK CONTROL SYSTEM
-- OFF
_ ON
RX-558R[E]COVER/1
98.12.23, 10:36 AM
1
G-1
Warnings, Cautions and Others/Warnung, Achtung und sonstige Hinweise/
Mises en garde, précautions et indications diverses/Waarschuwingen,
voorzorgen en andere mededelingen/Avisos, precauciones y otras notas/
Avvertenze e precauzioni da osservare
IMPORTANT for the U.K.
DO NOT cut off the mains plug from this equipment. If the plug
fitted is not suitable for the power points in your home or the
cable is too short to reach a power point, then obtain an
appropriate safety approved extension lead or consult your
dealer.
BE SURE to replace the fuse only with an identical approved
type, as originally fitted.
If nonetheless the mains plug is cut off ensure to remove the
fuse and dispose of the plug immediately, to avoid a possible
shock hazard by inadvertent connection to the mains supply.
If this product is not supplied fitted with a mains plug then follow
the instructions given below:
IMPORTANT.
DO NOT make any connection to the terminal which is marked
with the letter E or by the safety earth symbol or coloured green
or green-and-yellow.
The wires in the mains lead on this product are coloured in
accordance with the following code:
Blue :
Neutral
Brown :
Live
As these colours may not correspond with the coloured
markings identifying the terminals in your plug proceed as
follows:
The wire which is coloured blue must be connected to the
terminal which is marked with the letter N or coloured black.
The wire which is coloured brown must be connected to the
terminal which is marked with the letter L or coloured red.
IF IN DOUBT - CONSULT A COMPETENT ELECTRICIAN.
Caution STANDBY/ON
switch!
Disconnect the mains plug to shut the power off completely. The
STANDBY/ON
switch in any position does not disconnect the
mains line. The power can be remote controlled.
Achtung STANDBY/ON
-Schalter!
Den Netzstecker aus der Steckdose ziehen, um die Stromversorgung
vollkommen zu unterbrechen. Der Schalter STANDBY/ON
unterbrichet in keiner Stellung die Stromversorgung vollkommen. Die
Stromversorgung kann mit der Fernbedienung ein- und ausgeschaltet
werden.
Attention Commutateur STANDBY/ON
!
Déconnecter la fiche de secteur pour couper complètement le courant.
Le commutateur STANDBY/ON
ne coupe jamais complètement la
ligne de secteur, quelle que soit sa position. Le courant peut être
télécommandé.
Voorzichtig STANDBY/ON
schakelaar!
Om de stroomtoevoer geheel uit te schakelen, trekt u de stekker uit het
stopkontakt. Anders zal er altijd een geringe hoeveelheid stroom naar
het apparaat lopen, ongeacht de stand van de STANDBY/ON
schakelaar. U kunt het apparaat ook met de afstandsbediening aan-
en uitschakelen.
Precaución Interruptor STANDBY/ON
!
Desconectar el cable de alimentación para desactivar la alimentación
totalmente. Cualquier que sea la posición de ajuste del interruptor
STANDBY/ON
, la alimentación no es cortada completamente. La
alimentación puede ser controlada remotamente.
Attenzione L'interruttore STANDBY/ON
!
Disinserire la spina del cavo di alimentazione dalla presa della rete
elettrica per staccare completamente l'alimentazione. L'interruttore
STANDBY/ON
in nessuna posizione stacca la linea di alimentazione
elettrica principale. È possibile il controllo remoto dell'alimentazione.
Per I'ltalia:
"Si dichiara che il questo prodotto di marca JVC è conforme
alle prescrizioni del Decreto Ministeriale n.548 del 28/08/95
pubblicato sulla Gazzetta Ufficiale della Repubblica Italiana
n.301 del 28/12/95."
ATTENTION
Afin d'éviter tout risque d'électrocution, d'incendie, etc.:
1.
Ne pas enlever les vis ni les panneaux et ne pas ouvrir le coffret
de l'appareil.
2.
Ne pas exposer l'appareil à la pluie ni à l'humidité.
ATTENZIONE
Per ridurre il rischio di scosse elettriche, incendi, ecc...
1.
Non togliere viti, coperchi o la scatola.
2.
Non esporre l'apparecchio alla piogggia e all'umidità.
ACHTUNG
Zur Verhinderung von elektrischen Schlägen, Brandgefahr, usw:
1.
Keine Schrauben lösen oder Abdeckungen enternen und nicht
das Gehäuse öffnen.
2.
Dieses Gerät weder Regen noch Feuchtigkeit aussetzen.
CAUTION
To reduce the risk of electrical shocks, fire, etc.:
1.
Do not remove screws, covers or cabinet.
2.
Do not expose this appliance to rain or moisture.
PRECAUCIÓN
Para reducir riesgos de choques eléctricos, incendio, etc.:
1.
No extraiga los tornillos, los cubiertas ni la caja.
2.
No exponga este aparato a la lluvia o a la humedad.
VOORZICHTIG
Ter vermindering van gevaar voor brand, elektrische schokken, enz.:
1.
Verwijder geen schroeven, panelen of de behuizing.
2.
Stel dit toestel niet bloot aan regen of vocht.
RX-558R[E]SAFETY/1
98.11.26, 4:28 PM
1

G-2
Caution: Proper Ventilation
To avoide risk of electric shock and fire and to protect from damage.
Locate the apparatus as follows:
Front:
No obstructions open spacing.
Sides:
No obstructions in 10 cm from the sides.
Top:
No obstructions in 10 cm from the top.
Back:
No obstructions in 15 cm from the back
Bottom:
No obstructions, place on the level surface.
In addition, maintain the best possible air circulation as illustrated.
Achtung: Angemessene Ventilation
Stellen Sie das Gerät zur Verhütung von elektrischem Schlag und
Feuer und zum Schutz gegen Beschädigung wie folgt auf:
Vorderseite: Offener Platz ohne Hindernisse.
Seiten:
Keine Hindernisse innerhalb 10 cm von den Seiten.
Oberseite:
Keine Hindernisse innerhalb 10 cm von der Oberseite.
Rückseite:
Keine Hindernisse innerhalb 15 cm von der Rückseite.
Unterseite:
Keine Hindernisse. Auf eine ebene Oberfläche stellen.
Zusätzlich die bestmögliche Luftzirkulation wie gezeigt erhalten.
Attention: Ventilation Correcte
Pour éviter les chocs électriques, l'incendie et tout autre dégât.
Disposer l'appareil en tenant compte des impératifs suivants
Avant:
Rien ne doit gêner le dégagement
Flancs:
Laisser 10 cm de dégagement latéral
Dessus:
Laisser 10 cm de dégagement supérieur
Arrière:
Laisser 15 cm de dégagement arrière
Dessous:
Rien ne doit obstruer par dessous; poser l'appareil sur
une surface plate.
Veiller également à ce que l'air circule le mieux possible comme
illustré.
Voorzichtig: Zorg Voor Goede Ventilatie
Om gevaar voor brand of een elektrische schok te voorkomen, dient u
bij opstelling van het apparaat op de volgende punten te letten:
Voorkant:
Voldoende ruimte vrij houden.
Zijkanten:
Minstens 10 cm aan weerszijden vrij houden.
Bovenkant:
Niets bovenop plaatsen; 10 cm speling geven.
Achterkant:
Minstens 15 cm ruimte achteraan vrij houden.
Onderkant:
Opstellen op een egaal horizontaal oppervlak.
Bovendien moet er rondom voldoende luchtdoorstroming zijn, zoals in
de afbeelding aangegeven.
Precaución: Ventilación Adecuada
Para evitar el riesgo de choque eléctrico e incendio y para proteger el
aparato contra daños.
Ubique el aparato de la siguiente manera:
Frente:
Espacio abierto sin obstrucciones
Lados:
10 cm sin obstrucciones a los lados
Parte superior: 10 cm sin obstrucciones en la parte superior
Parte trasera:
15 cm sin obstrucciones en la parte trasera
Fondo:
Sin obstrucciones, colóquelo sobre una superficie
nivelada
Además, mantenga la mejor circulación de aire posible como se
ilustra.
Attenzione: Problemi di Ventilazione
Per evitare il rischio di folgorazioni ed incendi e proteggere l'unità da
danni, installarla nel modo seguente.
Davanti:
Nessun ostacolo, spazio libero
Lati:
Nessun ostacolo per almeno 10 cm
Sopra:
Nessun ostacolo per almeno 10 cm
Retro:
Nessun ostacolo per almeno 15 cm
Fondo:
Libero ed in piano
Inoltre, mantenere il più possibile la circolazione dell'aria.
Wall or obstructions
Wand oder Hindernisse
Mur, ou obstruction
Wand of meubilair
Pared u obstrucciones
Parete o ostacol
Spacing 15 cm or more
Abstand von 15 cm oder mehr
Dégagement de 15 cm ou plus
Minstens 15 cm tussenruimte
Espacio de 15 cm o más
15 cm di distanza o più
Stand height 15 cm or more
Standhöhe 15 cm oder mehr
Hauteur du socle: 15 cm ou plus
Standard op minstens 15 cm van de vloer
Allura del soporte 15 cm o más
Altezza del tavolino 15 cm p plù
Front
Vorderseite
Avant
Voorkant
Frente
Davanti
RX-558RBK
Floor
Boden
Plancher
Vloer
Piso
Pavimento
English
Deutsch
Français
Nederlands
Italiano
Español
RX-558R[E]SAFETY/1
98.11.26, 4:28 PM
2

1
English
Table of Contents
Parts Identification ...................................... 2
Getting Started ........................................... 3
Before Installation ...................................................................... 3
Checking the Supplied Accessories ........................................... 3
Connecting the FM and AM (MW/LW) Antennas ..................... 3
Connecting the Speakers ............................................................ 4
Connecting Other Components .................................................. 5
Connecting the Power Cord ....................................................... 7
Putting Batteries in the Remote Control .................................... 7
Basic Operations ......................................... 8
Turning the Power On and Off (Standby) .................................. 8
Selecting the Source to Play ....................................................... 8
Adjusting the Volume ................................................................. 9
Selecting the Front Speakers ...................................................... 9
Muting the Sound ....................................................................... 9
Recording a Source .................................................................... 9
Attenuating the Input Signal .................................................... 10
Adjusting the Front Speaker Output Balance ........................... 10
Reinforcing the Bass ................................................................ 10
Adjusting the Tone ................................................................... 10
Basic Settings ........................................... 11
Changing the Source Name ...................................................... 11
Setting Center and Rear Speakers for the DSP Modes ............ 11
Storing the Basic Settings and Adjustments -- One Touch
Operation ........................................................................... 12
Using the Sleep Timer .............................................................. 12
Receiving Radio Broadcasts ........................ 13
Tuning in Stations Manually .................................................... 13
Using Preset Tuning ................................................................. 13
Selecting the FM Reception Mode ........................................... 14
Using the RDS (Radio Data System) to Receive FM Stations ... 14
Searching for a Program by PTY Codes .................................. 15
Switching to a Broadcast Program of Your Choice
Temporarily ........................................................................ 16
Using the DSP Modes ................................ 17
Available DSP Modes According to the Speaker Arrangement .. 18
Adjusting the 3D-PHONIC Modes .......................................... 19
Adjusting the DAP Modes ....................................................... 19
Adjusting the Surround Modes -- Dolby Surround and JVC
Theater Surround ............................................................... 20
Activating the DSP Modes ....................................................... 21
Using the DVD MULTI Playback Mode .......... 22
Activating the DVD MULTI Playback Mode .......................... 22
COMPU LINK Remote Control System ......... 23
Operating Other Components ..................... 24
Troubleshooting ......................................... 26
Specifications ............................................ 27
EN01-07.RX-558R[E]/1
99.1.28, 8:37 PM
1
2
English
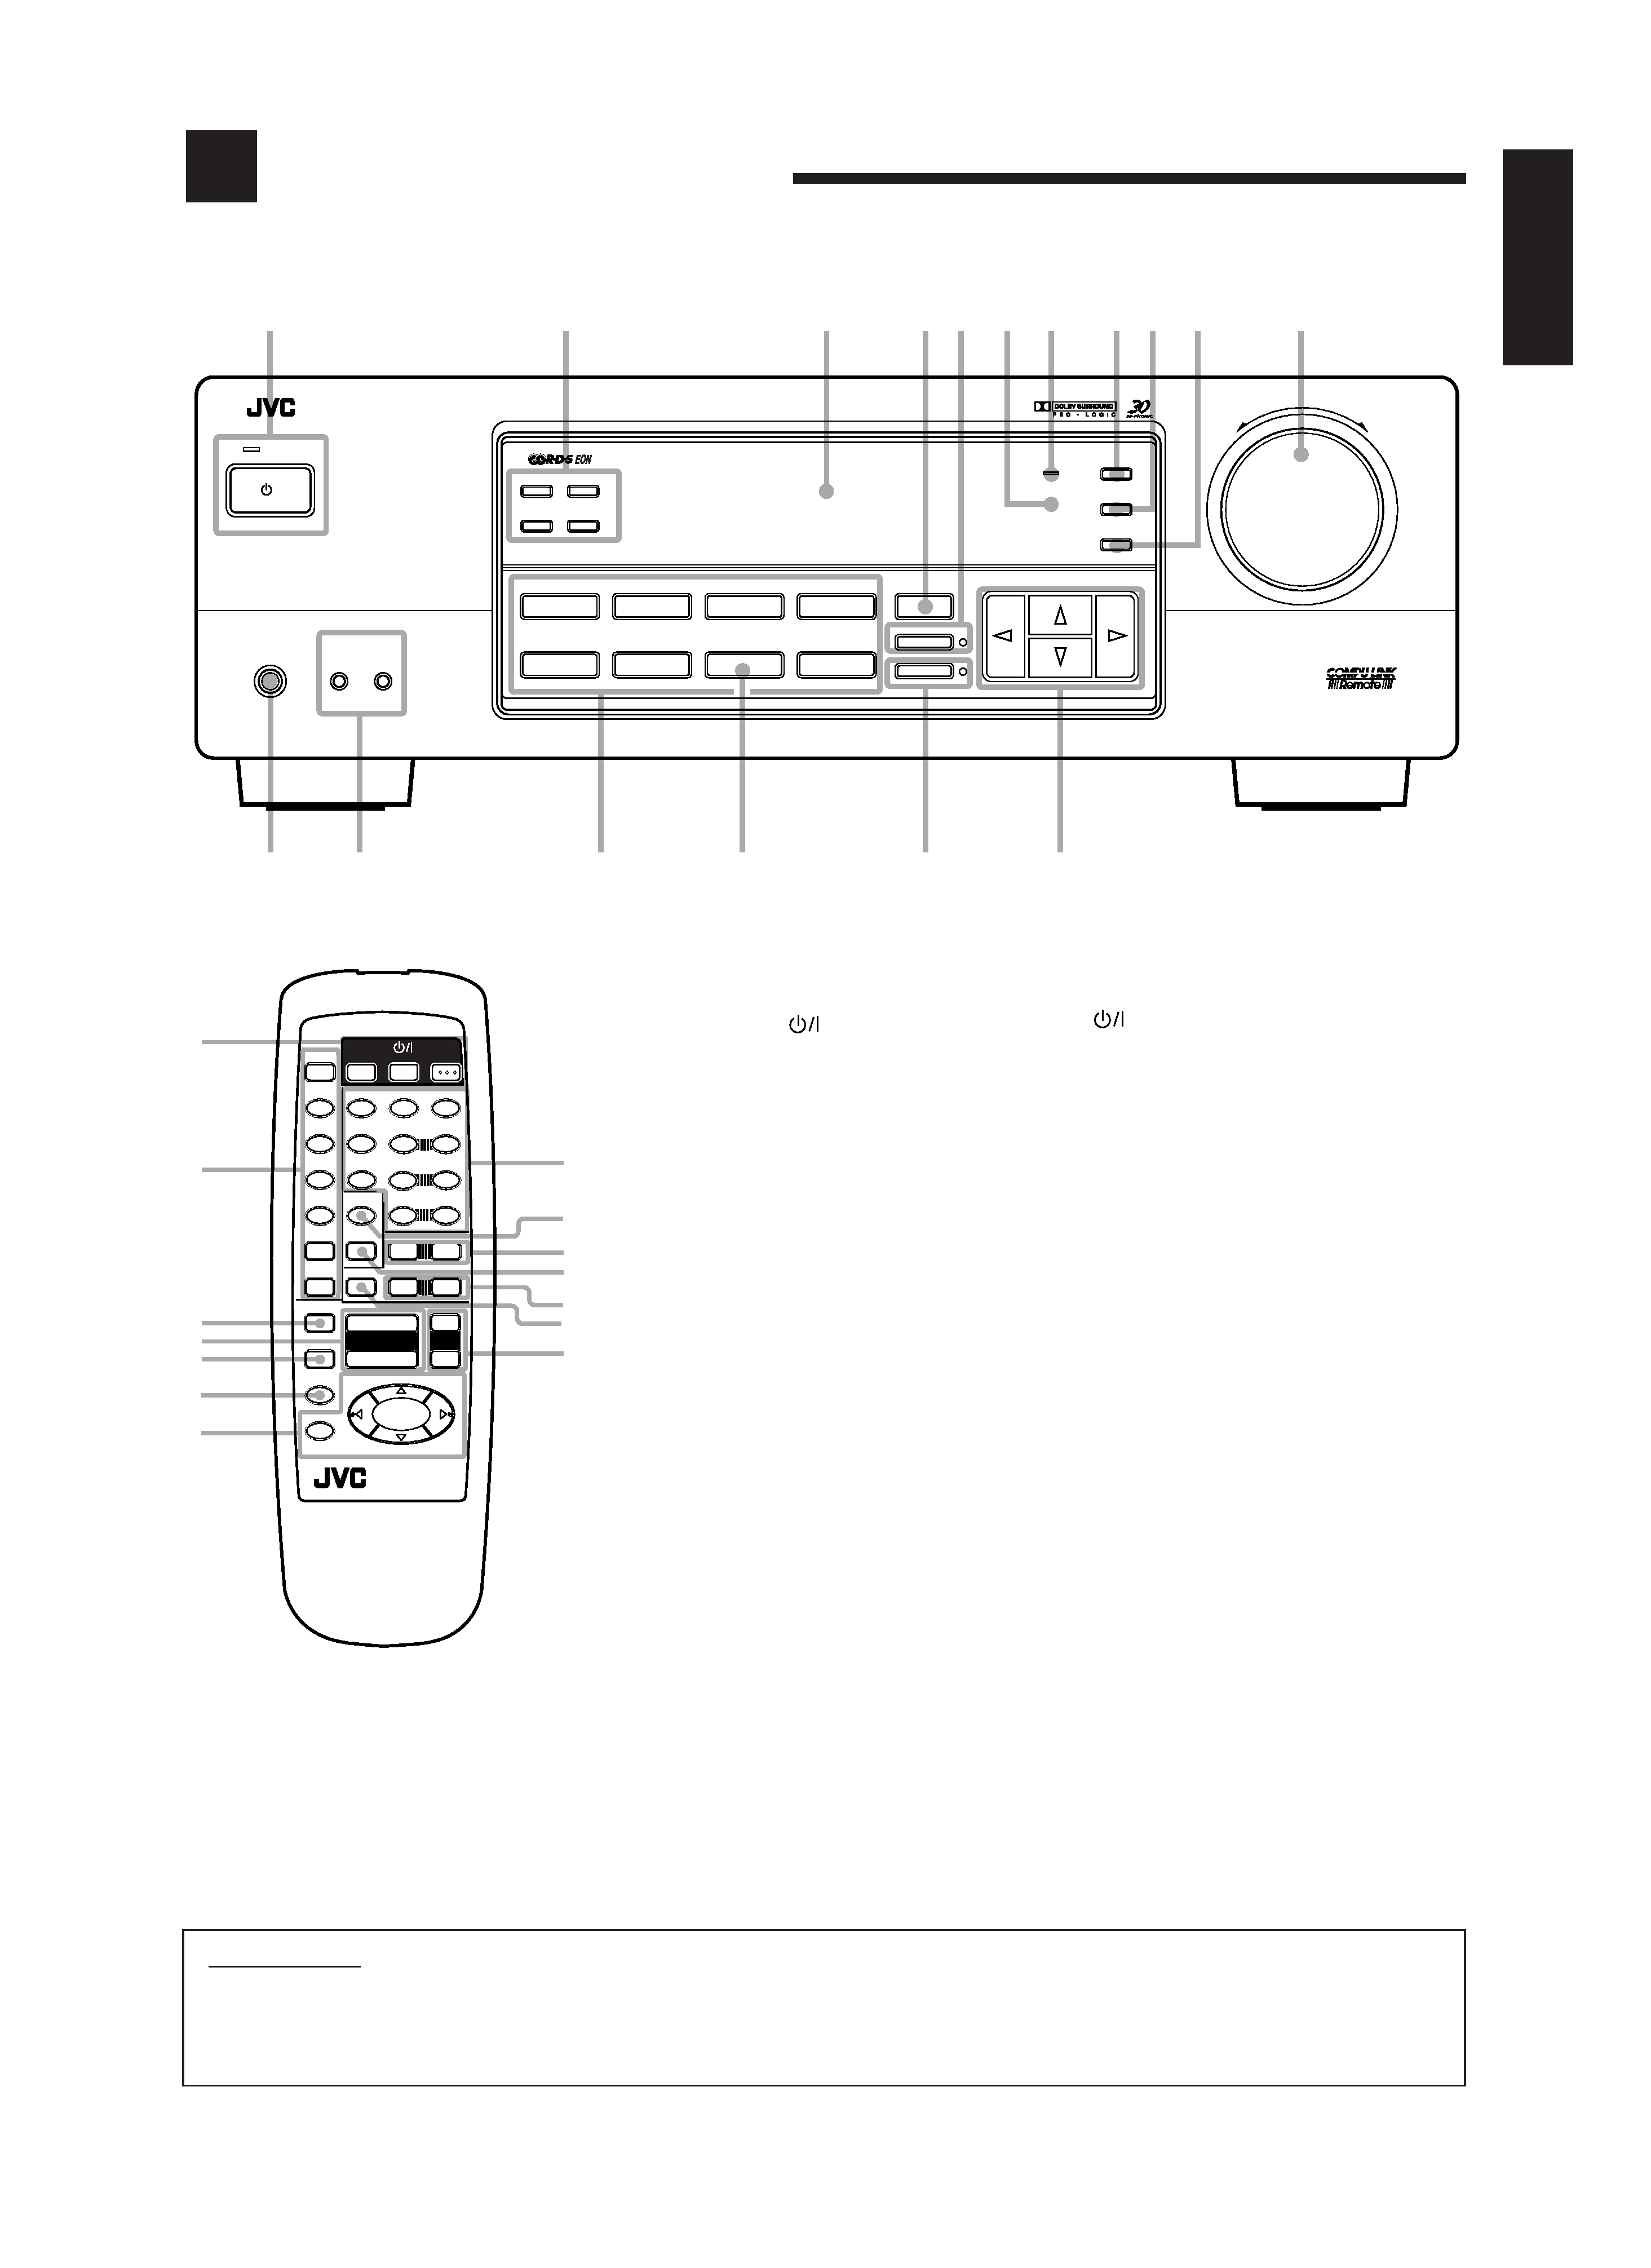
Parts Identification
Become familiar with the buttons and controls on the receiver before use.
Refer to the pages in parentheses for details.
Front Panel
1 STANDBY/ON
button and STANDBY
lamp (8)
2 RDS operation buttons (14)
PTY SEARCH, DISPLAY MODE, EON, TA/
NEWS/INFO
3 Display (8)
4 SURROUND button (18)
5 ONE TOUCH OPERATION button and lamp
(12)
6 Remote sensor (7)
7 BASS BOOST lamp (10)
8 ADJUST button (10) *
9 SETTING button (11) *
p MEMORY button (13)
q MASTER VOLUME control (9)
w Cursor control buttons
e INPUT ATT. button and lamp (10)
r SOURCE NAME button (11)
t Source selecting buttons (8)
DVD MULTI, DVD, VCR, FM*, AM*,
TAPE/MD, PHONO, CD
y SPEAKERS 1/2 buttons (9)
u PHONES jack (9)
IMPORTANT:
To use the Cursor control buttons (
w) on the front panel:
What these buttons actually do depends on which function you are trying to adjust. Before using these buttons, select the function by
pressing one of the buttons marked with *.
Remote Control
1
buttons (8, 25)
TV, VCR, AUDIO
2 Source selecting buttons (8)
CD, TAPE/MD, FM/AM, VCR, DVD,
DVD MULTI, PHONO
3 ONE TOUCH OPERATION button (12)
4 VOLUME +/ buttons (9)
5 MUTING button (9)
6 SLEEP button (12)
7 · Operating buttons for audio/video components
(24)
· RDS operation buttons (14)
PTY SEARCH, PTY +/, DISPLAY
8 · 10 keys for selecting preset channel (13, 24)
· 10 keys for adjusting sound (12, 19, 24)
· 10 keys for operating audio/video components
(24)
9 SOUND CONTROL button (12, 19, 24)
p TV VOL. /+ buttons (25)
q CD-DISC button (24)
w TV CH /+ buttons (25)
e TV/VIDEO button (25)
r VCR CH +/ buttons (25)
6
1
2
4
1
7
4
1
RM-SR558RU REMOTE CONTROL
SLEEP
8
+
TV CH
TV/VIDEO
PHONO
CD-DISC
+
TV VOL.
DVD MULTI
ONE TOUCH
OPERATION
VCR CH
+
+
MUTING
VOLUME
£ PTY SEARCH
DISPLAY
PTY
+ PTY
+
TAPE/MD
FM/AM
VCR
DVD
SOUND
CONTROL
3
2
1
5
SURROUND
TEST
DELAY
6
5
4
EFFECT
CENTER +
5
9
8
7/P
REAR·L +
5
TV
VCR
AUDIO
CD
+10
10
REAR·R +
MENU
ENT
5
4
5
8
r
3
q
w
p
7
9
e
6
9
RX-558R
FM/MW/LW RECEIVER
STANDBY
STANDBY/ON
PHONES
SPEAKERS
1
-- OFF
_ ON
2
/I
PTY SEARCH
EON
TA/NEWS/INFO
DISPLAY MODE
ADJUST
SETTING
MEMORY
DVD MULTI
CD
DVD
PHONO
VCR
TAPE/MD
SOURCE NAME
FM
SURROUND
INPUT ATT.
ONE TOUCH OPERATION
AM
MASTER VOLUME
+
ENHANCED COMPULINK CONTROL SYSTEM
12
3
4 5
8
7p
q
w
e
r
t
y
u
BASS BOOST
EN01-07.RX-558R[E]/1
99.1.28, 8:37 PM
2