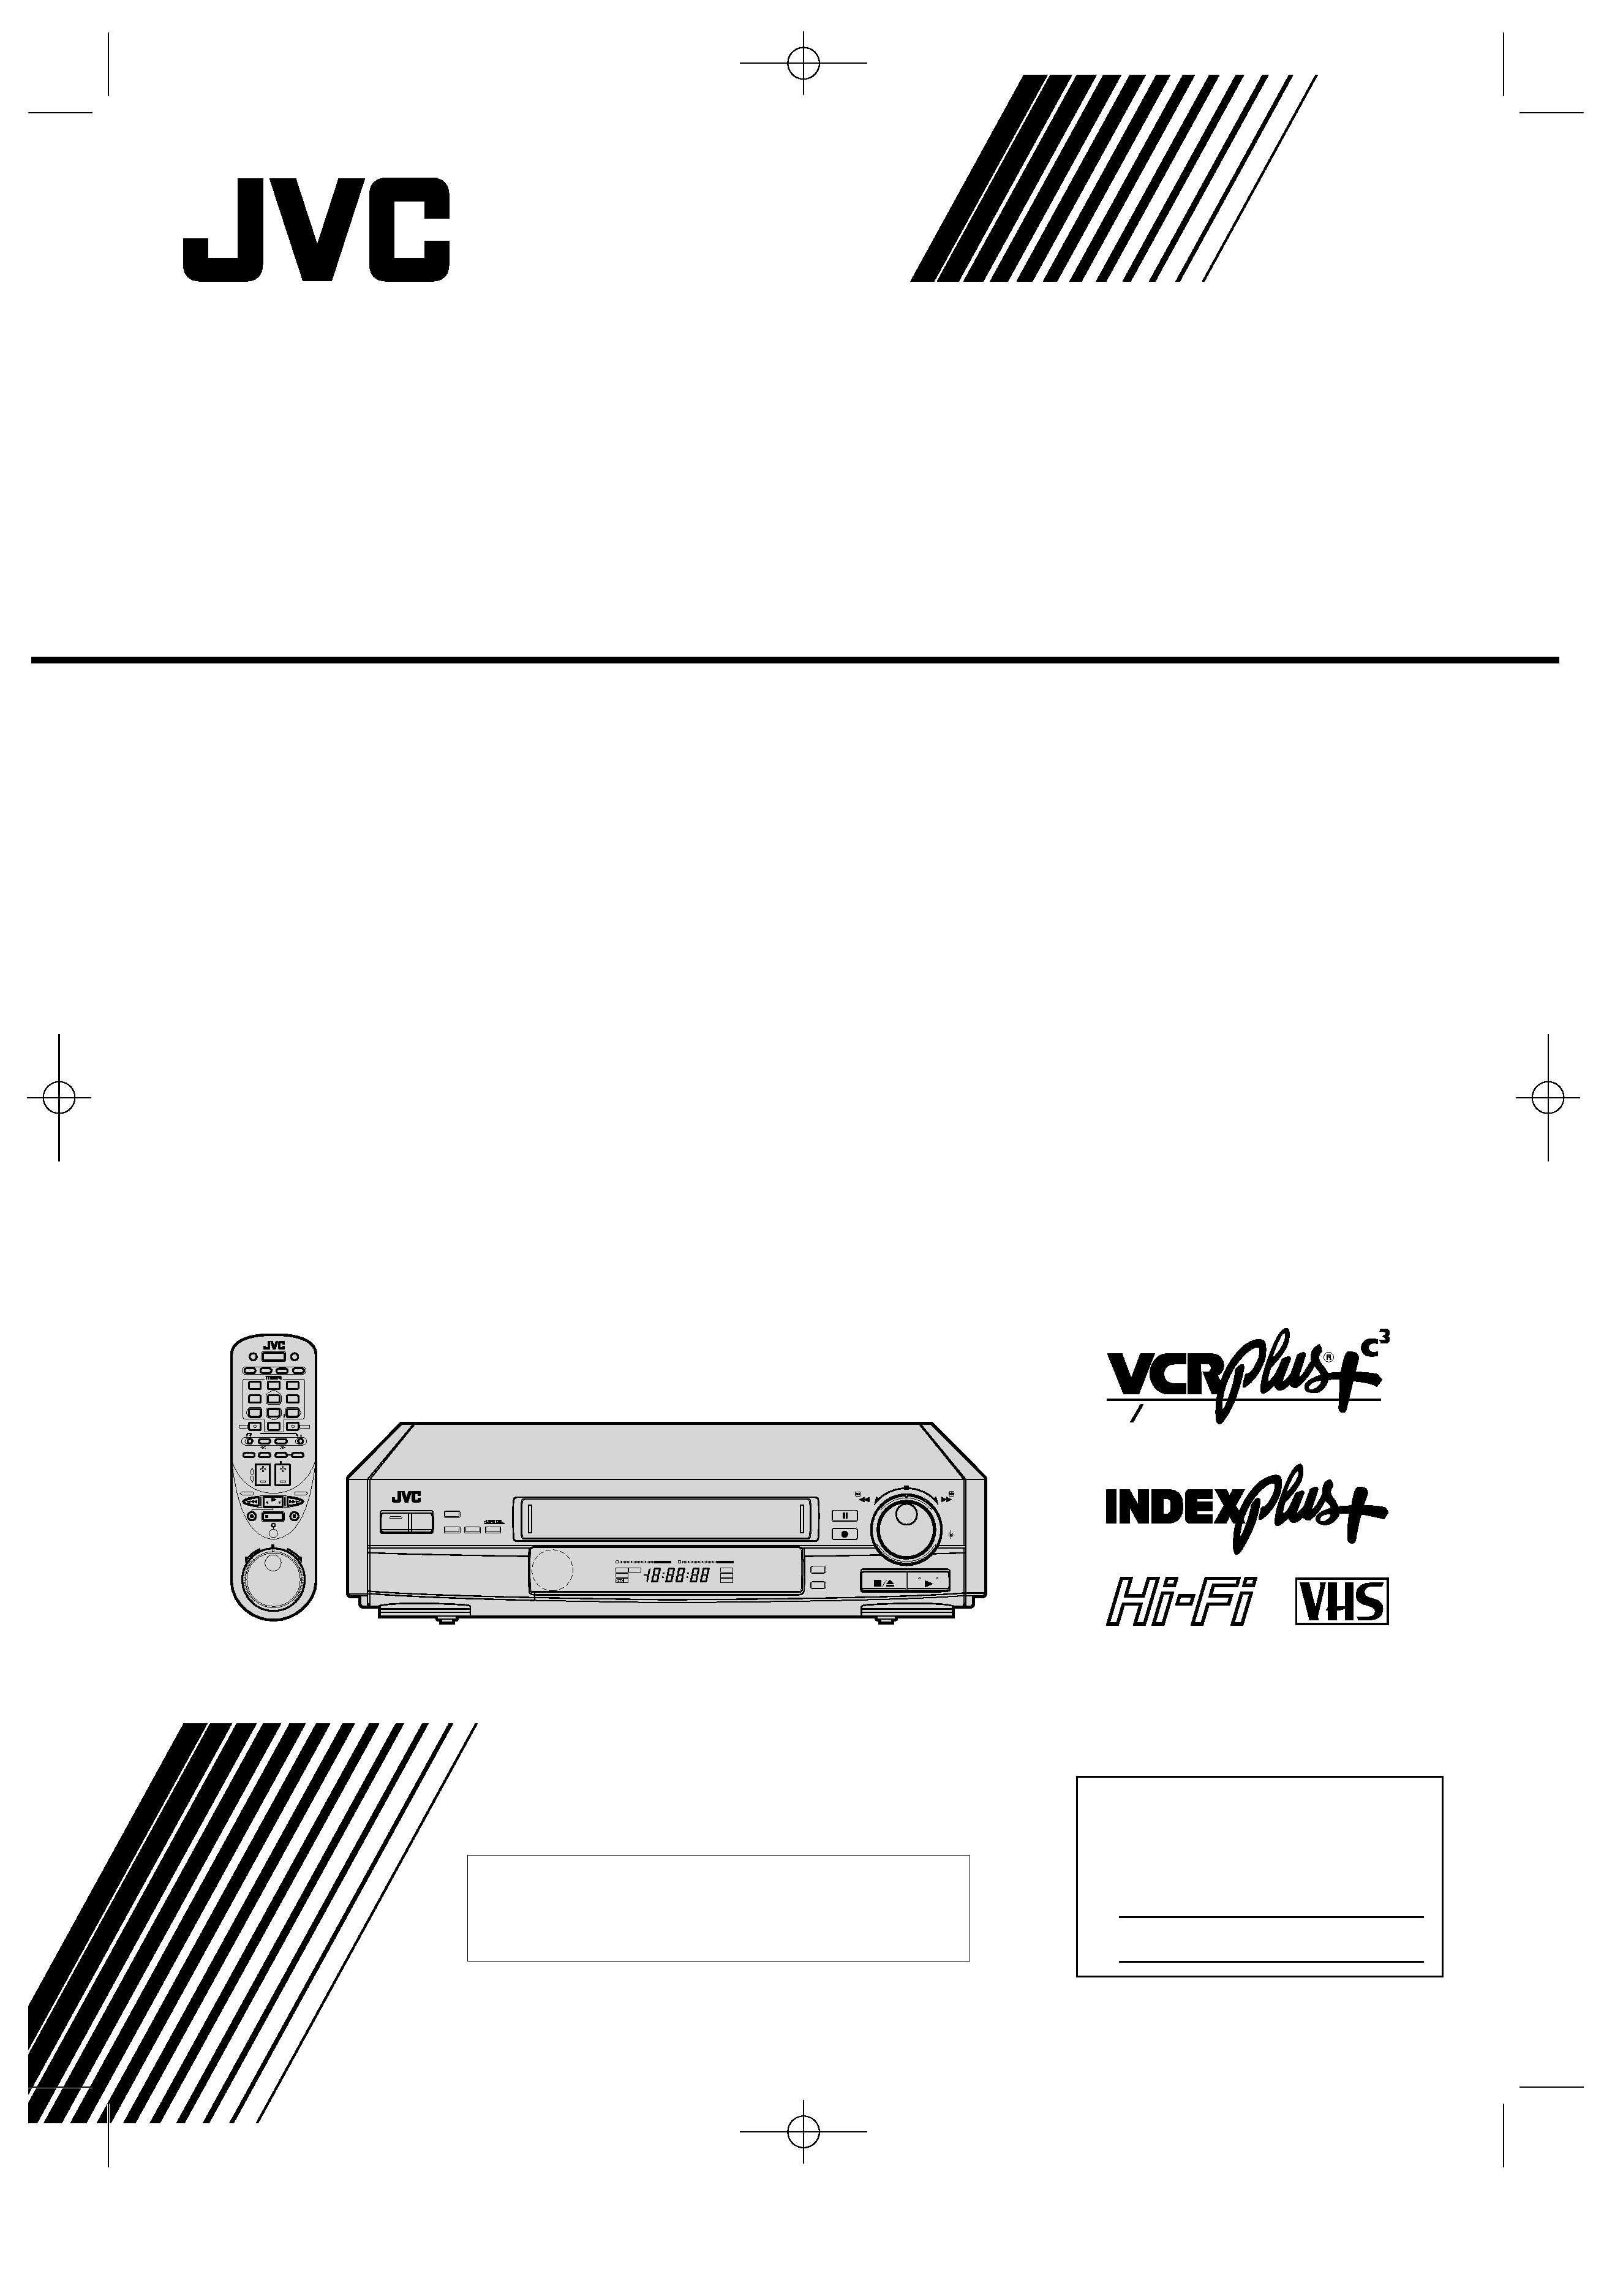
HR-IP820U
INSTRUCTIONS
PU30425-1720
HR-IP8
20U
VIDEO CASSETTE RECORDER
For Customer Use:
Enter below the Serial No. which is
located on the rear of cabinet. Retain
this information for future reference.
Model No.
HR-IP820U
Serial No.
w
Channel
Changer
Cable
REW
FF
JOG
SHUTTLE
POWER
MENU
CH/SET
A.DUB
PAUSE
REC
STOP/EJECT
PLAY
SELECT
+
HM
S
I T R
TIMER
VIDEO
M
SP
EP
REC
SAP
PAUSE
ST
AM
PM
PLAY
L
dB
20
15
10
8
4
62
0
2
4
6
+8
R
dB
20
15
10
8
4
62
0
2
4
6
+8
00
00
00
00
00
00
00
00
00
00
0
00
00
00
00
00
00
00
00
00
00
0
INSERT
TV/VIDEO
DISPLAY
INFO
TIMER
WEEKLY
POWER
DAILY(MF)
AUX
OSD
CABLE
TV
VCR
SEARCH
F1
F2
F3
F4
VOL.
CH/SET
PLAY
STOP
JOG/SHUTTLE
REV
FWD
1
23
4
56
7
89
0
SP/EP
C.MEMORY
ADD
INDEXPlus+
TITLE
C.RESET/SKIP
A
B
C
J
K
L
S
T
U
V
W
X
Y
Z
D
E
F
G
H
I
P
Q
R
M
N
O
SELECT
MENU
CANCEL
ENTER
PAGE
CLEAR
CURSOR
CURSOR
PRINT
TM
For INDEX Plus+ System operation, refer
to the separate INDEX Plus+ instruction
manual.
HR-IP820U-EN-1
97.5.20 5:24 PM
Page Hyo-1
Safety Precautions
2
RISK OF ELECTRIC SHOCK
DO NOT OPEN
CAUTION
CAUTION:
TO REDUCE THE RISK OF ELECTRIC SHOCK.
DO NOT REMOVE COVER (OR BACK).
NO USER-SERVICEABLE PARTS INSIDE.
REFER SERVICING TO QUALIFIED SERVICE PERSONNEL.
The lightning flash with arrowhead symbol, within an
equilateral triangle, is intended to alert the user to the
presence of uninsulated "dangerous voltage" within the
product's enclosure that may be of sufficient magnitude to
constitute a risk of electric shock to persons.
The exclamation point within an equilateral triangle is
intended to alert the user to the presence of important
operating and maintenance (servicing) instructions in the
literature accompanying the appliance.
Note to CATV system installer:
This reminder is provided to call the CATV system installer's
attention to Article 820-40 of the NEC that provides guidelines
for proper grounding and, in particular, specifies that the cable
ground shall be connected to the grounding system of the
building, as close to the point of cable entry as practical.
WARNING:
TO PREVENT FIRE OR SHOCK
HAZARD, DO NOT EXPOSE THIS
UNIT TO RAIN OR MOISTURE.
CAUTION:
This video cassette recorder should be used with AC 120V`,
60 Hz only.
To prevent electric shocks and fire hazards, do NOT use any other
power source.
CAUTION:
TO PREVENT ELECTRIC SHOCK, MATCH WIDE BLADE
OF PLUG TO WIDE SLOT, FULLY INSERT.
ATTENTION:
POUR ÉVITER LES CHOCS ÉLECTRIQUES, INTRODUIRE
LA LAME LA PLUS LARGE DE LA FICHE DANS LA
BORNE CORRESPONDANTE DE LA PRISE ET POUSSER
JUSQU'AU FOND.
Cassettes marked "VHS" (or "S-VHS") can be used with this video
cassette recorder.
HQ VHS is compatible with existing VHS equipment.
NOTE:
When you are not using the video recorder for a long period of
time, it is recommended that you disconnect the power cord
from the AC outlet.
Changes or modifications not approved by JVC could void
user's authority to operate the equipment.
The rating plate and the safety caution are on the rear of the
unit.
Please read the "Precautions" section of this instruction
manual and the "Video Products Safety Guide" enclosed with
this manual before installing or operating the VCR.
This instruction manual, and the other reference materials
enclosed with it, contain important information on VCR
operation and proper usage. Please keep them near your VCR
in a place where you can easily access them for reference.
It should be noted that it may be unlawful to re-record pre-
recorded tapes, records, or discs without the consent of the
owner of copyright in the sound or video recording, broadcast
or cable program and in any literary, dramatic, musical, or
artistic work embodied therein.
How To Use This Instruction Manual
This instruction manual begins with an introductory
section, "Getting To Know Your VCR", followed by the
necessary set-up procedures in "Setting Up Your VCR".
The next five sections --"Playback", "Recording", "Timer-
Recording with VCR Plus+", "Timer-Recording without
VCR Plus+" and "Special Features" -- take you step-by-
step through these operations of your VCR. "Editing"
introduces you to your VCR's editing features. "If You
Have Any Questions" is the section you should refer to if
you experience any problems in VCR operation or if you
need additional information regarding a feature or
terminology. At the end of the book you will find
"Warranty" information and the locations you can contact
"For Servicing".
Throughout the book, if you ever need to refer to
another page for instructions or information, you will be
told so by a
mark pointing to the page number.
Unless otherwise specified, operation buttons
mentioned in the instructions refer to those located on the
remote control, not those duplicated on the VCR.
Remember, you must use your VCR correctly to fully
enjoy it. Please use this manual effectively. It's the surest
and quickest way to unlock the full potential of your new
JVC VCR.
JVC
VIDEO
CASSETTE
RECORDER
HR-xxxxxxx
VCR Plus+ and PlusCode are trademarks of Gemstar Development Corp.
VCR Plus+ system is manufactured under licence from Gemstar
Development Corporation.
VCR PLUS+, PLUSCODE and INDEX PLUS+ are trademarks of
Gemstar Development Corporation. VCR PLUS+ and INDEX PLUS+
Systems are manufactured under license from Gemstar Development
Corporation and Index Systems, Inc.
HR-IP820U-EN-1
97.5.20 5:24 PM
Page 2
Table Of Contents
3
Getting To Know Your VCR
Front & Back Panel ...................................................4
Wireless Remote Control...........................................5
Display Panel & On-Screen Mode Superimpose ......6
On-Screen Menus and Displays ................................7
Setting Up Your VCR
Making the right connections ....................................8
Setting your VCR's clock ..........................................9
Setting your VCR's tuner
(if you don't use a Cable Box).................................10
Setting your VCR's tuner and Cable Box
Controller ................................................................12
Setting Up the VCR Plus+ feature ..........................15
Playback ···········································17
Recording·········································23
Timer-Recording with
VCR Plus+ ········································26
Timer-Recording without
VCR Plus+ ········································28
Special Features ····························31
Editing···········································32
If You Have Any Questions
Before requesting service........................................36
Notes regarding .......................................................38
Precautions ···········································39
About head cleaning ··························39
Specifications·······································39
For Servicing ········································42
Warranty ·················································43
For information on INDEX Plus+, refer to the
separate INDEX Plus+ instruction manual.
Operaciones básicas en
español ···············································40
Contents Of Separate INDEX Plus+
Instruction Manual
System Outline ·························································3
INDEX Plus+ Button Functions·······························4
Preparing To Use INDEX Plus+ ·······························5
Receiving Broadcasts··············································9
Channel-Related Information
-- Practical Use of CSPG -- ······························10
Program-Related Information (PRI)
-- Practical Use of PRI --···································11
About Cassettes·····················································12
Recording ·······························································13
Finding A Program·················································15
Revising/Erasing Directories ································18
Other Convenient Functions·································21
Retroactive Indexing··············································26
Reading A Directory From A PR Tape ··················29
Restoring Lost Data ···············································30
Helpful terms and information ······························32
Troubleshooting ·····················································33
There are two instruction manuals for the
HR-IP820U--
This one for the HR-IP820U VCR functions
The other one for the HR-IP820U INDEX
Plus+ system
Please refer to both manuals when operating the
HR-IP820U.
HR-IP820U-EN-1
97.5.20 5:24 PM
Page 3
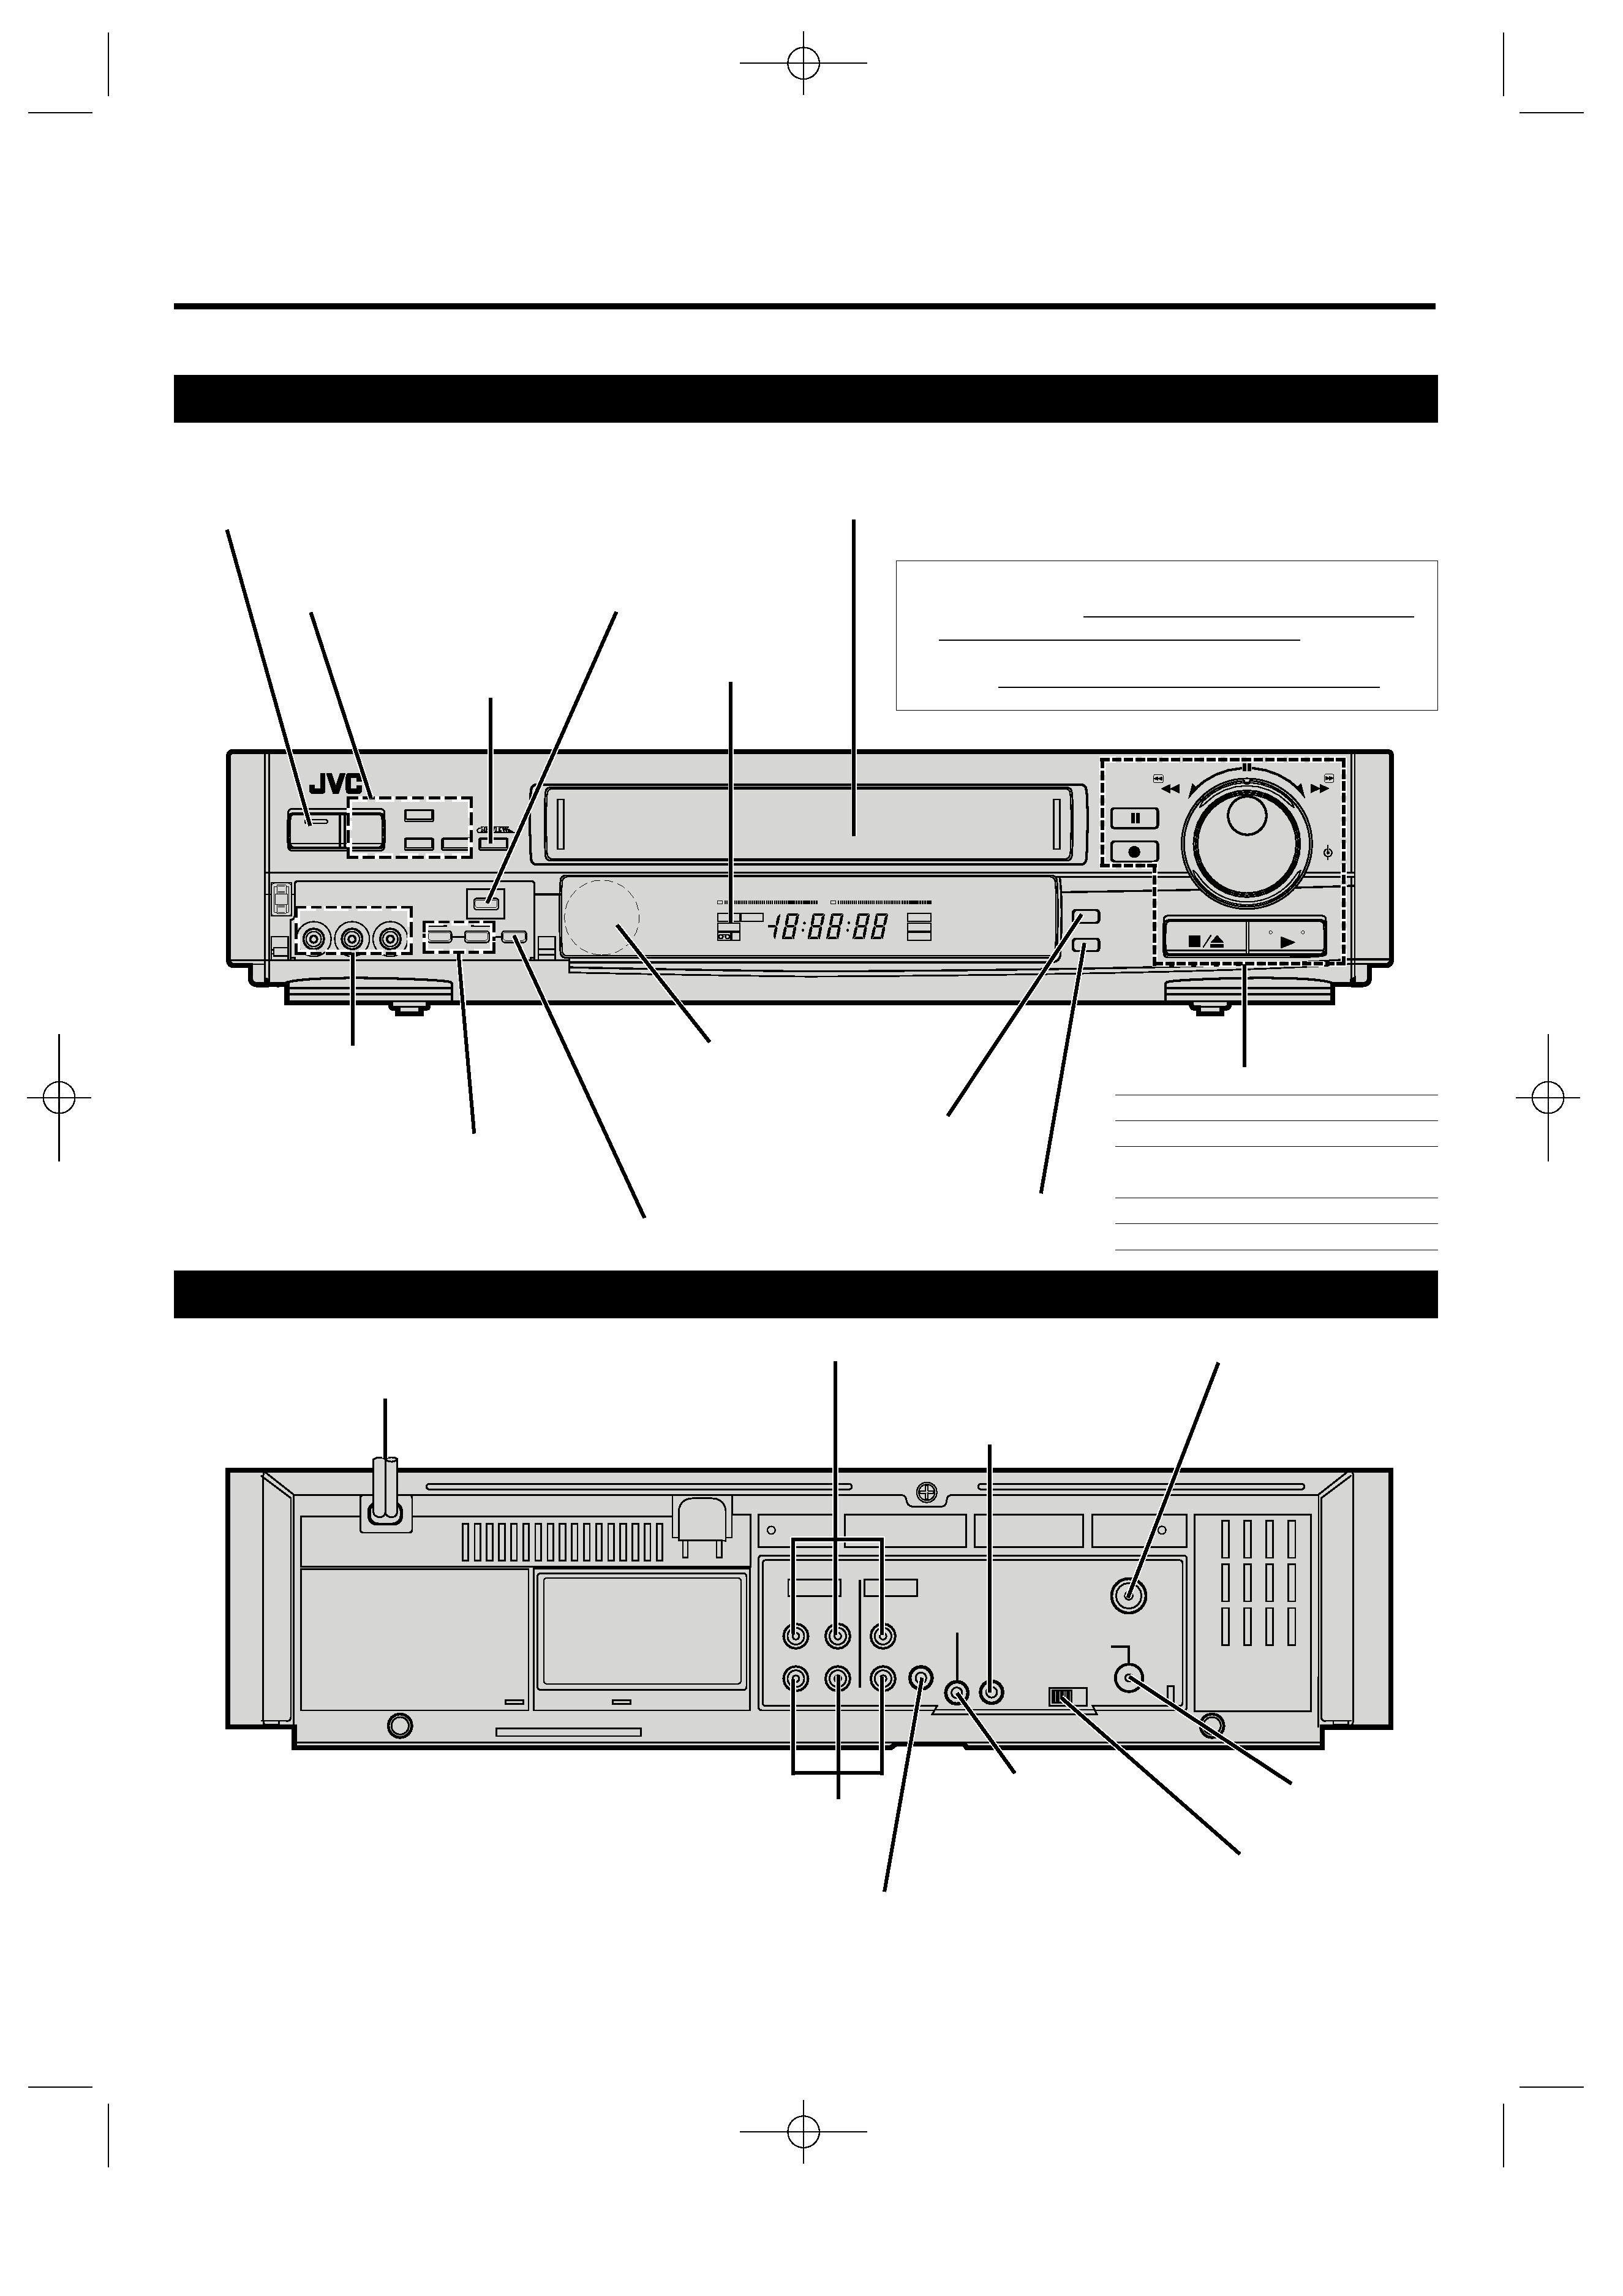
Getting To Know Your VCR
4
REW
FF
JOG
SHUTTLE
POWER
MENU
CH/SET
A.DUB
MARK
R.A.EDIT
PAUSE
REC
STOP/EJECT
PLAY
ERASE
SP/EP
START
SELECT
+
INDEX
HM
S
I T R
TIMER
VIDEO
M
SP
EP
REC
SAP
PAUSE
ST
AM
PM
PLAY
L
dB
20
15
10
8
4
62
0
2
4
6
+8
R
dB
20
15
10
8
4
62
0
2
4
6
+8
00
00
00
00
00
00
00
00
00
00
0
00
00
00
00
00
00
00
00
00
00
0
INSERT
VIDEO (MONO)LAUDIOR
Front Panel
WARNING
Do not insert fingers or foreign objects into the cassette
loading slot since this could lead to injury or damage to the
mechanism. Be especially careful with children.
Do not try to pull out a cassette once automatic loading has
started. This could cause injury or damage the mechanism.
POWER Button
Cassette Loading Slot
Infrared Sensor Window
(Point the remote control toward this.)
VIDEO/AUDIO Input
Connectors
p. 32, 33
Display Panel
p. 6
Basic Operation Buttons
5
/8
STOP/EJECT
4
PLAY
2
/3
Rewind/Fast-Forward
(JOG/SHUTTLE control)
6
PAUSE
q
REC (Instant Timer)
Back Panel
AC Power Cord
p. 8
RF Output Channel
Select Switch
p. 8
ANT. IN Connector
p. 8
AUDIO/VIDEO OUT(put)
Connectors
p. 8
RF OUT
Connector
p. 8
OUT
AUDIO
VIDEO
CH3
CH4
RF OUT
ANT.IN
IN
OUT
IN
RL
CABLE
BOX
PAUSE/
SPECIAL
FUNCTION
G-LINK
IN/OUT
Instant ReView
Button
p. 20
AUDIO/VIDEO IN(put) Connectors
p. 32
PAUSE/SPECIAL
FUNCTION
Connector
p. 22, 33, 34
CABLE BOX
Connector
p. 12
To open the front cover, push the left upper end where labelled "PUSH-OPEN".
MENU/CH/SET/
SELECT
p. 7
R.A.EDIT START
Button
p. 34 35
INDEX MARK and
ERASE Buttons
p. 20
SP/EP Button
p. 23
INSERT Button
p. 32
A. DUB Button
p. 33
G-LINK Connector
This connector is provided for
use with future applications.
HR-IP820U-EN-1
97.5.20 5:24 PM
Page 4
5
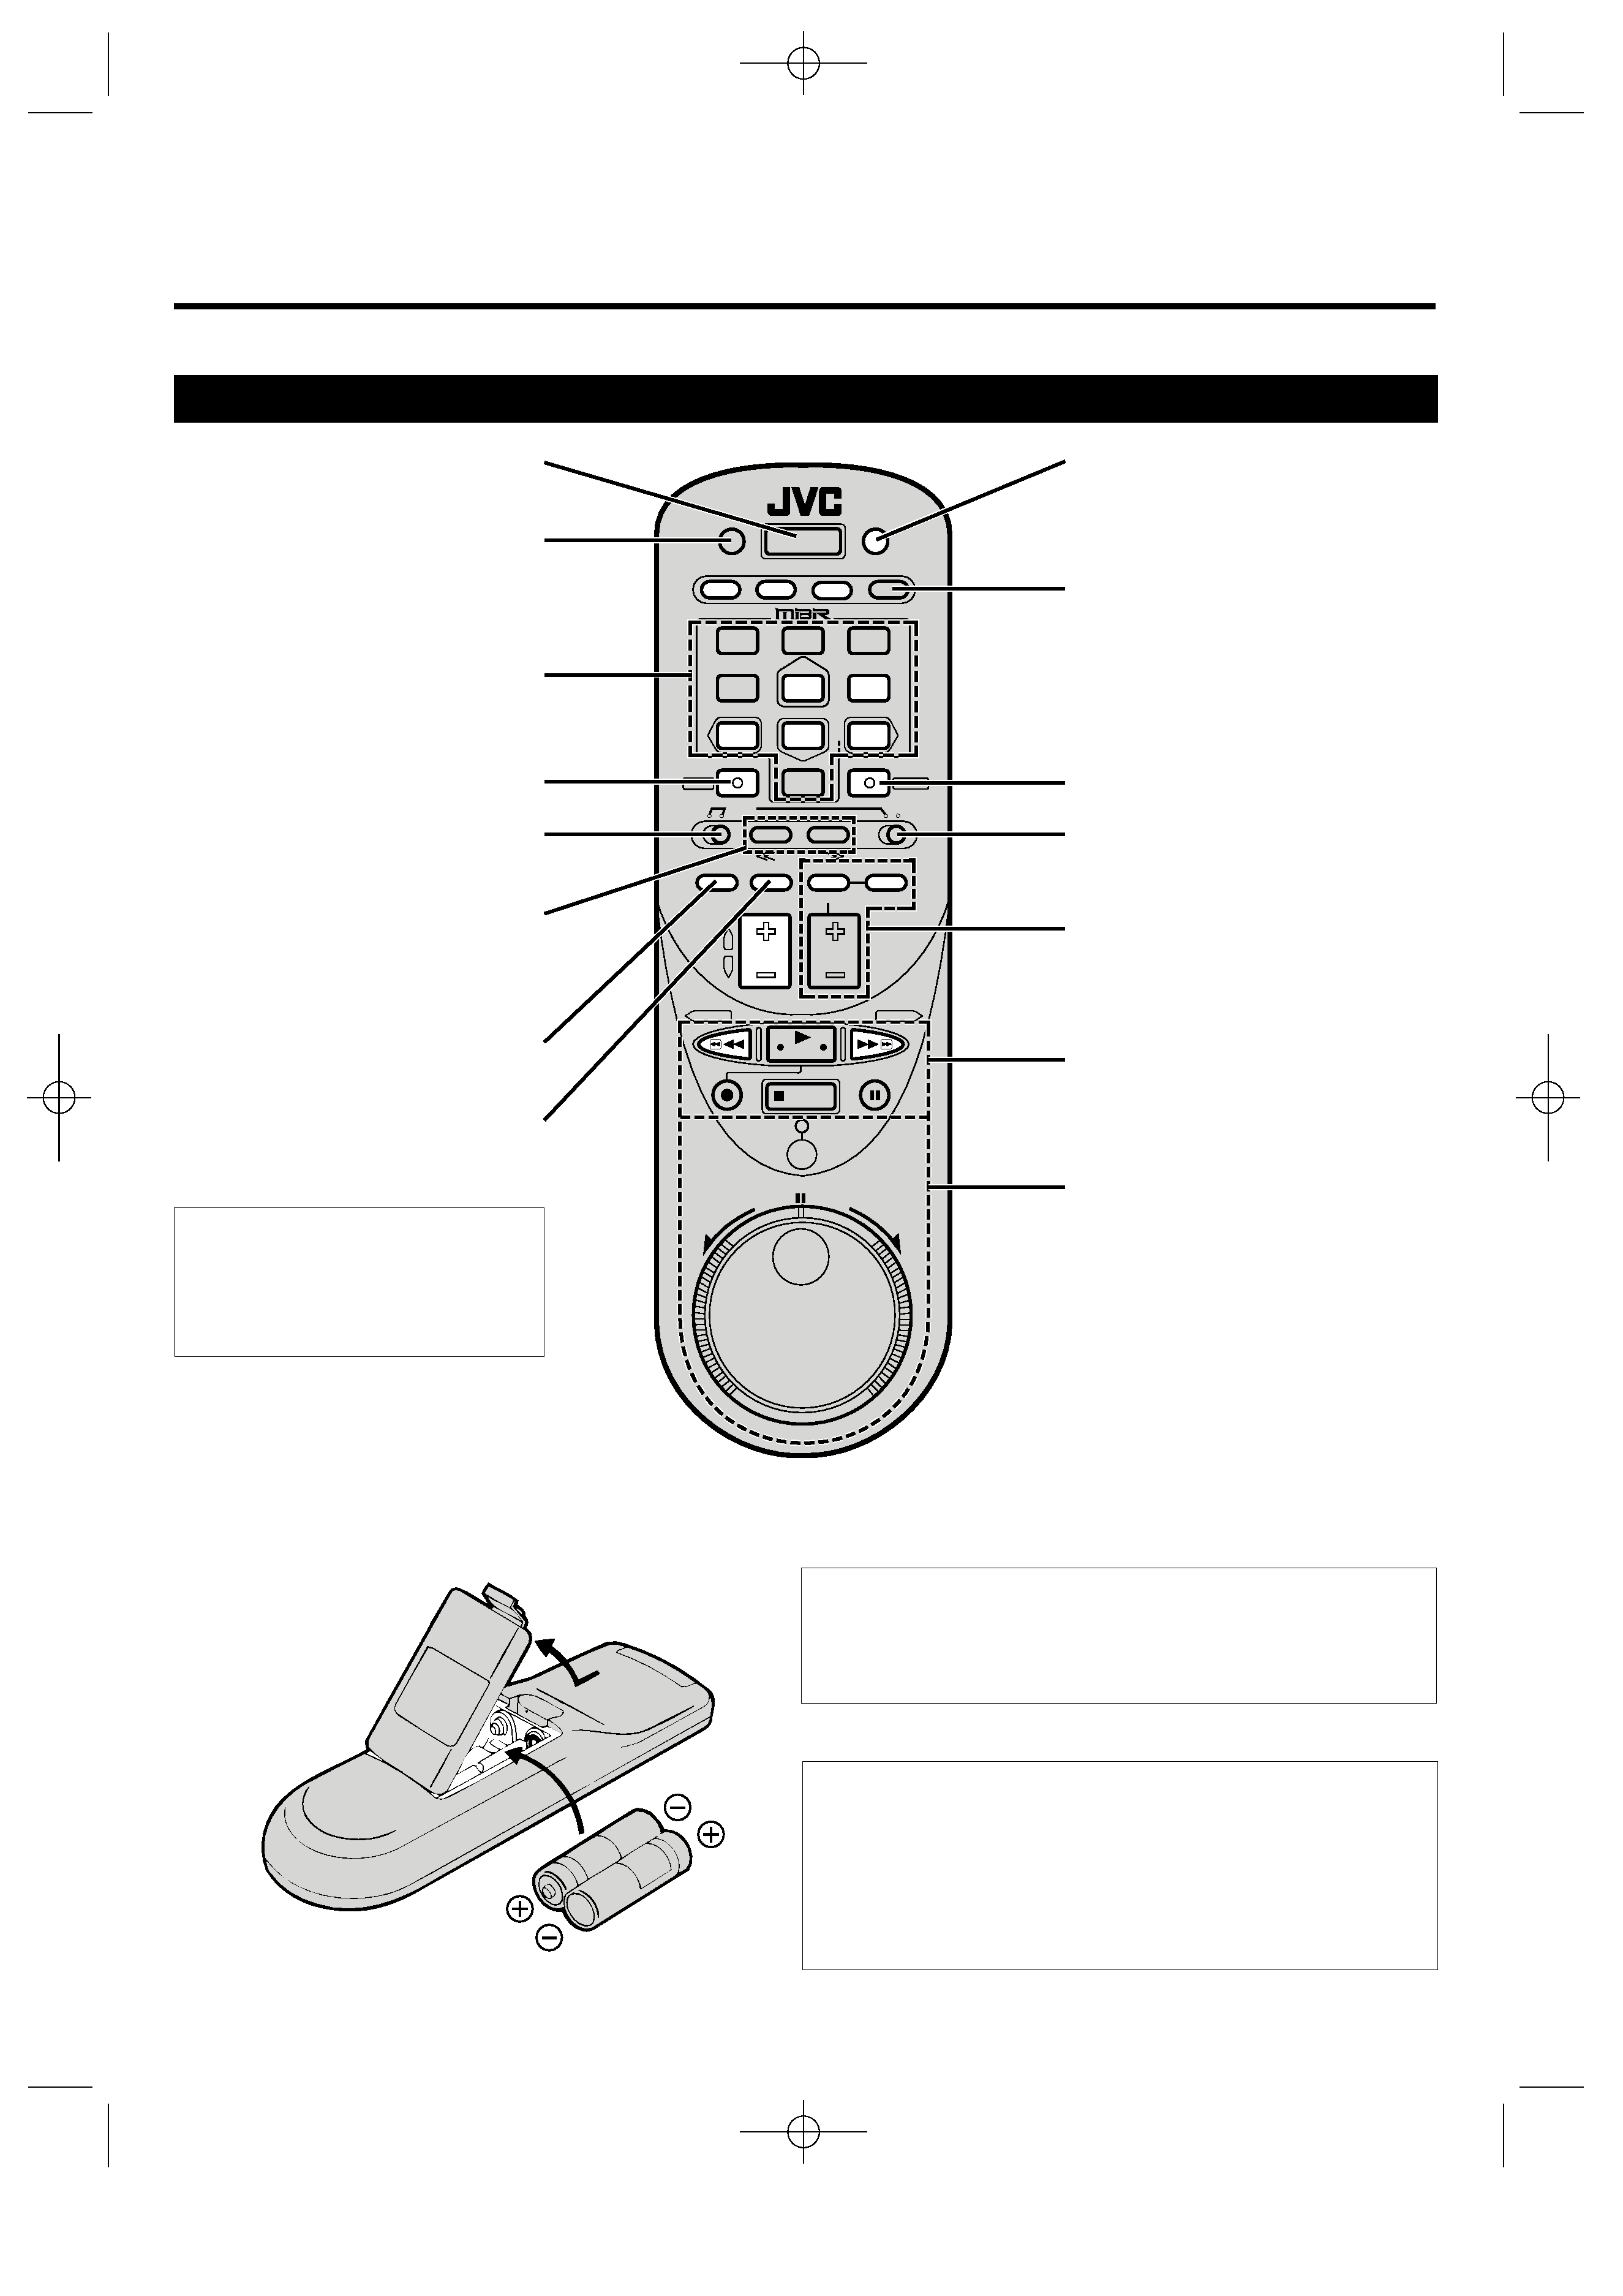
Wireless Remote Control
TV/Video Mode Switching
ENTER/OSD
Tape Speed
Tuner and Counter Control
*TV/CABLE control
select switch
Timer
p. 27, 29
Display
p. 6, 21
Power
Multi-Purpose Digit Keys
On-Screen Menu
p. 7
Multi-Speed Slow Motion,
High-Speed Search,
Index Search
p. 18, 20
Basic Functions
p. 17, 23
Installing Batteries
1 Slide the battery compartment cover in the direction of the arrow.
2 Insert 2 "AA"-size batteries (provided) in the correct directions.
3 Replace the cover.
This remote control can operate most of your VCR's functions.
1 Point the remote control toward the VCR's sensor window.
2 Press the appropriate operation button.
The maximum operating distance of the remote control is
about 8 m (26 ft).
This remote control can also operate various brands of TVs and
Cable Boxes. For instructions,
p. 31.
How To Use
TV/VIDEO
DISPLAY
INFO
TIMER
WEEKLY
POWER
DAILY(MF)
AUX
OSD
CABLE
TV
VCR
SEARCH
F1
F2
F3
F4
VOL.
CH/SET
PLAY
STOP
JOG/SHUTTLE
REV
FWD
1
23
4
56
7
89
0
SP/EP
C.MEMORY
ADD
INDEXPlus+
TITLE
C.RESET/SKIP
A
B
C
J
K
L
S
T
U
V
W
X
Y
Z
D
E
F
G
H
I
P
Q
R
M
N
O
SELECT
MENU
CANCEL
ENTER
PAGE
CLEAR
CURSOR
CURSOR
PRINT
Tuner and Counter Control
Jog/Shuttle Control
p. 19
*VCR control select switch
* Since POWER, TV/VIDEO, Digit keys and CH +/-
buttons are also available to operate your TV and/or
cable box, set these VCR/TV/CABLE control select
switches as required depending on the unit you want
to operate.
To operate VCR: Simply set the VCR switch toVCR.
To operate TV:
Set the VCR switch to the left and
set the TV/CABLE switch toTV.
To operate Cable Box: Set the VCR switch to the left
and set the TV/CABLE switch
to CABLE.
Buttons labeled or highlighted in green,
and the remote control unit's Jog/Shuttle
control, are also used for INDEX Plus+
operation. Refer to the INDEX Plus+
instruction manual.
HR-IP820U-EN-1
97.5.20 5:24 PM
Page 5