

- 1 -
CONTENTS
IN THE BOX ....................................................................................... 2
AV SWITCHING ................................................................................. 2
OVER AIR DOWNLOAD .................................................................... 2
YOUR DIGITALRECEIVER ................................................................ 3
REMOTECONTROLHANDSET ......................................................... 4
REMOTECONTROLHANDSET ......................................................... 5
PREPARATION 1 .............................................................................. 6
PREPARATION 1 .............................................................................. 7
EVERYDAY OPERATION 2 .............................................................. 8
ADVANCED OPERATION 3 ........................................................... 13
APPENDIXA- SAFETY .................................................................. 19
APPENDIX B - SPECIFICATION .................................................. 20-21
APPENDIX C - CONNECTINGAVCR .............................................. 22
APPENDIX D - TROUBLESHOOTING GUIDE .................................. 23

- 2 -
IN THE BOX
Inside your HDB60 receiver package you should have:
This user guide
HDB60 digital terrestrial television receiver
Mains adaptor
Set of batteries for the handset
Aerial cable
SCART cable
AV SWITCHING
If after connecting the HDB60 to your TV as shown you do not see a picture, press AV button on your
TV remote until you see the First Time Install screen.
OVER AIR DOWNLOAD
Over Air Download: To ensure that your digital receiver always has the most up todate information. Please
ensure that after use it is set to its standby mode. The HDB60 automatically powers up at 3AM each day
and searches for any new information which may be broadcast and will download this to your box
automatically. This operation will normally take approximately 30 seconds.
If you have an important recording to make at 3AM which must not have a 30 second interrupt then you
can disable the auto OAD search by performing the following:
1. Press Menu button and using the up / down buttons highlight CONFIG and press the SELECT button,
2. Use the up and down buttons to highlight "RECEIVER UPGRADE" and press SELECT button.
3. Using the left / right button change function from Enable to Disable.
4. Press SELECT button then MENU and MENU to return to Normal l operation.
Do not forget to re enable the automatic OAD function after you have made your recording by repeating
the above instructions but this time selecting ENABLE.
- 3 -
)URQW
5HDU
UWÃPVU
6IU@II6
W8S
UW
6V9DP
%WÃ98
GS
6rhÃv
UWÃ
UWÃT86SUÃpxr W8SÃT86SUÃpxr
6V9DPÃ
GrsSvtu
%ÃWÃ98
D
DSÃDshrq
ThqiÃGrq
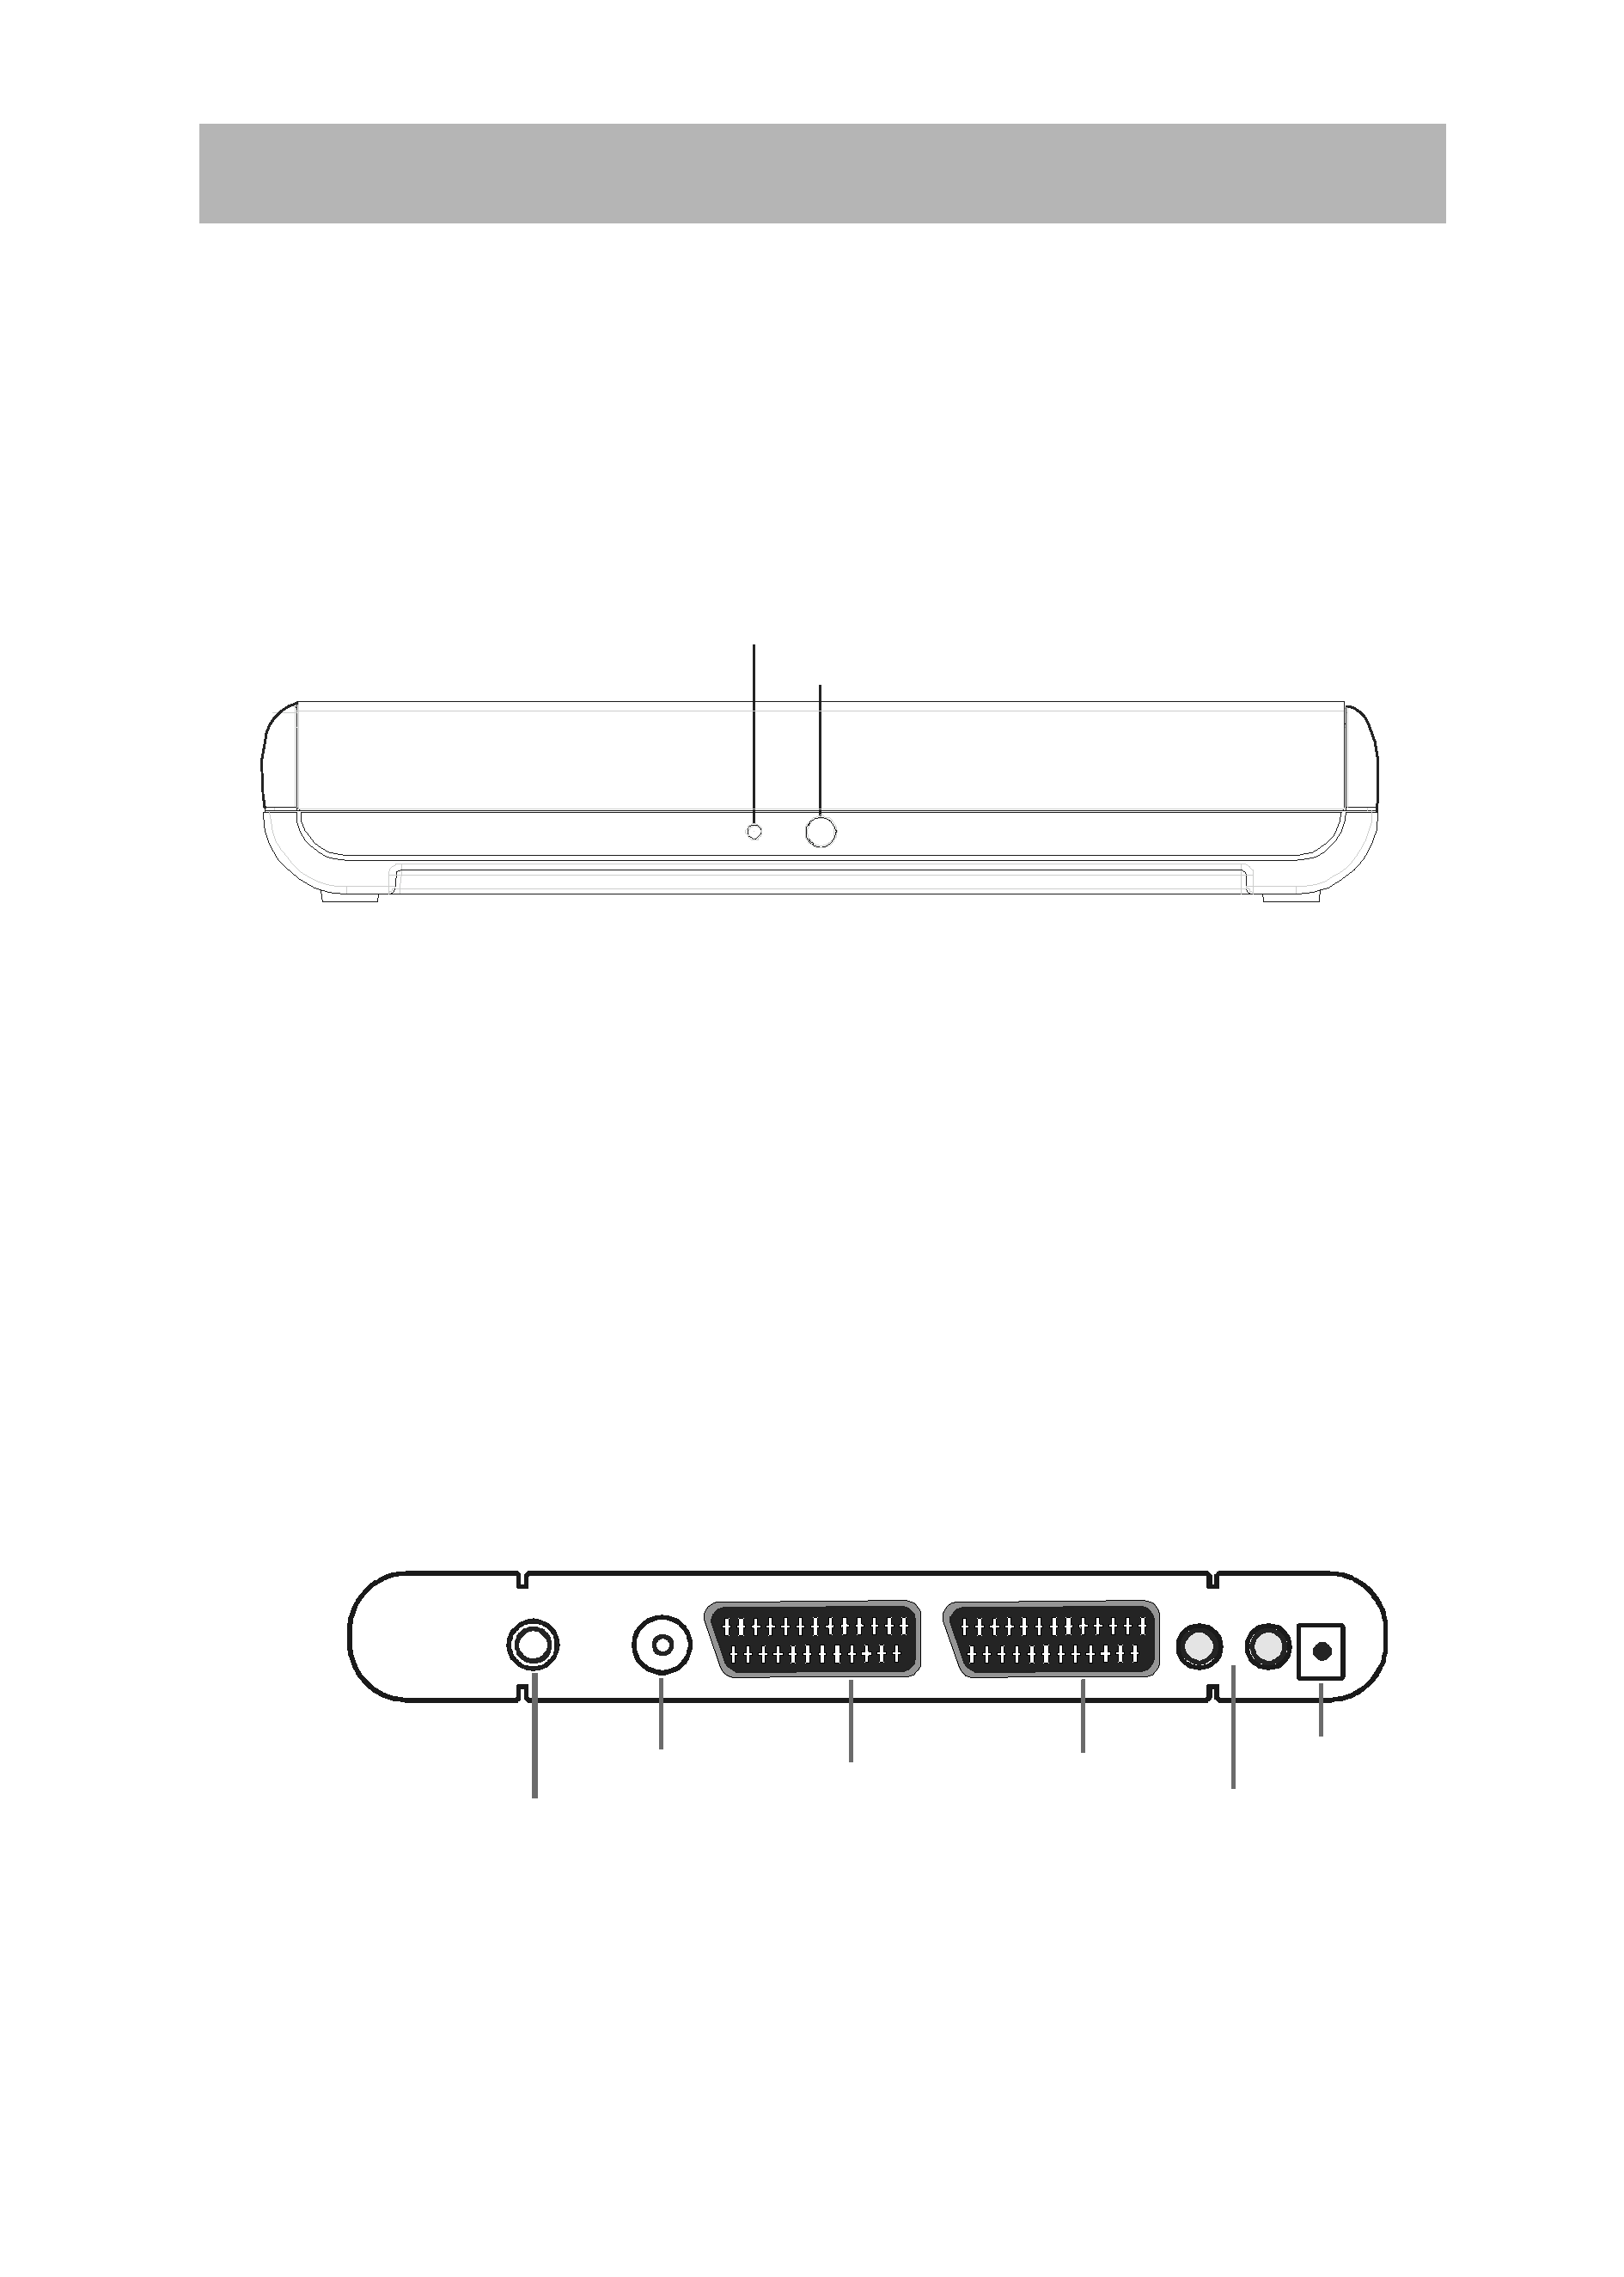
YOUR DIGITAL RECEIVER

- 4 -
UW9UWÃ"
ThqiÃ
IrvpÃ&
Xvqrà $
QthrÃÃ
QthrÃqÃ
WyrÃ
WyrÃqÃ
(
DsCryà %
QhtrÃSrqÃ
VÃ$
GrsÃ$
QhtrÃqBrrà !
@và '
Tivyrà (
HrÃ!
BvqrÃ'
HrÃ#
7yrà #
SvtuÃ$
9Ã$
TryrpÃ%
`ryyà "
Urà &
REMOTE CONTROL HANDSET