HITACHI
OPERATING GUIDE FOR
COLOUR MONITOR CPX1498MS
BEDIENUNGSANLEITUNG FÜR FARBMONITOR CPX1498MS
MODE D'EMPLOI DU MONITEUR COULEURS CPX1498MS
CPX1498M.S
6/4/99
1:50 pm
Page 1

CPX1498M.S
6/4/99
1:50 pm
Page 2
BEFORE OPERATING THIS EQUIPMENT
Mains Supply:
This equipment is designed to operate on 220-240V AC 50Hz only. Do not operate on
DC power supplies or other voltages. Before connecting to the mains, please read the
following instructions carefully.
IMPORTANT FOR THE UNITED KINGDOM
WORDING FOR CLASS 1 EQUIPMENT INSTRUCTION BOOKS AND LABELS
The mains lead on this equipment is supplied with a moulded plug incorporating a fuse, the value
of which is indicated on the pin face of the plug. Should the fuse need to be replaced, an ASTA or
BSI approved BS 1362 of the same rating must be used. If the fuse cover is detachable, never
use the plug with the cover omitted. If a replacement fuse cover is required, ensure it is of the
same colour as that visible on the pin face of the plug. Fuse covers are available from your dealer.
DO NOT cut off the mains plug from this equipment. If the plug fitted is not suitable for the power
points in your home or the cable is too short to reach a power point, then use an appropriate safety
approved extension lead or consult your dealer.
Should it be necessary to change the mains plugs, this must be carried out by a competent
person, preferably a qualified electrician.
If there is no alternative to cutting off the mains plug, ensure that you dispose of it immediately,
having first removed the fuse, to avoid a possible shock hazard by inadvertent connection to the
mains supply.
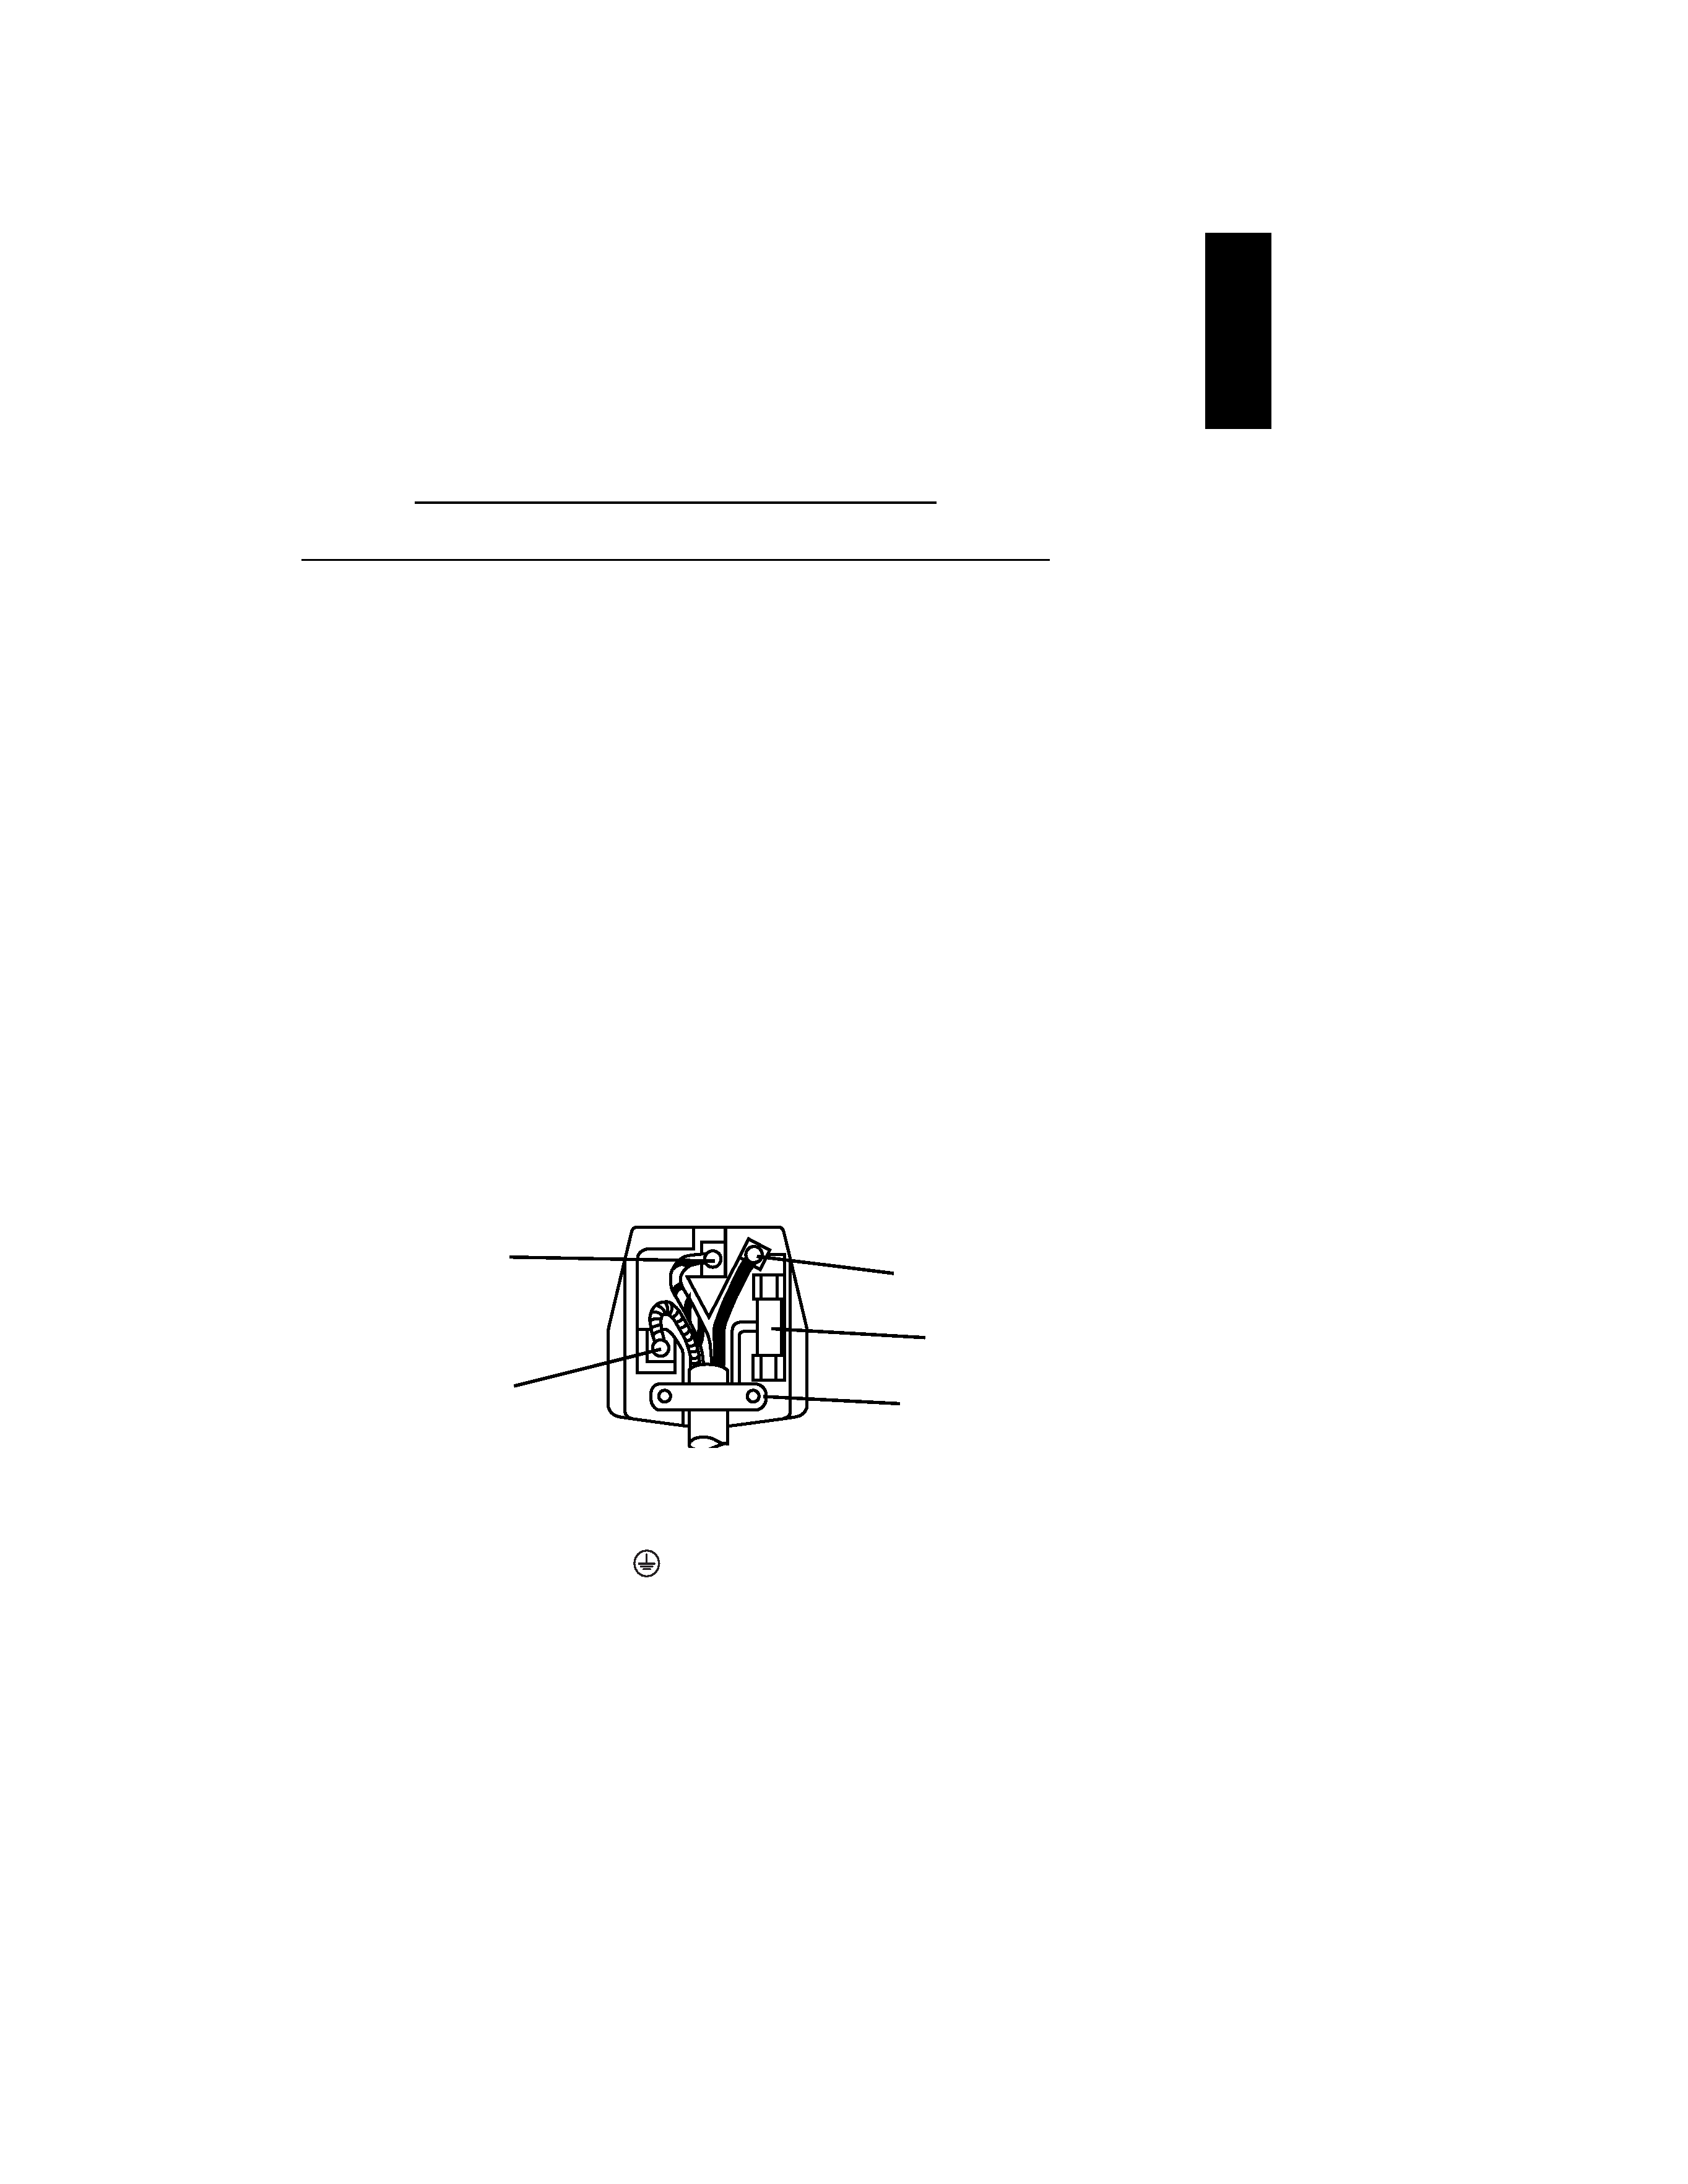
WARNING: THIS EQUIPMENT MUST BE EARTHED
IMPORTANT
The wires in the mains lead are coloured in accordance with the following code;
Green and Yellow= Earth, Blue = Neutral, Brown = Live
As these colours may not correspond with the coloured markings identifying the terminals in your plug,
proceed as follows:
The wire which is coloured GREEN and YELLOW must be connected to the terminal in the plug which is
marked with the letter E or by the EARTH symbol
or coloured GREEN or GREEN and YELLOW. The
wire coloured BLUE must be connected to the terminal with the letter N or coloured BLUE or BLACK. The wire
coloured BROWN must be connected to the terminal marked with the letter L or coloured BROWN or RED.
E
3
ENGLISH
Green and
Yellow to Earth
Blue to Neutral
Brown to Live
Fuse
Cord Clamp
CPX1498M.S
6/4/99
1:50 pm
Page 3
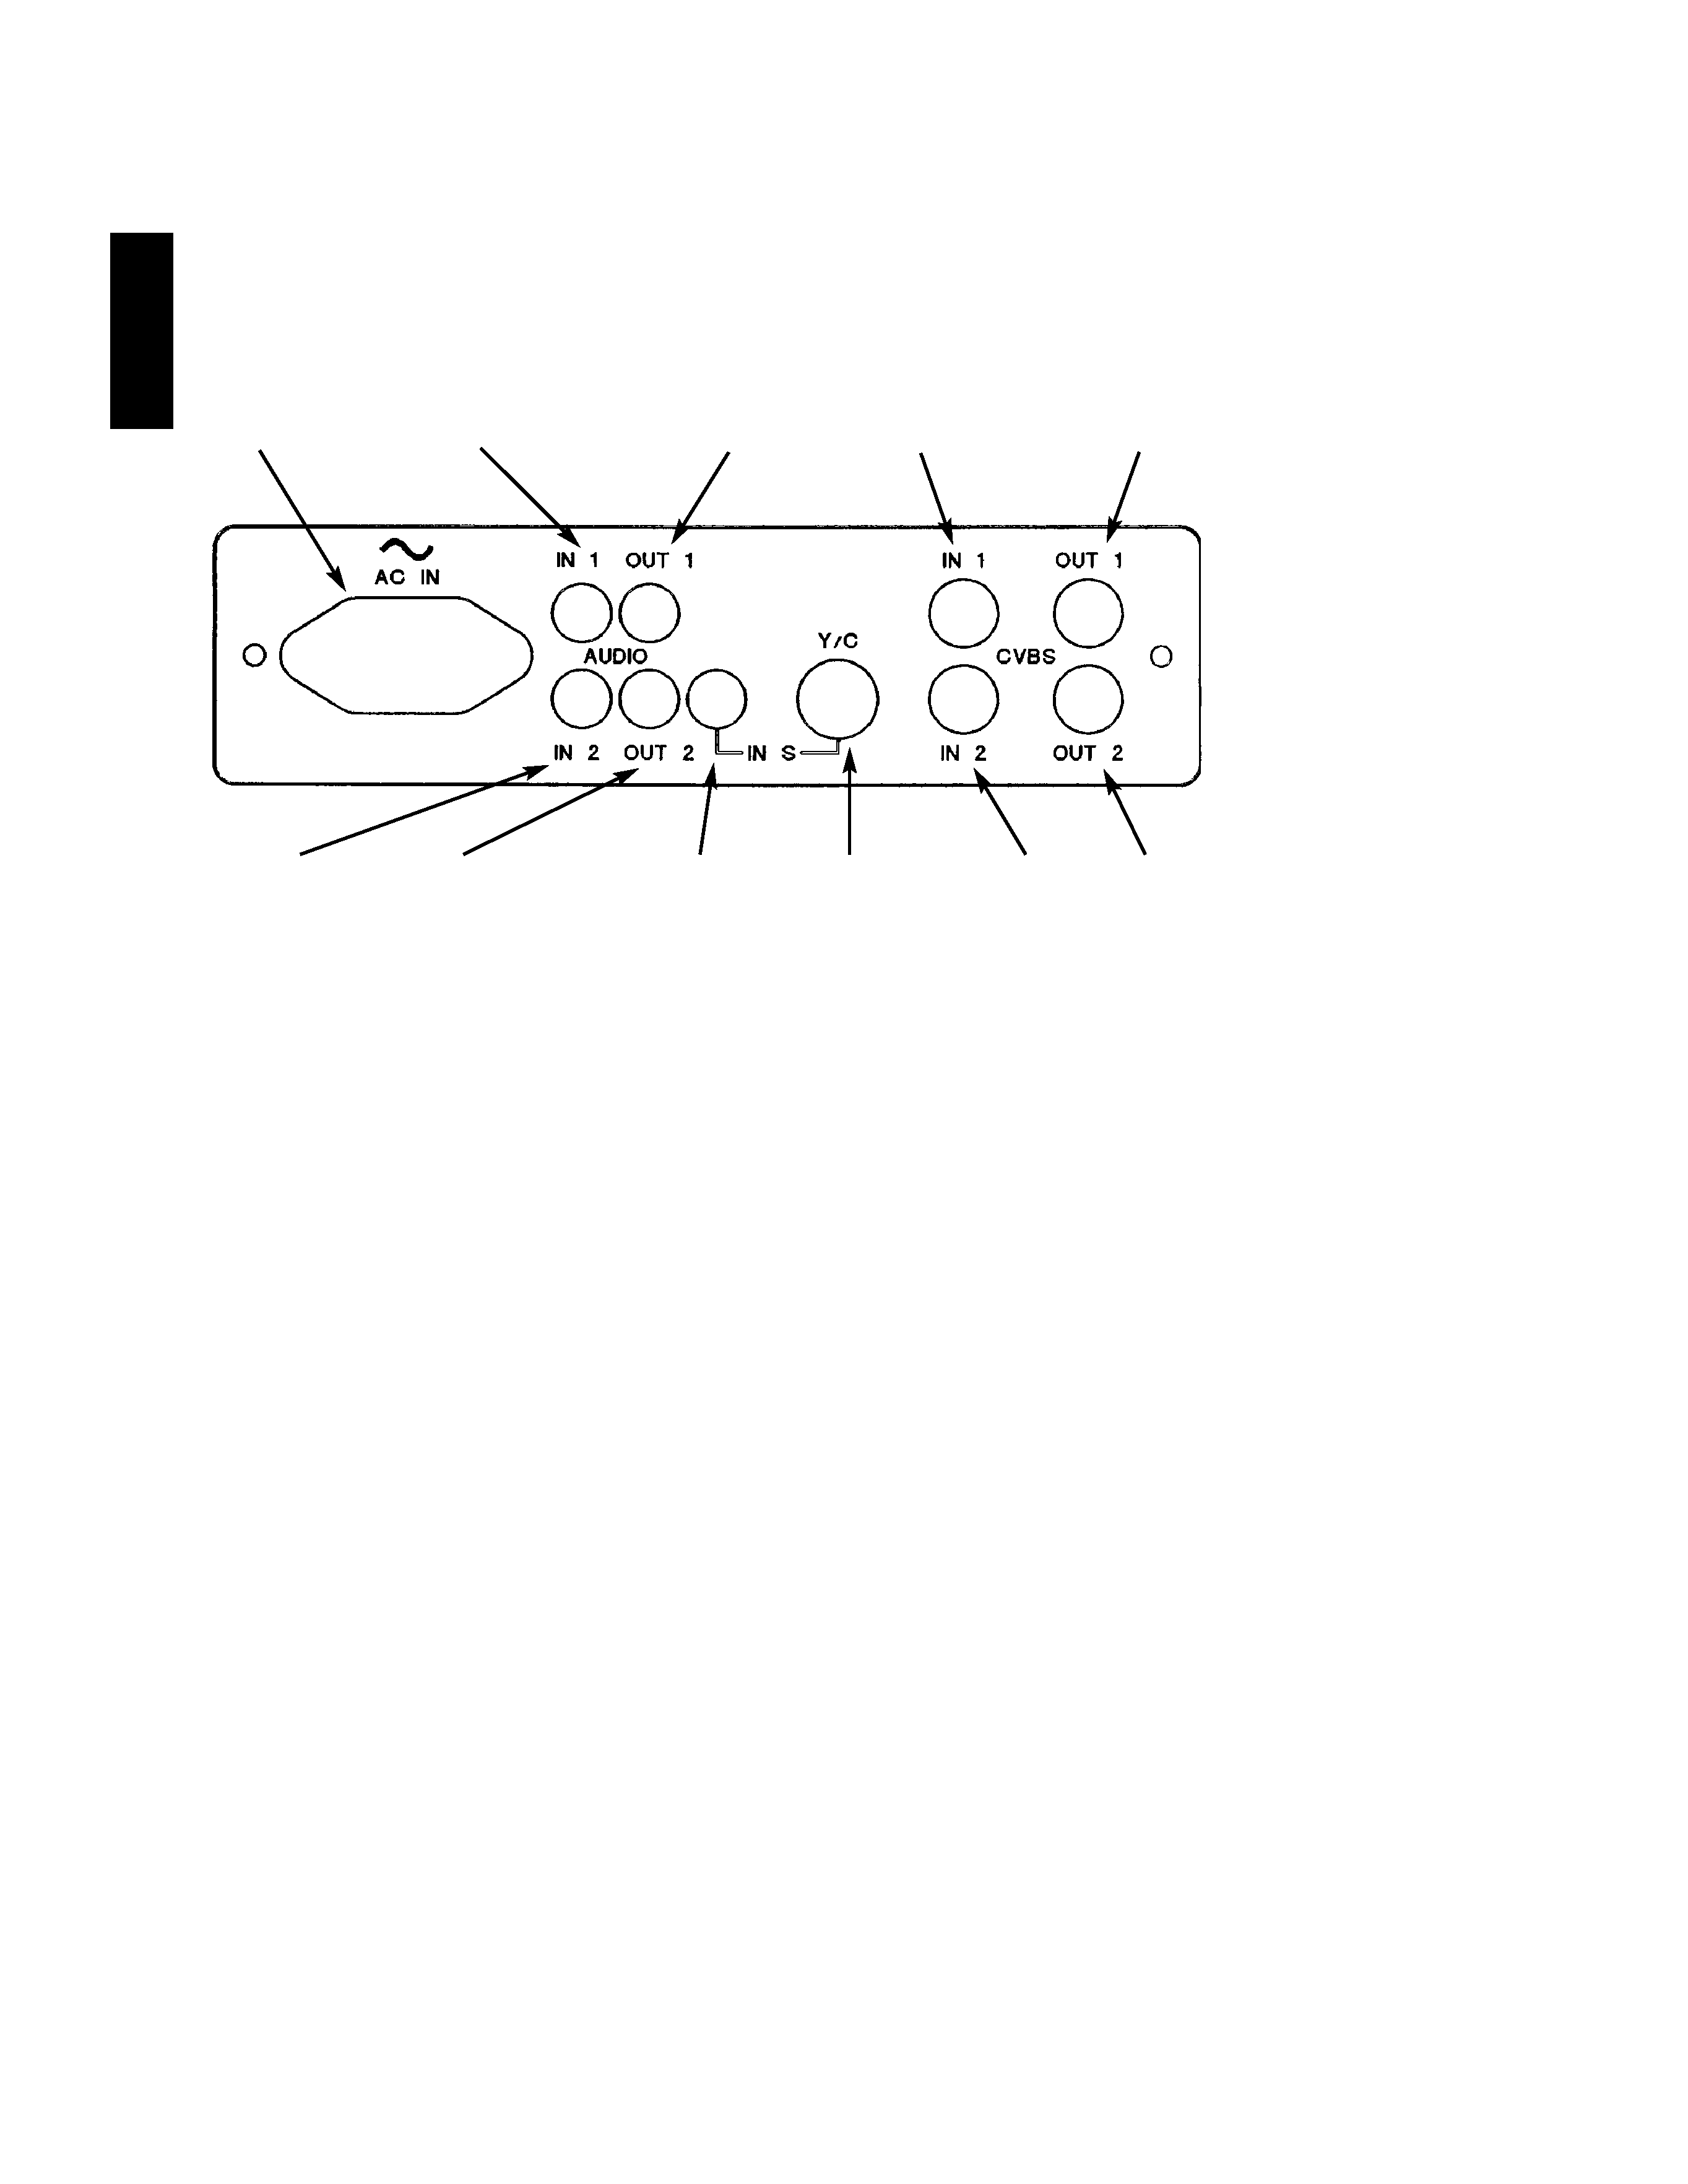
SET-UP INSTRUCTIONS
Connect your equipment to the desired sockets of this monitor
REAR VIEW
OUTPUT SIGNALS
If desired, the signal inputs to the Video-in and Audio-in sockets can also be
input to other equipment, such as a VCR. Simply connect VCR to the Video-out
and Audio-out sockets, using suitable connecting leads. Please refer to your
VCR operating guide for further instructions. The Video-out sockets have a 75
termination resistor which is automatically disconnected when a connection is
made to them.
4
ENGLISH
AUDIO-IN 1
A.C. INPUT
AUDIO-OUT 1
VIDEO-IN 1
VIDEO-OUT 1
AUDIO-IN 2
S-VHS
SOCKET
AUDIO-OUT 2
AUDIO-IN
S-VHS
VIDEO-
IN 2
VIDEO-
OUT 2
CPX1498M.S
6/4/99
1:50 pm
Page 4
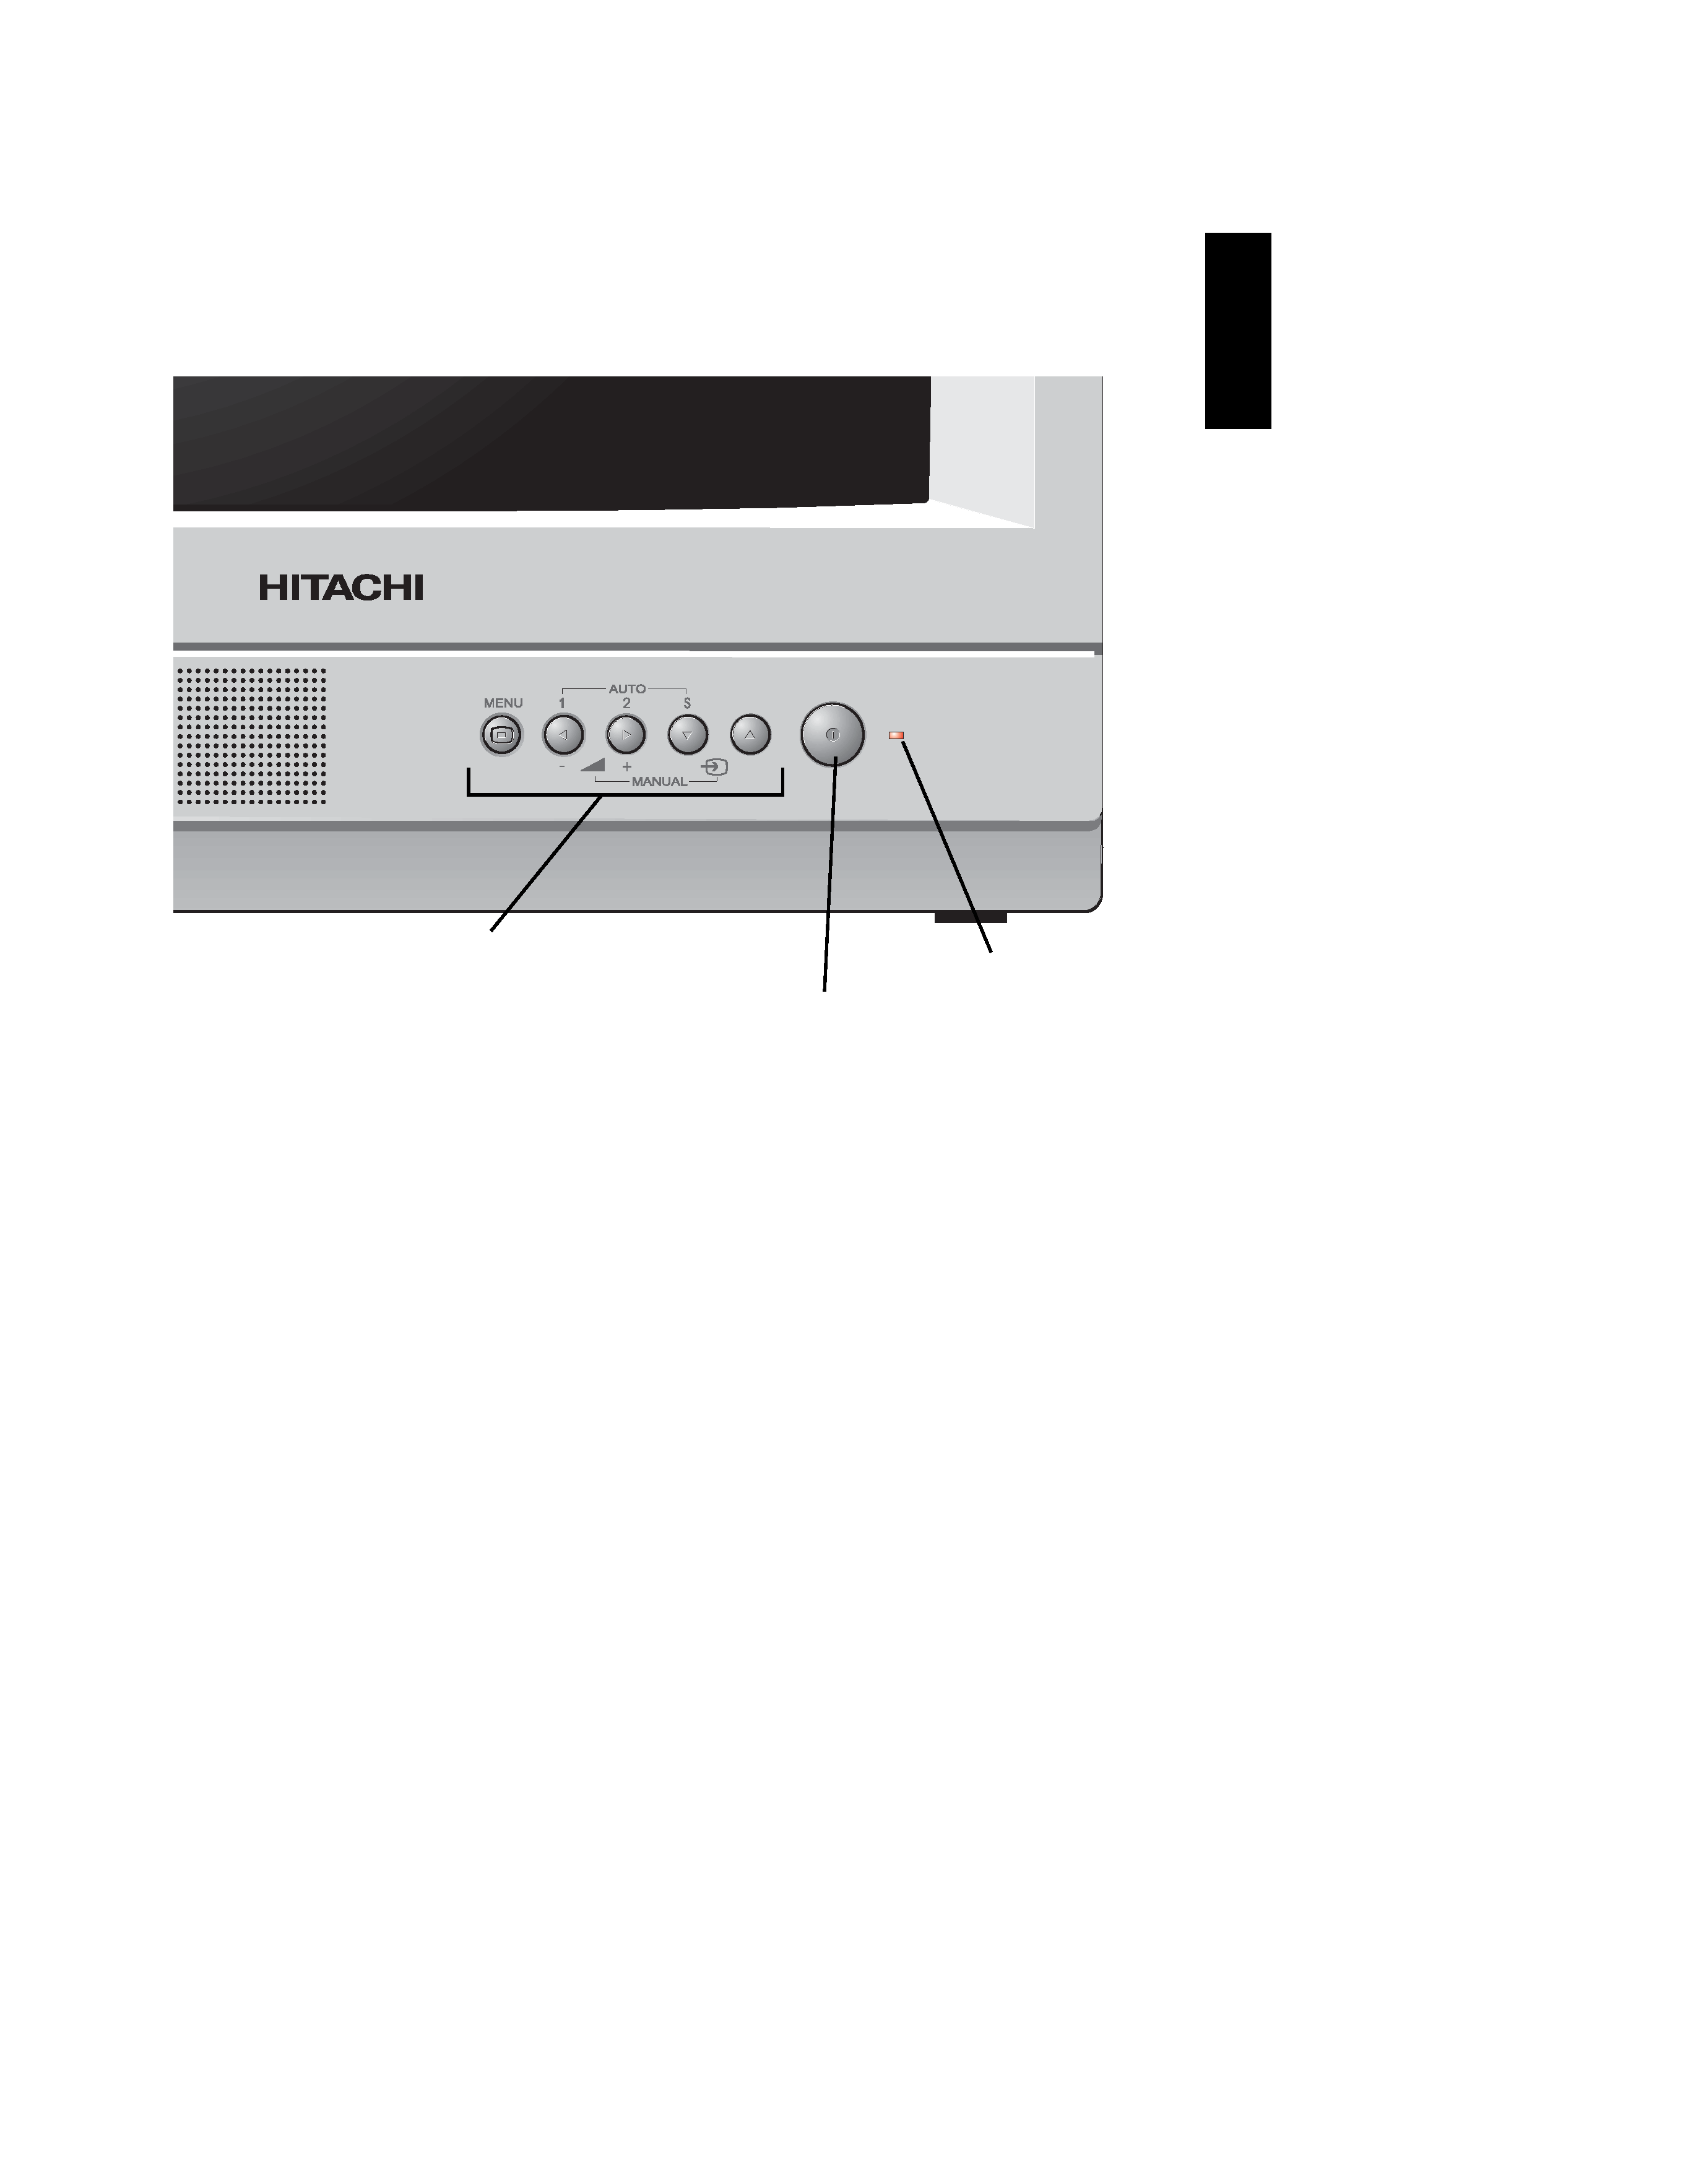
Control of monitor
All control for this monitor other than on/off is via the five front control buttons,
MENU 7 3 1 5, using these buttons will allow you to navigate your way around
the `on screen displays` (OSD) built into this monitor.
5
ENGLISH
Control buttons
LED
ON/OFF
Switch on monitor and equipment. The red LED indicator on the front of the
monitor will light.
CPX1498M.S
6/4/99
1:50 pm
Page 5