
GB
Instructions for use
22LD4200

- 1 -
Contents
Remote Control Buttons ......................... 2
Control Panel Buttons ............................ 3
Preparation ............................................. 4
Installation of device on the wall
(Optional) ............................................. 4
Features ............................................... 6
Panel Features .................................... 6
Safety Precautions ................................. 6
Before Switching on your TV ................. 8
Power connection ................................ 8
Connections to the Aerial socket ......... 8
How to connect other devices .............. 8
Inserting batteries in the remote
control handset .................................... 8
Switching the TV ON/OFF ....................... 8
To switch the TV on: ............................. 8
To switch the TV off: .............................. 9
Operating the TV ..................................... 9
A.P.S. (Automatic Programming
System) ................................................ 9
Operating with the buttons on the
TV set ................................................... 9
Operating with Remote Control ........... 9
Menu System ........................................ 10
Sound Menu ....................................... 11
Picture Menu ...................................... 13
Feature Menu ..................................... 15
Installation Menu ................................ 16
Programme Menu .............................. 17
Source Menu ...................................... 18
Other Features ...................................... 19
TV Status ............................................ 19
Programme Swap (P<P) ................... 19
Double-digit (- / - -) ............................. 19
Personal Preferences (PP) ................ 19
Sound Indicator .................................. 19
Picture Mode ...................................... 20
Sleep Timer Indicator ......................... 20
Mute Indicator ..................................... 20
No-Signal Detection (TV) ................... 20
No-Signal Detection (PC) .................. 20
Volume Bar ......................................... 20
AV Modes ............................................ 20
Signal Out Of Range .......................... 21
PC MODE ............................................... 21
Installation .......................................... 21
Switching from TV to PC .................... 21
Main Menu in PC mode: ..................... 21
Sound Menu ....................................... 21
Picture Menu ...................................... 21
PIP Picture .......................................... 21
Feature Menu ..................................... 22
Geometry Menu .................................. 22
Source Menu ...................................... 22
PIP Source Menu ............................... 23
Teletext.................................................. 23
To operate Teletext ............................. 23
To select a page of Teletext ................ 23
To Select Index Page ......................... 23
To Select Double Height Text ............. 23
To Reveal concealed Information .... 23
To Stop Automatic Page Change ....... 24
To Select a Subpage .......................... 24
Fastext ................................................ 24
To exit Teletext .................................... 24
To Display the Time ........................... 24
Peripheral Equipment Connections .... 24
PC Sound Connection ....................... 24
Via the Euroconnector ........................ 25
Via Aerial Input .................................... 25
Decoder .............................................. 25
TV and Video Recorder ...................... 25
Playback NTSC .................................. 25
Search for and store the test signal
of the video recorder .......................... 25
Camera and Camcorder ................... 26
Connect the decoder to the video
recorder .............................................. 26
Connecting Headphones .................. 26
Connecting the PC ............................. 26
AERIAL Connections ............................. 28
PC INPUT TYPICAL DISPLAY MODES ... 29
Tips ........................................................ 30
Specifications ....................................... 31
Important Instruction ........................... 32
ENG-2200-1547UK-22 INCH TFT IB.p65
03.03.2004, 17:59
1

- 2 -
Remote Control Buttons
= Stand By
= Cursor Up
= Cursor Right
OK = Store
= Info (Program Menu)
0 - 9 = Direct Program
-/-- = Double Digit
=Previous Programme
P/CH + = Programme Up
+ = Volume +
= TV / Quit Menu
= External Source
(AV-1, AV-2, AV-3, S-VIDEO, PC)
Yellow (FEATURE) = Feature Menu
Blue (INSTALL) = Installation Menu
= Hold
= Update
= Index Page
= Reveal, PC = Switch from TV to PC
= Expand,
= Aspect ratio
= PIP on / PIP off
= Teletext
= Time
Red (SOUND) = Sound Menu
Green (PICTURE) = Picture Menu
= Mute
I-II = Mono/Stereo - Dual I-II
-
= Volume -
- P/CH = Programme Down
= Personal Preference
M = Menu
= Cursor Down
= Cursor Left
0
2.
ENG-2200-1547UK-22 INCH TFT IB.p65
03.03.2004, 17:59
2

- 3 -
Control Panel Buttons
ÃWPGVH@Ã
ÃQ8uÃ
H@IV
QPX@S
/('
,1)5$5(' 5(&(,9(5
ÃWPGVH@Ã
ÃQ8uÃ
H@IV
UW6W
63($.(5
UW6W
)227 723 &29(5
Q8ÃDIQVU
98Ã $W
Q8Ã6V9DP
6IUÃ&$Ã:
ENG-2200-1547UK-22 INCH TFT IB.p65
03.03.2004, 17:59
3
- 4 -
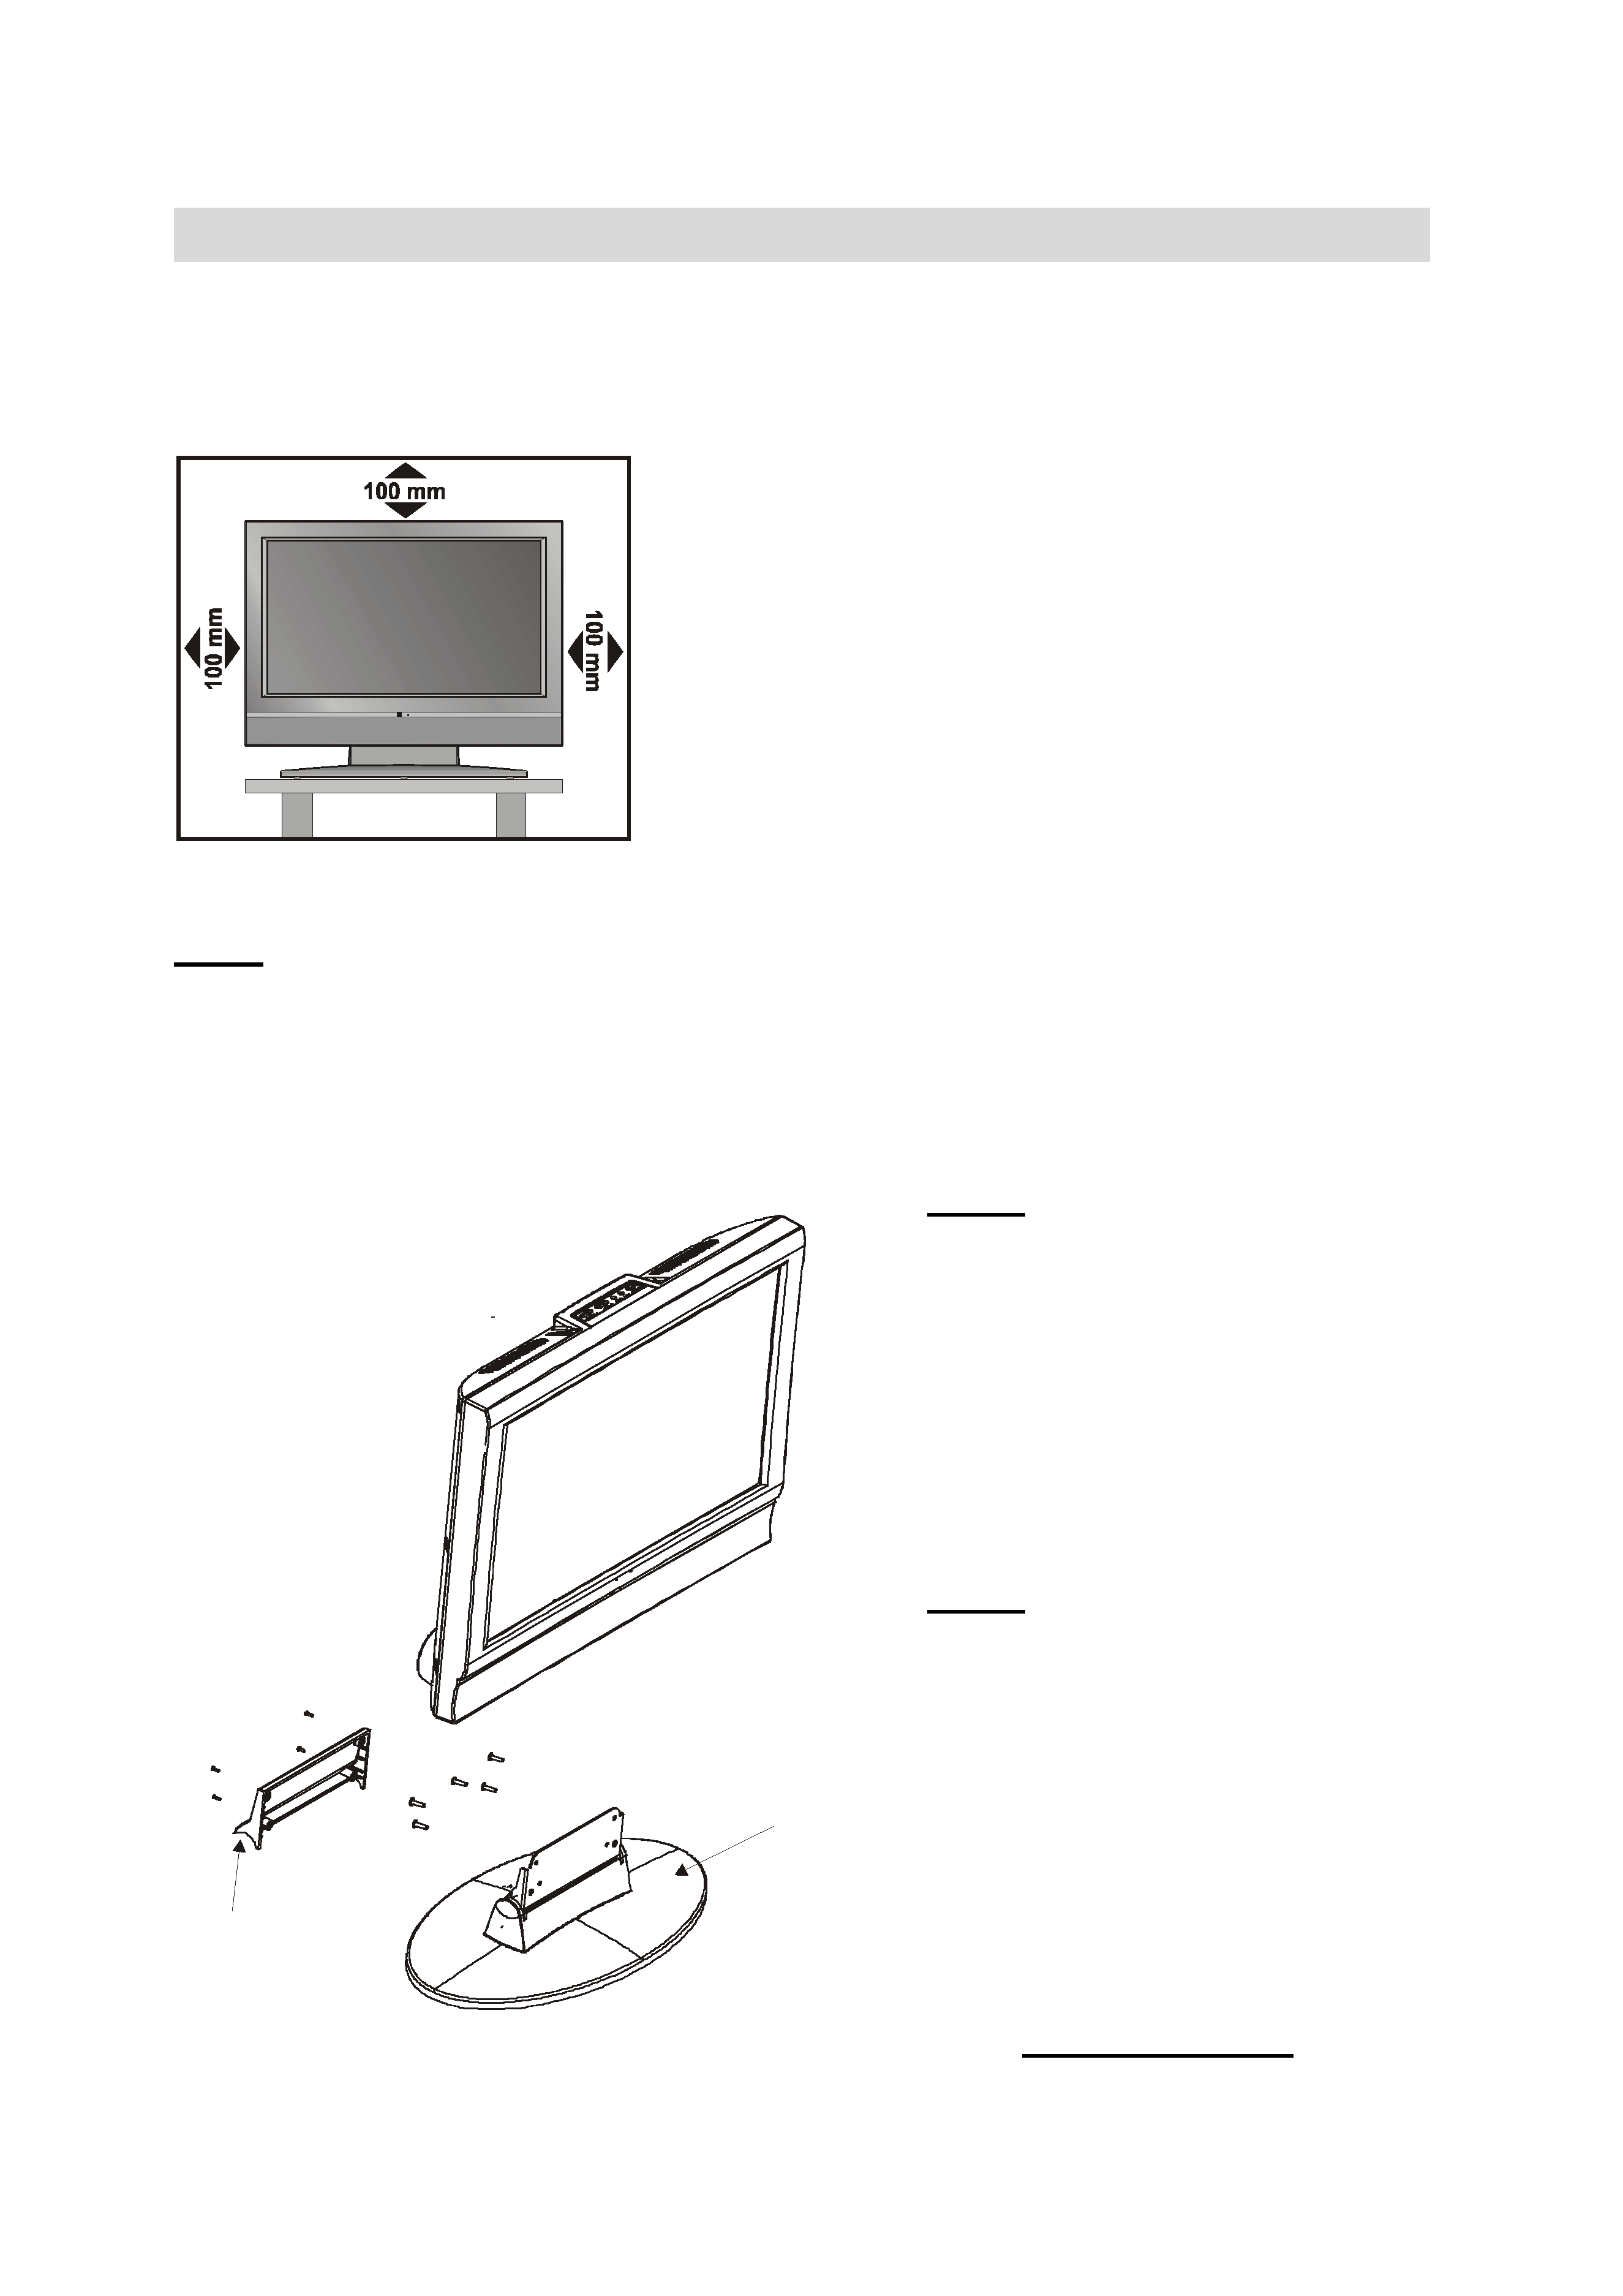
Preparation
Install Display on solid horizontal surface such as a table or desk.
For ventilation, leave a space of at least 10 cm free all around the set. To prevent any fault
and unsafe situations, please do not place any objects on top of the set.
Use this apparatus in tropical and/or moderate climates.
Installation of device on the wall (Optional)
Step1:
Invert the flat monitor screen and placed it on a flat surface. Remove the foot top cover. Re-
move the back support from the screen. Replace the support with the mounting bracket align
the holes from the bracket with the mounting holes found on the back of the monitor chassis.
Secure the bracket with the same four (4) 4 (mm) head screws.
Step 2:
Choose the wall where the monitor
would be located. Level and mark
with a pencil the four (4) mounting
points found on the wall bracket. Drill
pilot holes for the plastic anchors
then secure the wall bracket with the
four (4) L=32 mm x D=5 mm screws
(supplied).
Step 3:
Raise the monitor with the mounting
bracket attached and slip the top
opening to the safety flange on the
secured wall bracket. Let the monitor
fall in place safely and secure the
two (2) D=4 mm x L=10 mm safety
screws (supplied) with a long screw-
driver for additional security.
Note: Do not over tighten!
EDFN VXSSRUW
IRRW DVVHPEO\
ENG-2200-1547UK-22 INCH TFT IB.p65
03.03.2004, 17:59
4