
Audio Mode
1 Remote Control Signal Transmitter
2 Signal Transmitter Indicator
3 NAVI/AUDIO Switch
4 LIST Button
5 BAND Button
6 MUTE Button
7 DEFEAT Button
8 CHG (Changer) Button
9 V.SEL (Video Selector) Button
! Volume Control
" Joystick/:/J Button
Radio mode: Preset Selection (
)
SEEK DN/UP (
)
CD/MD Player/CD Changer mode: Disc Selection (
)
Music Sensor (
)
Equalizer/Surround mode: After calling Equalizer/Surround
mode with the A.PROC button, tilt the Joystick (
) to
select a desired item.
# DISP Button
$ SOURCE Button
% A.PROC (Audio Processor) Button
& DISC Button
( TUNER Button
) POWER Button
~ Numeric Keypad
+ OK Button
, DEL Button
Note: Depending on the head unit, some operations
cannot be performed. For details, see the Owner's
Manual for the head unit.
Navigation Mode
1 Remote Control Signal Transmitter
2 Signal Transmitter Indicator
3 NAVI/AUDIO Switch
4 RETURN Button
5
Button
6 DEST. Button
7 POS. Button
8
(Zoom/Wide) Button
9 NAVI OFF Button
! Rotary Encoder
" Joystick/ENT (Enter) Button
# MENU Button
$ VOICE Button
% ROUTE Button
&
(Zoom/Detail) Button
( LO. PT. Button
) NAVI POWER Button
~ Numeric Keypad
+ OK Button
, DEL Button
Note: Depending on the navigation system, some operations
are inoperative. For details, consult your Alpine dealer.
L
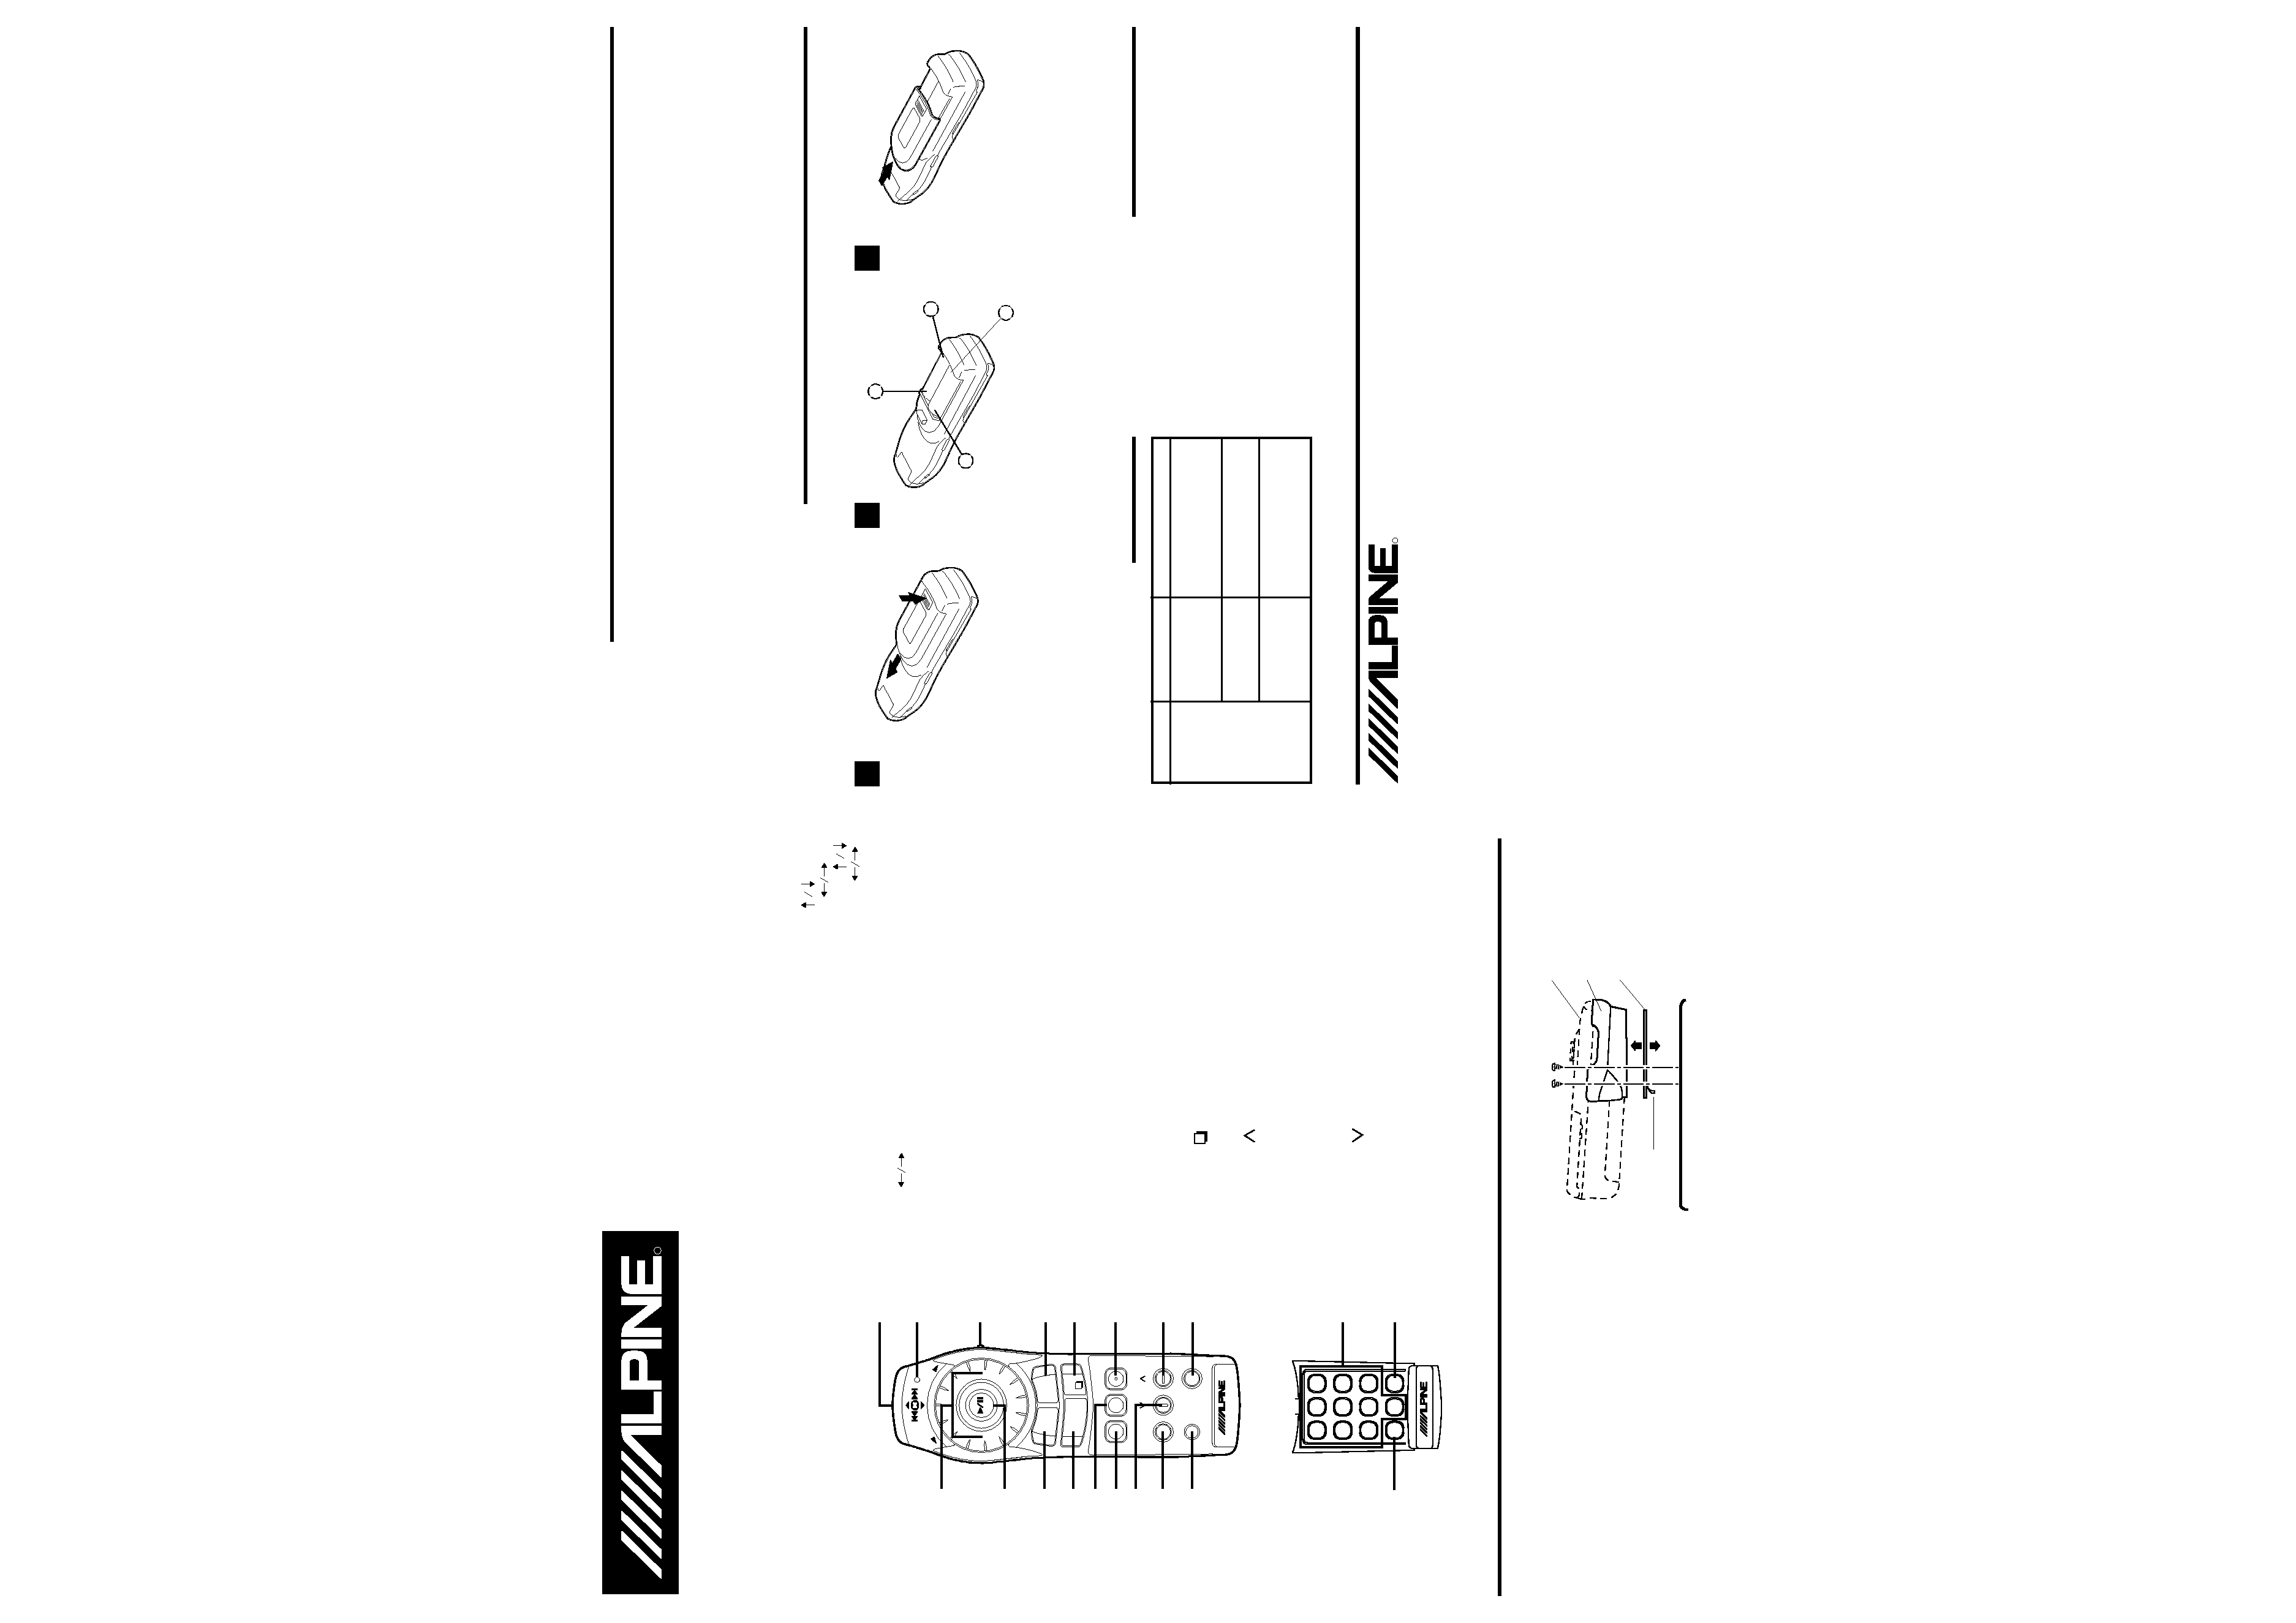
Installation of Remote Control Holder
· If direct sunlight reaches the remote control mounted on
the holder, remove the remote control from the holder
and put it in the glove compartment.
· If double-sided adhesive tape cannot install the holder
securely, use screws.
Note: Attach the blue protective paper side of double-sided
tape onto the console box, etc.
Console Box etc.
Blue Protective
Paper
Reinforcing Screws
Remote Control
Remote Control Holder
Double-Sided
Adhesive Tape
(Before attaching the tape,
remove dust from the
surface of attaching
place.)
R
1
2
3
4
5
6
7
8
9
!
"
#
$
%
&
(
)
~
+
,
RUE-4167
Remote Control Unit
Owner's Manual
Handling Precautions
Do not drop or apply shock to the unit. It may get permanently
damaged.
Keep the unit away from water and moisture, direct sun and
heat, and excessive dust.
Never use scouring pads, steel wool, abrasive powders or
harsh chemical agents, such as lye solution, for cleaning.
Clean with a soft, lint-free cloth or cotton swab slightly
dampened with a mild solution of detergent and water.
Do not operate this unit in a manner that could distract you
from driving safety.
In Case of Difficulty
1
2
3
-
+
+
-
Opening the battery cover.
Push on the cover and slide it as
indicated by the arrows then the cover
will be removed.
Replacing the battery.
Remove the old batteries. Insert
new ones matching the (+) and ()
polarities as shown in the diagram
inside the remote control.
Closing the cover.
Push the cover in the arrow direction
until a click is heard.
Specifications
Battery Type .............................................. AA size batteries
Battery Quantity ................................................................. 2
Dimensions (W
× H × D) ......................... 45 × 45 × 135 mm
(1-3/4"
× 1-3/4" × 5-1/4")
Weight (without battery) ................................. 70 gr (2.5 oz)
Battery Replacement
Applicable battery: Use two "AA" sized dry batteries or equivalent.
ALPINE ELECTRONICS, INC.
Tokyo office: 1-1-8 Nishi Gotanda,
Shinagawa-ku, Tokyo 141-8501, Japan
Tel.: (03) 3494-1101
ALPINE ELECTRONICS OF AMERICA, INC.
19145 Gramercy Place, Torrance,
California 90501, U.S.A.
Tel.: 1-800-ALPINE-1 (1-800-257-4631)
ALPINE ELECTRONICS OF CANADA, INC.
Suite 203, 7300 Warden Ave. Markham,
Ontario L3R 9Z6, Canada
Tel.: 1-800-ALPINE-1 (1-800-257-4631)
ALPINE ELECTRONICS OF AUSTRALIA PTY. LTD.
6-8 Fiveways Boulevarde Keysborough,
Victoria 3173, Australia
Tel.: (03) 9769-0000
ALPINE ELECTRONICS GmbH
Kreuzerkamp 7-11 40878 Ratingen, Germany
Tel.: 02102-45 50
ALPINE ITALIA S.p.A.
Via C. Colombo 8, 20090 Trezzano Sul
Naviglio MI, Italy
Tel.: 02-48 47 81
ALPINE ELECTRONICS FRANCE S.A.R.L.
(RCS PONTOISE B 338 101 280)
98, Rue De La Belle Etoile, Z.I. Paris Nord Il
B.P. 50016 F-95945, Roissy,
Charles De Gaulle Cedex, France
Tel.: 01-48 63 89 89
ALPINE ELECTRONICS OF U.K., LTD.
13 Tanners Drive, Blakelands,
Milton Keynes MK14 5BU, U.K.
Tel.: 01908-61 15 56
ALPINE ELECTRONICS DE ESPAÑA, S.A.
Portal De Gamarra 36, Pabellón 32
01013 Vitoria (Alava)-Apdo. 133, Spain
Tel.: 34-45-283588
68P20877Y34-O
Printed in Japan (Y)
R
Problem
Remote
Control
Inopera-
tive.
Cause
Reverse
placement of
battery.
Dead battery.
Remote Control not
pointed toward the
head unit.
Solution
Place the battery
correctly into its cradle
in the compartment.
Replace the battery with
a new one.
Point the remote control
directly toward your
head unit.
DEL
OK
12
3
45
6
78
9
0
SOURCE
VOICE
BAND
POWER
V.SEL
DISC
CHG
DEFEAT
ZOOM
MUTE
DISP
MENU
LIST
RETURN
VO
L DN
VOL
UP
A.PROC
ROUTE
DEST.
LO.PT.
TUNER
NAVI
POWER
NAVI OFF
ENT
POS.
(When the flip cover is open)
L
Installation du support de télécommande
· Si la lumière du soleil atteint la télécommande
lorsqu'elle est installée sur son support, enlevez-la du
support et rangez-la dans la boîte à gants.
· S'il n'est pas possible de fixer solidement le support
avec du ruban à double face adhésive, utilisez des vis.
Remarque: Collez le côté avec le papier de protection bleu
du ruban adhésif sur la console, etc.
Console, etc.
Papier de
protection bleu
Vis de renforcement
Télécommande
Support de télécommande
Ruban à double face
adhésive (avant de coller
le ruban, nettoyez la
surface appropriée.)
R
RUE-4167
Remote Control Unit
Mode d'emploi
Précautions
Ne pas laisser tomber ni soumettre à un choc la
télécommande. Elle pourrait être endommagée.
Ne pas exposer la télécommande à l'eau, l'humidité, la lumière
directe du soleil ni à une chaleur ou poussière excessive.
Ne jamais utiliser de tampon à récurer, de paille de fer, de
poudre abrasive ni de produits chimiques agressifs, comme
des diluants, pour nettoyer la télécommande.
Nettoyez la télécommande avec un chiffon doux sans
peluche ou une ouate de coton légèrement trempée dans
une solution douce de détergent et d'eau.
Ne pas faire avec la télécommande des réglages qui
puissent vous distraire de la route.
En cas de difficulté
-
+
+
-
Ouverture du couvercle du logement
de piles
Appuyez sur le couvercle et faites-le
glisser comme indiqué par les flèches
pour l'ouvrir.
Remplacement des piles
Enlevez les piles usées et insérez
deux piles neuves en respectant les
indications (+) et () à l'intérieur de
la télécommande.
Fermeture du couvercle
Poussez le couvercle dans le sens de la
flèche jusqu'à ce qu'il s'encliquette.
Spécifications
Type de piles ............................................... Pile de taille AA
Nombre de piles ................................................................. 2
Dimensions (L
× H × P) ........................... 45 × 45 × 135 mm
(1-3/4
× 1-3/4 × 5-1/4 po.)
Poids (sans pile) ............................................. 70 g (2,5 on)
Remplacement des piles
Piles utilisables: Deux piles sèches de taille "AA" ou équivalentes.
ALPINE ELECTRONICS, INC.
Tokyo office: 1-1-8 Nishi Gotanda,
Shinagawa-ku, Tokyo 141-8501, Japan
Tel.: (03) 3494-1101
ALPINE ELECTRONICS OF AMERICA, INC.
19145 Gramercy Place, Torrance,
California 90501, U.S.A.
Tel.: 1-800-ALPINE-1 (1-800-257-4631)
ALPINE ELECTRONICS OF CANADA, INC.
Suite 203, 7300 Warden Ave. Markham,
Ontario L3R 9Z6, Canada
Tel.: 1-800-ALPINE-1 (1-800-257-4631)
ALPINE ELECTRONICS OF AUSTRALIA PTY. LTD.
6-8 Fiveways Boulevarde Keysborough,
Victoria 3173, Australia
Tel.: (03) 9769-0000
ALPINE ELECTRONICS GmbH
Kreuzerkamp 7-11 40878 Ratingen, Germany
Tel.: 02102-45 50
ALPINE ITALIA S.p.A.
Via C. Colombo 8, 20090 Trezzano Sul
Naviglio MI, Italy
Tel.: 02-48 47 81
ALPINE ELECTRONICS FRANCE S.A.R.L.
(RCS PONTOISE B 338 101 280)
98, Rue De La Belle Etoile, Z.I. Paris Nord Il
B.P. 50016 F-95945, Roissy,
Charles De Gaulle Cedex, France
Tel.: 01-48 63 89 89
ALPINE ELECTRONICS OF U.K., LTD.
13 Tanners Drive, Blakelands,
Milton Keynes MK14 5BU, U.K.
Tel.: 01908-61 15 56
ALPINE ELECTRONICS DE ESPAÑA, S.A.
Portal De Gamarra 36, Pabellón 32
01013 Vitoria (Alava)-Apdo. 133, Spain
Tel.: 34-45-283588
R
Problème
Télécom-
mande
inopérante.
Cause
Mauvaise
orientation de
la pile.
Pile usée.
Télécommande
pas dirigée
vers l'appareil.
Nashi
Placez la pile
correctement dans son
logement.
Remplacez la pile par
une neuve.
Dirigez la télécommande
directement vers
l'appareil.
Mode audio
1 Emetteur de signal de commande à distance
2 Témoin de l'émetteur
3 Commutateur NAVI/AUDIO (navigation/autoradio)
4 Touche LIST (liste)
5 Touche BAND (gamme)
6 Touche MUTE (coupure du son)
7 Touche DEFEAT (invalidation)
8 Touche CHG (changeur)
9 Touche V.SEL (sélection vidéo)
! Réglage de volume
" Joystick/Touche :/J
Mode radio: Sélection des stations préréglées (
)
SEEK DN/UP (recherche haut/bas) (
)
Mode Lecteur CD/MD/Changeur CD: Sélection de disques (
)
Détection de plage (
)
Mode Egaliseur/Surround: Après accès au mode Egaliseur/
Surround avec la touche A.PROC, inclinez le joystick
(
) pour sélectionner un paramètre.
# Touche DISP (affichage)
$ Touche SOURCE (source)
% Touche A.PROC (processeur audio)
& Touche DISC (lecteur de disque)
( Touche TUNER (radio)
) Touche POWER (alimentation)
~ Clavier numérique
+ Touche OK
, Touche DEL
Remarque: Selon l'appareil pilote, certaines opérations ne
pourront pas être effectuées. Pour les détails,
voir le mode d'emploi de l'appareil pilote.
Mode de navigation
1 Emetteur de signal de commande à distance
2 Témoin de l'émetteur
3 Commutateur NAVI/AUDIO (navigation/autoradio)
4 Touche RETURN (retour)
5 Touche
(carte-guide)
6 Touche DEST. (destination)
7 Touche POS. (position)
8 Touche
(Zoom/Gros plan)
9 Touche NAVI OFF (arrêt navigation)
! Molette
" Joystick/ENT (validation)
# Touche MENU (menu)
$ Touche VOICE (guide vocal)
% Touche ROUTE (itinéraire)
& Touche
(Zoom/Carte détaillée)
( Touche LO.PT. (points locaux)
) Touche NAVI POWER
~ Clavier numérique
+ Touche OK (confirmation)
, Touche DEL (effacement)
Remarque: Certaines fonctions seront inopérantes selon
le système de navigation. Pour les détails,
consultez le revendeur Alpine.
1
2
3
4
5
6
7
8
9
!
"
#
$
%
&
(
)
~
+
,
DEL
OK
12
3
45
6
78
9
0
SOURCE
VOICE
BAND
POWER
V.SEL
DISC
CHG
DEFEAT
ZOOM
MUTE
DISP
MENU
LIST
RETURN
VO
L DN
VOL
UP
A.PROC
ROUTE
DEST.
LO.PT.
TUNER
NAVI
POWER
NAVI OFF
ENT
POS.
(Lorsque le couvercle est ouvert)
1
2
3